Hidden hot spring. Hidden canyon. Hidden gem. Everybody wants to see this hidden place for himself. And logically, there’s a huge debate on what “hidden” nowadays actually means. Some argue that once you write about it, it’s not hidden anymore. That’s why I don’t like the word hidden at all. Let’s say the places we write about are hard to access. And that’s why, for most of the tourists, they are “hidden”.
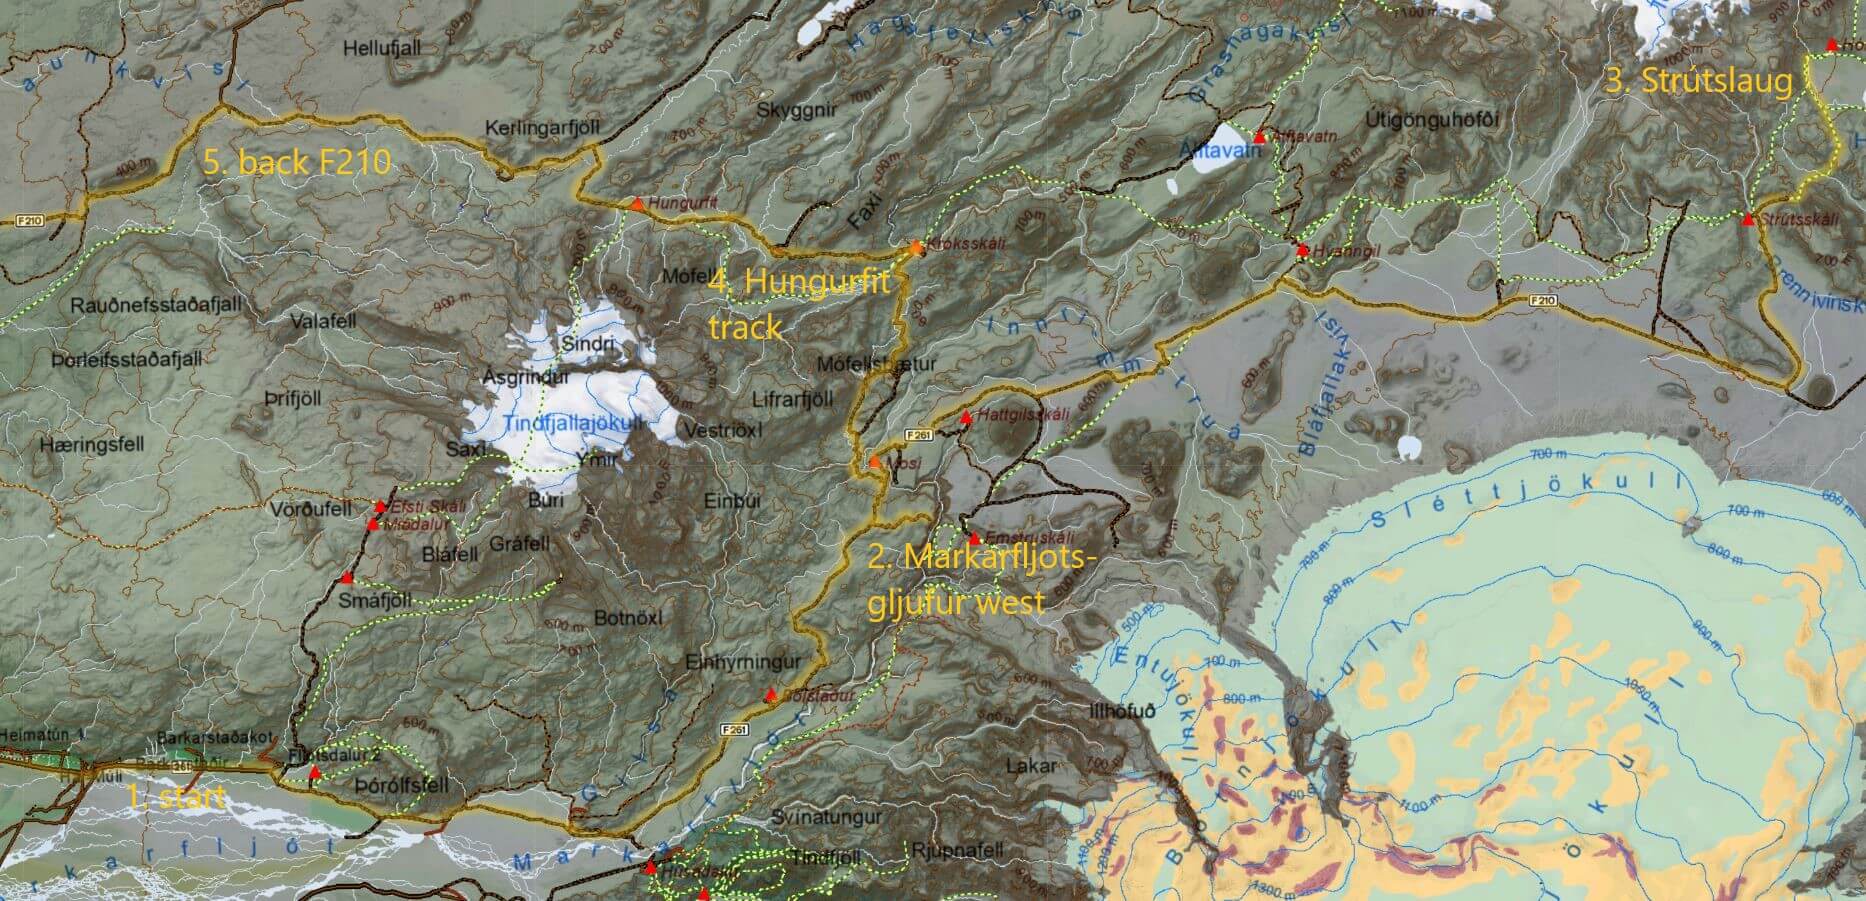
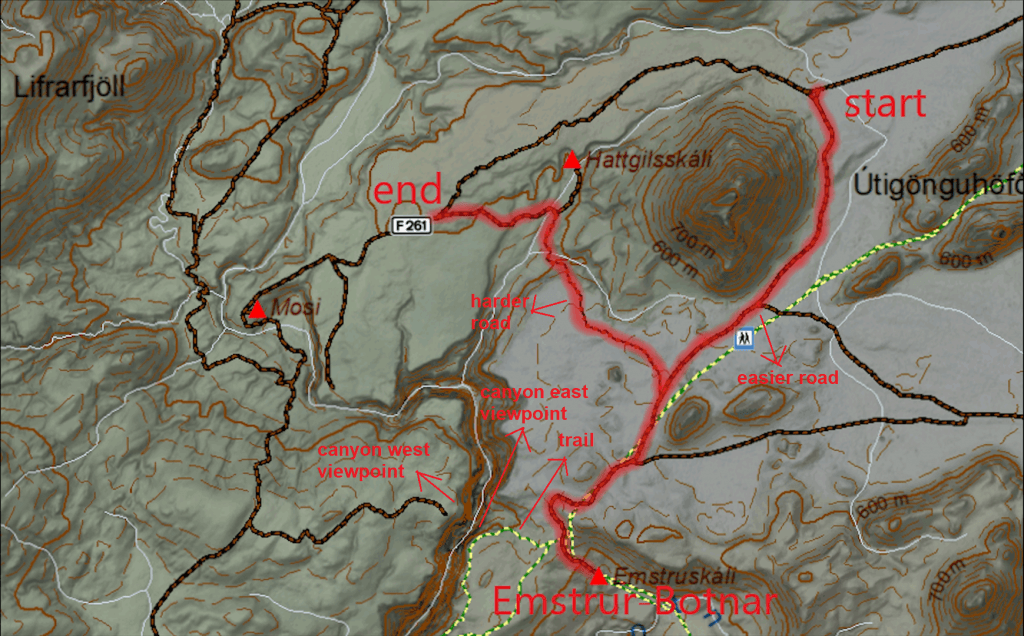
Map of our day around Fjallabak highlands
Contents
Rainy forecast and planning
The third day in a row forecast showed rain almost everywhere in the south and around the places we planned to visit. Once again, we had to alter our plans and chase the only remaining spots of good weather. If you are interested in how we do it, feel free to read our piece about finding a good weather in Iceland.
The forecast showed considerable rain at all the places which remained on our to-do list and even at all my back-up options. So, we basically had the following options:
- Drive and hike in a considerable rain and most likely also fog with no visibility – No.
- Make it a hot spring day in hot springs we had already visited in the past and around the pretty touristy and accessible southern region – No.
- Stay inside, go for restaurants, cafes, museums etc. – No.
- Do short hikes and go see waterfalls – we’d already done all we wanted in the south – No.
- Go for the only spot where the forecast showed only a little rain, although we’d already been around that area, highlands around F261 and F210 – OK!
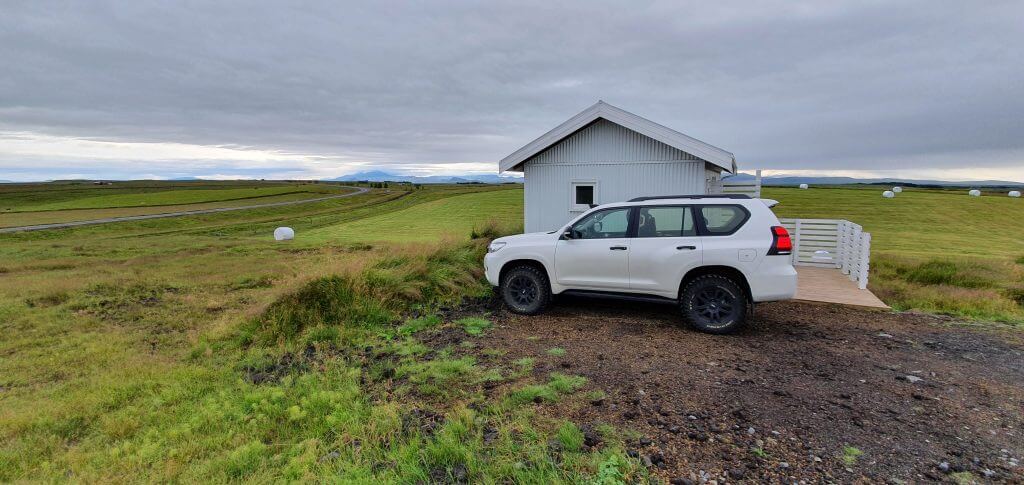
Our cabin between Hella and Hekla volcano
Our friend Haraldur gave us an insider tip to go see the very remote and picturesque highlands hot spring called Strutslaug, located exactly in this area. We couldn’t make it to Strutslaug on Day 2 of our trip, because we already had a pretty packed schedule and Haraldur told us it’s roughly a 4-hour hike roundtrip. This time it looked like the most plausible option – if it rains, at least we can soak in the hot spring. And let’s go for some adventure!
I also wanted to see Markarfljotslgjufur canyon from the west and if we had enough time and favorable weather, maybe also to drive the entire Hungurfit track. We had already driven the first part of the Hungurfit track on Day 2 and it was amazing (although really scary at times). So, this was the plan 🙂
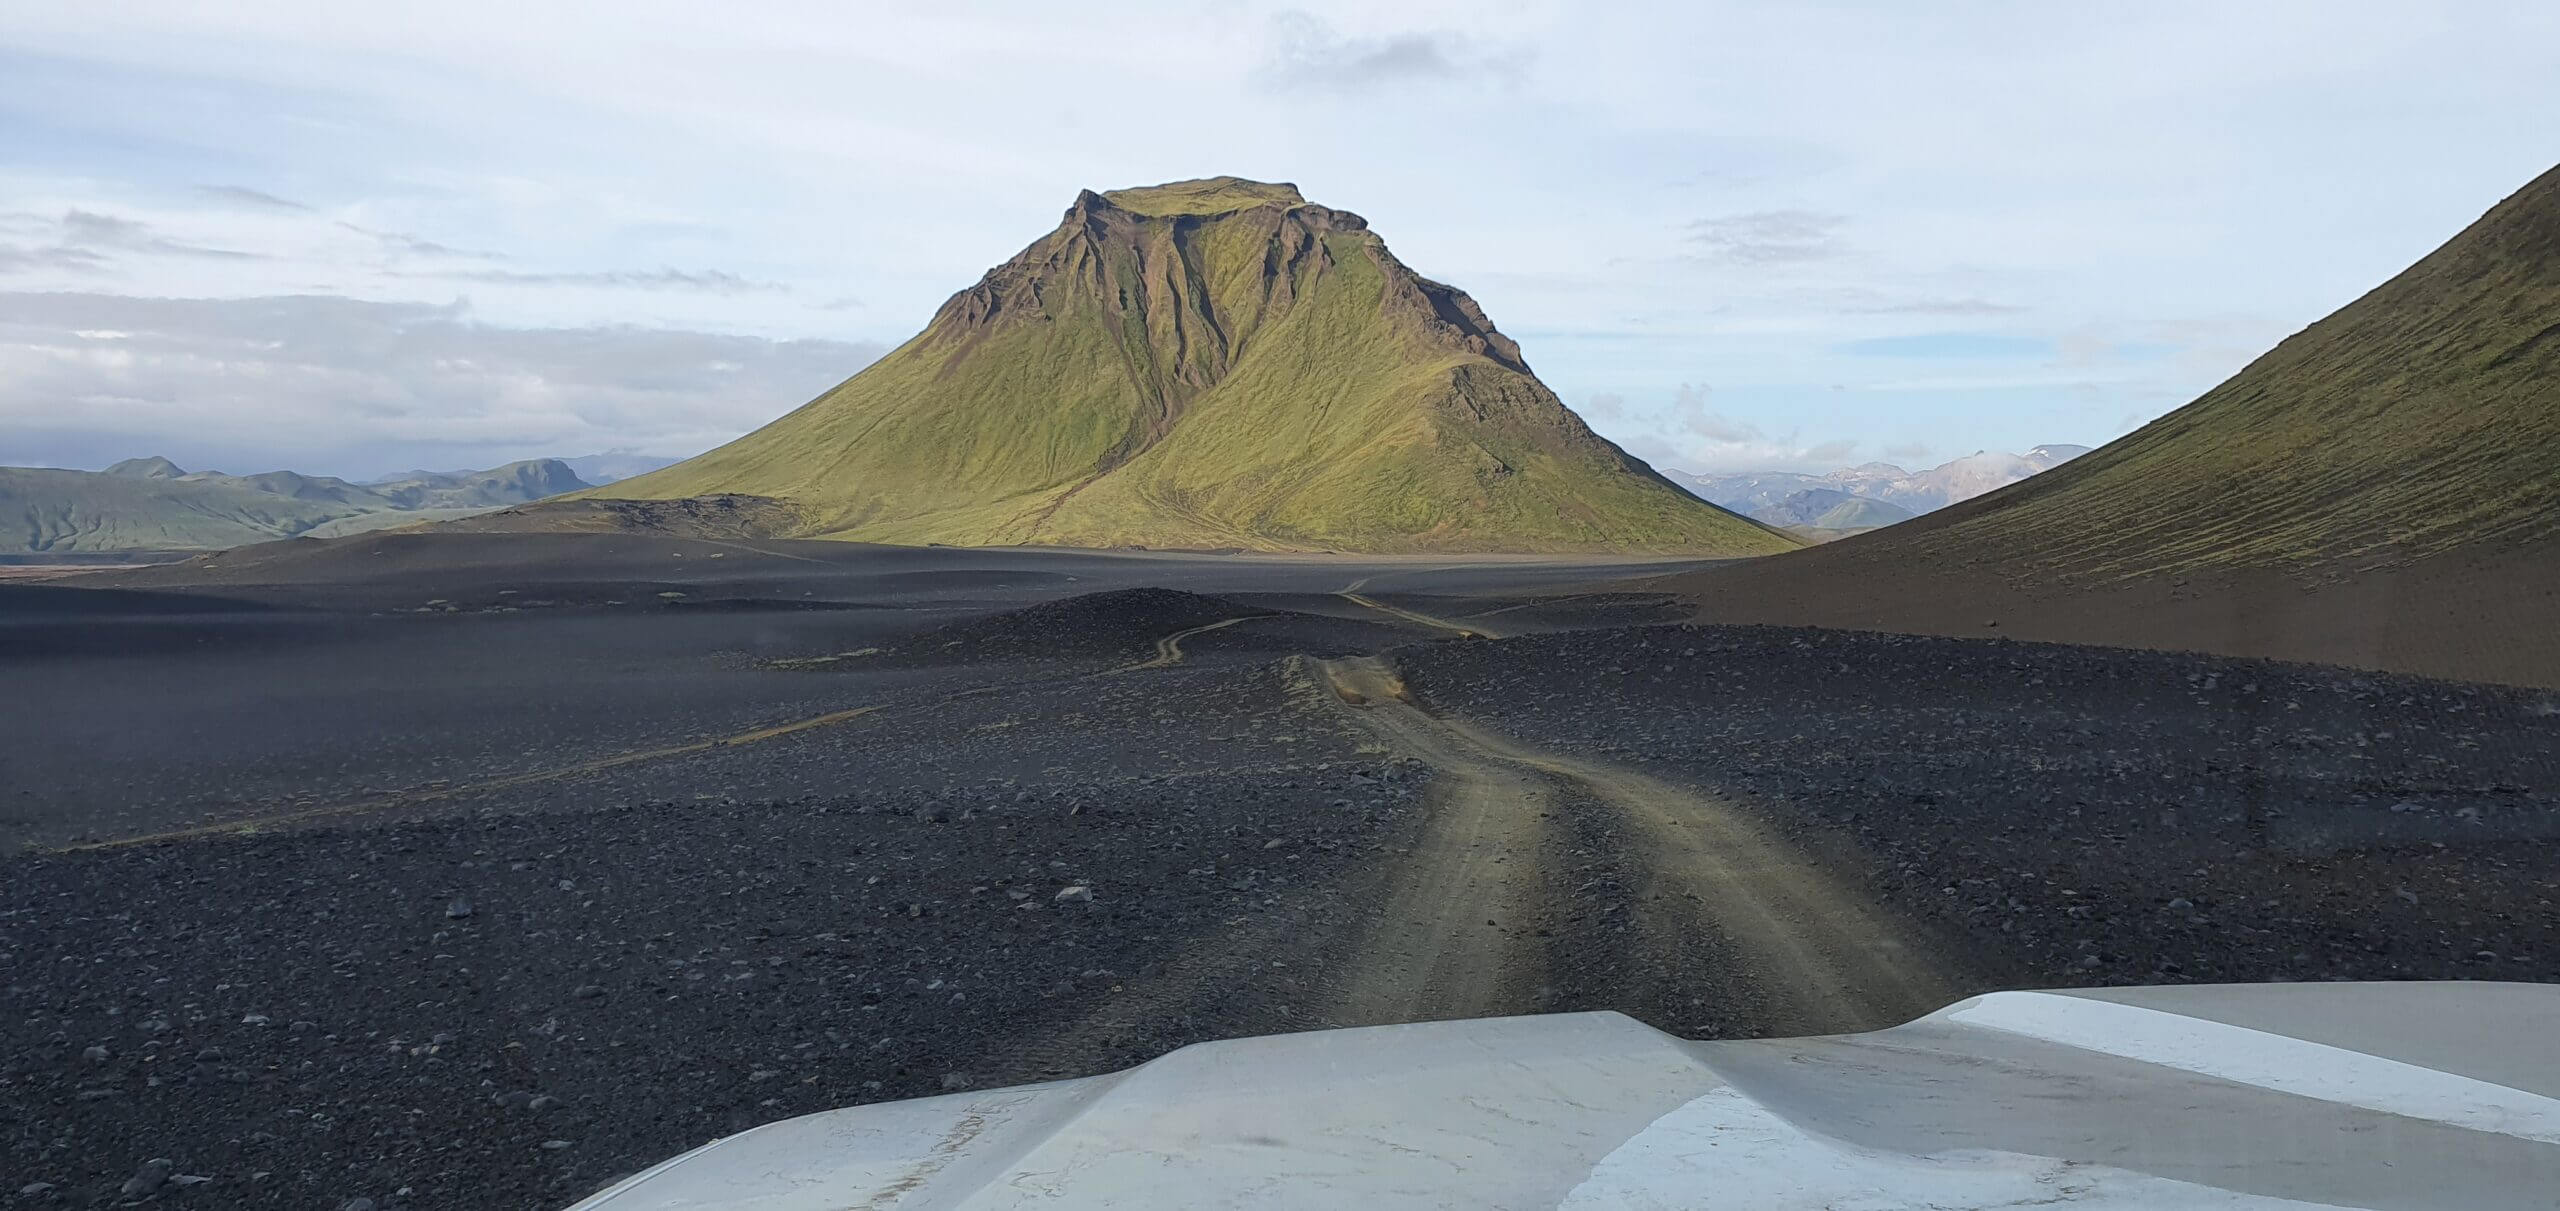
F261 from west to east
F261 Emstruleið
The forecast was indeed right. We left our cabin near Hekla and it was raining. It was raining also all the way towards F261. But once we got on F261, like a miracle, it just stopped raining and the skies even seemed to clear! Once, again – chase the weather 🙂
The western part of F261 basically leads through the other bank of the Krossá river and you are able to see the Thorsmork area and F249 well from it. This part contains a lot of big gravel and the drive has to be slow and not very comfortable. The scenery is beautiful as always, although, for me, F210 was even more picturesque. This may, however, be due to the effect that we had seen F210 first 🙂
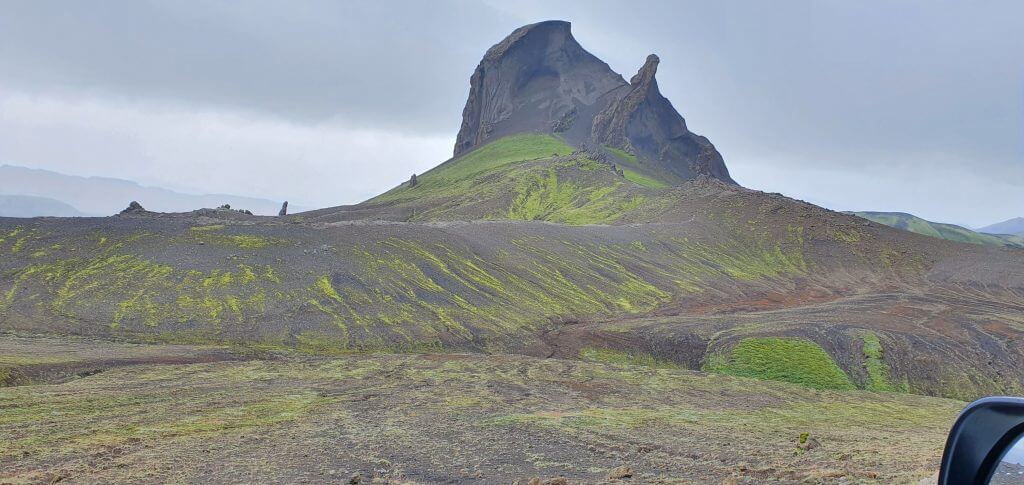
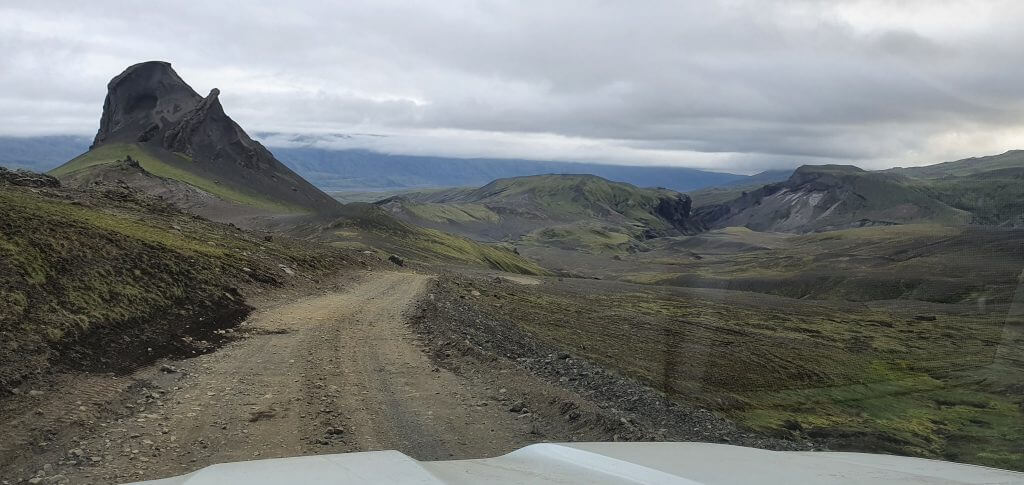
Einhyrningur mountain next to F261 road Emstruleið
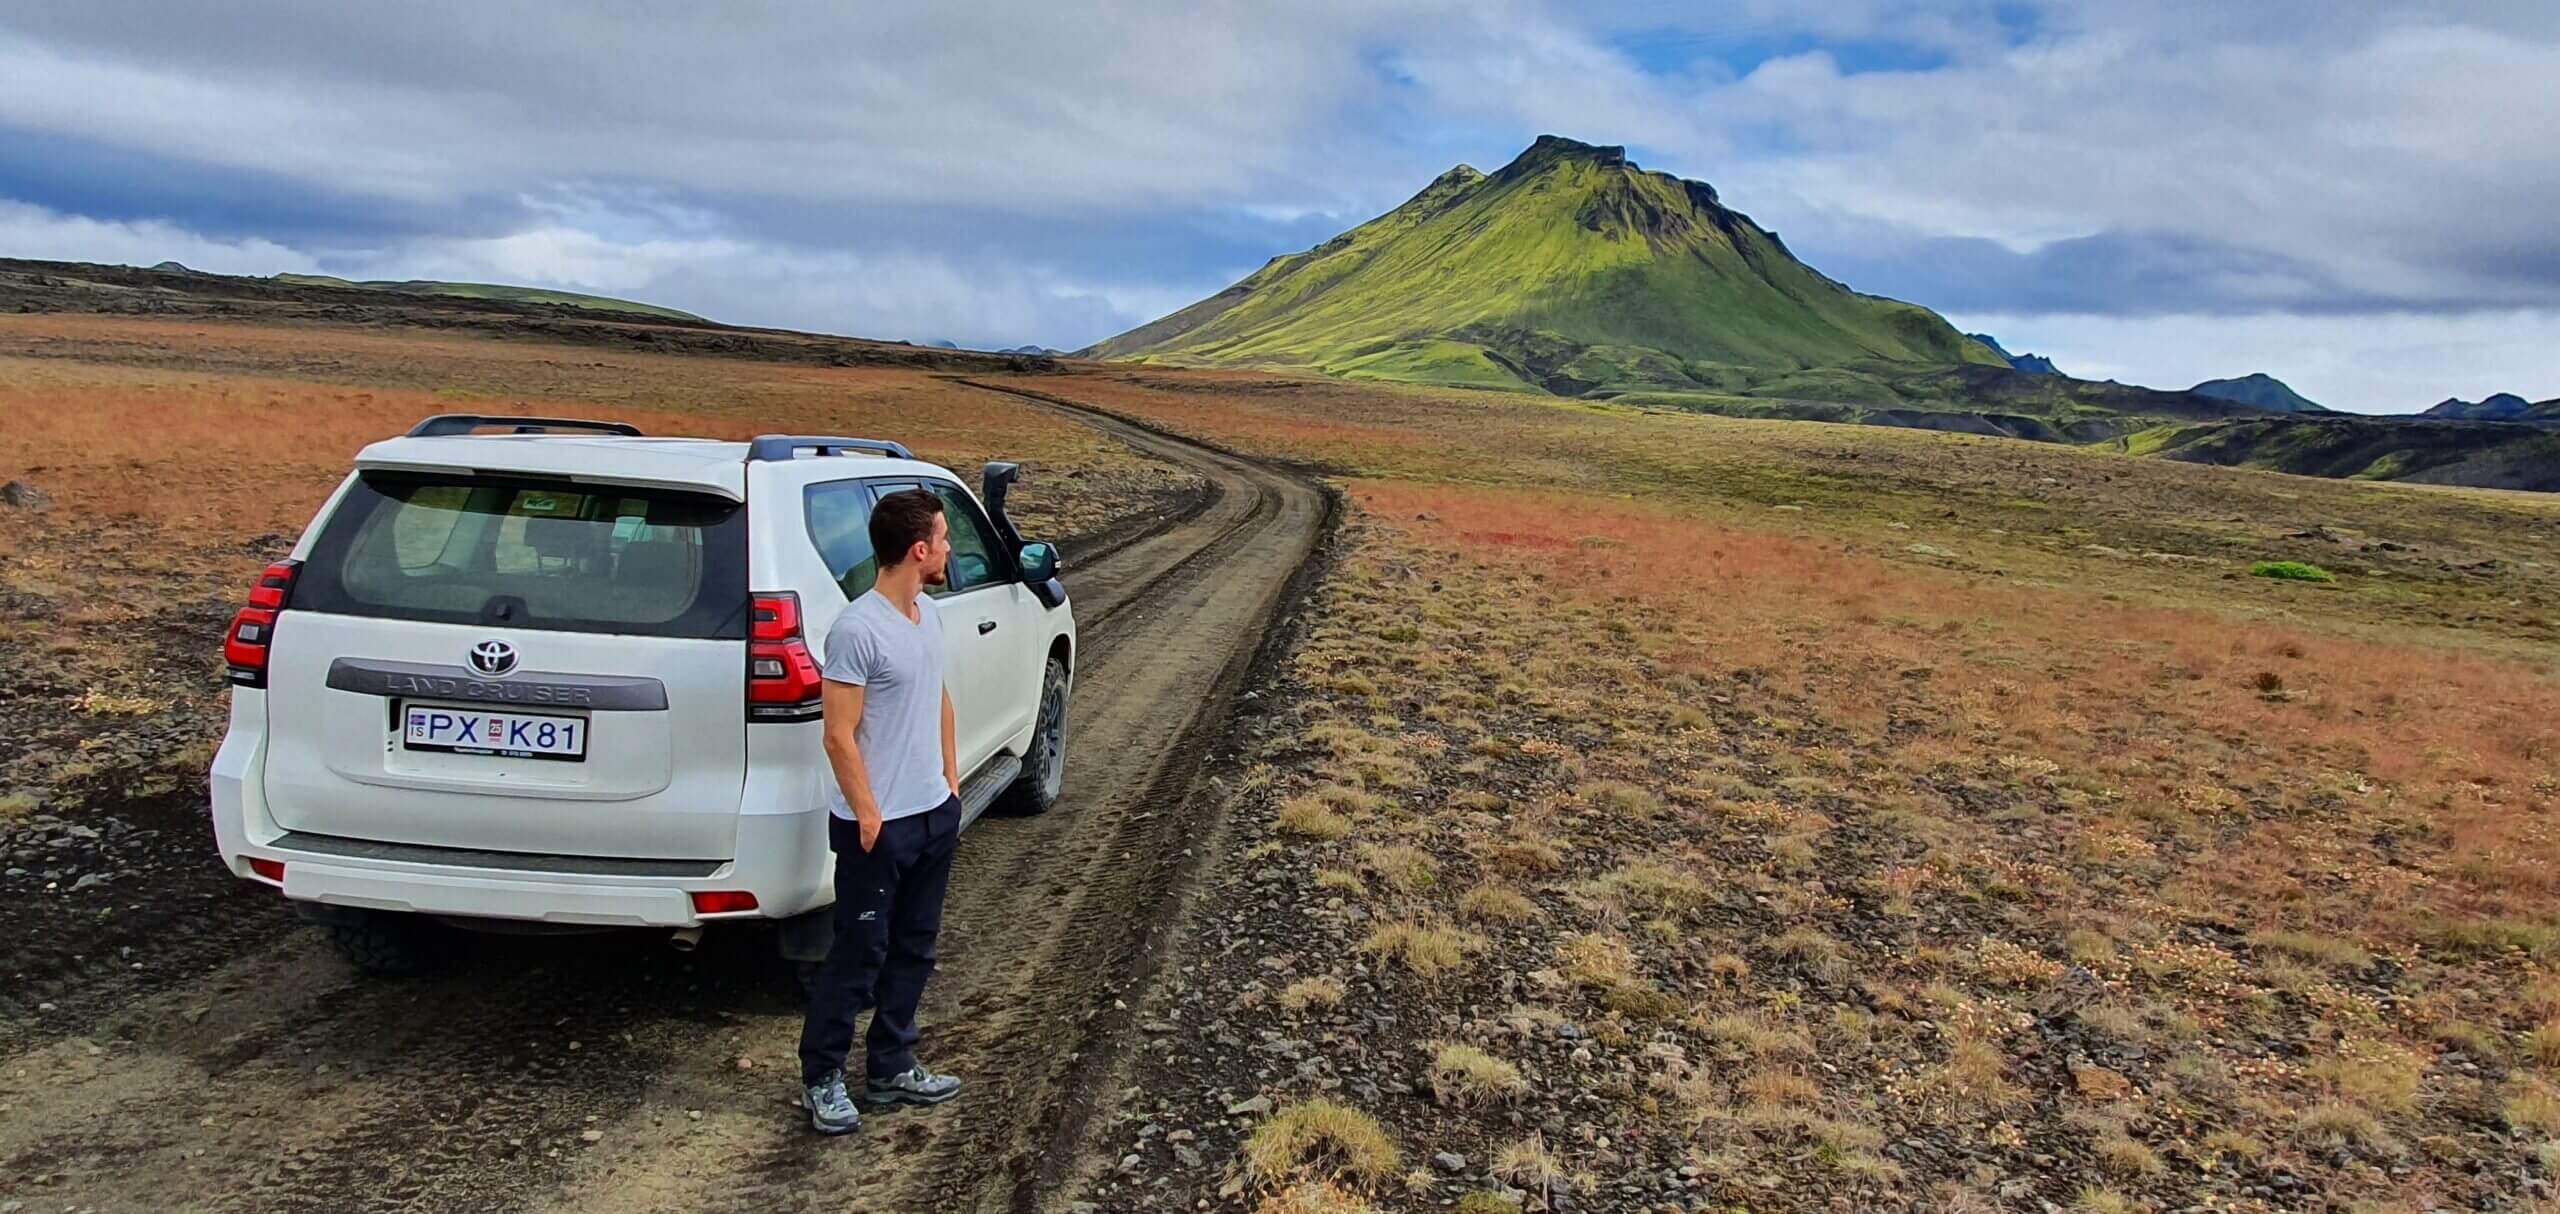
F261 near F210 is composed of big gravel and some steep sections so you have to drive slowly. F261 doesn’t contain any major river crossings, only Blafjalakvisl in the end (next to F210). Blafjalakvisl is considered to be a medium river crossing. At the time of our visit, this area was pretty dry and the water level in the rivers low, so it was pretty easy to cross the river. It’s definitely possible to drive F261 also in SUV like Dacia Duster, although I cannot imagine how uncomfortable it has to be. We recommend Land Cruiser and bigger.
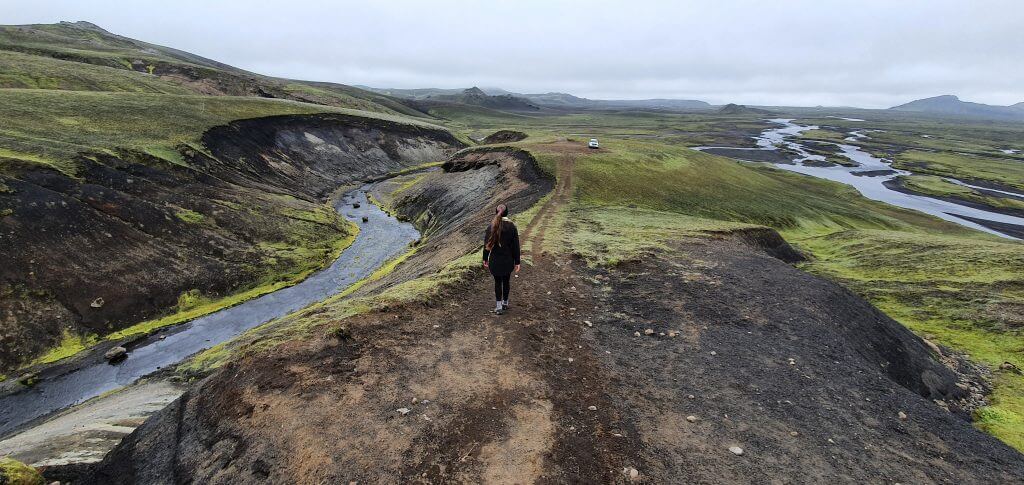
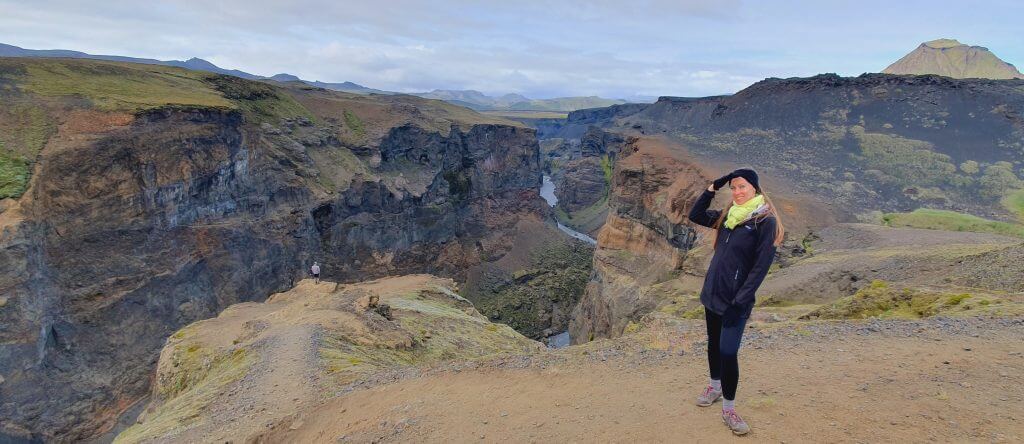
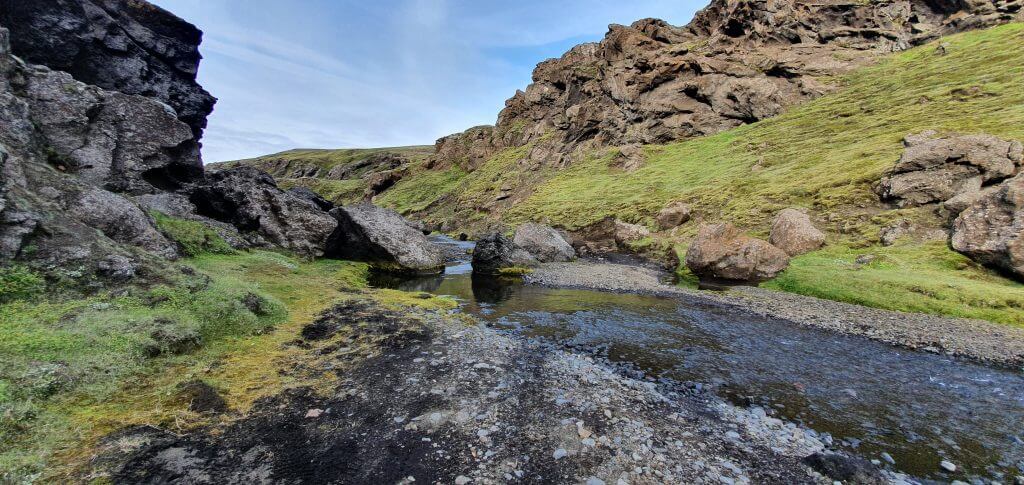
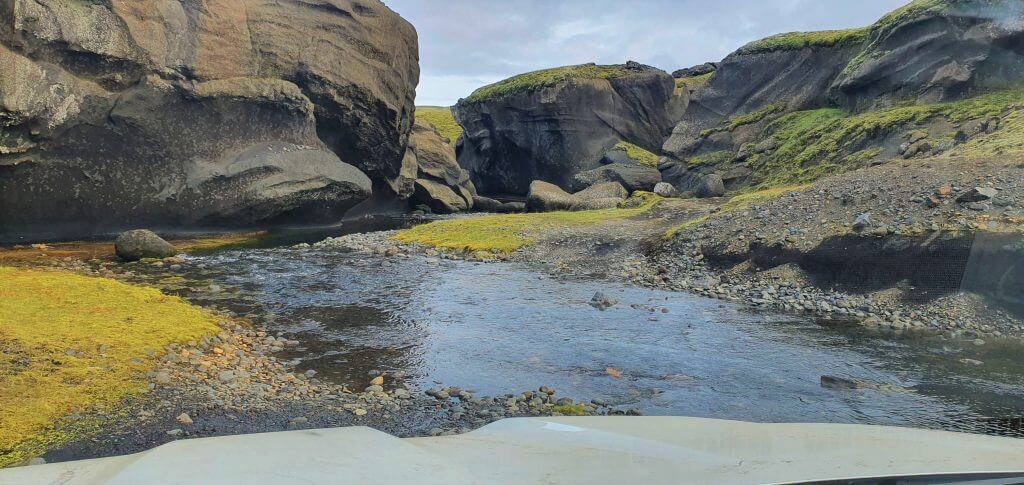
Markarfljotsgljufur canyon from the west
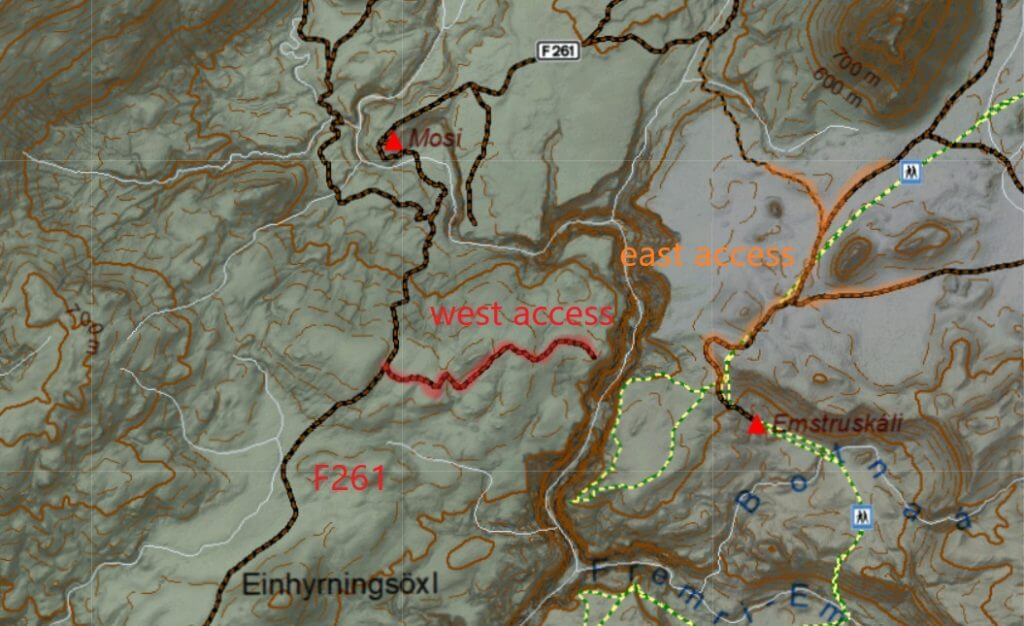
Markarfljótsgljúfur canyon west and east access
Near the end of F261, there’s a dirt track leading right as a detour from F261. It’s a detour to the western viewpoint of Markarfljotsgljufur canyon. We wrote about driving to Markarfljotsgljufur from the east here. The dirt track towards Markarfljot canyon is in pretty bad conditions, with some sharp stones all over the road. It’s also steep and narrow at some spots. However, it’s quite short. That being said, if you don’t feel like driving it, it’s also possible to simply hike/walk it.
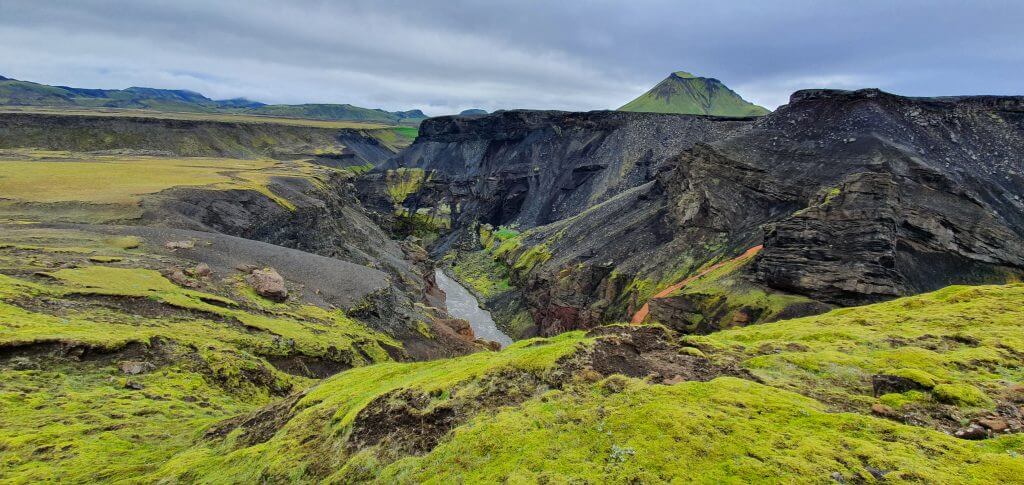
Markarfljótsgljúfur canyon from the west viewpoint
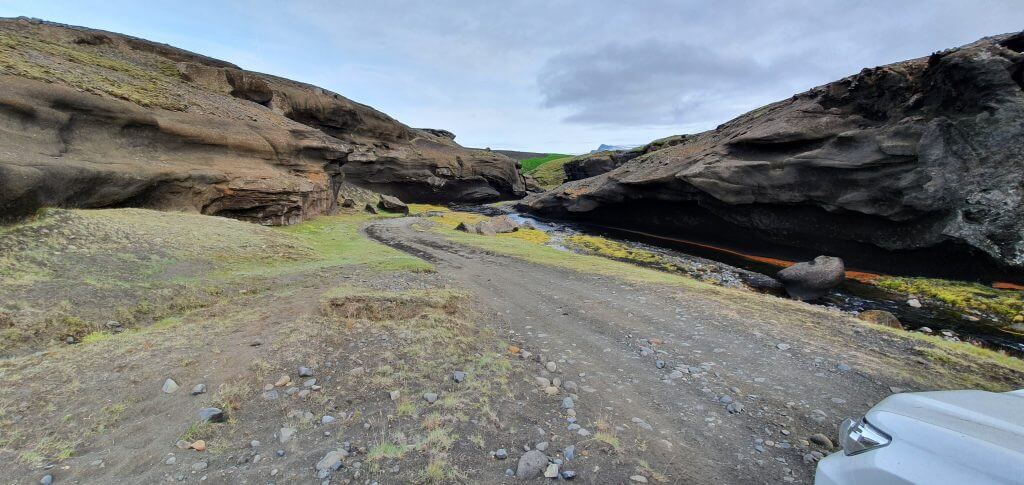
The dirt track ends at a flat-ground spot considered to be sort of a car park. There was a group of 3 jeeps driving the track right in front of us, so we all left our 4 cars at this parking spot. There’s a sign pointing to the left (north) with the name “Markarfljotsgljufur” and a walking sign, indicating a hiking trail. However, there’s no clear trail anywhere. Definitely not a marked one.
We managed to find a not very well visible path and follow it. However, this was a real challenge given that it simply disappeared from time to time. We took special care not to walk through any moss or other parts of the fragile nature and managed to somehow always connect to the well-trodden path. The unmarked trail mostly leads along the edge of the canyon.
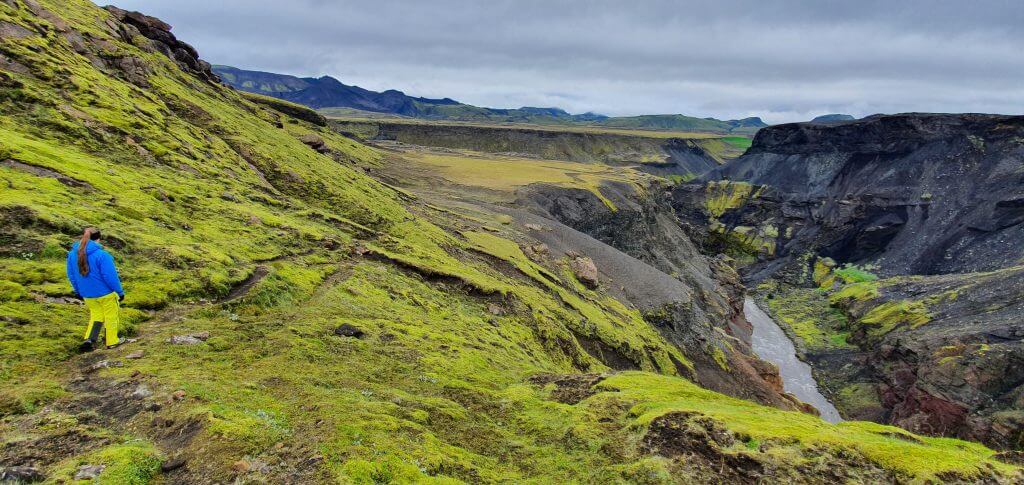
Hard to find the western trail of Markarfljotsgljufur canyon
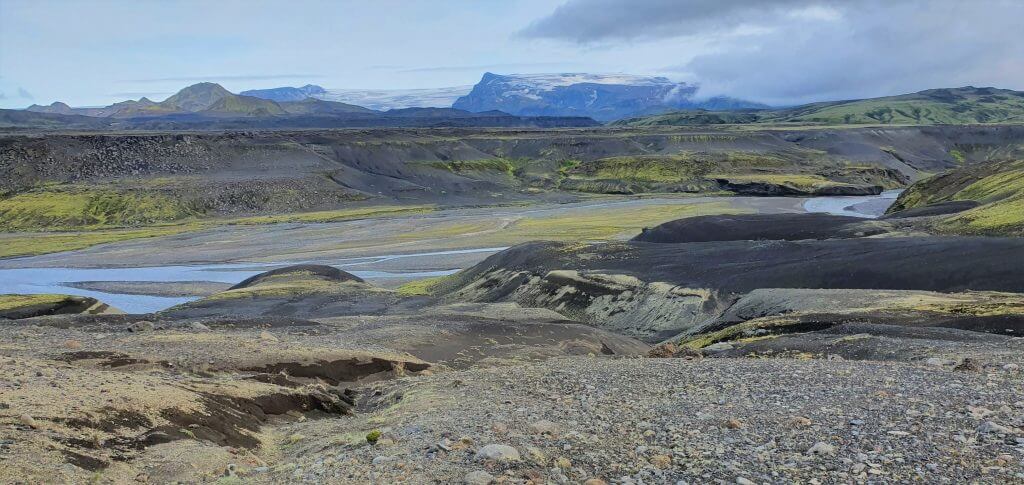
At this point you are already able to see some parts of the canyon, which is stunningly beautiful, however, you cannot see it in its entirety, because getting to the edge is simply too dangerous. There are no ropes, or barriers to prevent you from falling so you have to be very careful. We walked along the edge of the canyon towards the north for about 20-30 minutes when the path suddenly completely ended. The canyon widened and branched towards left and right at that point. I think the path was supposed to continue to the left (west) but we didn’t follow it anymore and rather turned back.
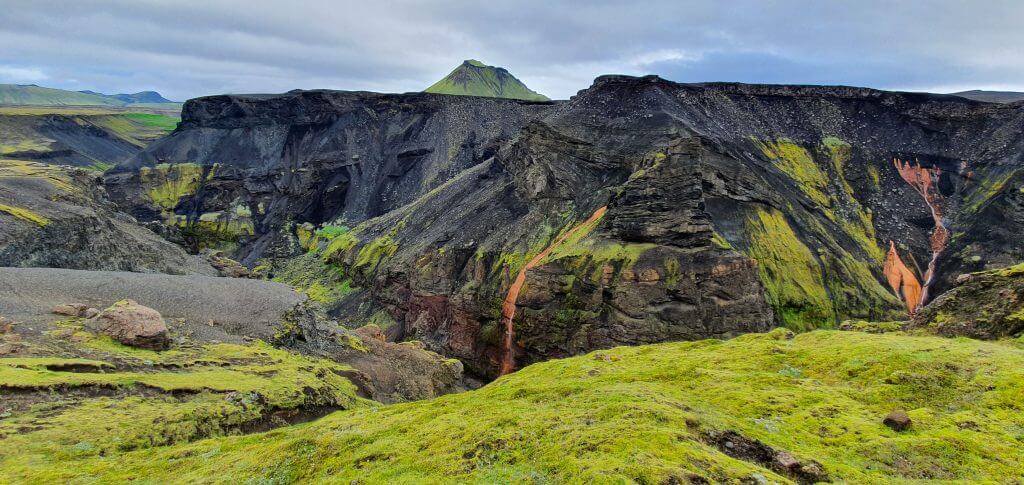
Amazing rock formations of the Markarfljotsgljufur canyon in Icelandic highlands
In the beginning, we also met a group of jeep travelers, who we realized were from Switzerland. They told us they didn’t manage to find any trail and came back to their cars. Luckily, we seemed to find a much bigger part of the trail than they did. Views along the path were beautiful, but they were definitely more stunning from the eastern viewpoint. So, if I chose to visit the Markarfljotsgljufur canyon again, I would definitely go for the eastern viewpoint only.
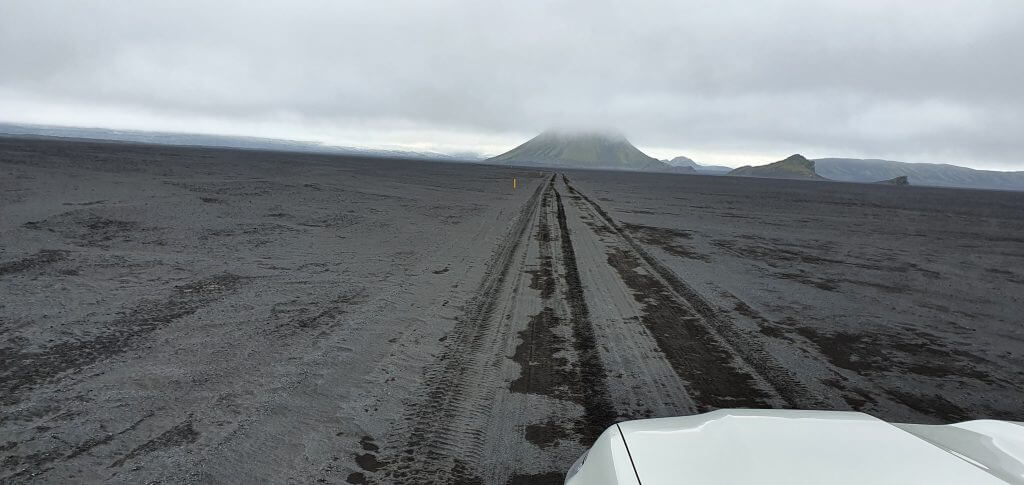
Strútur track
To get to the Strutur dirt track, you have to first ford the Blafjalakvisl river at the end of F261. We wrote more about F261 here and also in our List of F-roads. Then you have to drive a considerable part of F210 all the way towards Maelifell. We wrote about driving the F210 towards Maelifell here. Coming from the west of F210, right before the majestic Maelifell, there’s a turn left for the dirt track with the sign “Strútur hut”. That’s exactly where we turned this time.
Beware, the Strútur tracks we drove are just dirt tracks. Not even F-roads. This means they are even harder to drive than F-roads. Always check with your rental company if it allows for such roads, choose your car wisely and study the roads in advance. Mostly only super jeeps are allowed to drive the dirt tracks.
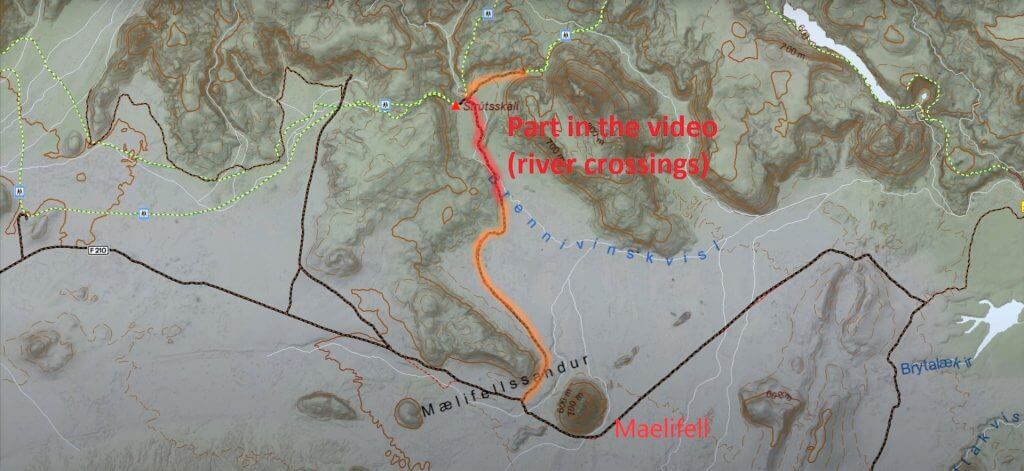
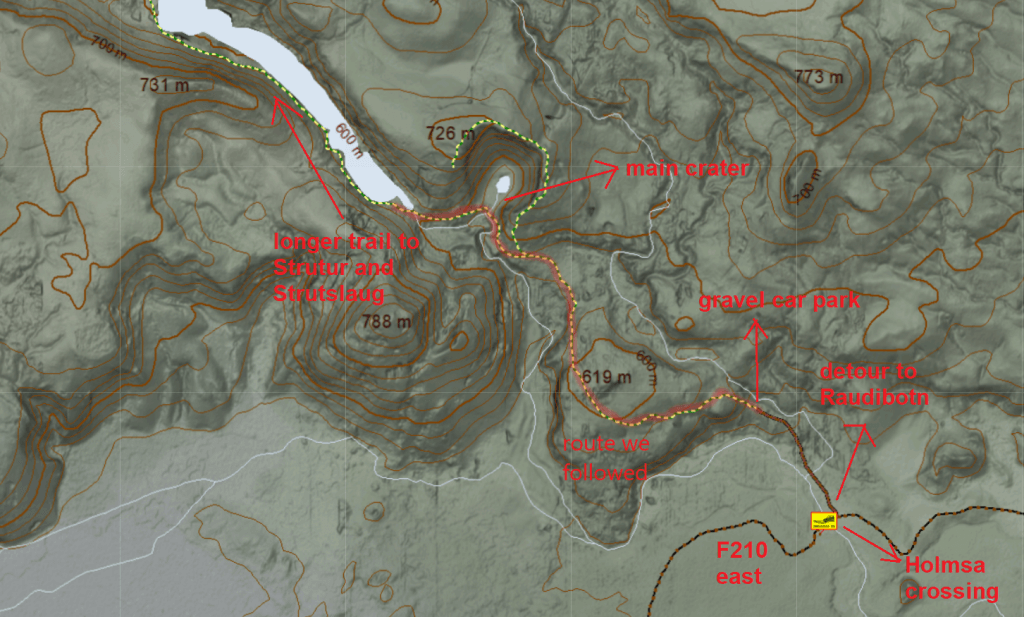
Strútur track to Strútslaug map
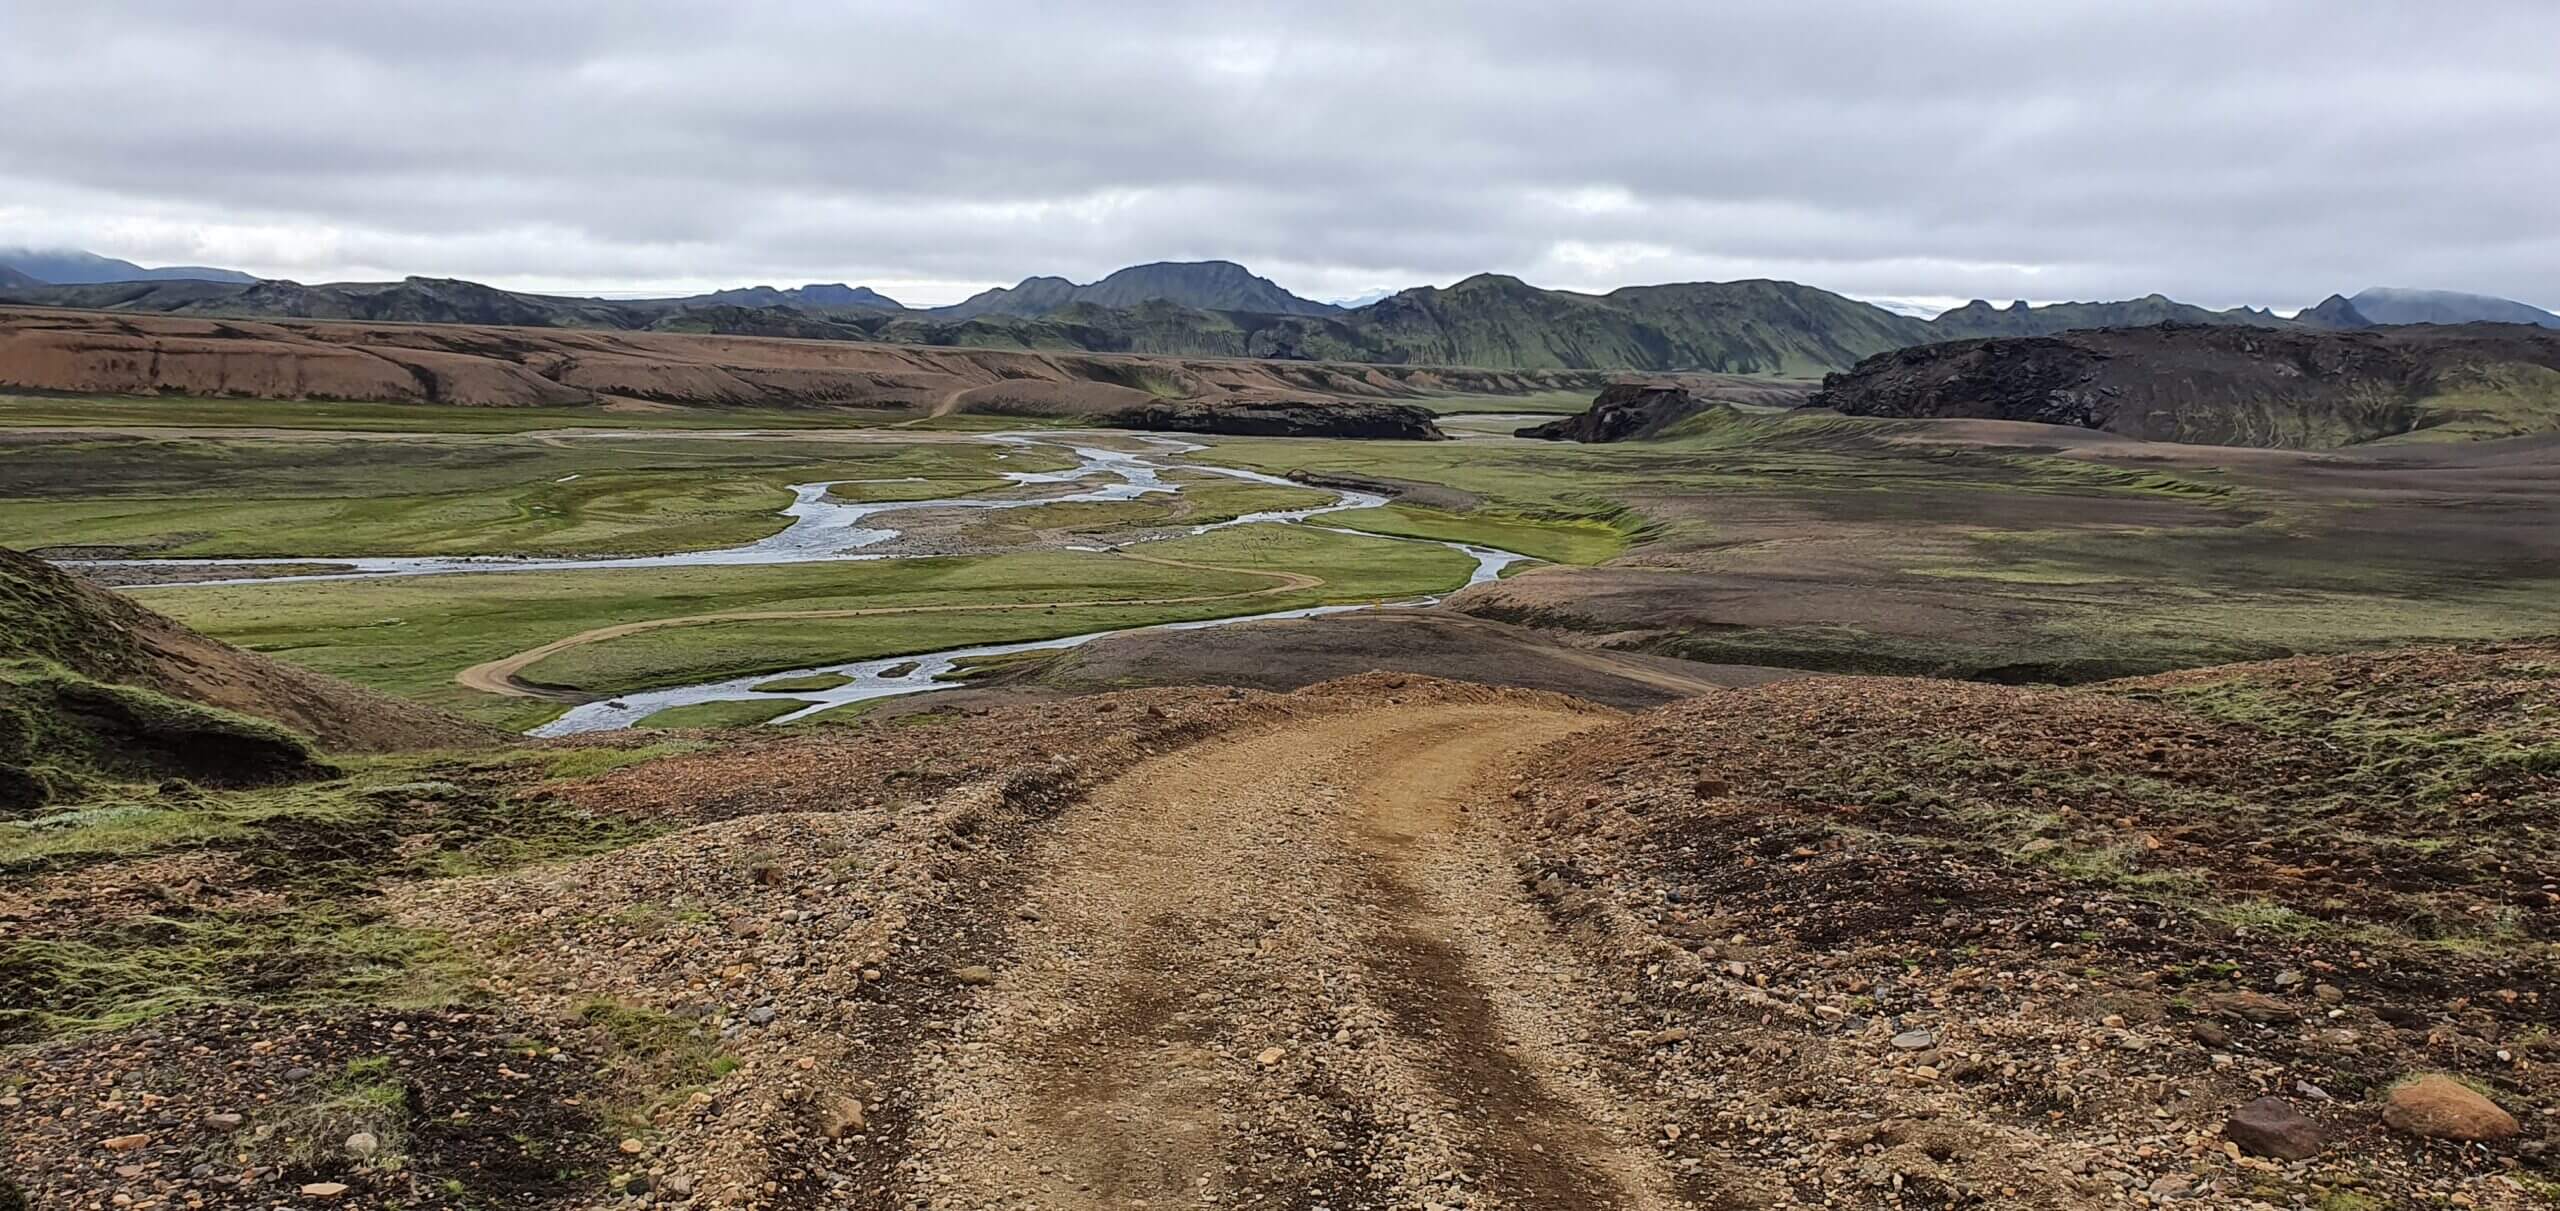
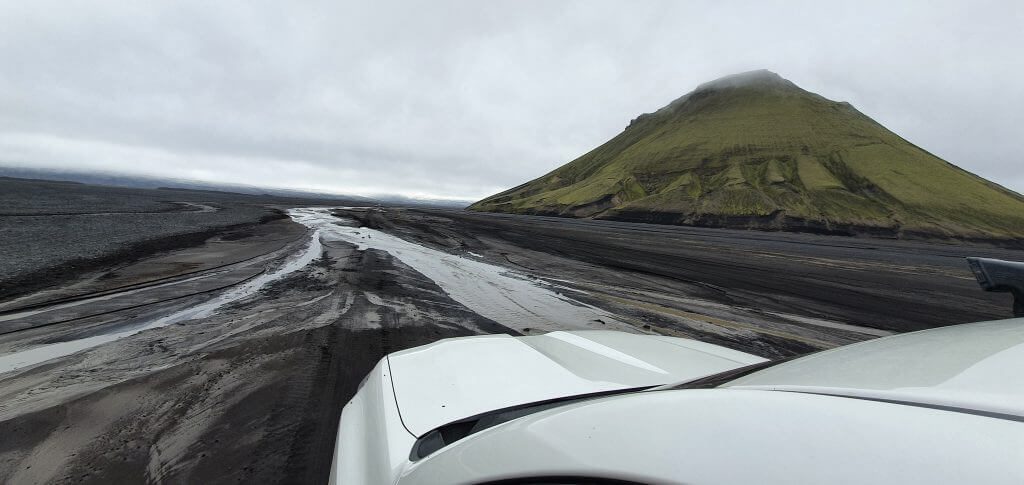
The dirt track towards Strútur hut (and Strútslaug hiking point) was a beautiful, totally remote track accompanied by many sheep, river streams, and tons of lush green moss. We drove in a cloudy weather and light drizzle, which made the specific lunar atmosphere of the place even stronger.
The Strutur track is not very long but you have to drive through multiple small to medium-sized river streams. The only spot which seemed terrifying at the first glance was a drive literally through the river for a hundred of meters. We reached the spot where the normal road simply ended and we couldn’t see any road, not even in the distance. Just yellow sticks in the river which led into the river and along the river bed (not to the other side of the river as usually).
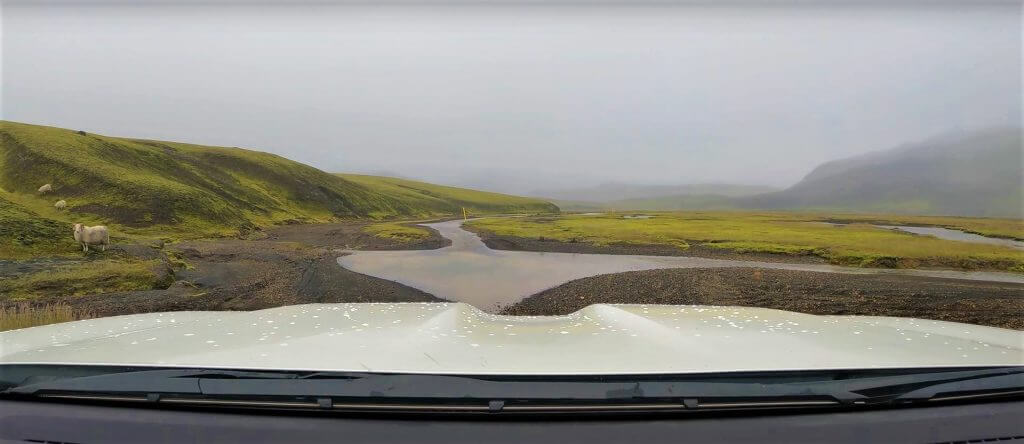
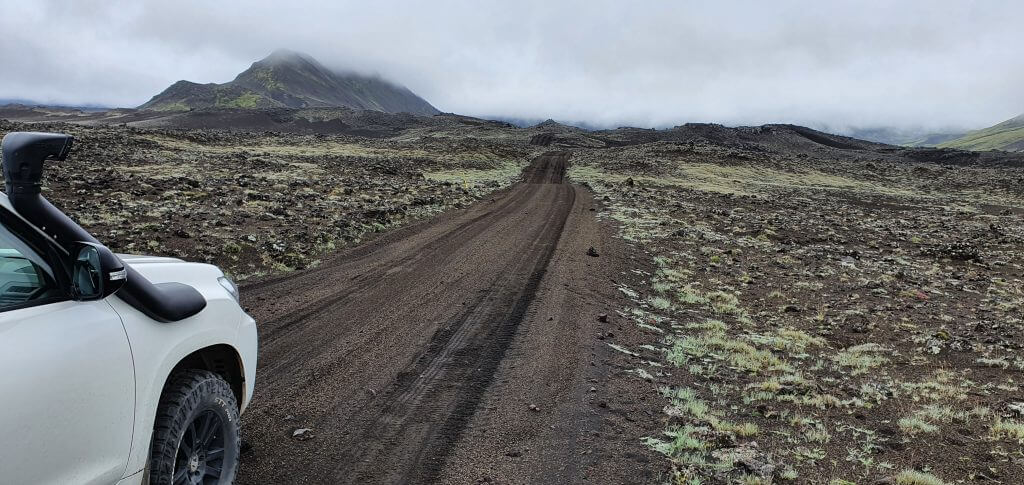
Strutur track to Strutslaug in a foggy weather
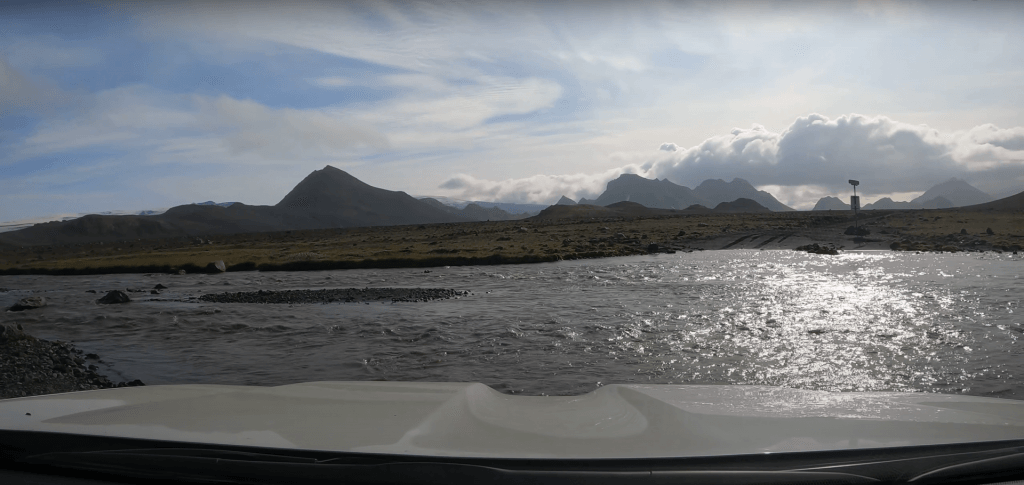
We had already driven through the length of the river bed at that point, during our drive via F210, but that was just a very shallow stream. Here the river already had some depth, I would consider it a medium-sized river crossing, but not just crossing, but rather river driving 🙂 There was no current, though and the river looked calm. I examined the river thoroughly and thanks to its calmness I could even see the bottom of the river bed which looked firm and even. The same was true for the rest of the river – at least as far as I could see.
The yellow sticks were located along the right bank, which looked slightly deeper than the left bank. But, I had already realized in the past – the sticks are there for some reason! Don’t try to be smarter than Icelandic rangers. It usually doesn’t end well 🙂 Thus, I came back inside our Land Cruiser, turned on 4×4, low-gear and locked the differential, and drove slowly along the right bank. The crossing was pretty exciting because we were virtually driving in the river for some time, but otherwise, it went smoothly.

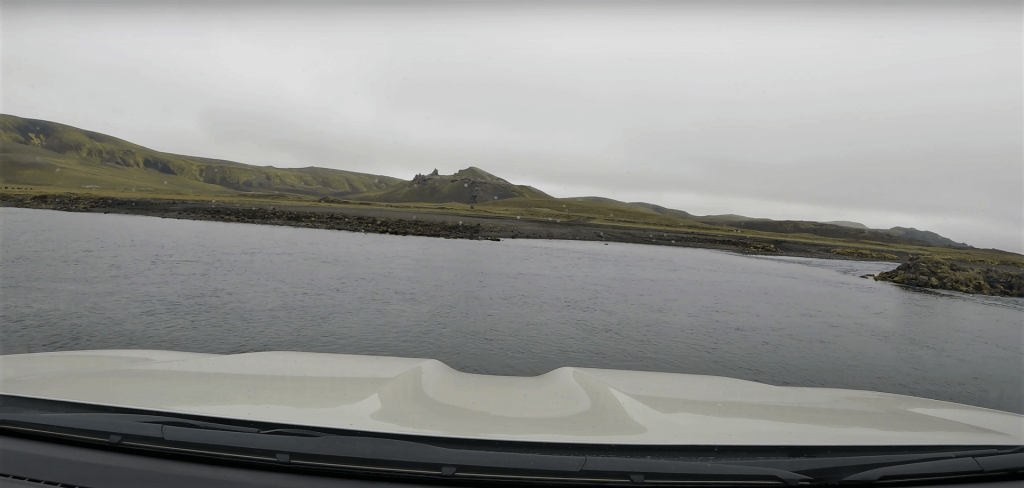
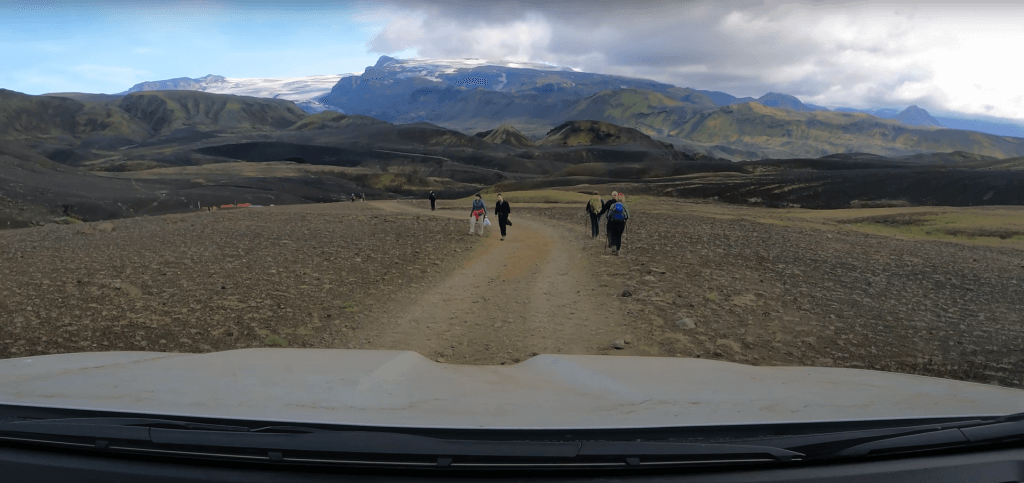
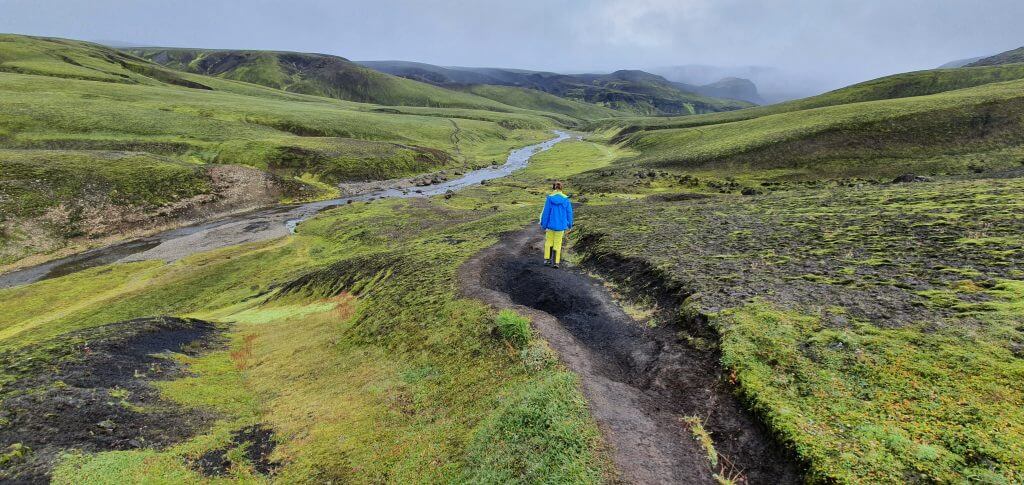
As far as I remember, there were maybe 1 or 2 more river crossings but none of them were that big. Soon we arrived close to the Strutur hut on our left, which looked lovely in the surroundings full of moss. There was a wooden sign pointing at several available trails from this point. We aimed at Strutslaug, naturally – this was the trail to the right.
Soon we realized, the trail is actually the road with very clear and well-trodden tracks. Hence we got back into our car and drove 1 more kilometer through this right detour and arrived at the little car park with another wooden sign pointing at different trails. This was the end of the Strutur dirt track. We left our car here and began our hike towards Strutslaug.
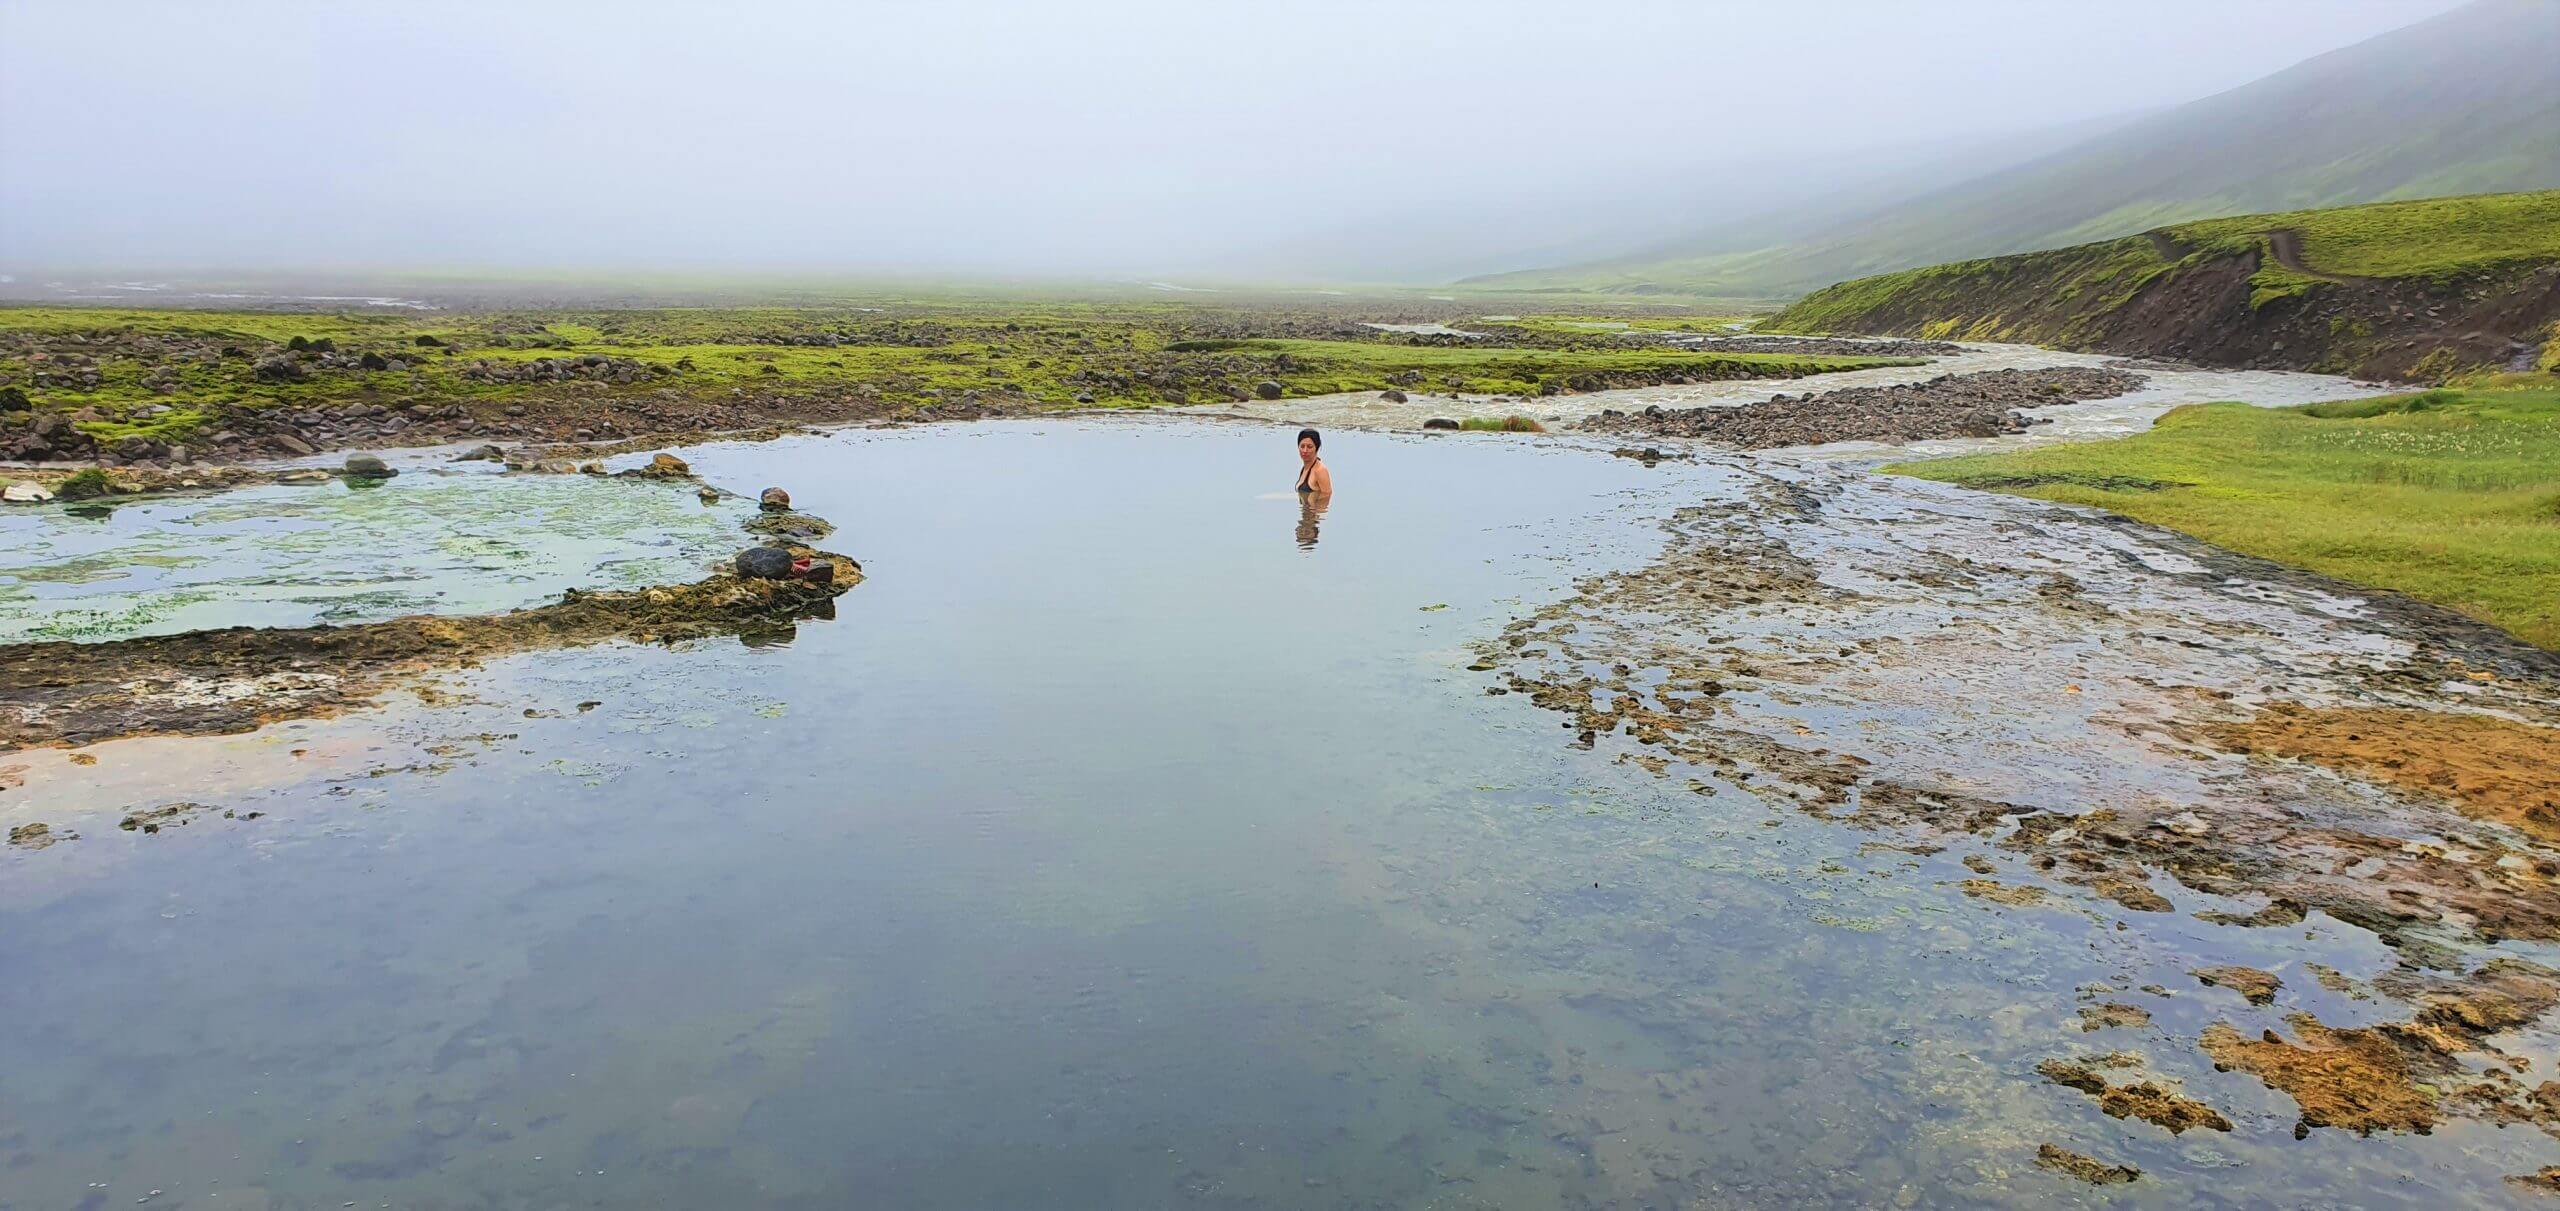
Strútslaug hot spring
See that little white thing? That’s our car at the improvised Strutslaug car park
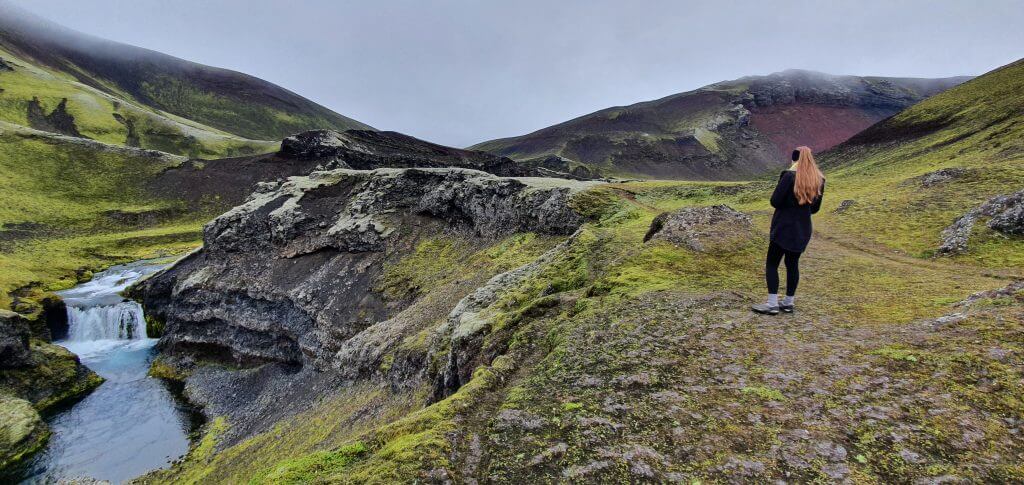
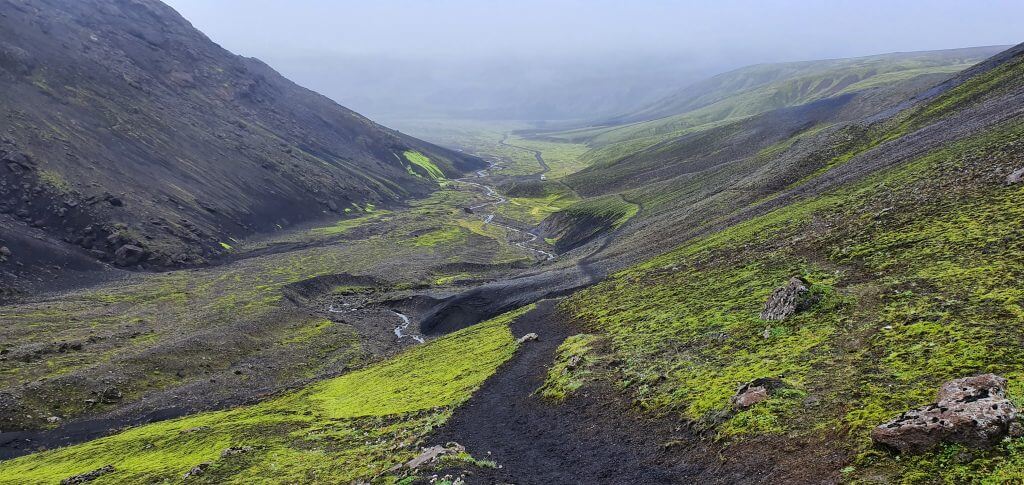
The hiking trail towards Strútslaug is roughly 5 kilometers long, not difficult at all, and it took us around 1.5 hours to finish it at a normal pace. It leads through nice valleys full of moss and along river streams. To hike to Strutslaug is a nice way to experience Icelandic highlands, even for families. The hike is pretty easy, just a bit long, but it doesn’t have any steep or exposed passages. It’s basically a walk through the moss valleys. Up until the last meters we were not sure where the end of the trail actually is. The Strutslaug itself is not well visible from the distance.
Beautiful Strútslaug hiking trail full of vivid green colors
When we arrived, we were very surprised not to be completely alone there. One hiker had been already there, setting up his tent in the area. After a short talk, he told us he was from the Netherlands, doing a walk all the way from Akureyri towards Hella, only via highlands and camping along the way. Brave guy 🙂 If it wasn’t for this adventurer, we would be definitely alone at Strutslaug.
There’s no changing cabin at Strutslaug. Anyway, we looked very much forward to bathing in Strutslaug, because the weather was very moody, with completely clouded skies and light drizzle throughout our entire hike. We put a bag on the wet ground, changed our clothes, covered them with waterproof clothes, and ran for the hot spring.
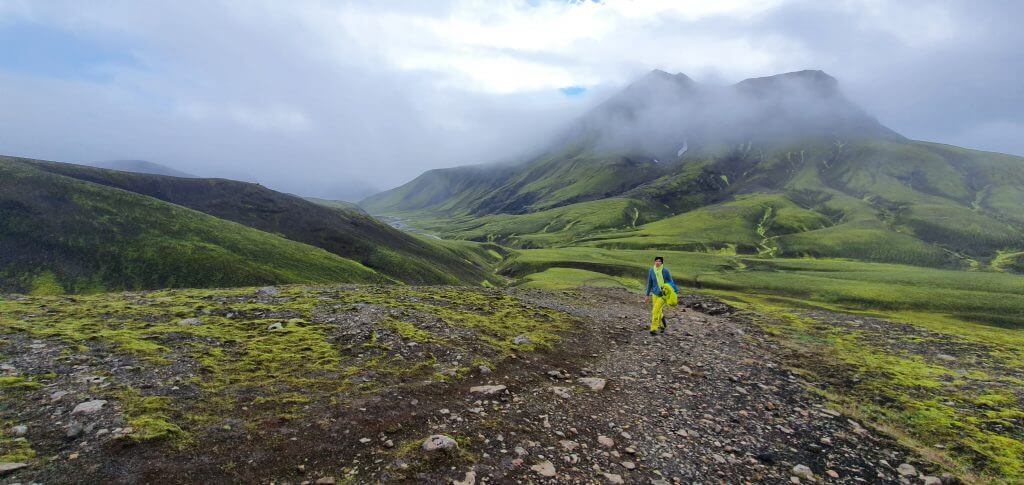
Surroundings of the Strútslaug hiking trail
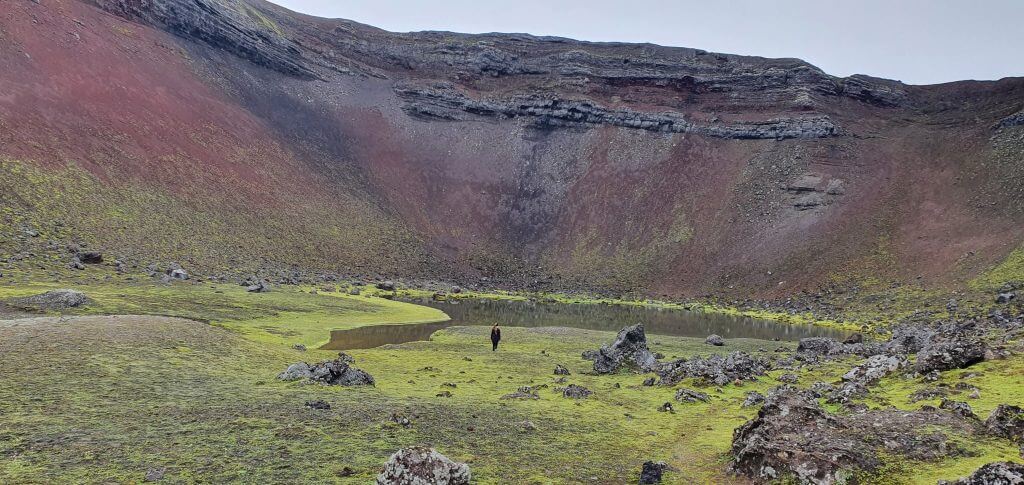
Strutslaug is a pretty big natural hot spring that could easily welcome tens of visitors. I guess it’s never really full, given its total remoteness. It’s also pleasantly hot, with a water temperature of around 40°C according to my (non) professional estimate. It’s a very surreal and pleasant bathing experience in the middle of the total nowhere. One of my favorite Icelandic hot springs.
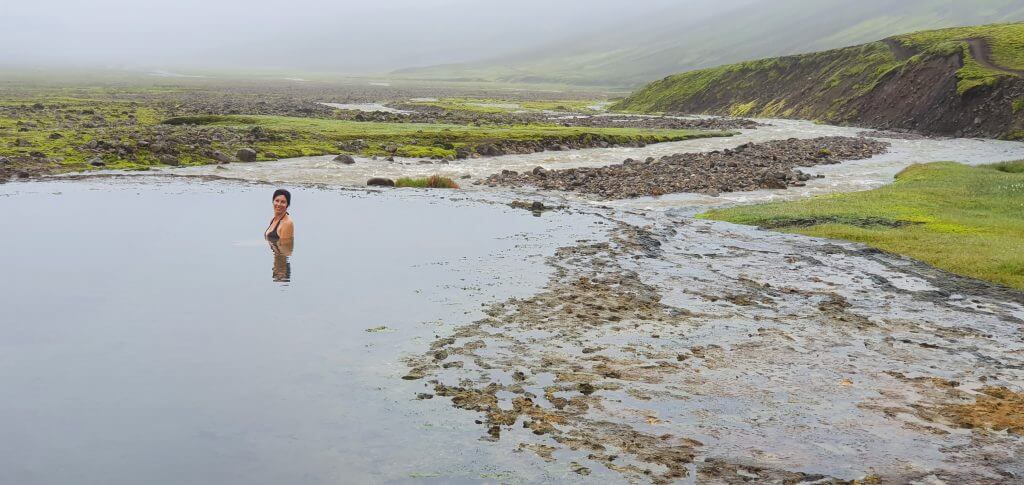
A really surreal place. This is a hidden hot spring Strútslaug
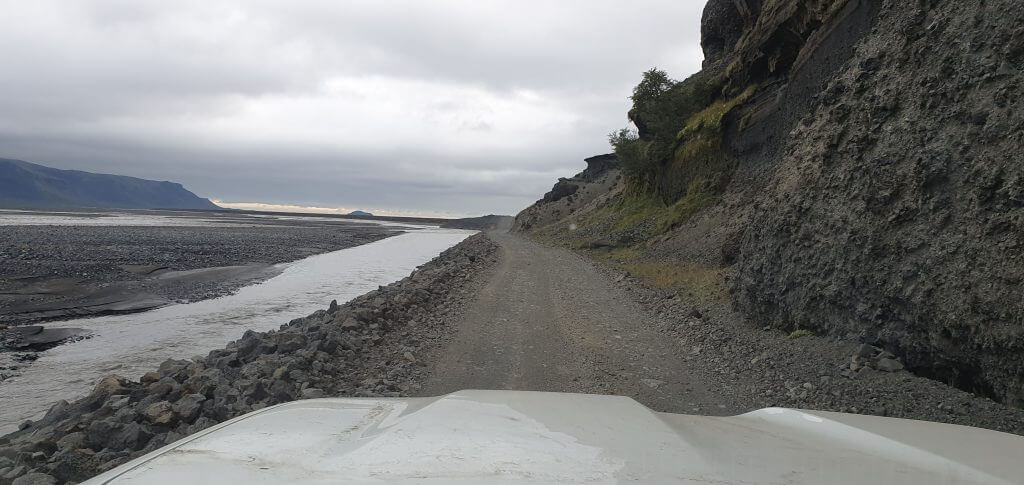
After soaking up in Strutslaug for about an hour, we hiked back to our car, drove back via Strutur track to Maelifell and then drove back via western F210 to F261. We crossed Blafjalaskvisl again and were deciding whether to go for one more adventure or not. Of course, we went 🙂 I persuaded my wife to drive the entire Hungurfit track.
Crazy Hungurfit track
We had already driven around one-third of the Hungurfit track on Day 2 of our highlands trip. It was very difficult, yet also amazingly stunning. As we already wrote about here, the first part of the Hungurfit track consists of narrow and steep passages and uneven gravel ground. You definitely need at least a big 4×4 to drive it, but we rather do recommend a superjeep, to be sure to drive it safely. Our friend Haraldur told us, our raised 33” Land Cruiser with snorkel was just about a minimum requirement for the Hungurfit track 🙂
Beware, the Hungurfit tracks we drove are just dirt tracks. Not even F-roads. This means they are even harder to drive than F-roads. Always check with your rental company if it allows for such roads, choose your car wisely and study the roads in advance. Mostly only super jeeps are allowed to drive the dirt tracks.
This is the legendary spot on the Hungurfit track. Many call it “impassable” 🙂
Left or right?
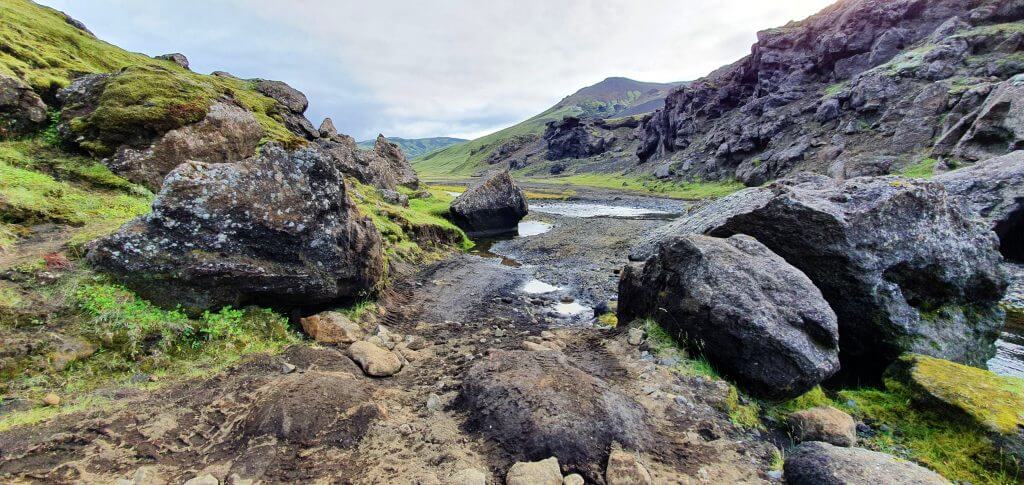
After the first part, you arrive at the main crossroad of the Hungurfit track. The left part leads through the amazing area full of river streams, many small river crossings, and a legendary place where you drive between two very close huge stone boulders. The right part leads through more steep and mountainous terrain with bigger holes and uneven ground and slopes, but no river crossings. For me it was an easy choice – I definitely wanted to drive again through the river crossing area. This river crossing area at the Hungurfit track was one of the most beautiful remote places I’ve seen in Iceland.

After finishing driving through the river streams area, we arrived at the crossroads which connect the two main detours (left and right) at their other endpoint. Afterwards the road continues into the steep hill and as far as I remember there were two paths available – one steeper but with better ground and one less steep but with big holes and worse terrain. I don’t remember which route we chose, but none of them was easy. We had to drive very slowly, though steadily with all our 4×4 assistants turned on and yet still the drive was scary and at times we really felt our 33” Land Cruiser drives on the edge of its capabilities. But we made it.
Many small to medium river crossings are an amazing part of the Hungurfit track
Although it started to get darker already (and thus much scarier) the views along the road were amazingly beautiful and one of their kind. The surrounding landscapes were breathtaking. This drive’s gonna stay long in my memories 🙂 There are different kinds of steep and narrow terrains, ascents, descents and even a drive in very narrow and deep tracks which you have to exactly follow meter by meter to not get yourself bumped away out of this world. We had thought this was the worst. No, it wasn’t 🙂
River crossing
We arrived at the pretty fast flowing river, which didn’t look shallow at all. And the crossing was wide. This was the point where I was seriously considering turning back even with our 33” Land Cruiser with snorkel. I simply didn’t feel like wading this river nor by walking through it first, it just looked dangerous. And I didn’t know anything about it. No cars in the radius of a hundred of miles maybe. I contemplated a little and then I decided for the most rational option – to put on my wading socks, take my hiking poles and attempt to wade the river firstly by foot very very carefully.

After getting into the river I realized the current wasn’t as strong as I had thought and also the river wasn’t as deep as I had thought, so I was able to get almost to the middle of the crossing. At that point I pretty much knew our Land Cruiser should be able to make it. I came back to our car, turned on all the 4×4 support systems (low gear, differential lock) and went slowly for the crossing exactly in the way I waded by foot. And the crossing went well! To not look too brave – we (and I) were still scared as hell when doing the crossing 🙂 but we had made all the rational precautions to ensure that we should be able to make it.
Ascents and descents
So, the worst part behind us. Or no? Not really. Soon we arrived at the top of the steep descent with the Hungurfit hut already visible in the far distance in front of us. This had signaled we should be nearing the final part of the road. The descent didn’t look that bad only because of the steep slope. The main problem was the quality of the track – big sharp stones stuck out every few meters from the ground followed usually by even bigger holes – and all of this in a steep descent.
Surroundings of the Hungurfit track are also amazingly beautiful
There was actually a crossroad at this point with the left and the right track both ending at the same point. None of the tracks looked attractive, though. We eventually chose the right track. It was already almost dark and the descent again tested the abilities of our Land Cruiser hugely. We successfully avoided the biggest holes and sharpest stones and got successfully to the end of this passage.
The rest of the road was thankfully much easier. I remember one more river crossing which was shallow, thus without any problems. After driving next to the Hungurfit hut we finally arrived at the junction with F210, turned left and headed towards west end of F210. Still an hour of driving via F210, now completely in the dark. Interesting experience. However, we had already driven via this part of F210 on Day 2 of our trip, so we knew it should be OK and it was.
Videos


![]() ask questions or get inspired in our community
ask questions or get inspired in our community