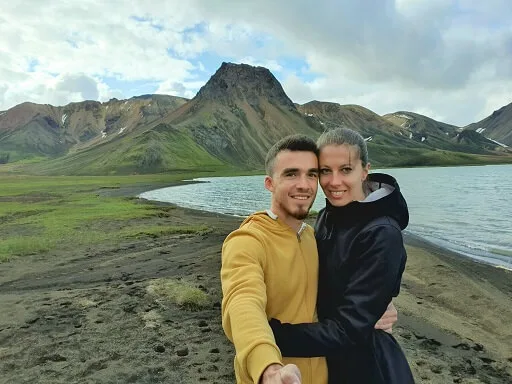
Snækollur is the highest peak of an amazingly beautiful Kerlingarfjöll. And guess what happens if you hike to the tallest point of the heavenly place? You will be getting once-in-a-lifetime views!
And that’s exactly what you will get once you climb to Snækollur on a nice day. Views above Kerlingarfjöll you will never forget.
Most Kerlingarfjöll visitors go just for the Hveradalir hot spring area and/or just visit the Kerlingarfjöll campsite area. Both of these are quite easy to hike, and this way, typically, everybody ends up visiting the same spots. Instead, we wanted to do something different this time. A hike to the highest peak of Kerlingarfjöll, Snækollur, seemed an ideal candidate.
Contents
Hike in a Nutshell
Hiking time: 4 to 7 hours round-trip (depends on the trail and conditions)
Length: 9.3km / 5.8mi
Difficulty: moderate to difficult
Season: July to September
Obstacles: slippery terrain, snowfields, sometimes bad visibility and sparse marking
Trail map: Snaekollur main hiking trail
Kerlingarfjöll Hiking Map
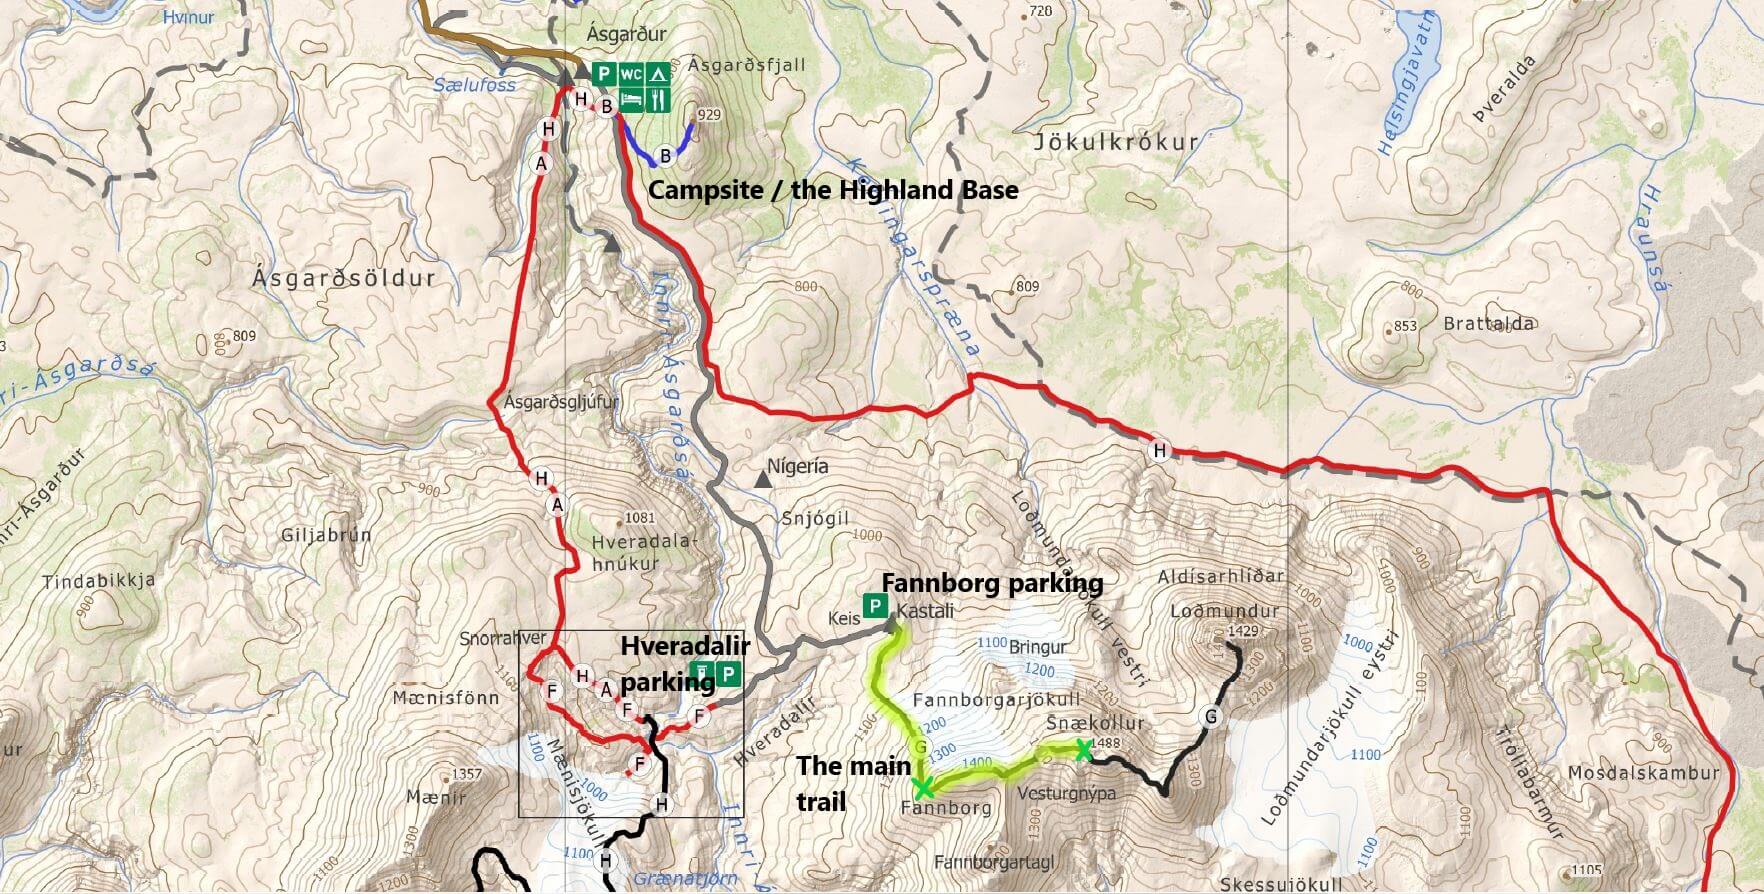
The main hiking trail to Snækollur along other Kerlingarfjöll hiking trails
How to get to the Snækollur trailhead
It’s easy to reach Kerlingarfjöll by car via Kjölur (road 35, or former F35) and F347. You need a proper 4×4 car, though. We’ve already explained how to get to Kerlingarfjöll in our Guide to Kerlingarfjöll.
Heading to Highlands? Read how to prepare for Highlands in Iceland.
Snækollur trailhead is just a few hundred meters from the main Hveradalir geothermal area. You can easily park there, similar to parking in Hveradalir.
When to hike Snækollur

We highly recommend hiking only from mid-July until mid-September, when the trails are clear of snow. Sometimes, when spring is hot enough, it may also be possible to do the hike a few weeks earlier. And vice versa, when summer is longer than usual, also a few weeks later.
These are the Top 25 Places in Icelandic Highlands.
Regarding weather, we again highly recommend visiting only on days without rain or strong winds. Ideally, you aim for a day with good visibility. Otherwise, it doesn’t make sense to hike to Snækollur and see nothing from above.
How to hike Snækollur
Hike to Snækollur is challenging. It’s no easy walk. You need to be in good physical shape to climb all the way up. On the other hand, the Snækollur hike is not especially dangerous or exposed if you come at the right time, in the right shape, and follow the right trails.
Now what about equipment? I highly recommend you bring hiking poles and a satellite location device, for example, PLB, if any emergency occurs. Otherwise, just autumn hiking clothes are needed.
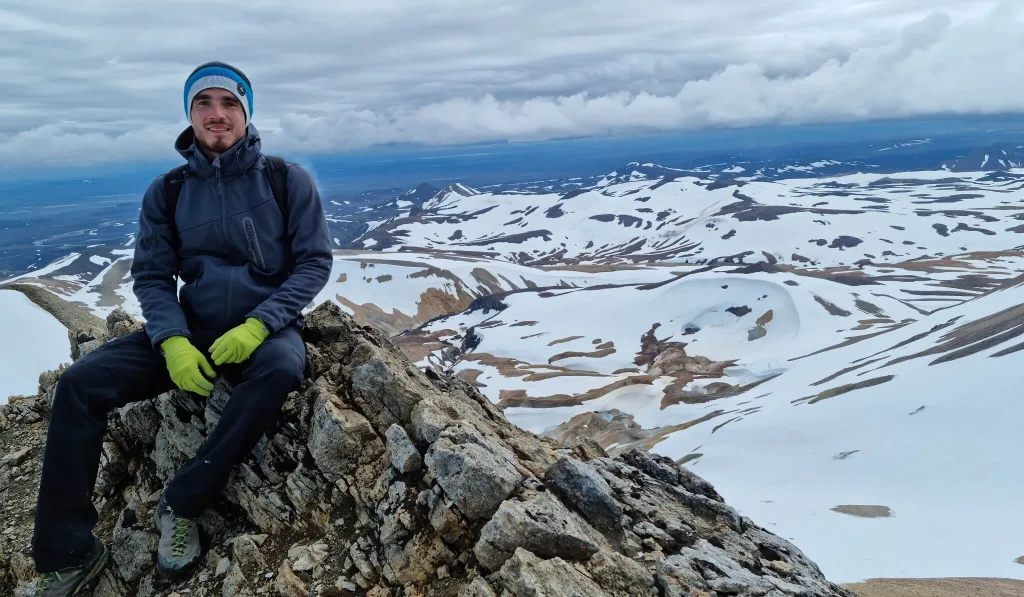
Views from the peak of Snækollur
Expect very chilly weather. The temperature reached around 5°C (41°F) at noon in July, when we reached the peak of Snækollur. Kerlingarfjöll is one of the coldest areas in Iceland due to its proximity to two glaciers and a pretty high altitude.
Oh, and one last thing – if you want to do the hike as a loop, starting at an unmarked trail in Hveradalir (as we did), you will need to cross a river. In that case, bring some water shoes and a little towel.
Hiking trails to Snækollur
There is one main hiking trail to Snækollur. It begins next to the Hveradalir geothermal area car park and leads first to the peak of Fannborg and then to Snækollur. It can only be done as an out-and-back trail. The main route is the easiest one for orientation.
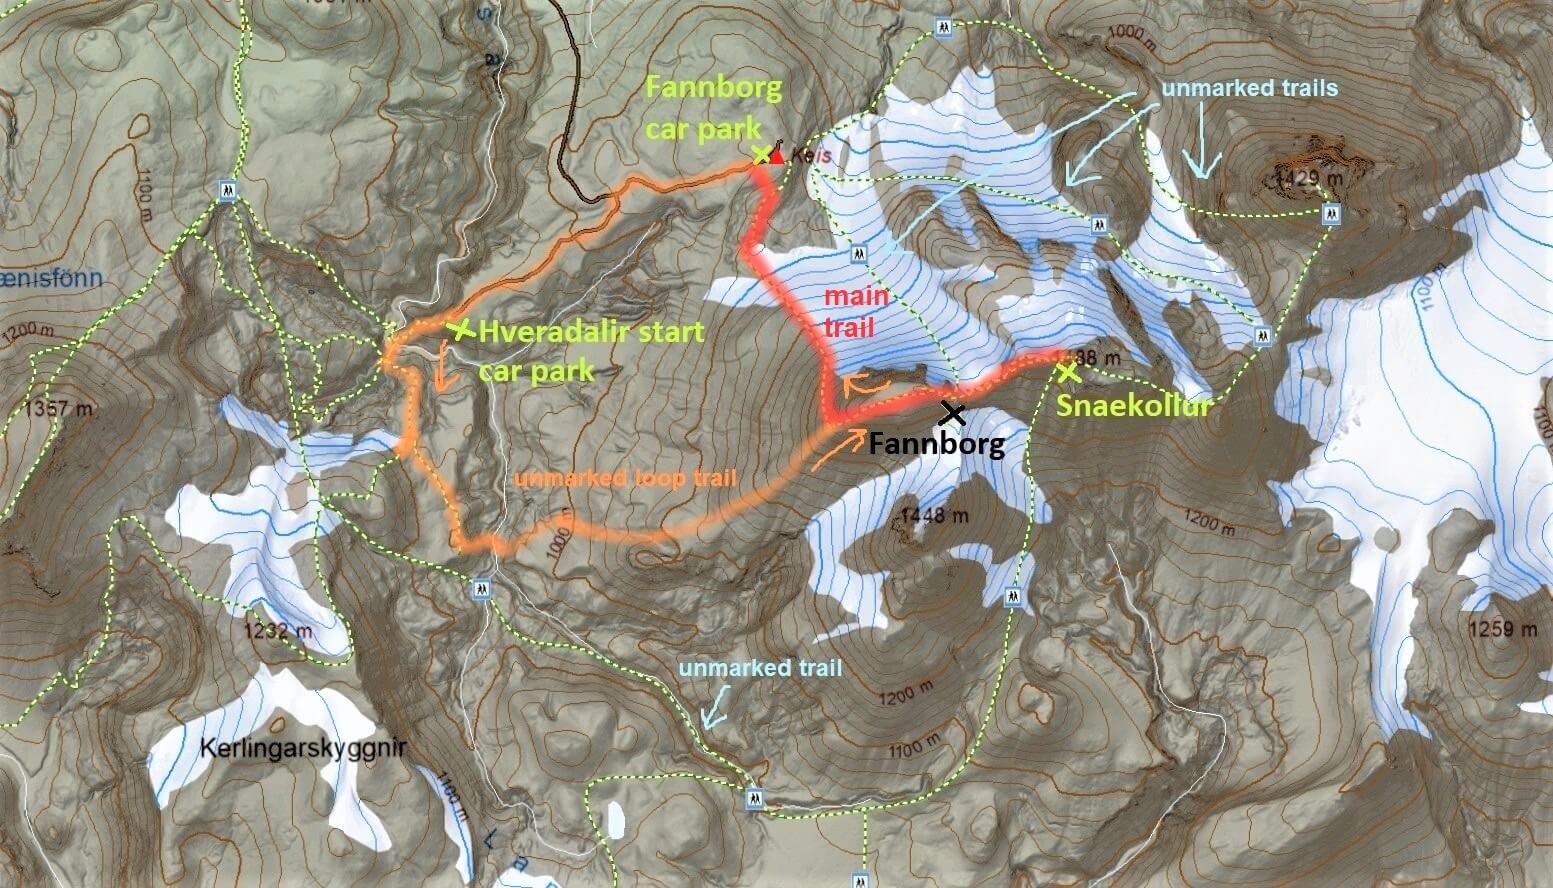
Various hiking trails to Snaekollur, most of them unmarked
Then there are also several unmarked hiking trails leading to and from Snækollur. It was almost impossible to get any info about ANY of these trails, even the marked one, before our trip. This was also one of the main reasons why I decided to write this article.
All the alternative routes to make a “loop trail” are unmarked or barely marked. We’ve chosen one of these loop trails. And it was pretty hard to follow. I recommend instead taking the marked trail to Snaekollur and back the same way.
Before every trip check weather forecast, road conditions, and safety warnings.
Fannborg car park to Snaekollur – the main trail
When you drive to Hveradalir, coming from the Kerlingarfjöll campsite direction, there’s an often-overlooked detour left, a few hundred meters before reaching Hveradalir. This detour will take you to the Fannborg car park.
This is the beginning spot for the only marked trail to Snaekollur. We took this route on our way down, returning from the peak. This is the recommended trail. We describe it in detail in the section about the descent.
Hveradalir car park to Snaekollur – mostly unmarked
This is the trail we took on our way up. It starts at a Hveradalir hot springs area (marked) and follows as an unmarked detour towards the river crossing. You then steeply and steadily climb upwards to Fannborg, where you will join the marked main Fannborg trail. For more details, see our Snækollur experience below.
Other trails – mostly unmarked
There are multiple other, mostly unmarked trails leading to and around Snaekollur – see our Snækollur trails map. Most of them were covered by deep snow at the time of our visit in July. I strongly advise against taking these trails without a local guide. There’s a risk of an avalanche and dangerous falls.
Our Snækollur hiking experience
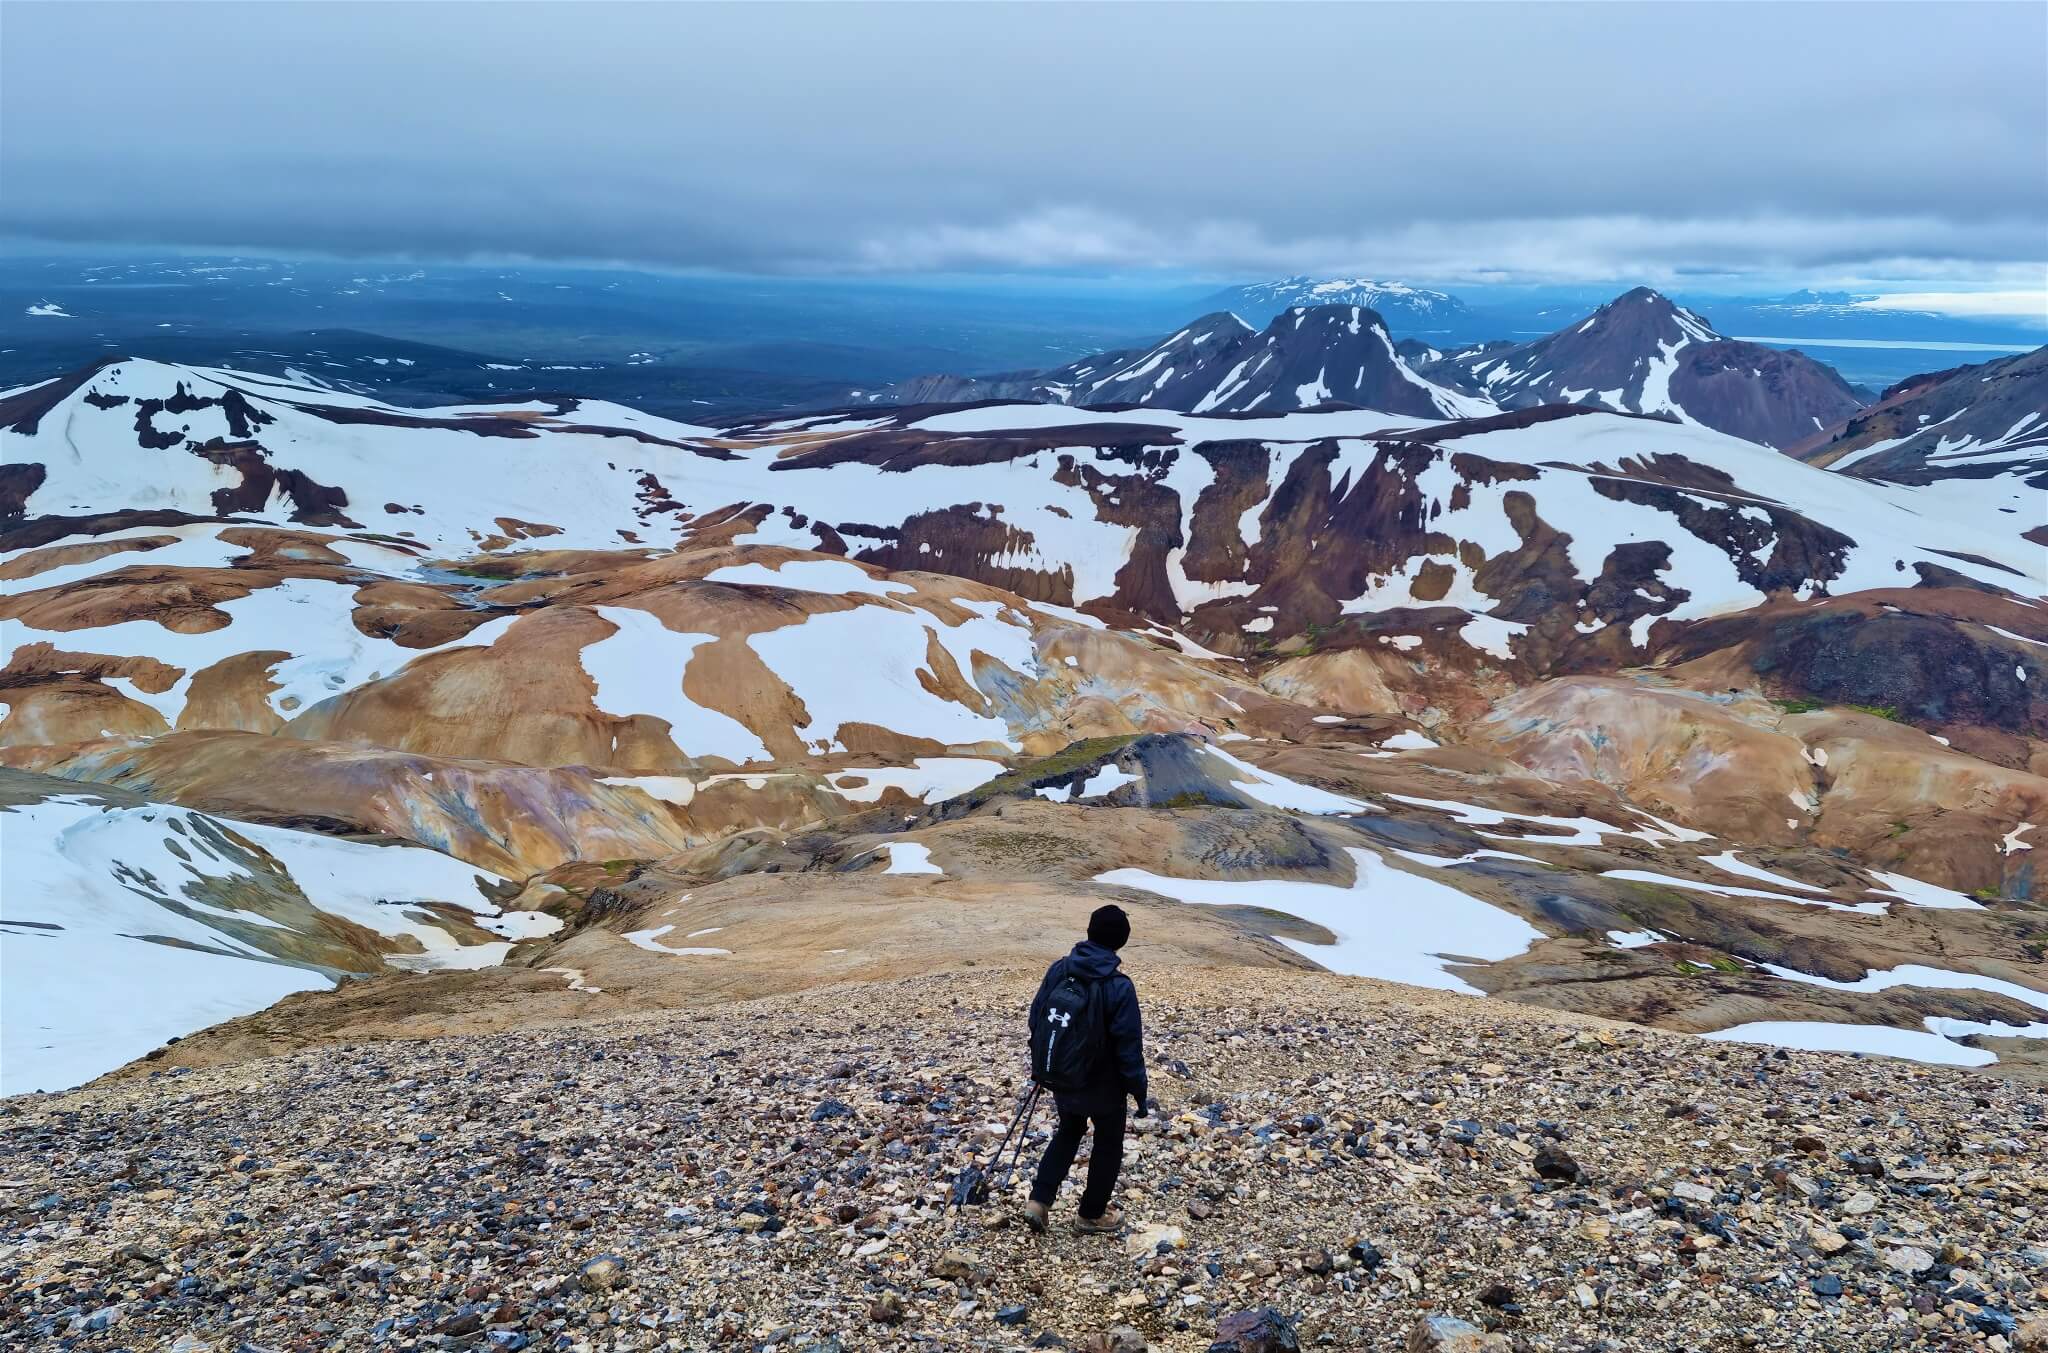
Views from the Snækollur hike in Kerlingarfjöll
Since our first visit to Kerlingarfjöll, I wanted to see Kerlingarfjöll also in nice weather, which seemed almost impossible. I’ve been watching the forecast for quite some time, and Kerlingarfjöll had the worst weather possible for most of the time. The same happened last July when I was planning our 2nd visit.
Trail and Conditions
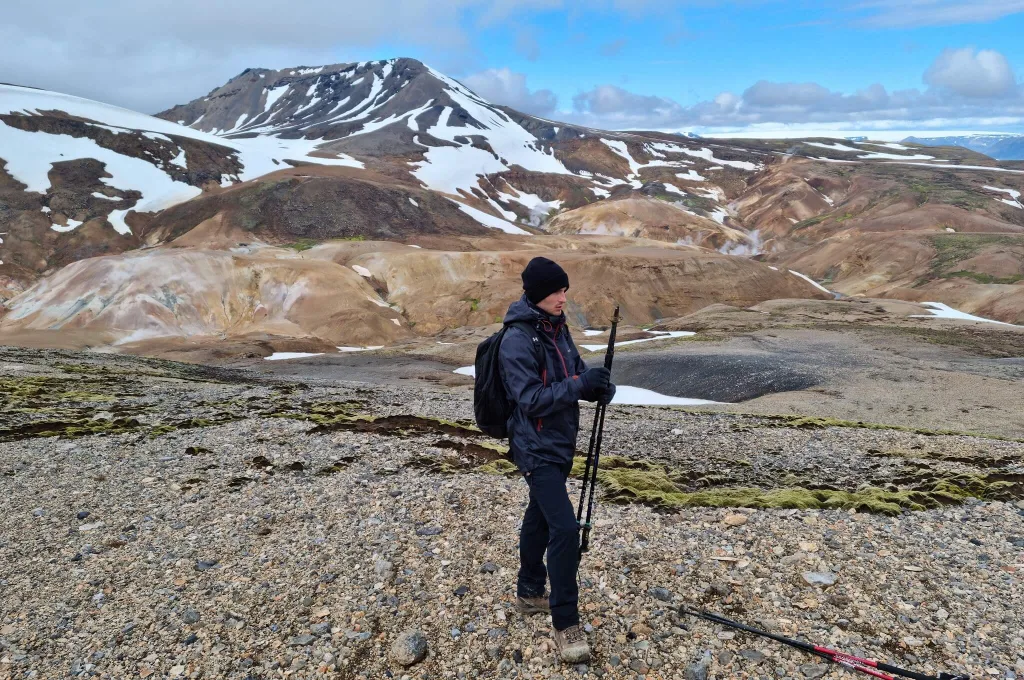
We began our hike to Snaekollur at 11:00 after a long morning drive from Selfoss to Kerlingarfjöll in the middle of July. The weather was very nice when it came to Kerlingarfjöll – cloudy, no rain, little wind, and occasional sun fighting through the clouds.
It was not ideal, though. From time to time, some huge fog clouds appeared, especially the higher we were on the trail. Nevertheless, this was definitely very good weather for the hike.
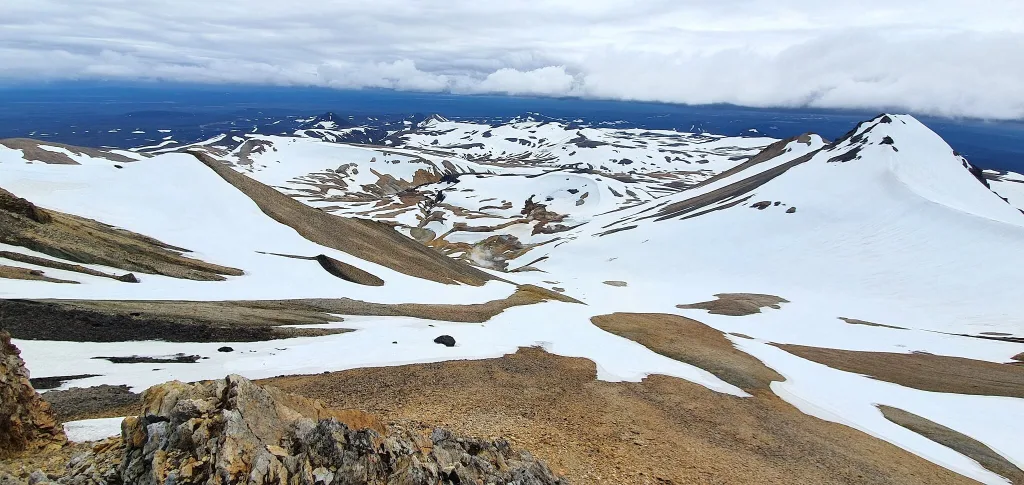
Snækollur hike views
We chose a loop trail that starts in Hveradalir hot spring area, follows a marked path in Hveradalir towards Hverabotn, and then it turns into an unmarked trail as a direct ascent to Fannborg. Once reaching Fannborg, it then continues via a classical partially marked trail to Snækollur.
We finished at Snækollur, turned back, took the main marked trail down via snowfields to reach the north-eastern Fannborg car park, and then walked back to Hveradalir. This was our Snækollur hiking trail in a nutshell. Now how did it look in detail?
Ascent from Hveradalir
We left the car in a classical Hveradalir car park, where visitors of all the Hveradalir hot spring area park. Firstly, we descended to the famous hot spring area. Several short hiking trails lead all around Hveradalir, so we struggled a bit to connect to the correct path toward Snaekollur.
Following the Wikiloc trail on our cell phones definitely helped a lot. In Hveradalir, we turned left, climbed stairs onto a nearby hill, and continued hiking the otherworldly landscapes of Kerlingarfjöll for a few hundred meters.
Beginning of the unmarked trail from Hveradalir to Snækollur
The marked trail then starts turning right. However, this is the direction toward another hot spring area called Hverabotn, not the right direction for our hike. Firstly, we got confused and hiked a little bit in this direction, but then we realized we had to take a different – unmarked – trail, so we did.
We followed some barely visible footsteps, which anyway disappeared for most of the time, and mostly used Wikiloc GPS trail for orientation.
Please never ever step on moss or fragile orange soil. It may never recover. If unsure, you better take a marked trail.
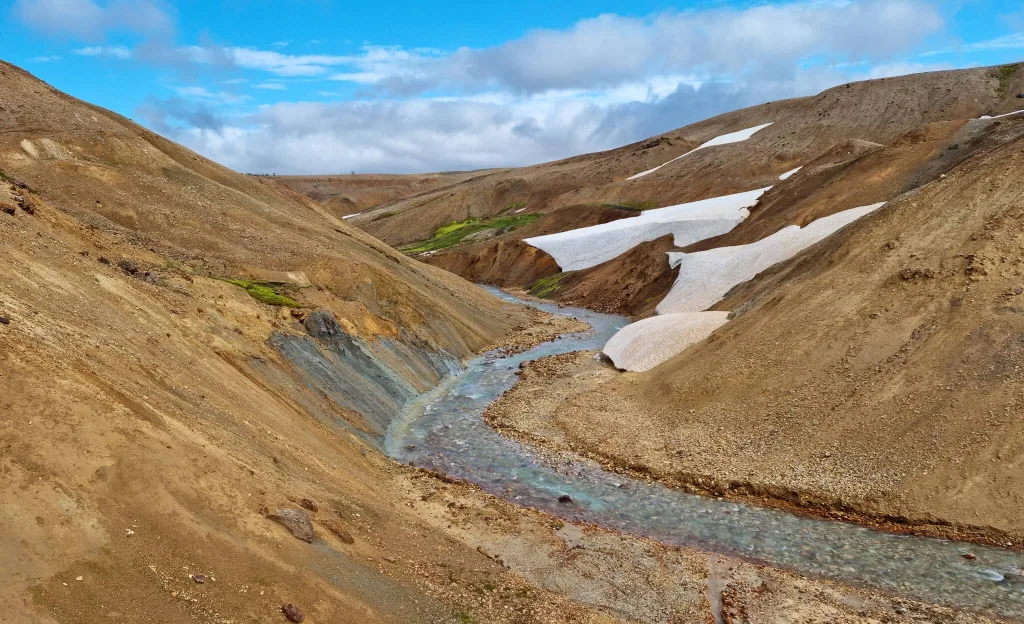
River crossing
We reached the point where there was no other way than to cross the nearby river. We searched for a suitable spot for a while and had to descend down to the river via slippery hills, following the almost invisible footsteps and our GPS.
At times even GPS didn’t help because its precision is relatively poor without a satellite connection. Nonetheless, we were surrounded by the fantastic beauty of Kerlingarfjöll and full of energy and motivation to reach Snaekollur.

We finally found an (at least for us) suitable crossing point. We removed our shoes, put on our wading shoes, and quickly crossed the ice-cold river stream.
Soon after the river crossing, another obstacle appeared right in front of us. A large, melting snowpack was blocking the (at least what we thought to be) trail, so we had to find a safe and careful way around it.
A word of caution – never step on any moss in Iceland, and don’t step on the ground in a way that the soil below your feet falls down. This can cause erosion to the fragile soil. If this is the case, find a different path or turn back.
The Worst Part
After about 20 minutes of searching for the best spot to climb the nearby hill, we finally found our way. We finished the very steep and slippery ascent with the substantial help of our hiking poles. This was one of the worst spots of the entire hike – hard orientation and risk of falling down. That’s why we instead recommend taking the main marked trail.
Snækollur hiking trail ascent
The footsteps completely disappeared at this point, and we only had to use our GPS trail. GPS was inaccurate and often led directly via deeper snowfields, which didn’t feel safe to cross through.
During this part, we basically had to traverse a lot between snowfields and take special care to step only on stones and gravel and head towards Fannborg. This is precisely the point where you need good visibility. I cannot imagine heading towards Fannborg if we didn’t see it before us.
Fannborg ascent
What followed was the steep and steady ascent towards Fannborg, with the ground covered by trillions of pieces of broken stones. With each step, we were getting more and more rewarded with better and better views of the entire Kerlingarfjöll area. You will not get these views anywhere else, only from this hike.
Between Fannborg and Snækollur
After about less than an hour, we successfully connected to the (supposedly) yellow-marked hiking trail leading from the left (from the Fannborg car park) and continuing up to Fannborg and Snaekollur. The only thing was – the marks were not there 🙂 However, the footsteps on the ground were more evident, so we could follow them more easily. Finally, some guidance.
We reached the peak of Fannborg after 2.5 hours of hiking from Hveradalir. On a nice day with good visibility, views from Fannborg are already more than impressive.
If, for whatever reason, you are unable or just don’t want to continue all the way to Snaekollur, you don’t need to regret it too hard because you will already see close to the best available views from Fannborg.
Views from Fannborg, the peak right before Snaekollur
Nevertheless, we initially thought we’d already reached Snækollur when we got to Fannborg. Only after checking the GPS, I wondered why it still shows less than one more kilometer to go.
Unfortunately, after we climbed to Fannborg, the fog settled down more intensely, interrupting our breathtaking views. At that moment, we contemplated ending the hike at Fannborg and turning back because continuing with almost zero visibility didn’t make sense. Moreover, Snækollur seemed still quite far away and not that easy to reach with a lot of snow on the trail.
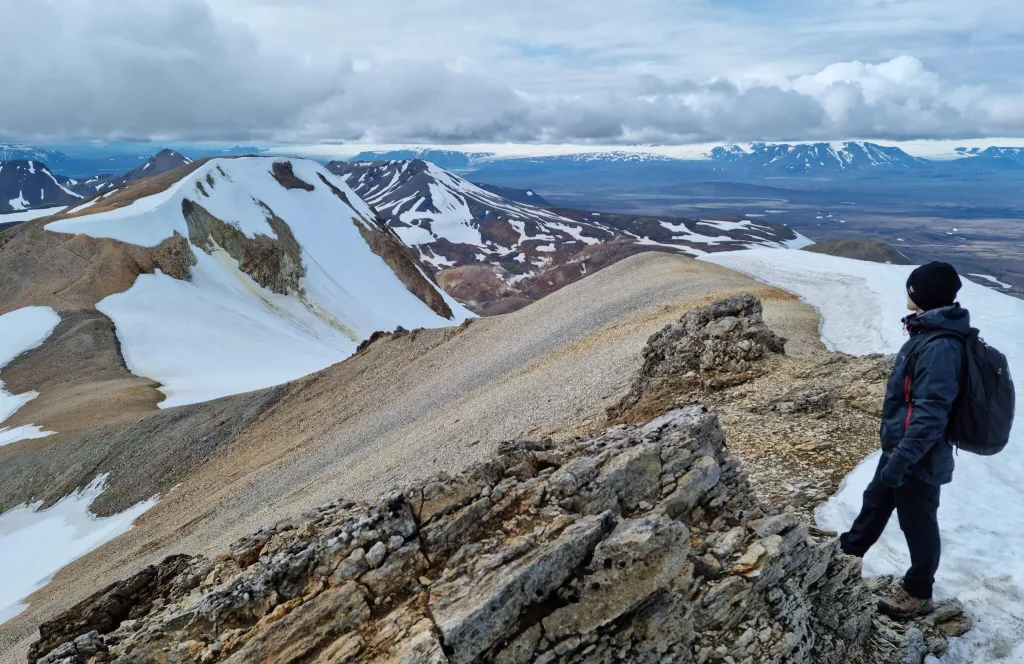
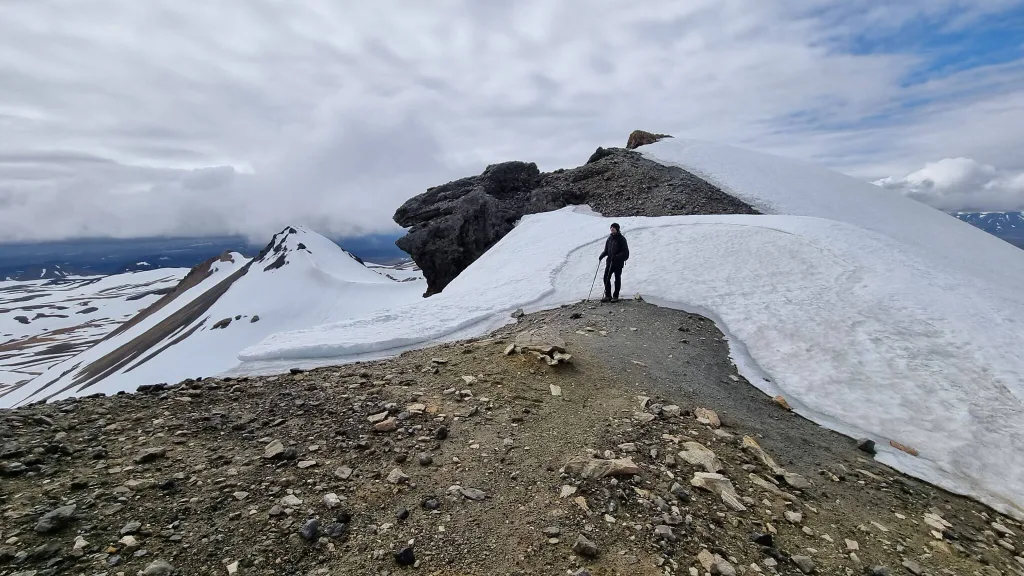
Snækollur ridge
My cousin co-hiker, however, persuaded me to finish our hiking plan, no matter the weather. And luckily, I agreed. In the same way, the fog had started to settle down, it slowly faded away in a few minutes, and our spectacular views got even better.
Snaekollur hike – ridge with snow
360° views into Kerlingarfjöll, Hveradalir, and around all nearby hills and hot springs partially covered with snow and partially with out-of-this-world orange and blue colors were simply overwhelming.
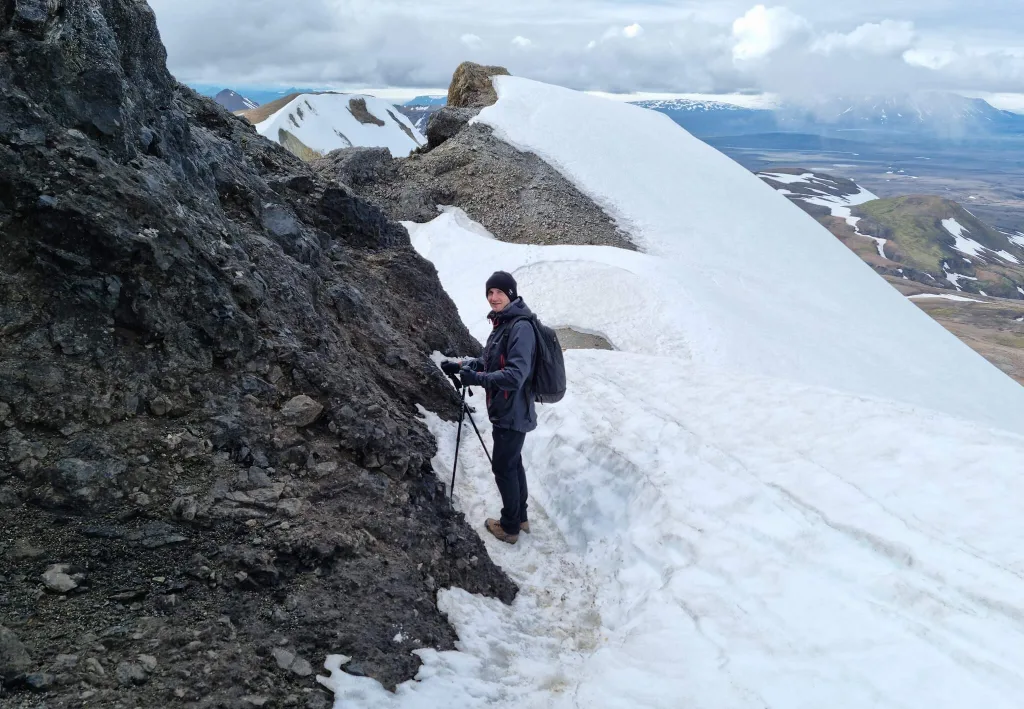
That being said, we still had to hike for quite some time through the ridge leading from Fannborg to Snaekollur. There was still a lot of snow on this part of the trail, so we had to be careful, and hiking poles came really handy here. We also had crampons in our backpacks but didn’t need them because the snow was soft, and the problem wasn’t the grip on the snow but the fear of falling deep into the snow. And, obviously, you don’t know what’s below the snow.
Firstly, we had to descend a bit from Fannborg, only to ascend again a few hundred meters later. The trail was not evident from a distance and sometimes not even clear a few meters ahead.
We reached the point where we had no other option than just to go through the snowfield and slightly climb over the big rock. During this part, we passed some pretty exposed spots of the trail, with steep falls on both sides. Luckily, the snow was firm enough to hold us, which we’d tried to test before stepping on it.
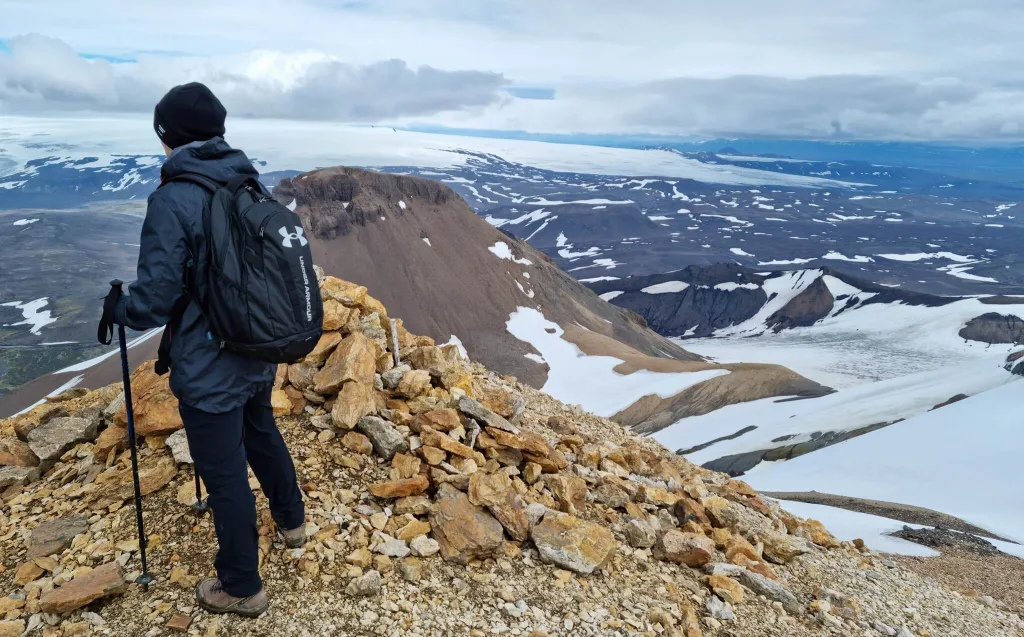
At the peak of Snækollur
Finally, the last and the steepest climb took us to our final destination – the peak of Snækollur. It was hard but totally worth it! We felt like having climbed the Icelandic version of Mt. Everest.
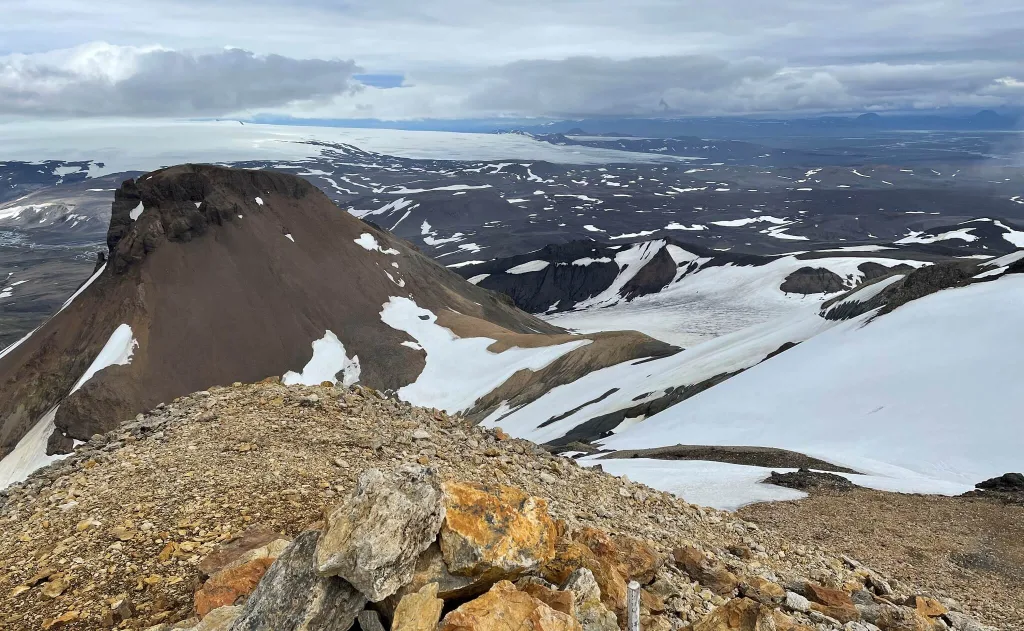
Snækollur, the highest peak of the entire Kerlingarfjöll, obviously offers the best views out there over the Kerlingarfjöll area. We were lucky with good visibility and pleasant weather. Although cloudy, the clouds were high enough not to block our views and small enough not to produce rain. On a nice day, views from Snækollur could easily qualify as a natural wonder.
Descent – partially marked trail
If it wasn’t so cold out there, we would have stayed and admired the views for at least an hour. However, the reality was a bit harsher, with around 5°C (41°F) and occasional wind, up at Snaekollur. This meant that, by just sitting or standing, we started to feel pretty cold, and thus, we were pretty motivated to move again.
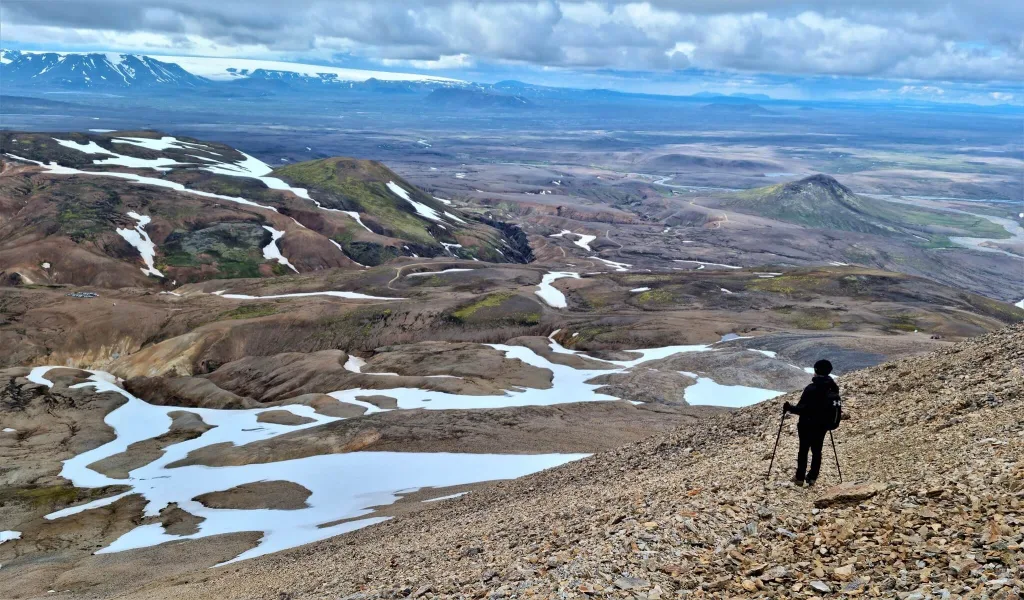
Descent from Fannborg
We had to return via the same steep and exposed parts, partially covered with snow, to reach Fannborg again (see section Snækollur ridge). Then we continued further down, now via the yellow-marked trail leading to the north-east. We got back to the little crossroads of our unmarked trail, which we used for the climb up and of a (supposedly) marked path with footsteps leading eastwards (to the right).
The trail led diagonally downwards on the slope of Fannborg, with billions of broken stones forming the ground. Still no marks, just footsteps. Eventually, we reached the point where there were only snowfields to continue through. One gigantic, which didn’t look very safe, and one smaller, with what looked like some old footsteps. We opted for the smaller snowfield with (hopefully) footsteps.
My cousin checked the snowfield, and it seemed to be pretty firm. Hence, we began our snowfield descent. Luckily, everything went alright. After crossing the biggest snowfield of our trip, we finally saw a stick in the ground. Is this supposed to be the mark or just the random stick? Yes, it turned out to be a mark, because it was followed by another yellow bar soon.
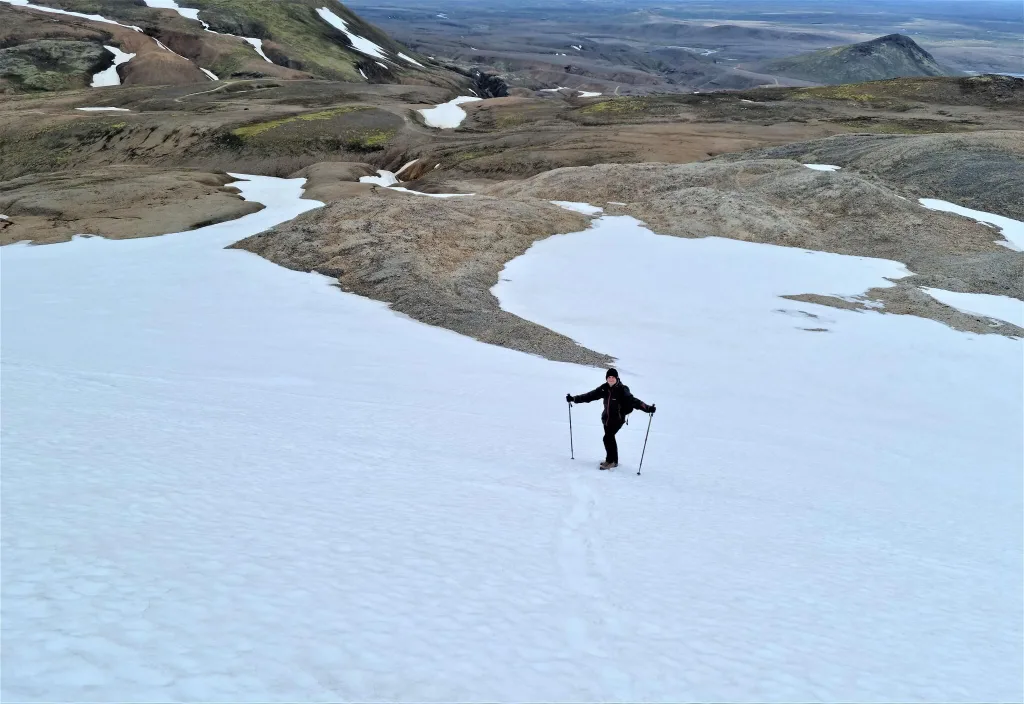
Snækollur hiking trail snowfields
Finally – a first real trail mark after 4 hours of hiking. This made the descent much more straightforward, and no other obstacles were on the trail. Soon we arrived at the Fannborg car park and headed back to the Hveradalir car park, which is about 10 minutes of walking on F347 away.
To sum up, the north-eastern (supposedly) marked trail to Fannborg is definitely easier in many aspects:
- The bottom part of this trail is marked, making orientation easier.
- Even after marks end, there should be trodden footsteps to follow in summer.
- This trail is much shorter. The unmarked trail via Hveradalir was more adventurous, but I instead recommend you take the partially marked trail from the separate Fannborg car park.
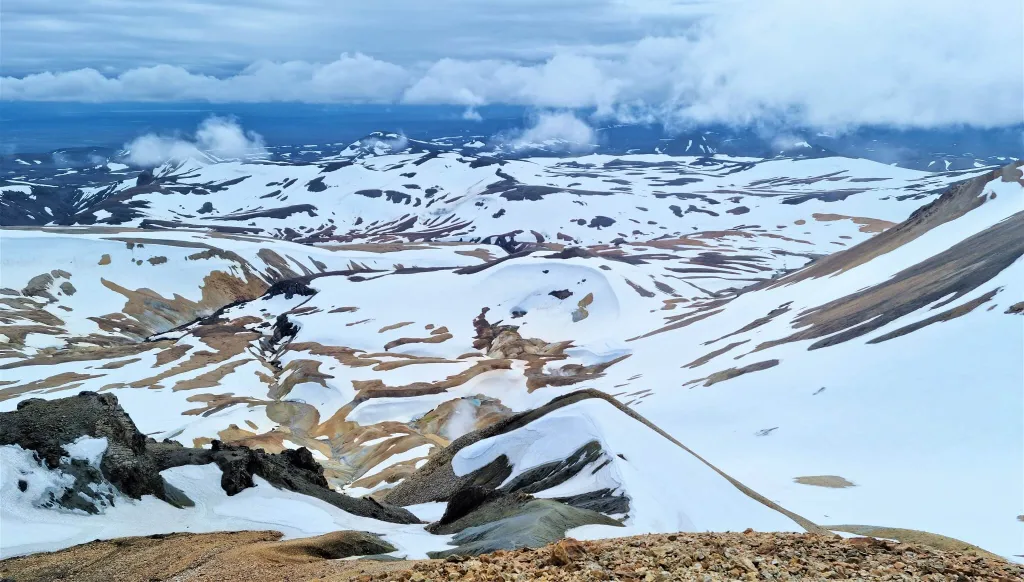
Bird’s eye views of still snowy Kerlingarfjöll even in July, after the hard winter
YOU MAY ALSO LIKE:
- Guide to Kerlingarfjöll
- Hidden Gems In Iceland Nobody Mentions
- Best Hikes in Amazing Thakgil
- Ultimate Guide to Hiking in Þórsmörk
- Laki Craters Hiking: All You Need To Know
- Grænihryggur hike: The Hidden Green Ridge
- Everything about the Fimmvörðuháls hike
- Hvannagil Golden Valley hike
![]() ask questions or get inspired in our community
ask questions or get inspired in our community