I’ve seen several articles which claimed to be the “Fimmvorduhals hike guide” but they still didn’t contain all information I needed and didn’t answer all my questions. I’m not saying they are not useful, they are just not detailed enough. For example, I couldn’t clearly find out how long the hike will take us, getting some very mixed estimates ranging anywhere from 6 hours to 2 days. This and more I tried to put together in 1 comprehensive article about the Fimmvorduhals hike.
Fimmvorduhals hike – what is it?
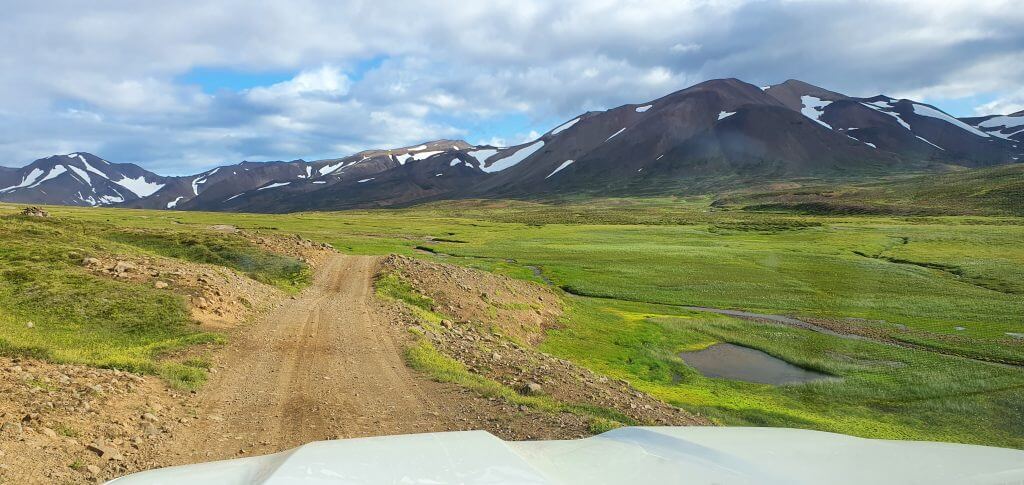
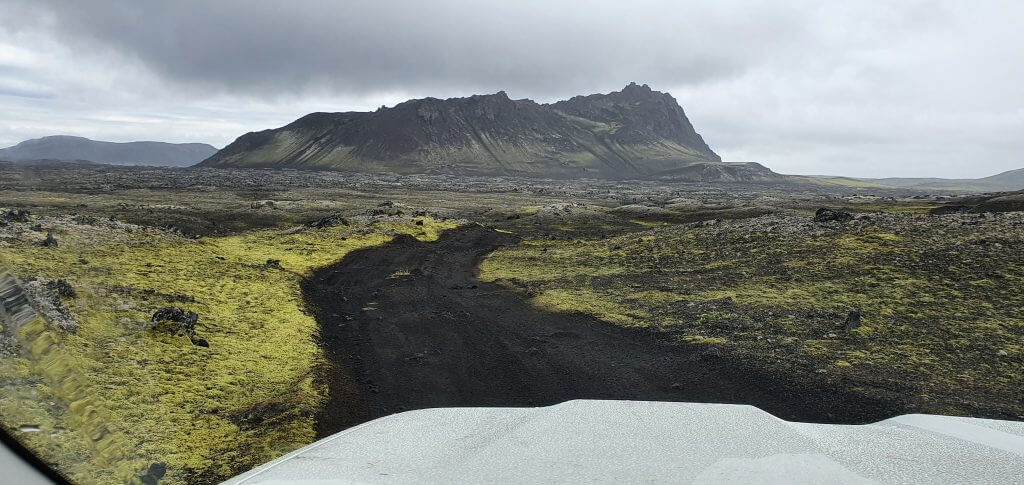
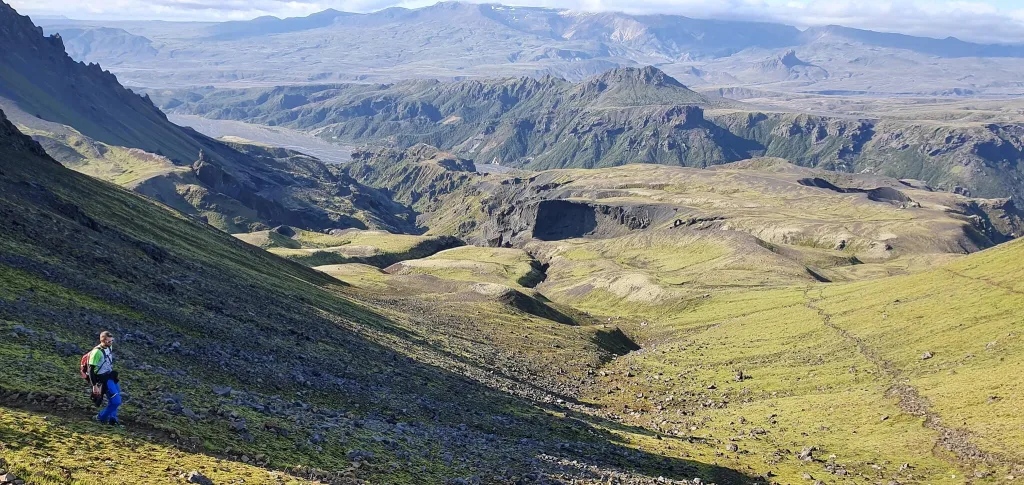
It is said to be one of the most beautiful Icelandic hikes located in the spectacular southern Highlands of Iceland. And I can only confirm that it really is. At least in nice weather 🙂 Otherwise, it may easily turn into a long and unpleasant struggle.
Fimmvorduhals pass is a mountain pass located between the two glaciers between Skogar (yes, Skogafoss waterfall) and Basar hut in Thorsmork. And this is exactly the trail of the hike – the traverse from Skogar to Thorsmork or the other way round. Skogar is best known for its beautiful waterfalls, while Thorsmork is famous for its hard-to-access natural beauties, valleys, rivers, glaciers, and mountains. And the Fimmvorduhals hike is full of everything of these.
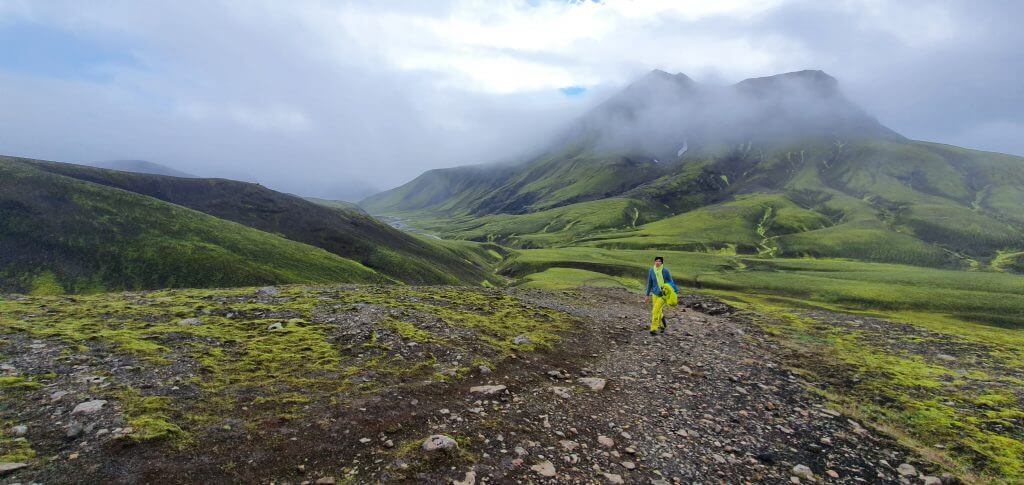
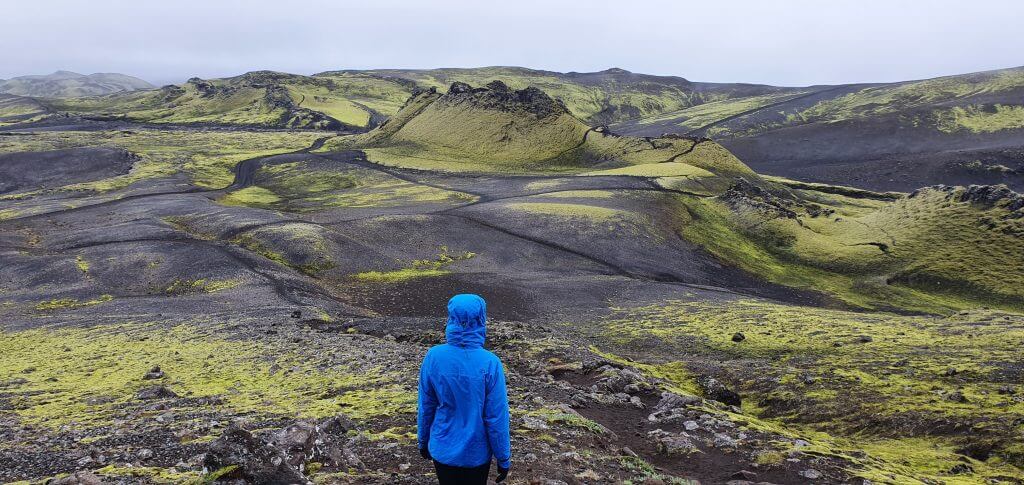
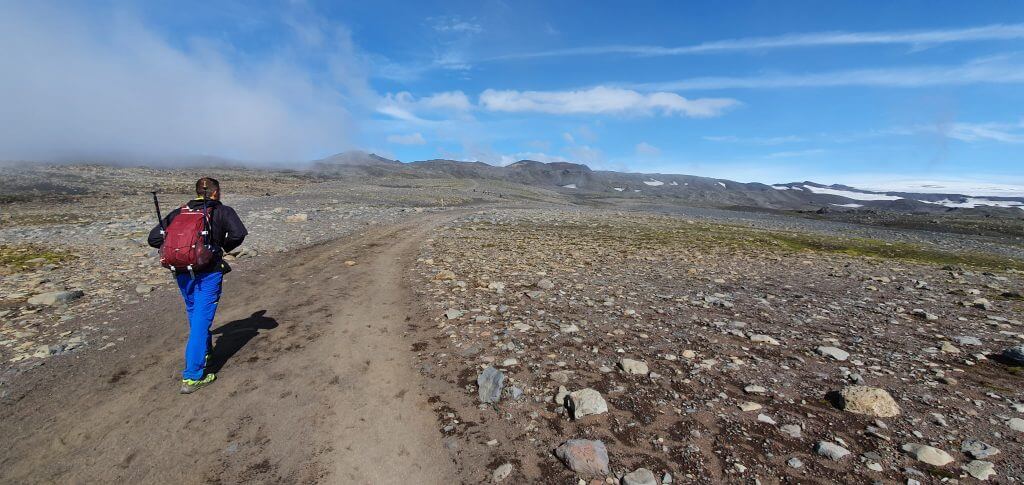
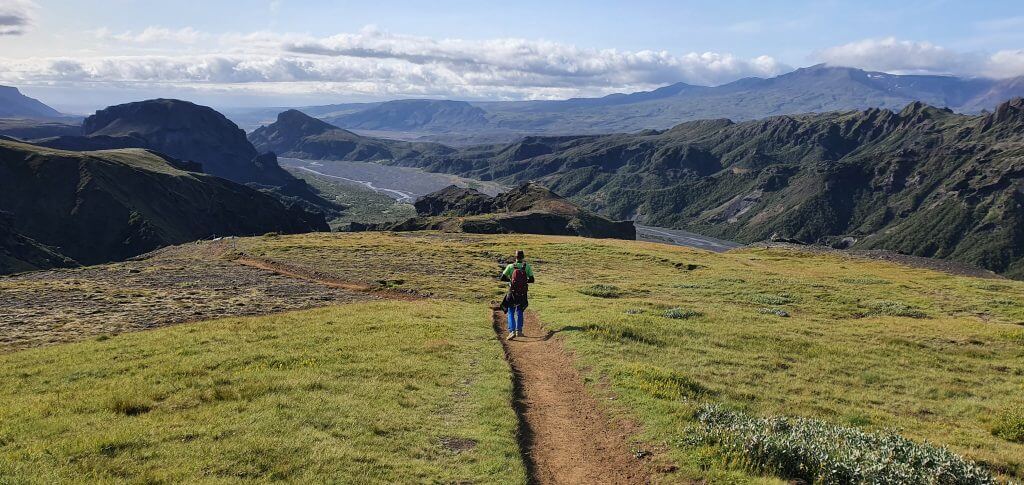
The trail around Fimmvorduhals snowfields
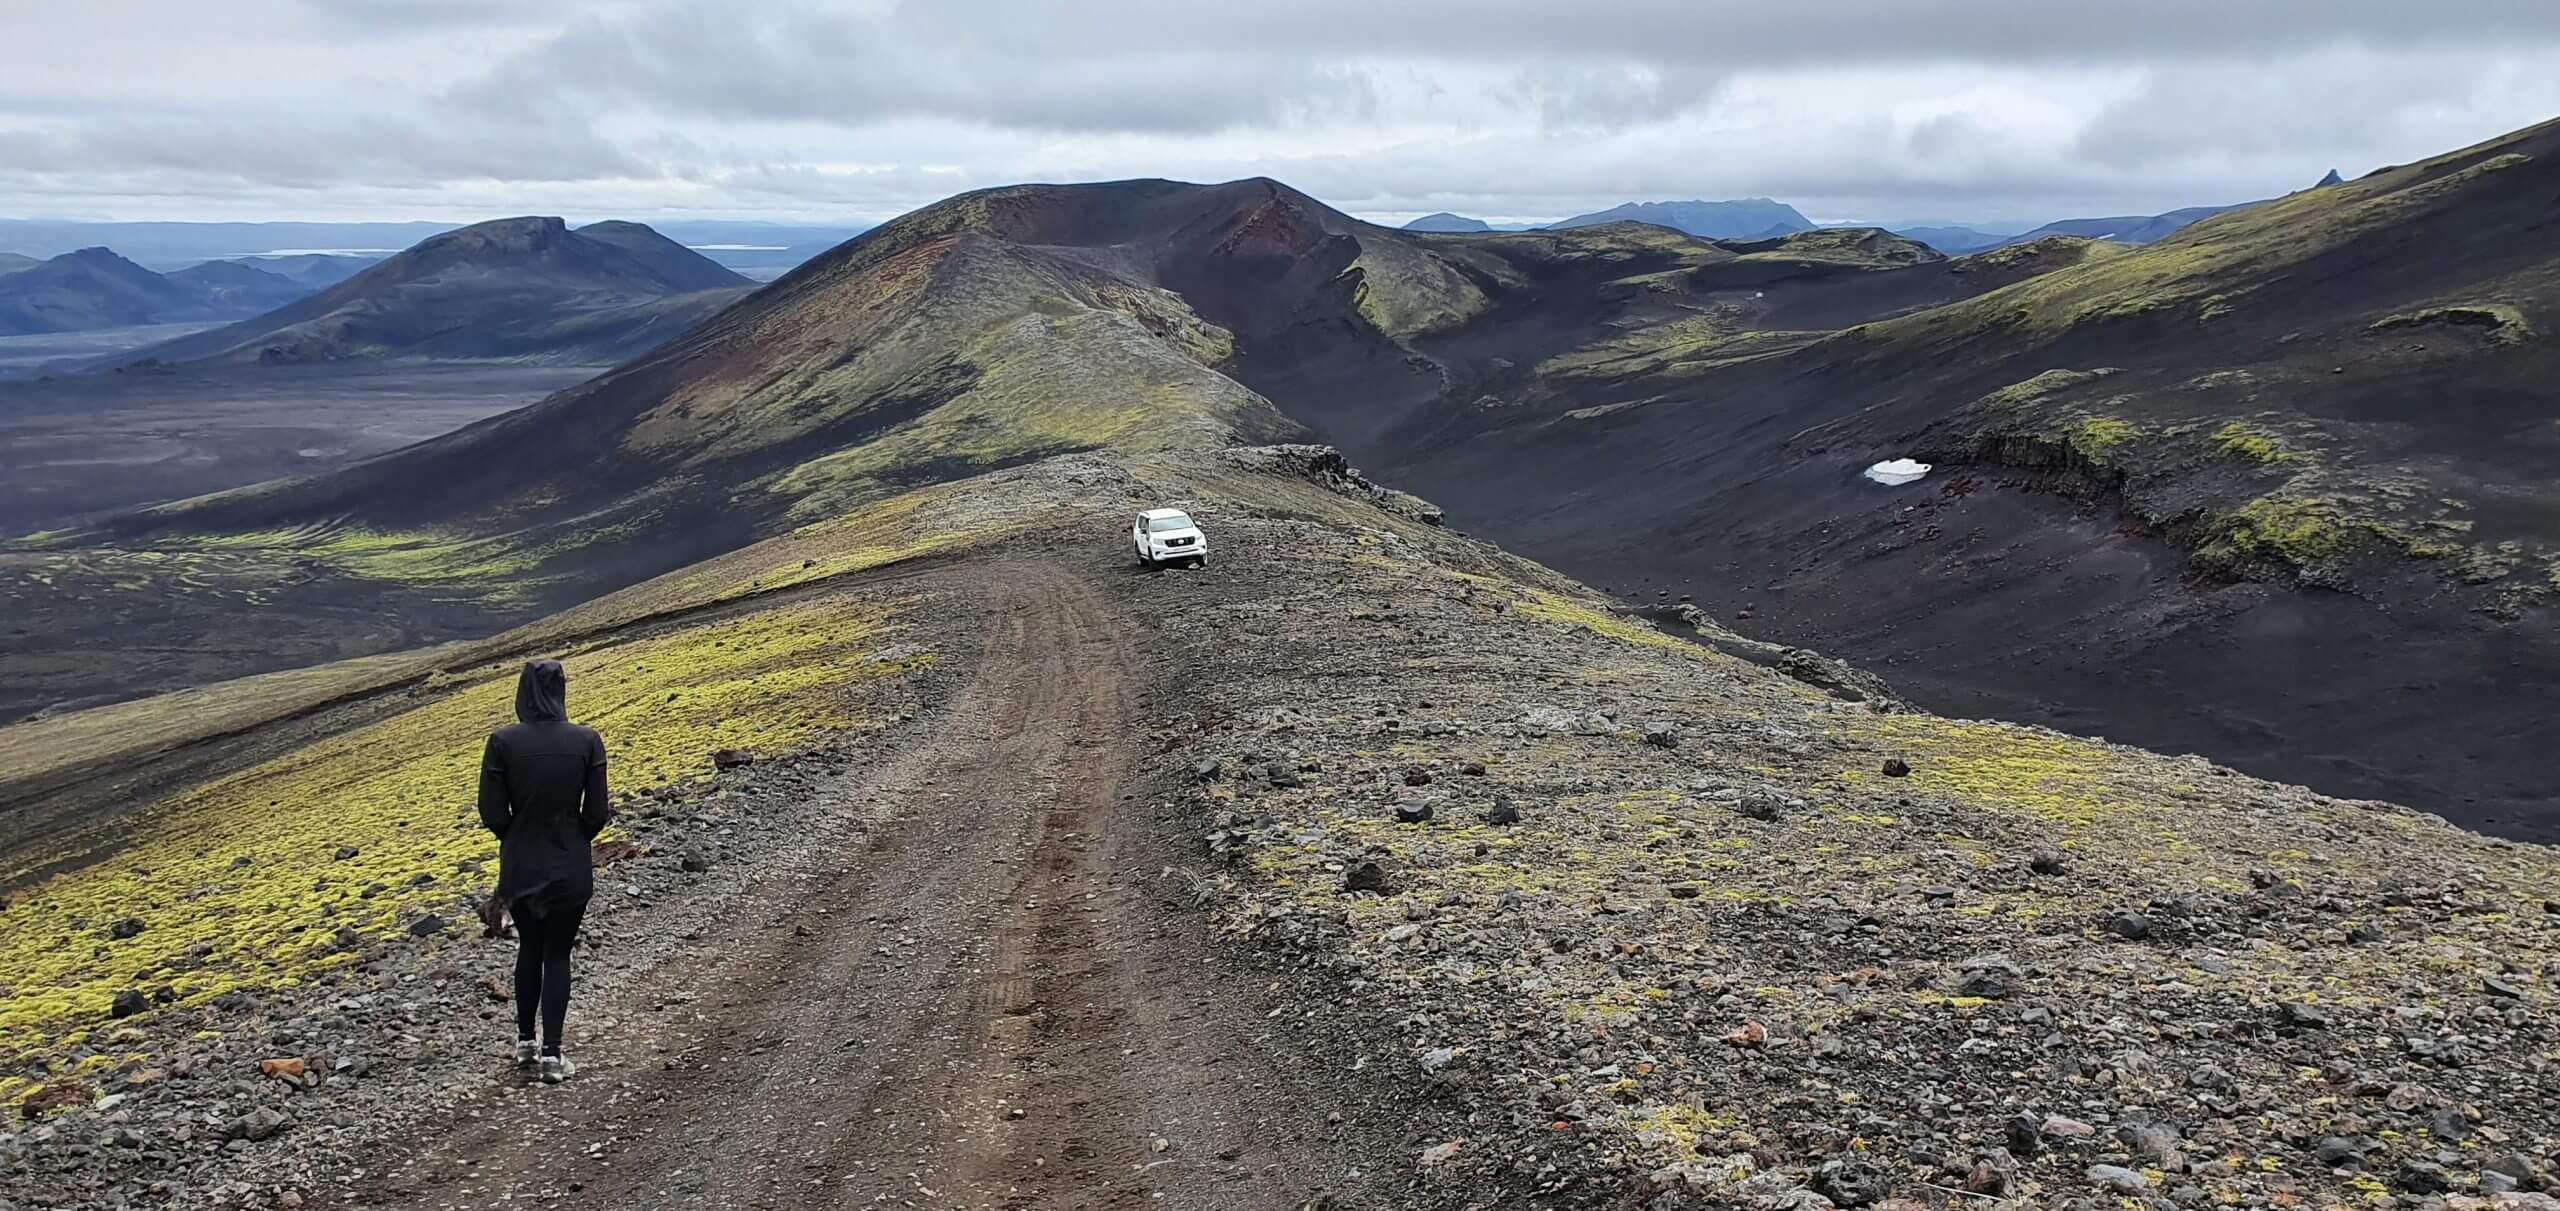
For any Icelandic enthusiast, the Fimmvorduhals hike is a must-go. It proudly belongs to the greatest spots in the Icelandic Highlands. It’s not a question of if, but rather a question of when. Of course only if you feel like doing it – because it’s not that easy (but also not any horror – in good weather) and it takes 7 to 12 hours to complete – based on your skills.
When to go
This is a crucial decision. I changed the planned day for the hike 4 times. This meant 4 times contacting the bus company for changing the tickets and 4 times explaining this to my foreign hiking buddy Vicente 🙂 But it was well worth it. If the weather doesn’t look good, please don’t go and better change your plans / reschedule the hike to a different day.
The basic answer is easy – in summer only. Some parts of the hike are covered by snow all year round, so you cannot avoid snow completely. But there are spots that are impassable if there’s too much snow and there are spots that are easily passable even when walking on the snow. So, the more specific answer would be – ideally in the second half of July or in August. At this time, the last winter’s snow should be already melted and the “next year’s” snow hasn’t arrived yet.
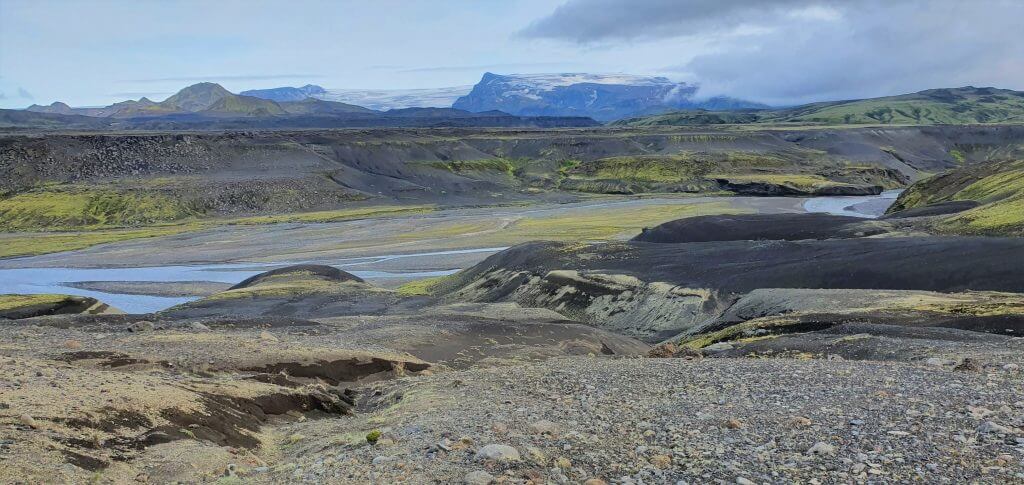
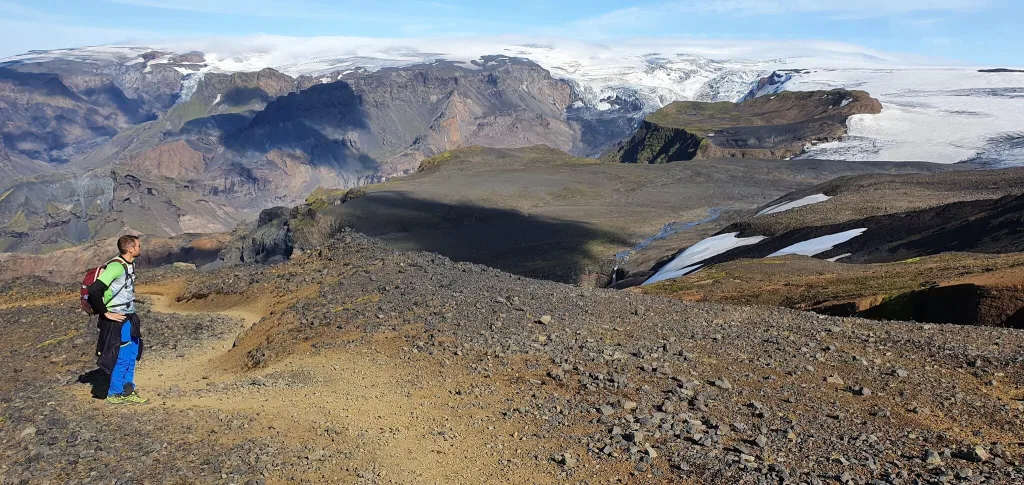
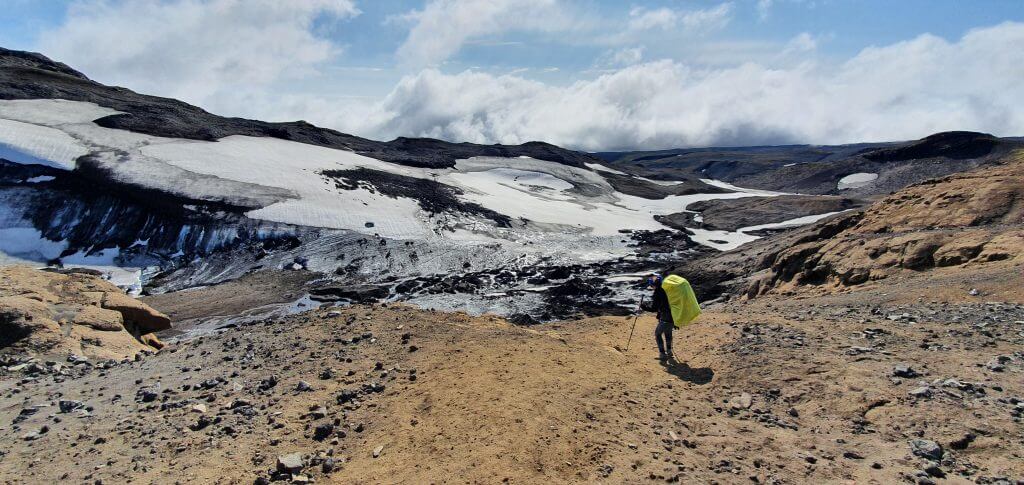
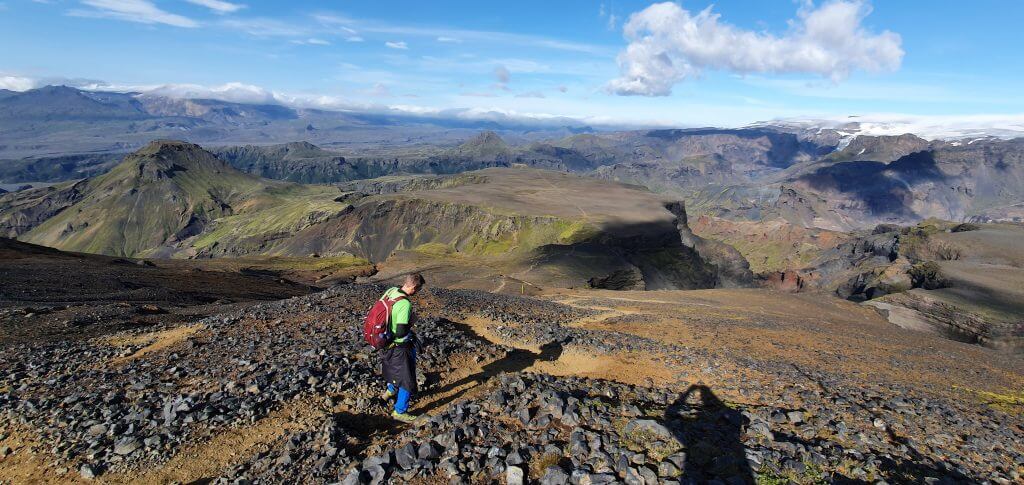
Descent from Fimmvorduhals craters of Magni and Modi to Thorsmork
Generally, the trail is open for hiking from somewhere around the beginning of June to somewhere around the middle of September. But the more away you go from July/August, the more difficult the hike will be. Of course, it all depends on your hiking skills. If you are used to hiking in snow, wind, cold, and/or rain, you have more flexibility in terms of when to go.
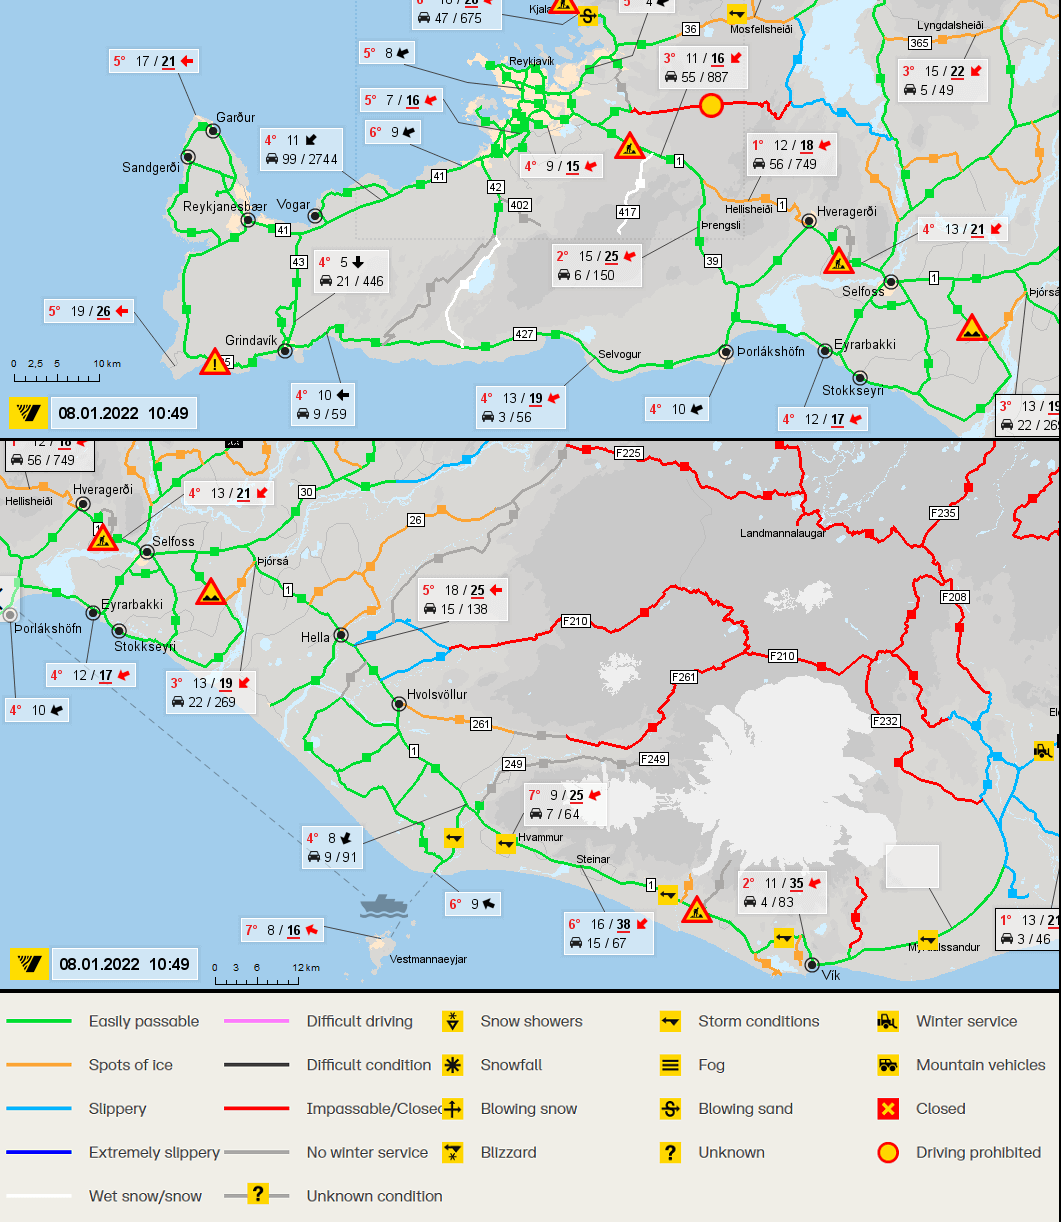
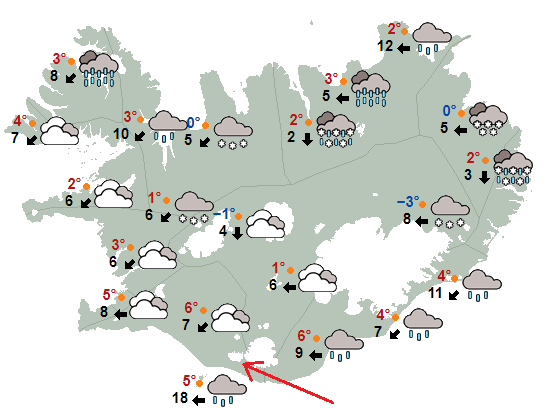
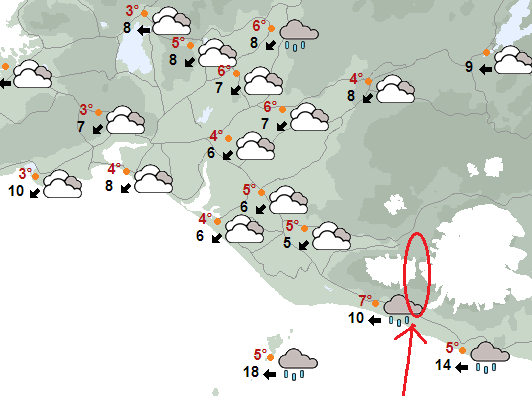
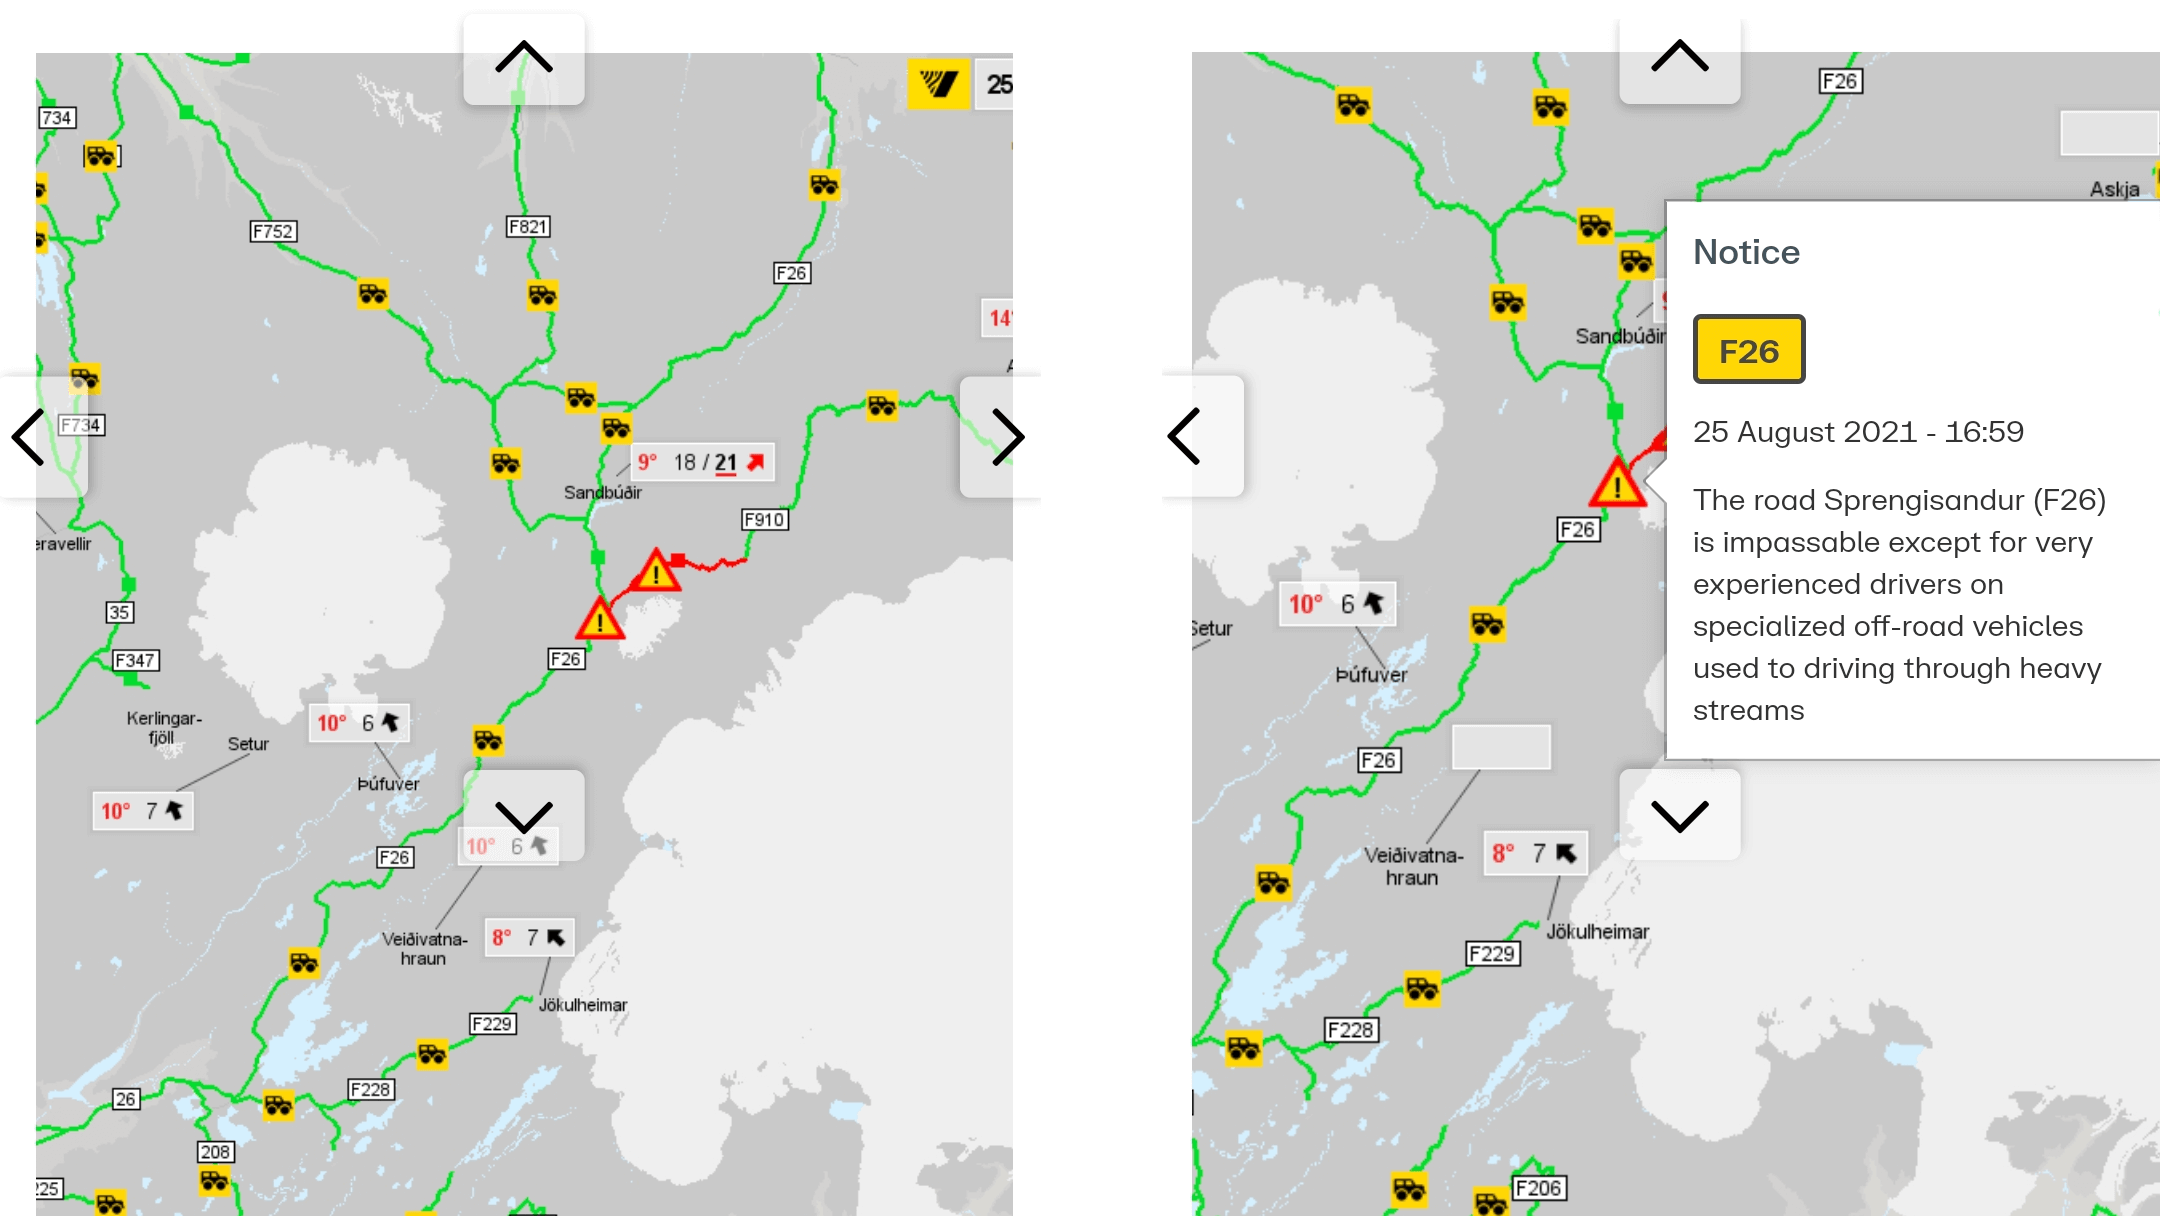
Even in July/August – please look at the forecast and look at the safetravel.is for any warnings. Although Fimmvorduhals is not Mt. Everest, it can get bad in unfavorable weather. How to read the weather forecast? We wrote an entire article about how to find good weather in Iceland, feel free to read it. Besides that, a short summary of it is below in the “Weather” section.
Weather
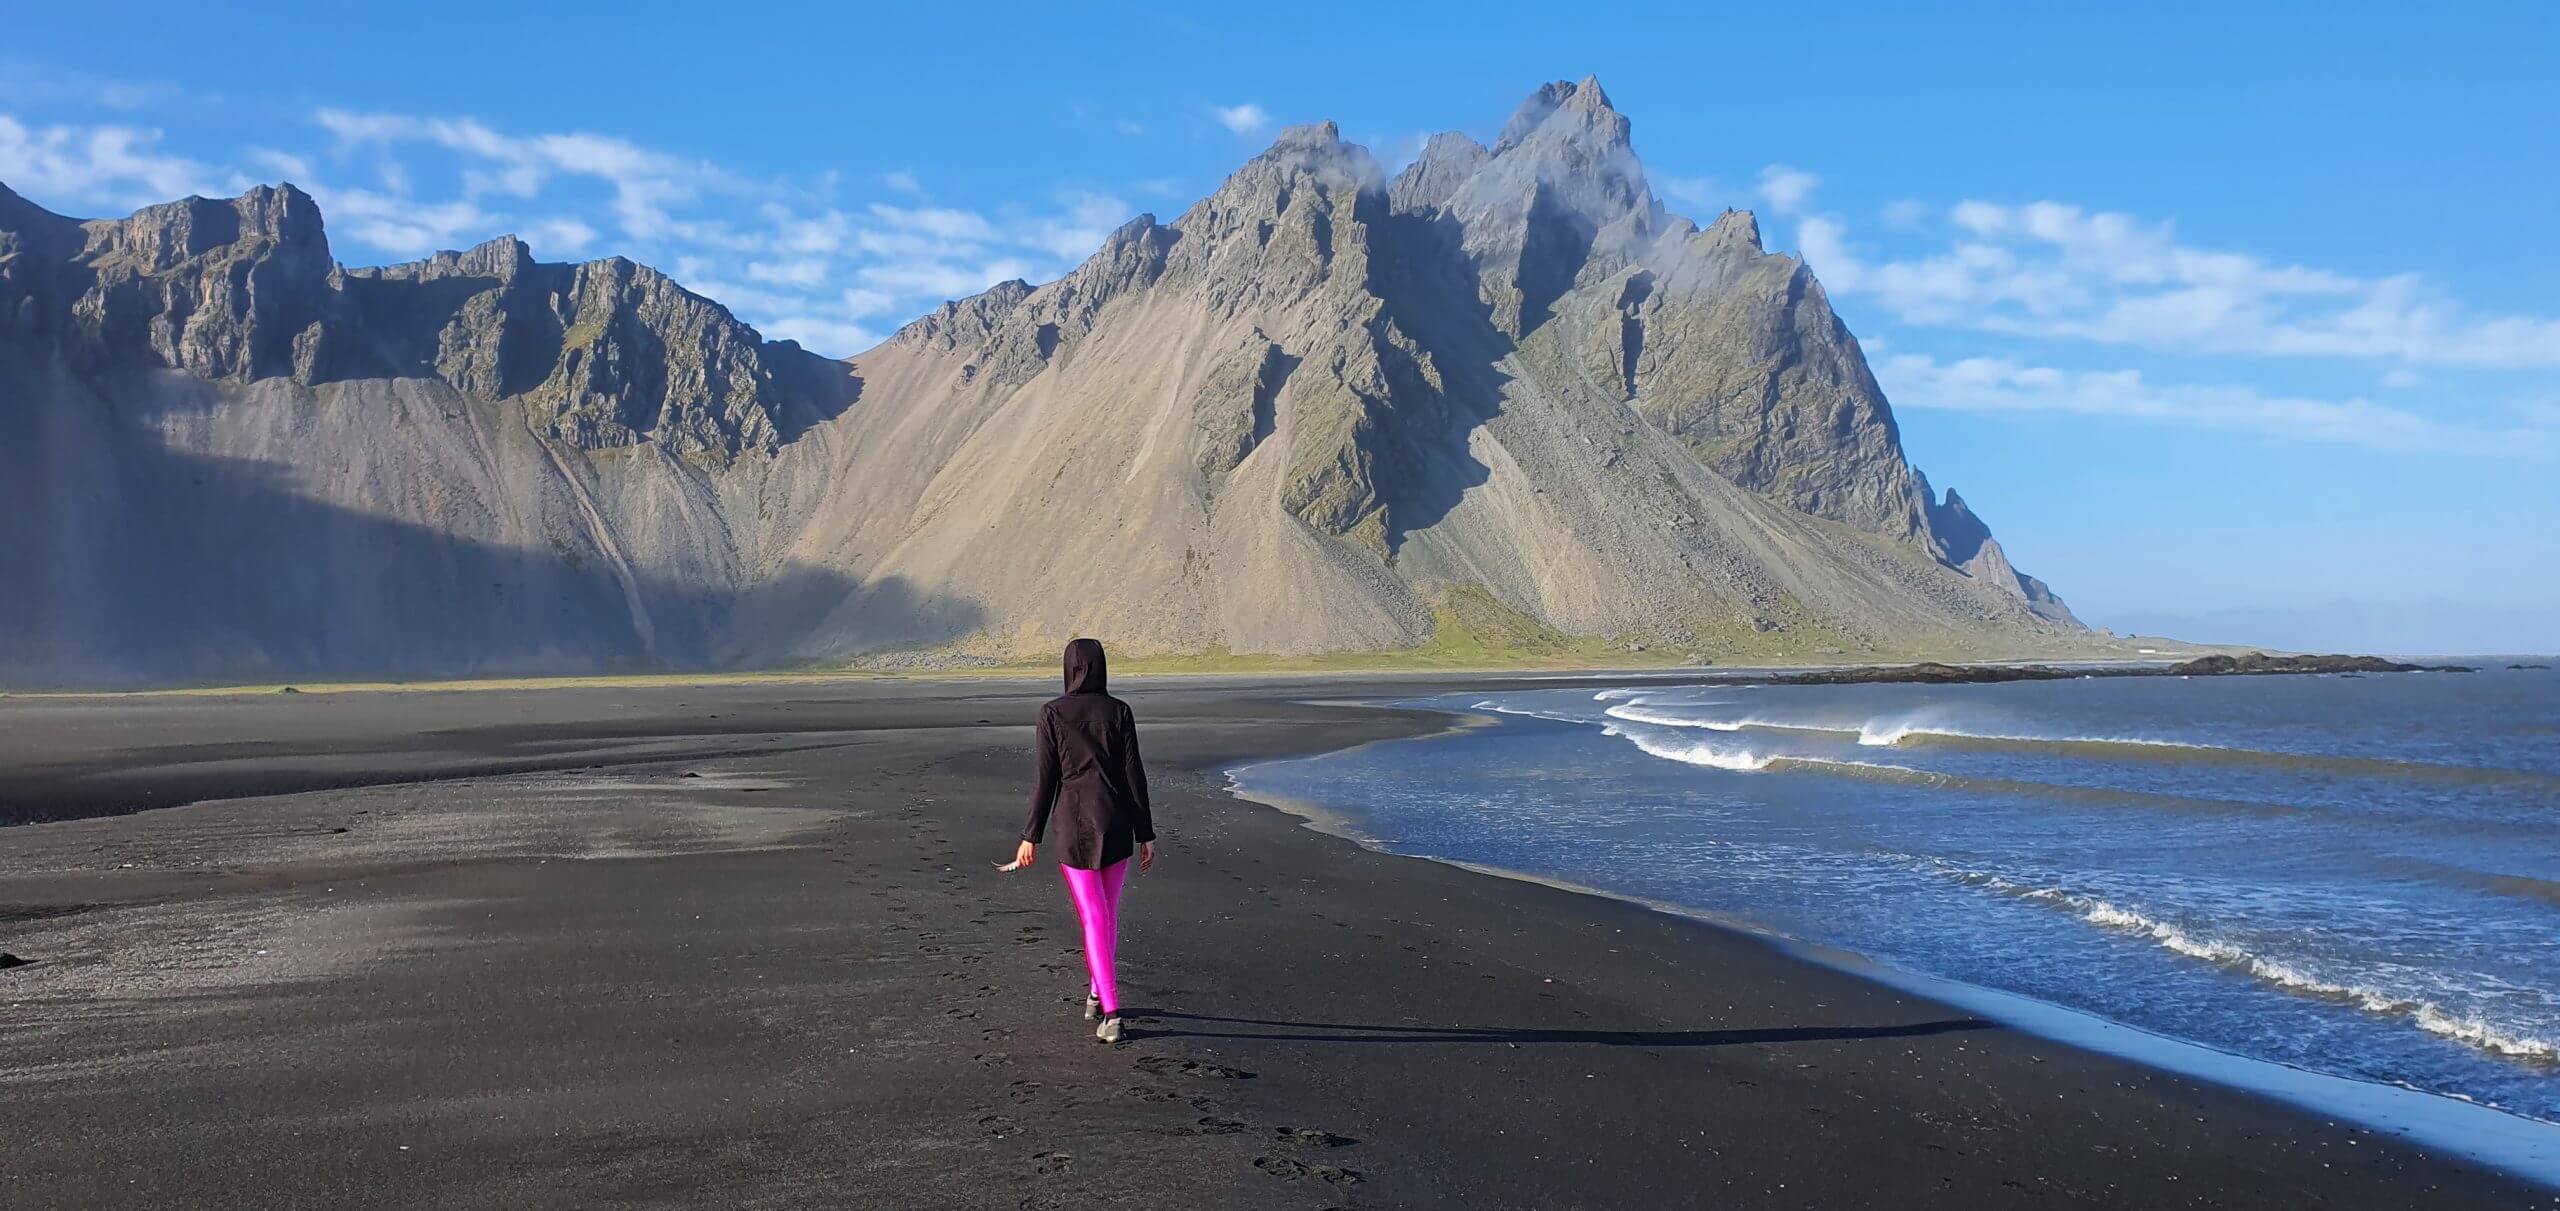
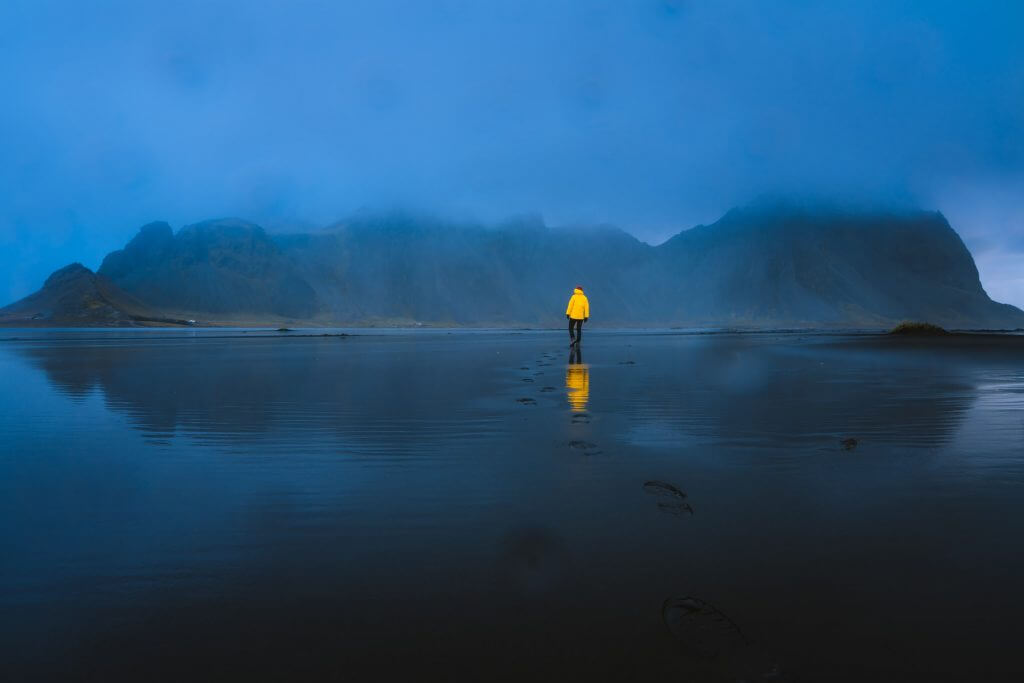
Ideally, you want to naturally aim for no rain, no wind, and clear skies. If this is the case, you have already won. But in Iceland, this is not the case most of the time 🙂 So what you at minimum want to aim for is little rain and little wind. Although fog is unpleasant because your view isn’t the best, it isn’t life-threatening, as is often the case with wind and rain.
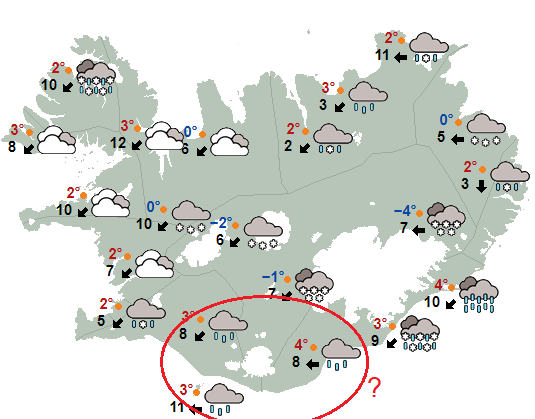
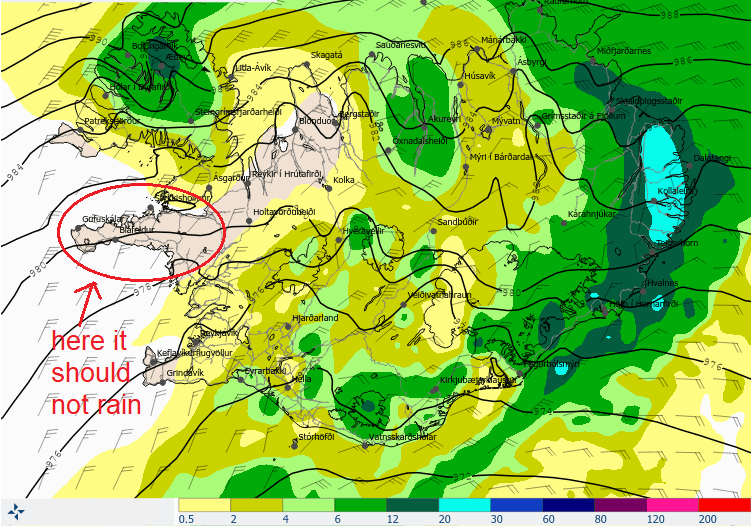
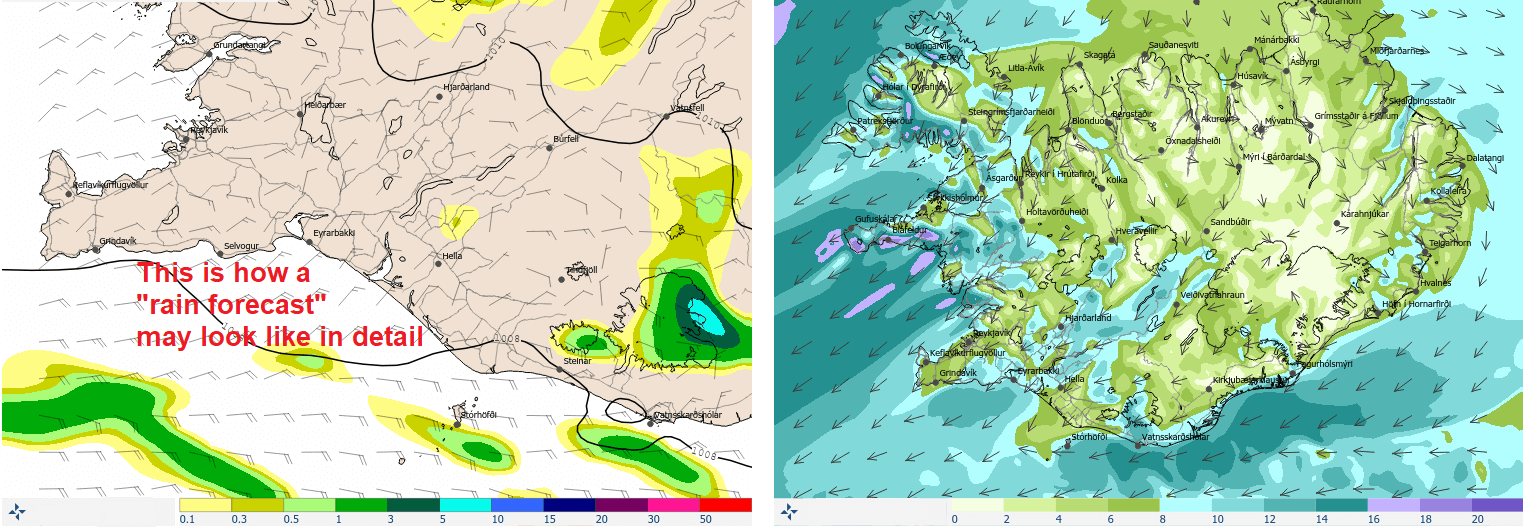
It’s important to study the forecast at en.vedur.is. This is an Icelandic meteorological station and you will not get any other foreign forecast which is more precise. Forget about Google’s weather.com, sorry for saying that, but that one is complete bullshit. At en.vedur.is don’t look just at the general forecast – go into the detailed forecast for rain, detailed forecast for the wind, and look specifically at the Fimmvorduhals pass. We described this in detail in our Iceland weather forecast article.
Hiking the Fimmvorduhals waterfall way
Last but not least – looking at the 1 week ahead forecast is (almost) completely useless 🙂 The weather changes very quickly, oftentimes in minutes/hours, 1-week ahead forecast will almost surely change. The forecast which most of the time worked pretty well in our case was 1-2 days ahead forecast. This one didn’t change that much.
The word of caution – even the best forecast doesn’t guarantee you the weather it states. Reality may be better or worse (usually worse in Iceland). So please be prepared for it. And anytime you feel unsafe to proceed, better don’t proceed and turn back. Accommodation/money loss is always more reasonable than health loss. One part of the hike – the part exactly between the two glaciers – is the part where the weather is usually the most unpredictable, changes quickly, and usually is worse than forecasts.
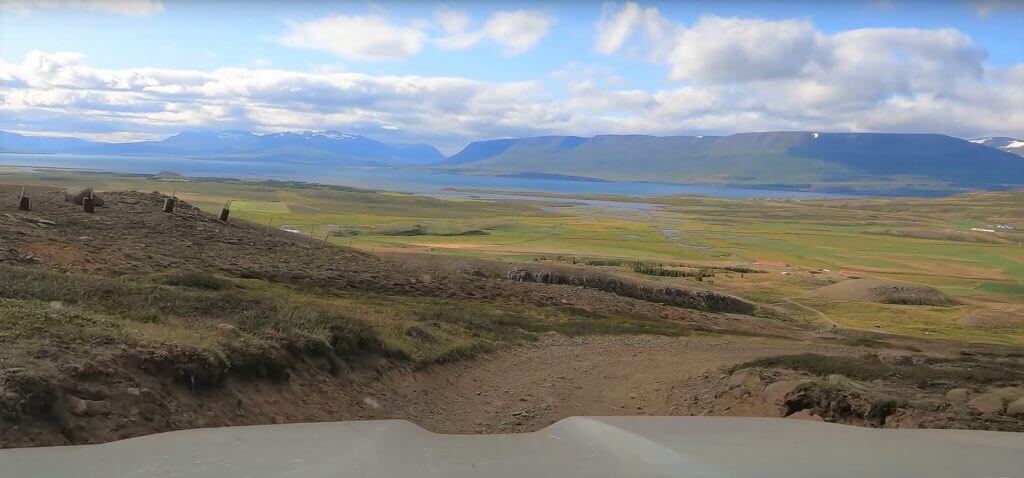
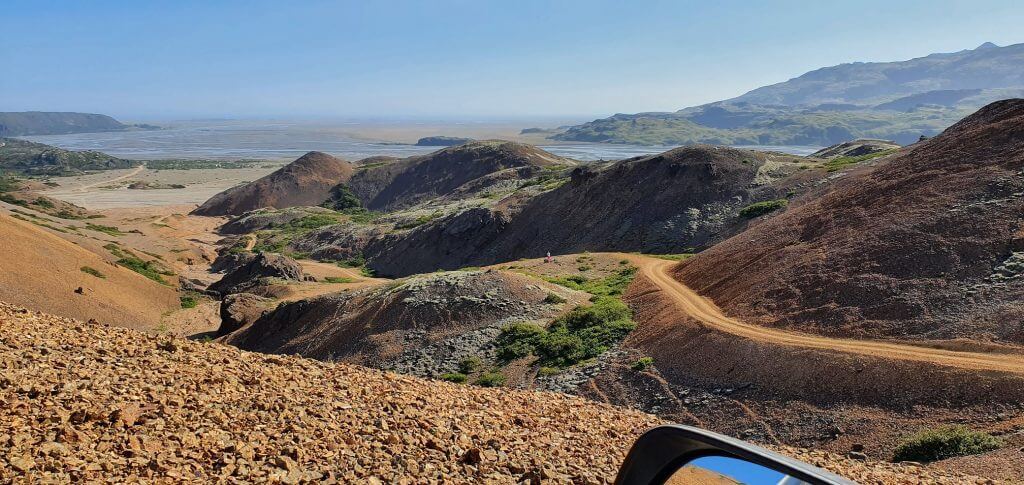
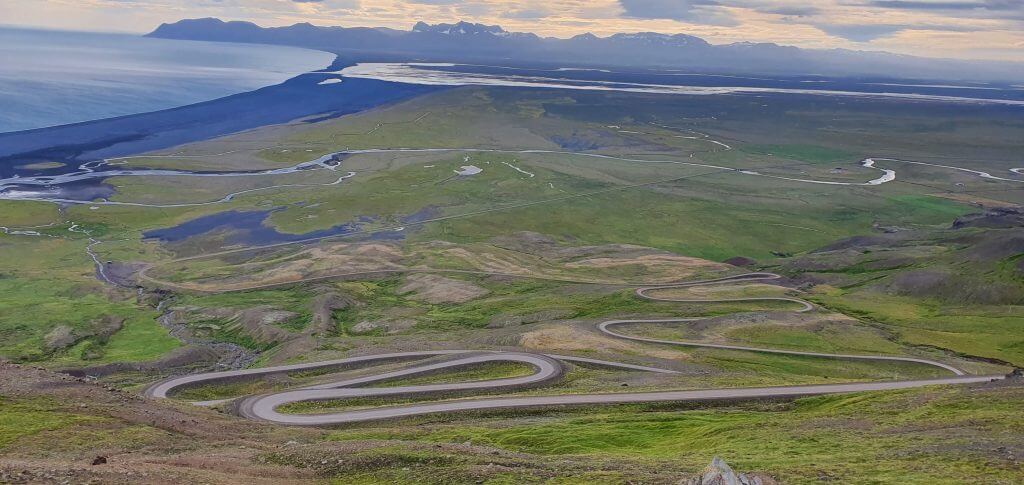
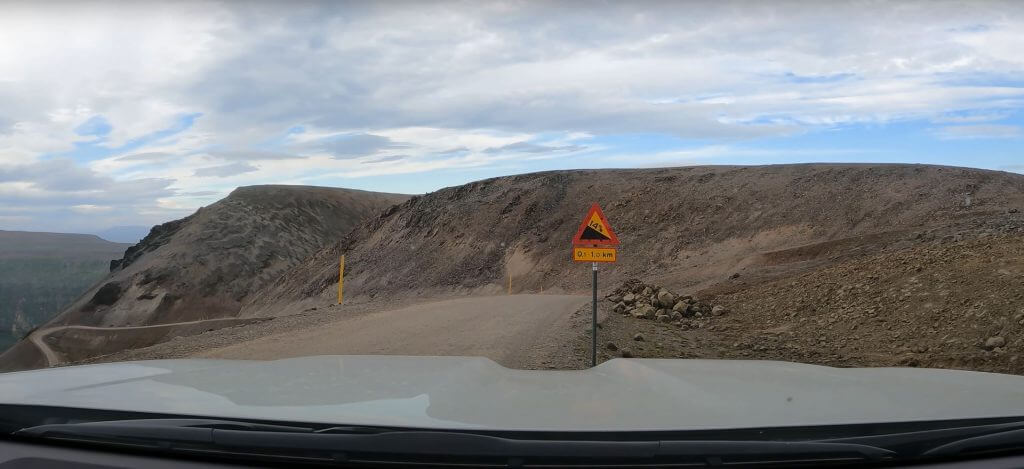
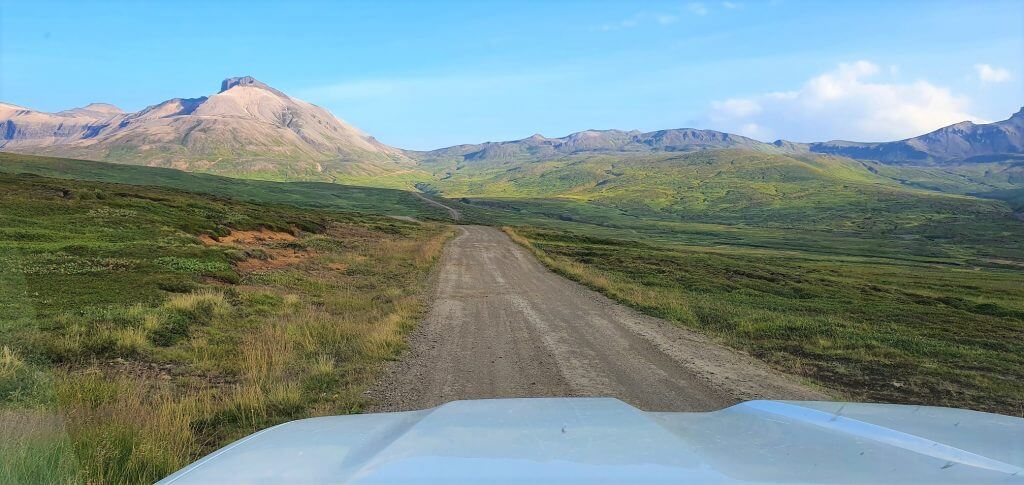
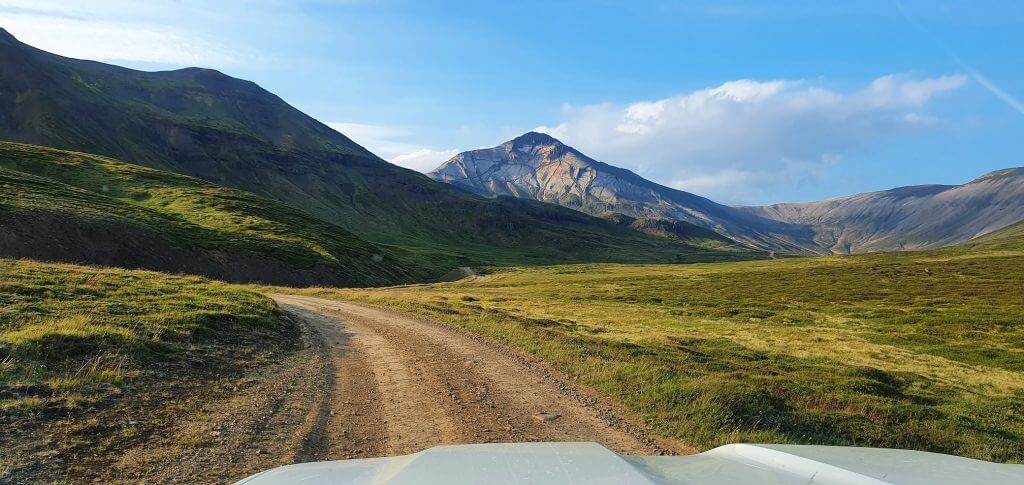
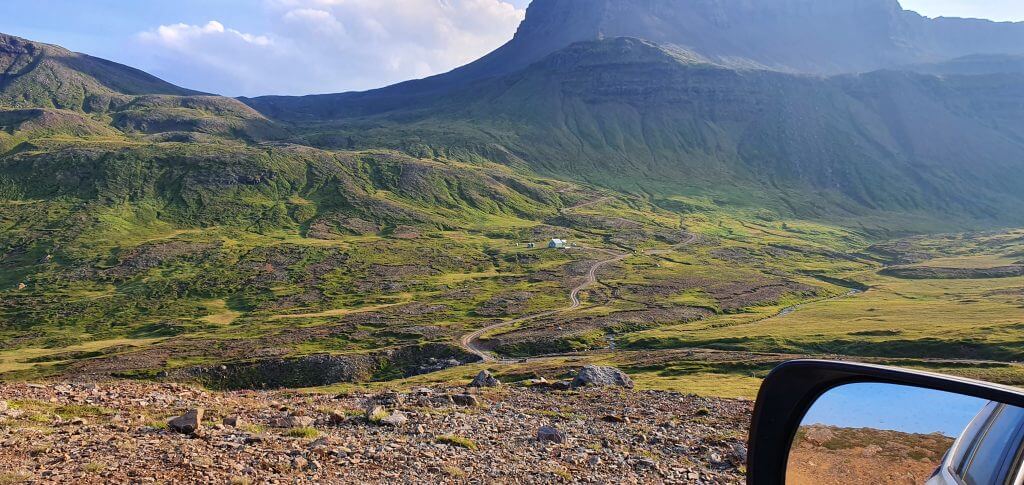
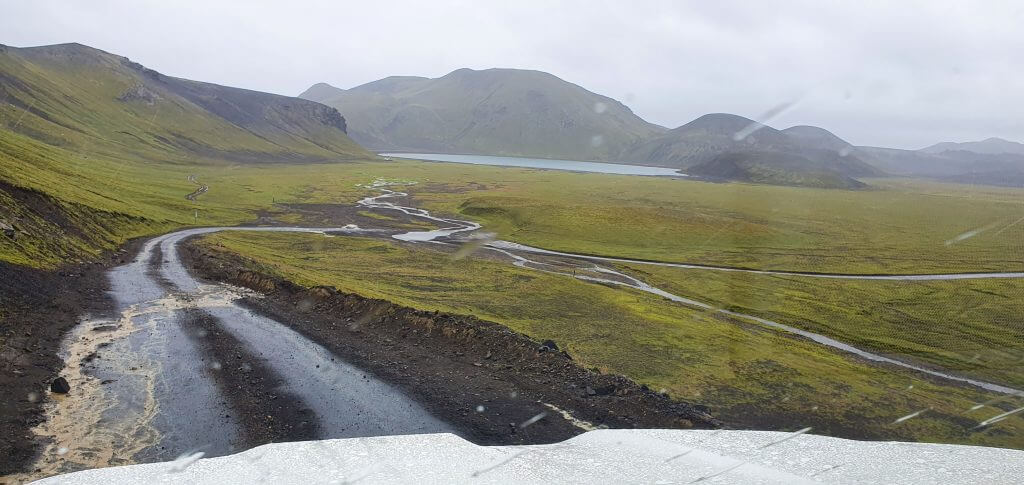
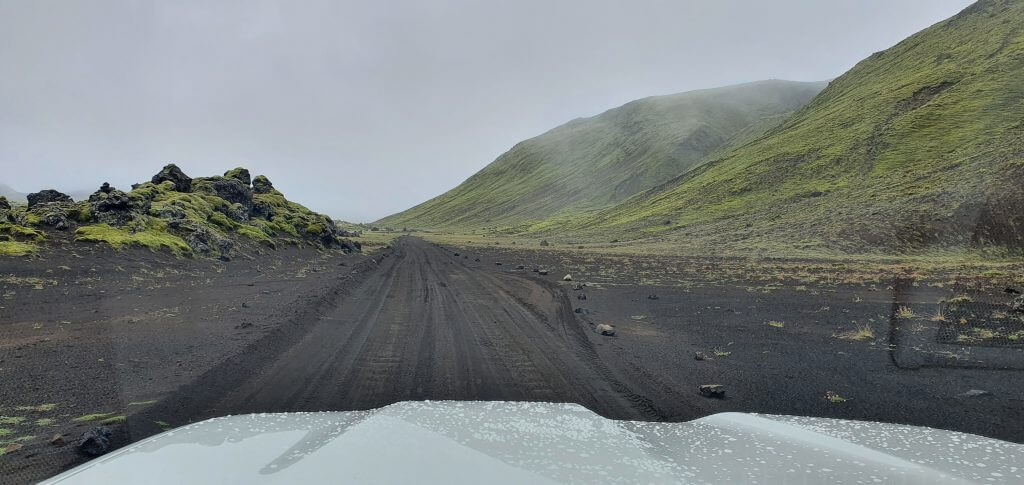
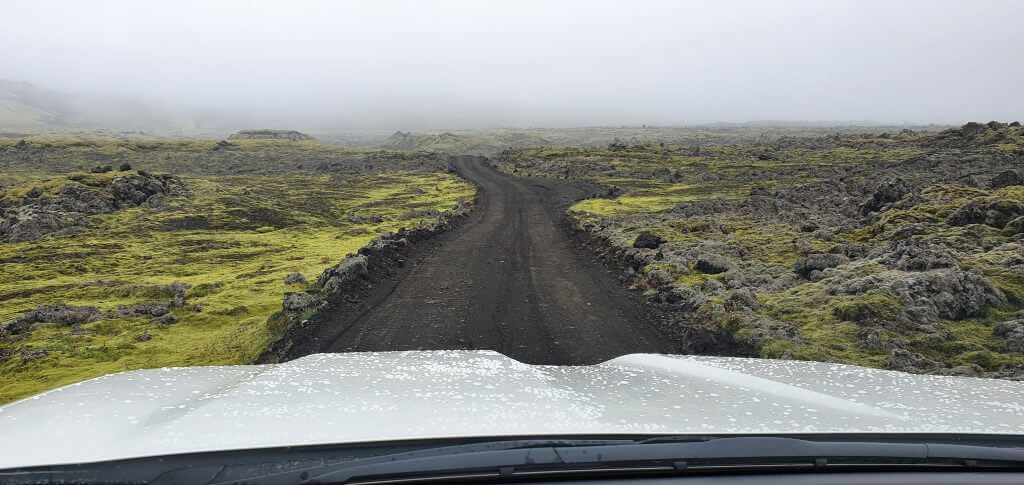
How to get to the Fimmvorduhals hike
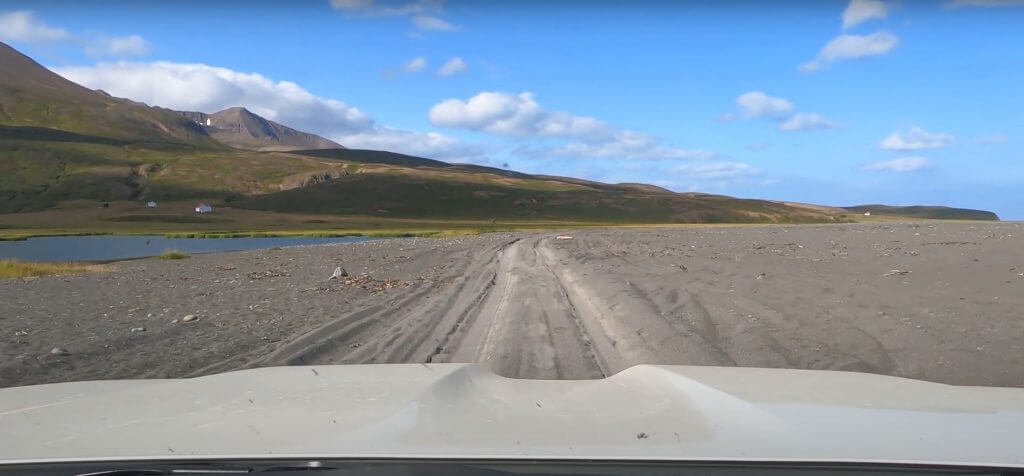
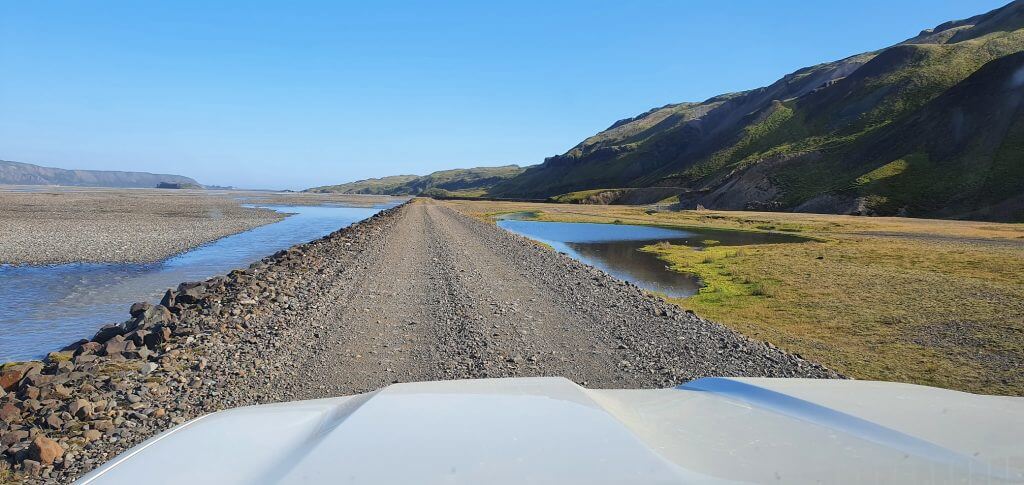
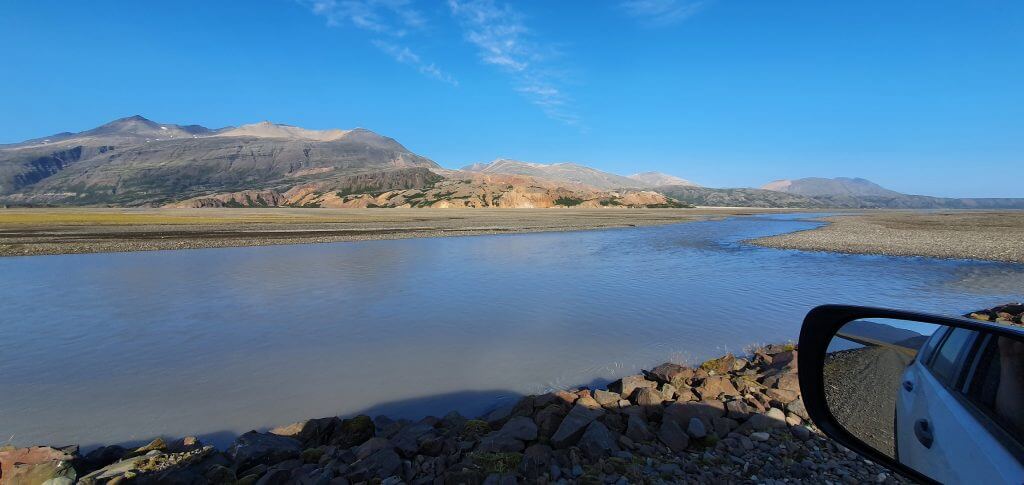
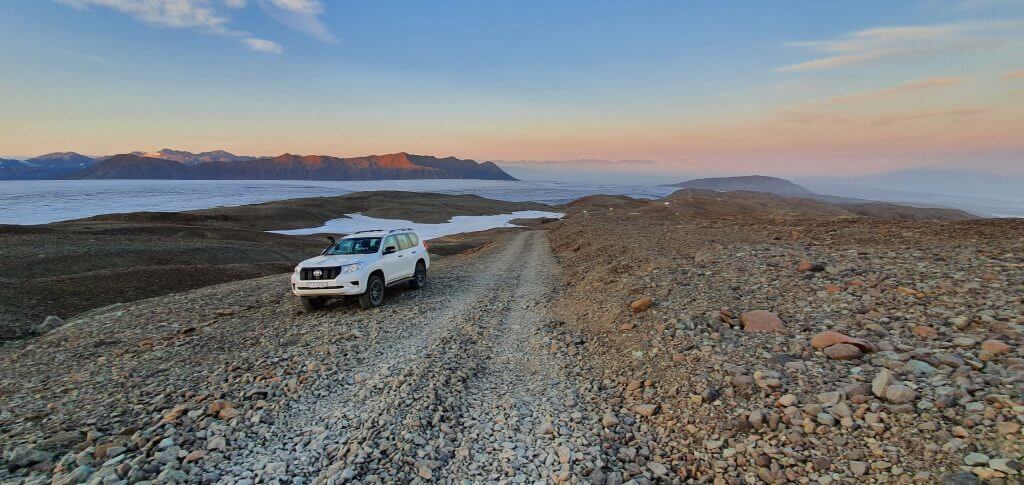
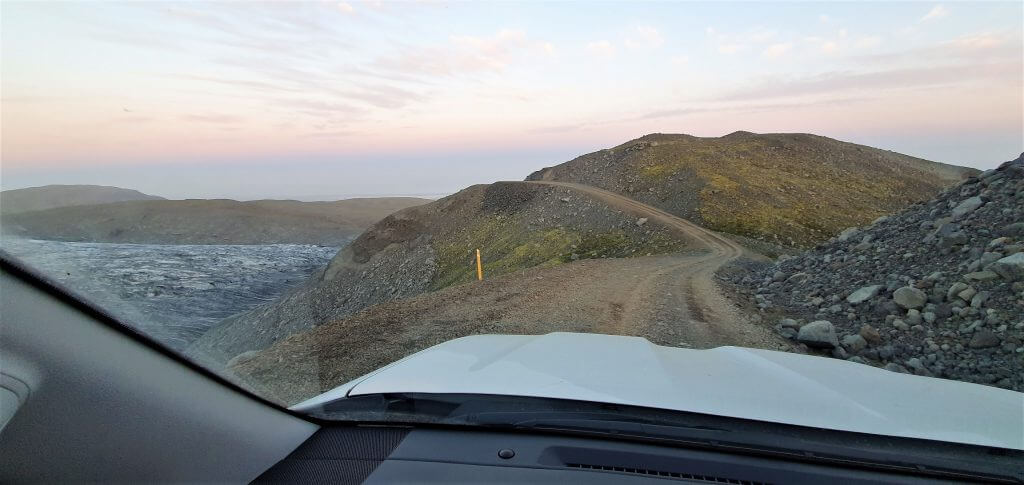
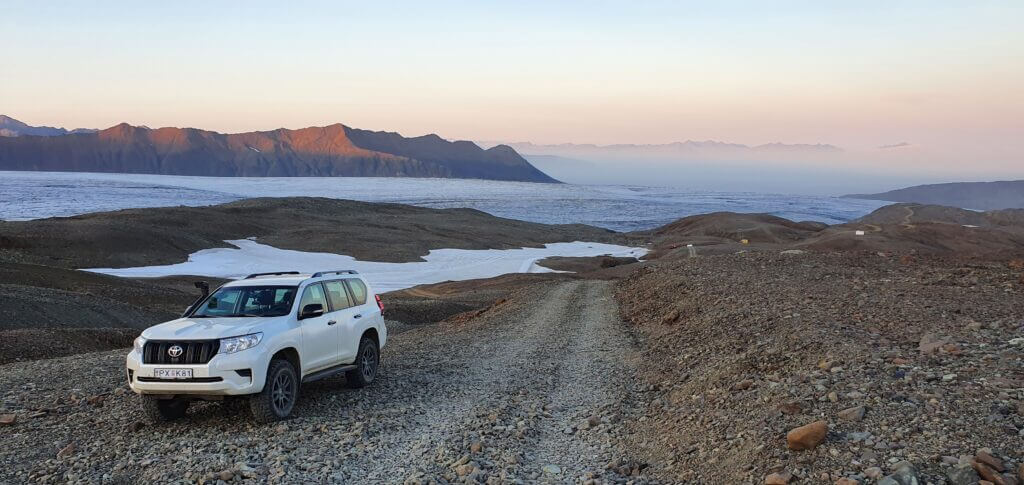
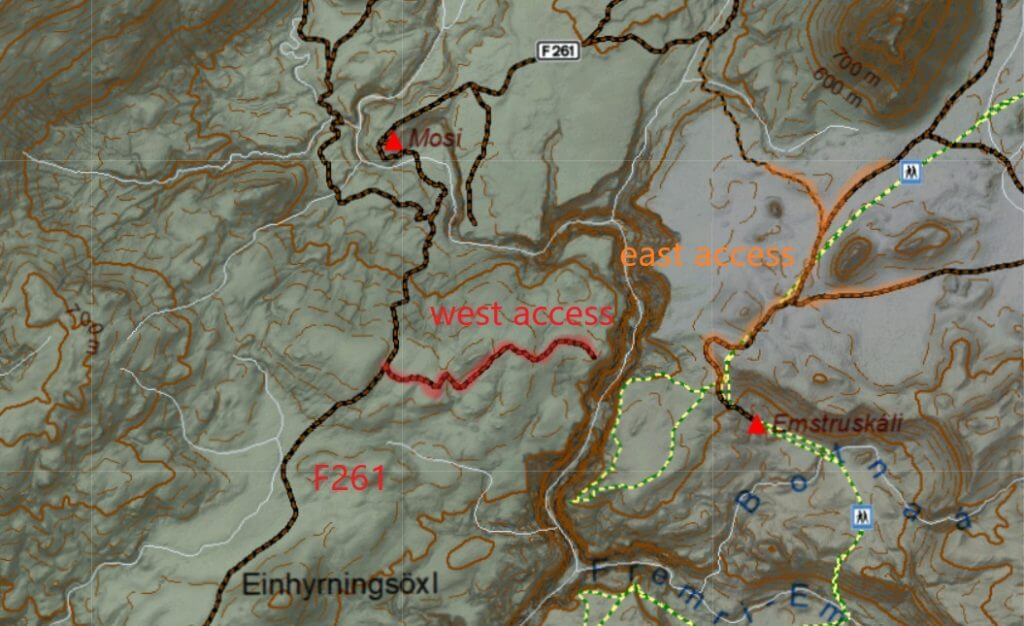
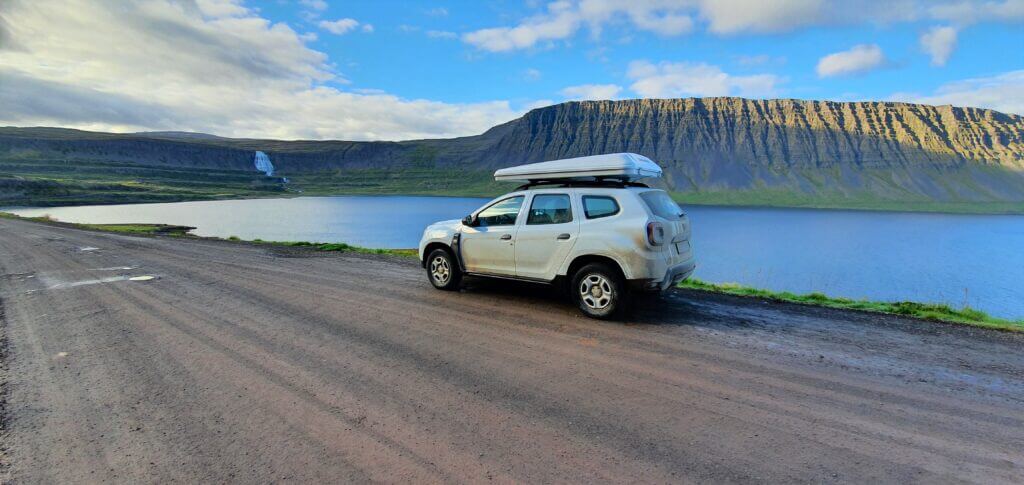
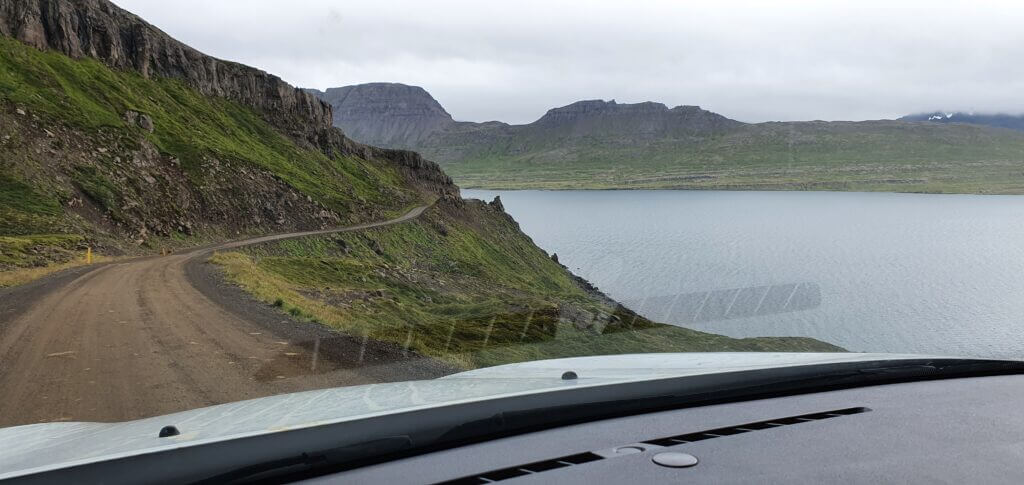
Another crucial question after the choice of the season, date, and day is a question of how to get to and from the Fimmvorduhals hike. Do you have a rental car? Yes, you can drive to Skogar (or Thorsmork) then – but how to get back, if the hike ends 30 kilometers away? 🙂 Unless you have an (experienced) friend (with a big 4×4) waiting for you at the other end of the trail, you would need to take the bus or the guided Fimmvorduhals tour (10% discount code: 26-EPIC-IMG) with transportation. Or stay overnight in accommodation in Thorsmork. The bus is usually the cheapest option.
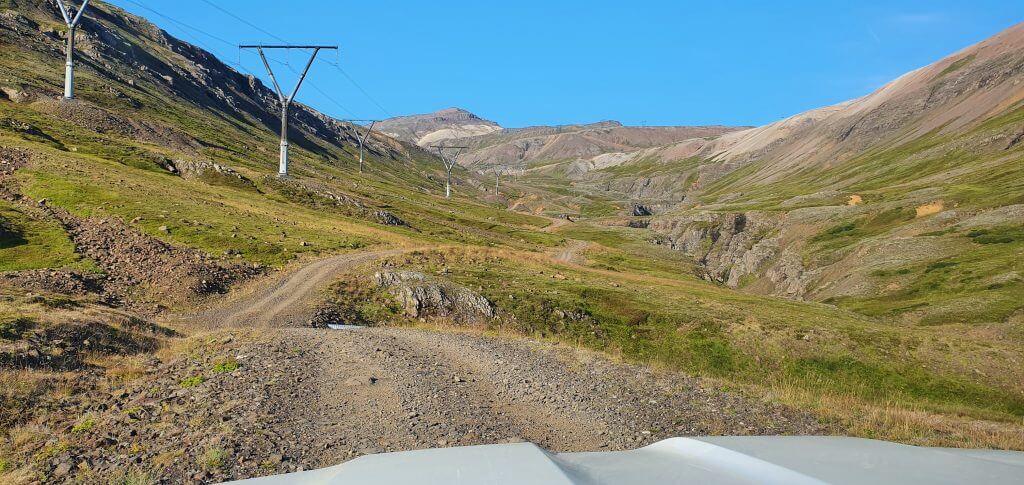
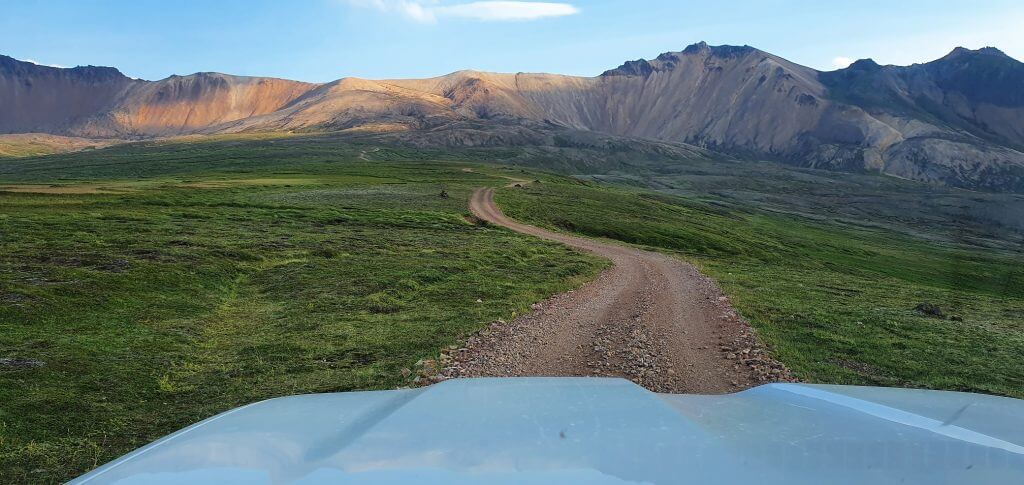
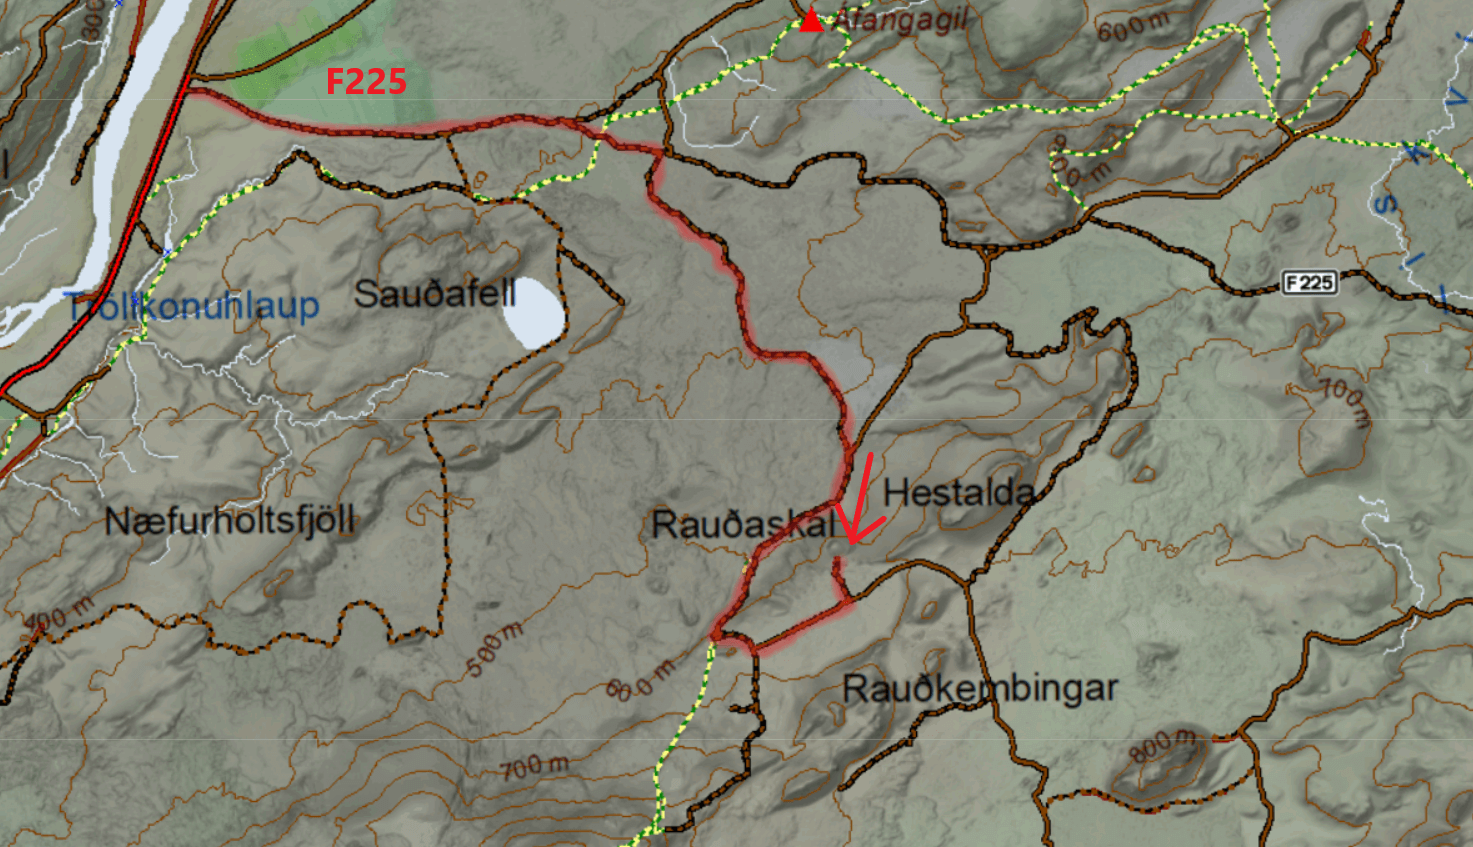
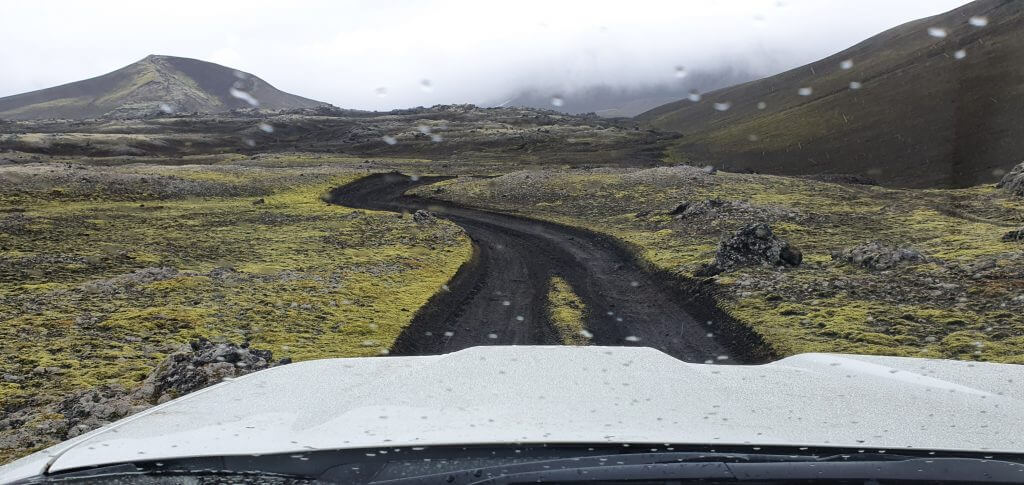
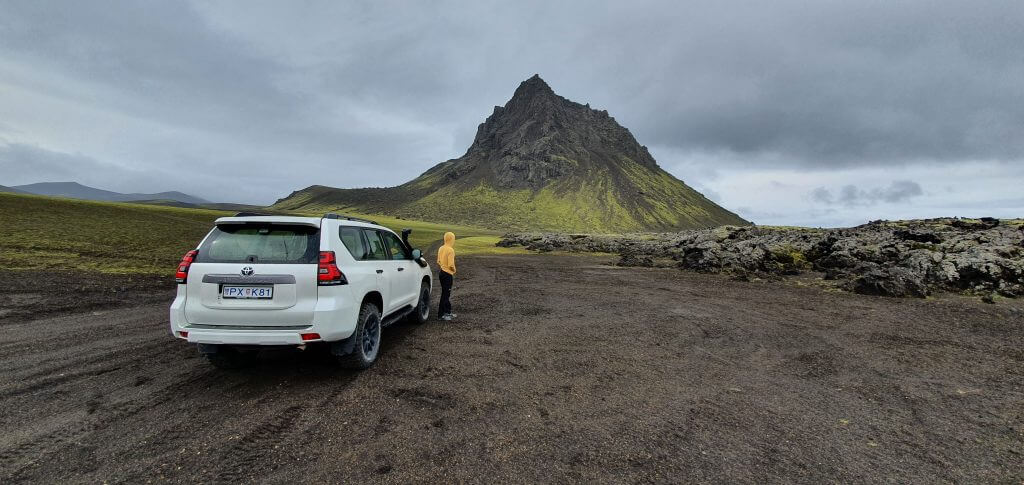
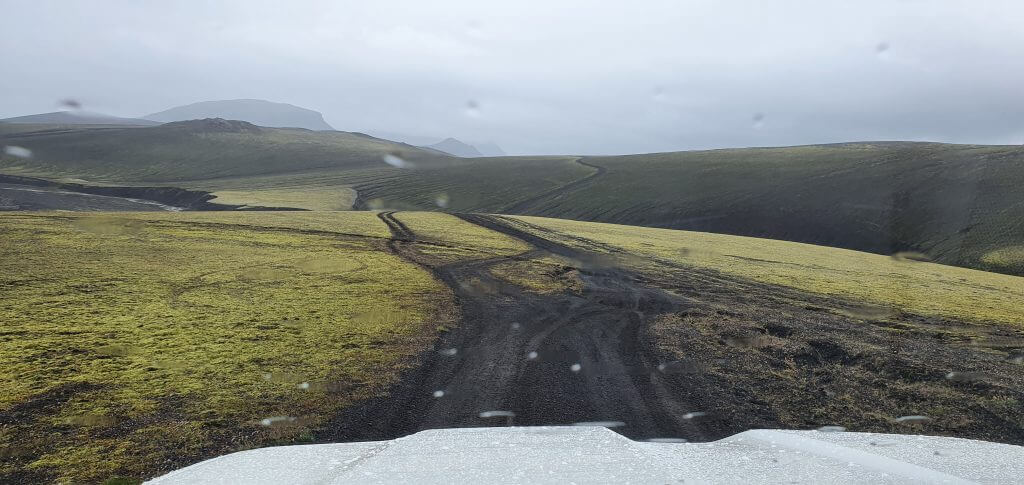
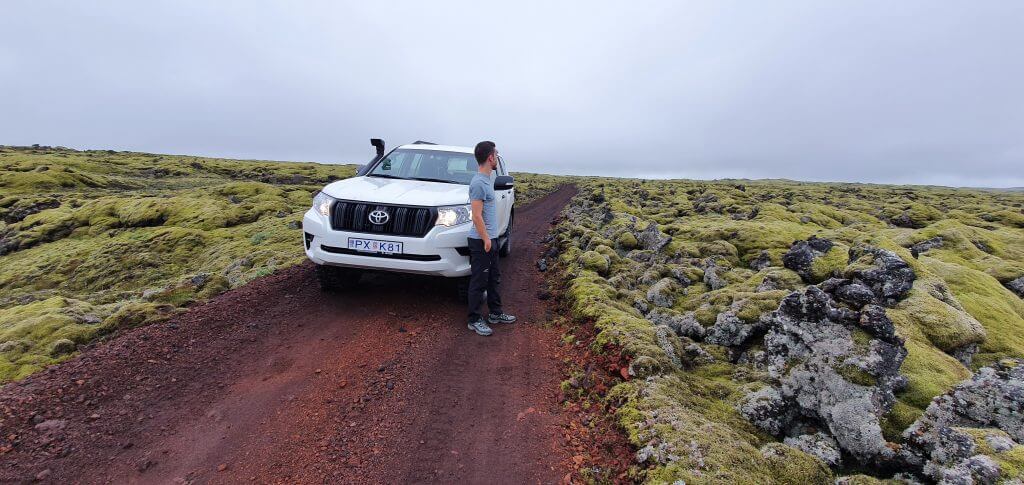
Getting to the Fimmvörðuháls trailhead may be challenging. Hope our guide helps a bit!
Bus to Skógar and Bus from Thórsmörk
If you Google the buses from/to Skogar and Thorsmork, you will soon realize you don’t have that many options. If you want to start in Skogar and end in Thorsmork (as we did, and most of the visitors as well) the first bus arrives at Skogar at 9:45 AM and the last bus leaves Thorsmork at 20:00 PM. This means that if you want to complete the Fimmvorduhals hike in 1 day AND you don’t have a car, you need to do it in 10 hours. Period.
Here is the Fimmvorduhals bus schedule (10% discount code: in our newsletter). This 1-day loop can only be achieved during the peak season when the last bus from Thorsmork leaves as late as 8 PM.
The Fimmvorduhals bus is also called “the highland bus” and the tickets – although a bit misleading – work pretty well. You can buy 1 ticket which includes the round trip – i.e. either from Reykjavik/Hvolsvollur to Skogar + from Thorsmork back to Reykjavik/Hvolsvollur – or the other way round. The ticket from Reykjavik is roughly 20-30Eur more expensive compared to that from Hvolsvollur.
Hiking to Baldvinsskali hut
Here is the schedule of the Thorsmork buses (10% discount code: in our newsletter). Beware that the evening bus from Thorsmork runs only during the peak season. Otherwise, you have to reach out for the other options. If you arrive outside of the main summer season, you have to either:
- Book a night roughly at the halfway of the hike in the Baldvinsskali hut, or
- Book a night in Thorsmork – the closest option is Basár hut, the next option is Langidalur campsite and the furthest one (but maybe the most glamorous) is the Volcano huts in Husadalur
What I did was to drive with our car to Hvolsvollur and leave the car there at the big car park of N1 gas station. Then I took the bus to Skogar (10% discount code: in our newsletter), which (as mentioned above) arrived shortly before 10 AM. Then we made the Fimmvorduhals hike (which took us roughly 8 hours in a medium-to-quick pace) and ended up at Basar hut before 7 PM. Finally, we took the same bus back from Basar hut to Hvolsvollur and I came back to our car at 10 PM in Hvolsvollur, thus making it all in 1 day.
It is possible to do the same also with Reykjavik as your start/endpoint, but add additional 2 hours each way (that’s what my friend Vicente has done).
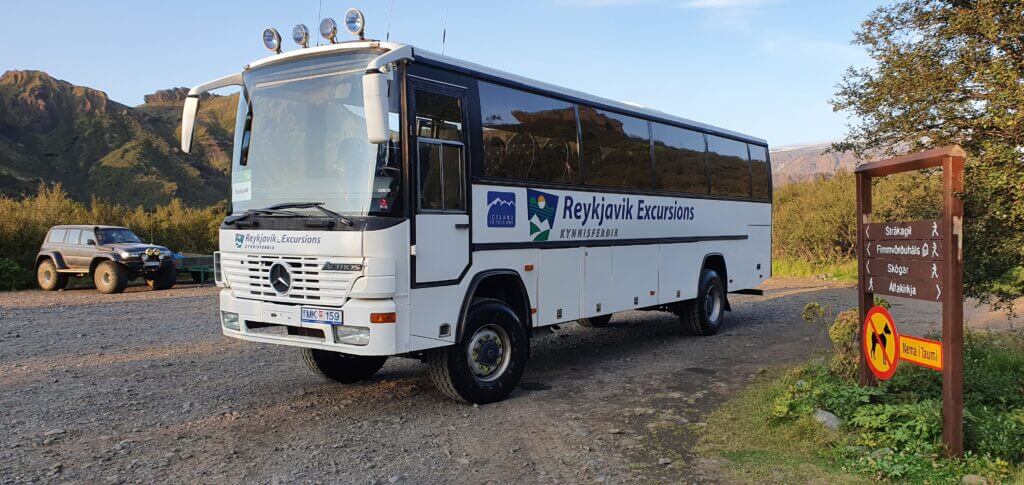
Bus to/from Thorsmork standing at Básar hut
After buying the ticket you also have to reserve your seats on the bus for a particular day and time by writing an email to the bus company. To sum it up, the entire process works like this:
- You buy the ticket, 10% discount code: in our newsletter (free cancellation up to 24 hours before departure)
- You write an email to the bus company with a specific date and time request (free changes up to 24 hours before departure)
I recommend booking in advance and then making changes a few days before if necessary due to weather. That’s what I had to do several times due to changing rain and wind forecasts. There are usually enough places on the buses (and if there’s a lot of tourists, they usually send more buses). That being said – yes, it’s good to book in advance, but changing a few days before the hike shouldn’t be a problem under normal circumstances.
If you already know beforehand that you can’t make it on time for the bus schedules, you may still book a night in either the Baldvinsskali hut or in Basar/Langidalur/Husadalur campsites. If they have free places, you may come there even without booking it in advance. Of course, booking in advance is recommended. But you can call there and ask a few days in advance for availability and decide based on that.
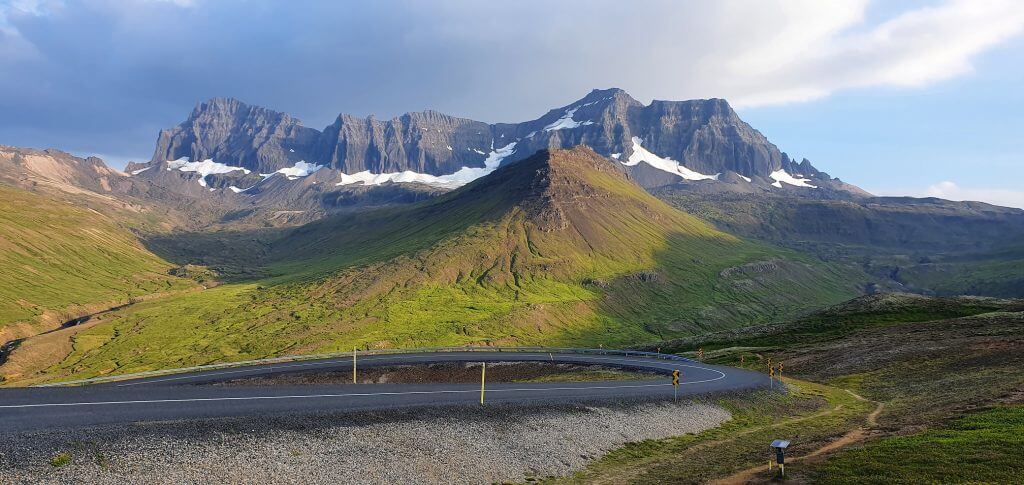
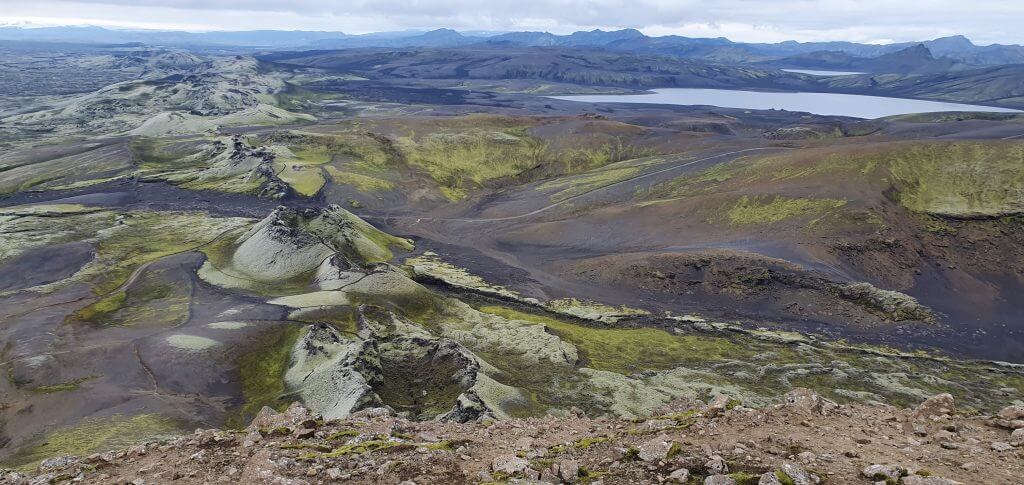
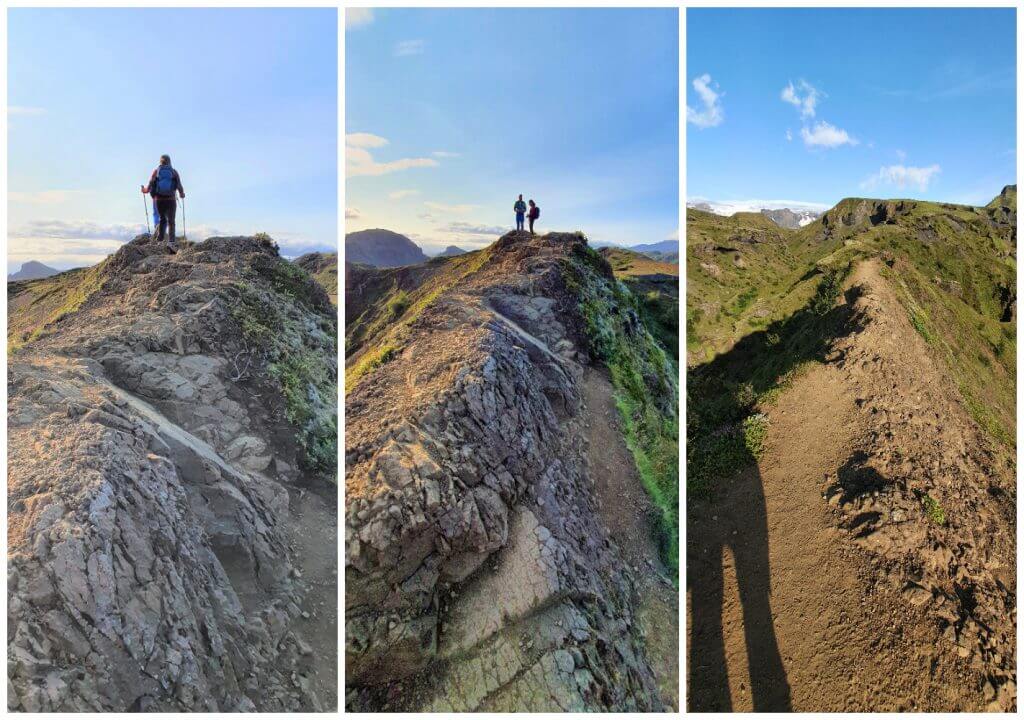
Views from the Fimmvörðuháls pass, once you get to the top
Car to Skógar and Bus from Thórsmörk
Since the 2024 season a new bus by SouthCoast Adventures from Þórsmörk to Skógar and Hvolsvollur has been introduced. Thanks to our reader Brooke for pointing this out! 🙂
The bus leaves Þórsmörk from either Básar, Langidalur or Húsadalur in the evening during the main summer season and drives all the way to Skógar. This makes the logistics much easier for those who can arrive at Skógar by car.
SouthCoast Adventures bus will now give you the desired flexibility if you have a car, because you can now:
- Arrive at Skógar by car at ANY time in the morning.
- Do the hike to Þórsmörk.
- Take the bus from Thórsmörk back to Skógar in the evening.
Thanks to this option, you can now easier do the Fimmvörðuháls hike in one day. This is especially true if you are not a fast hiker or unsure of how long the hike will take for you. The solution is simple – just arrive at Skógar by car as soon as possible and leave yourself as much time for the hike as you need.
Best Fimmvörðuháls hike tours
Best Fimmvörðuháls hike guided tour by Icelandic Mountain Guides
Would you rather like to take a guided tour? The best Fimmvorduhals hike guided tour is undoubtedly operated by Icelandic Mountain Guides. We can more than just recommend this 5* local Icelandic company with amazing reviews and guides. If you don’t feel like hiking alone, Icelandic Mountain Guides specialize exactly in hiking tours, like Fimmvorduhals is.
1-Day Fimmvörðuháls guided tour
We’ve researched all available 1-day tours to Fimmvorduhals, and the tour by Midgard Adventure wins on all fronts – price, guides, reviews, organization. You can have a 10% discount for Midgard Adventure tours with the discount code: EPICICELAND10.
6-Days combo Fimmvörðuháls + Laugavegur tour
By far the best Laugavegur hike guided tour by Icelandic Mountain Guides
This tour is the gem among all hiking tours in Iceland. You will see the most beautiful Icelandic landscapes and sleep in authentic Icelandic mountain huts along the way. All this accompanied by amazing guides who will take care of you all the time.
You can have a 10% discount for Icelandic Mountain Guides tours with the discount code: 26-EPIC-IMG (you can find all currently working promo codes also here).
Length
The hike is 26 kilometers long (16 miles). How long does it take to complete it? This is the aspect that is kind of hard to estimate because everyone has a different pace. One American website stated that it took their entire family some 6-7 hours to finish the hike. This I find unbelievably fast (don’t know if they are superheroes or what), but it can be considered as a bottom estimate of the time.
On the other hand, some guys on the Alltrails app stated it took them around 12 hours to complete the hike. This is a bit long in my opinion, but it can be pretty much realistic if you have a slow hiking pace. So yes, the estimate to complete the entire hike is somewhere between 7 to 12 hours and depends on both the weather and your hiking skills.
Last part of the Fimmvorduhals hike
We’ve done the Fimmvorduhals hike in the perfect weather and it took us 8 hours to complete it, including small food breaks and several little photo pauses. If I had to assess our pace, I would say it was pretty quick in the beginning and then we slowed down considerably. So, to sum it up, our pace was probably medium-to-quick. This may change drastically in case of bad weather, though, so count on that, please.
This is also how I recommend doing the hike. It’s better to be quicker in the beginning, not make that many pauses and check the trail map about your status. If you realize that 3 hours have passed and you are already halfway through the hike (as we realized), then your pace is probably quick and you can slow down. And vice versa – if you realize that 5 hours have passed and you are halfway through the hike, then your pace is probably slower and you should hurry up to make it under 10 hours.
Who to go with
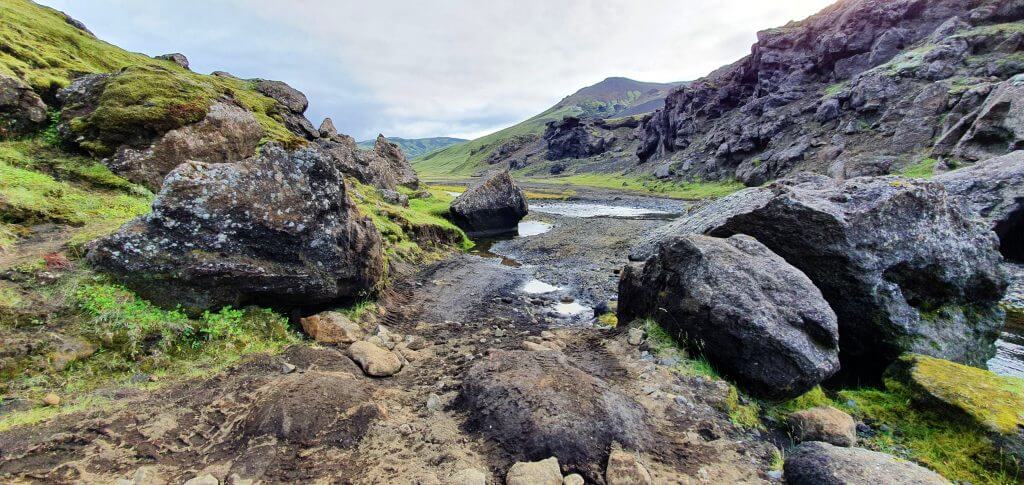
This may be a strange question for someone, but I’m gonna put it in here anyway 🙂 My wife didn’t feel like doing such a long and strenuous hike and I didn’t want to push her. On the other hand, I really wanted to do the hike. So how do we solve this situation? One of the options is to go alone. Yes, this is doable. We even met a girl our age who has done the hike alone. Still, I don’t recommend going alone. You never know what can happen during the hike and it’s always better to have a companion for a plethora of reasons.
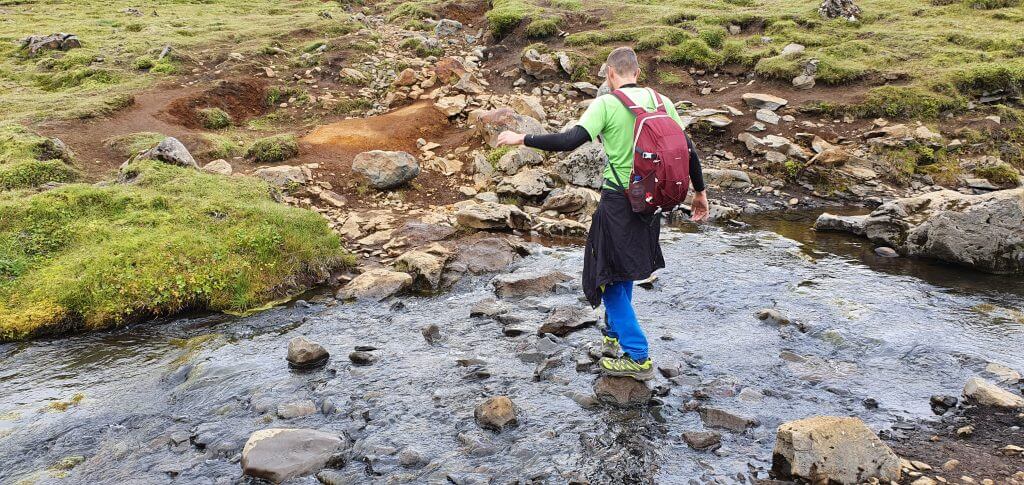
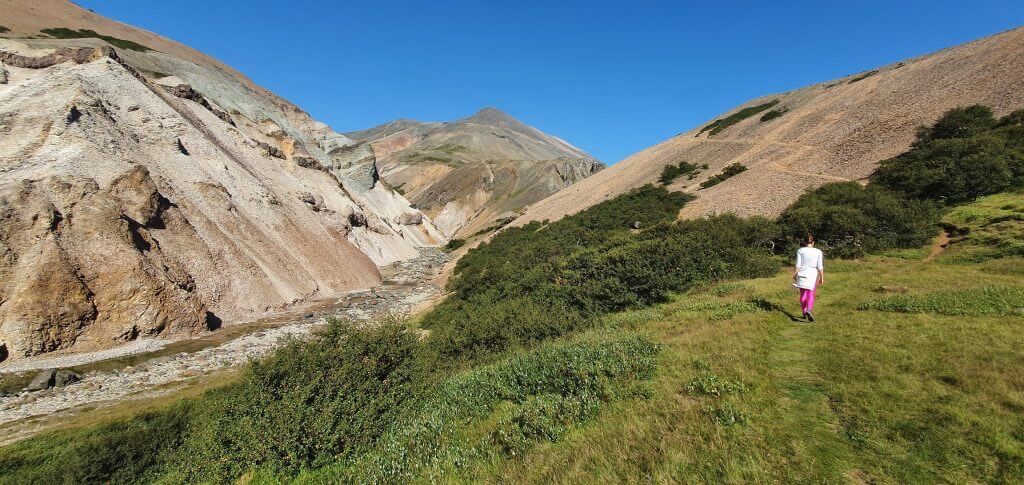
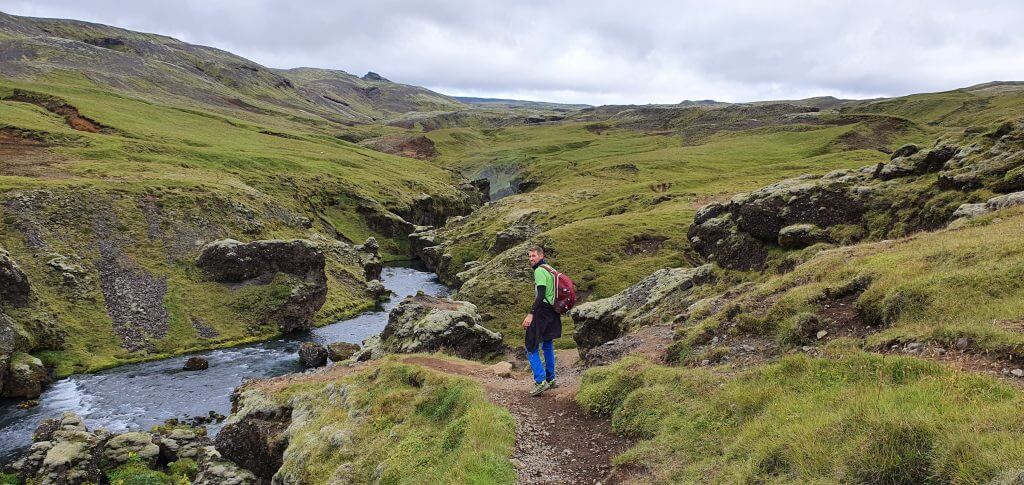
Little streams in the beginning of the Fimmvorduhals trail
I knew I didn’t want to go alone for the trail I hadn’t already known. But I didn’t give up and I decided to find a company – via FB. There are many groups on Facebook devoted to Iceland, one of them particularly popular called “Travel Iceland”. I’m thankful to this group for useful Icelandic info and even for finding a hiking buddy for the Fimmvorduhals hike 🙂 And I was pretty lucky, because (only after we started the hike) I realized my hiking buddy Vicente was really well equipped and an experienced hiker.
Difficulty
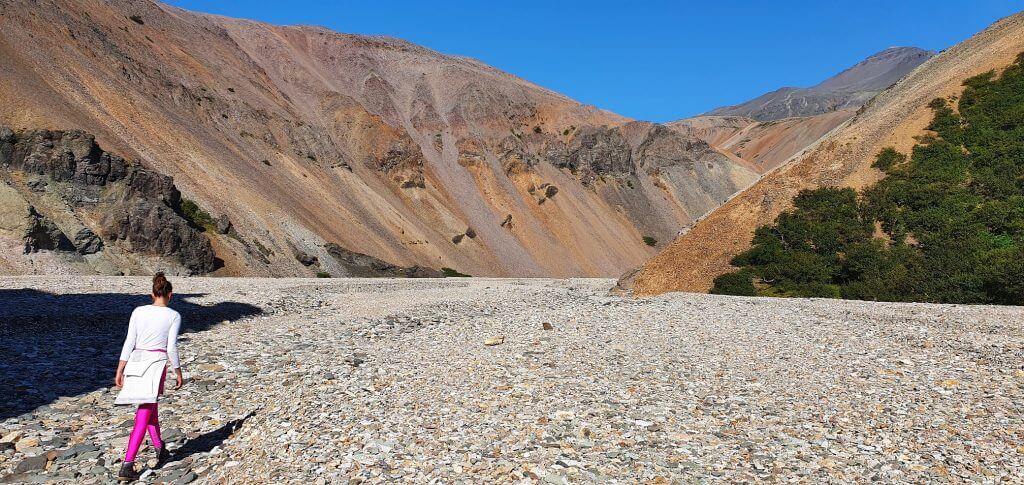
I’m originally from Slovakia where we do have somewhat high (2500+ meters) mountains. I’m used to hiking, though I wouldn’t say I’m any good at it. I would consider the hike to be of medium difficulty. The trail itself is not that difficult. The first half of the trail is basically a long gravel/clay walk without any steep sections. The only real issue with the Fimmvorduhals hike might be its length – for someone this hike may be too long for 1 day. For me, it was just right and I still had some energy left after the finish.
The second half of the trail (after the hut) is slightly more technical, but except for one spot, I didn’t find it dangerous or highly difficult. This one spot is the 2nd hill after the Baldvinsskali hut (when going from the Skogar direction). There’s a steep slope with the ground consisting of a mix of clay, ice, and ash. The grip is not very good and the angle/slope is pretty steep. This is the only part where I felt unsafe and even scared a bit. But that may be my specific issue – I just don’t like steep slopes with bad grip and uneven terrains – like ice and ash. This is where hiking poles literally saved my life (or at least avoided a broken leg).
Resting after finishing the most difficult part of the hike
Snowfields were not any big issue for us, they were easily passable and not steep at all. No crampons were needed. I even took a pair with me, just to be sure, but I didn’t need to use them at all. Next, the only part of the hike with chains – the part after Modi and Magni volcanoes – wasn’t that dangerous in my opinion. Yes, the chains are a bit scary, or better said, the steep fall below them is a bit scary – but this part is short and thanks to the chains easily doable.
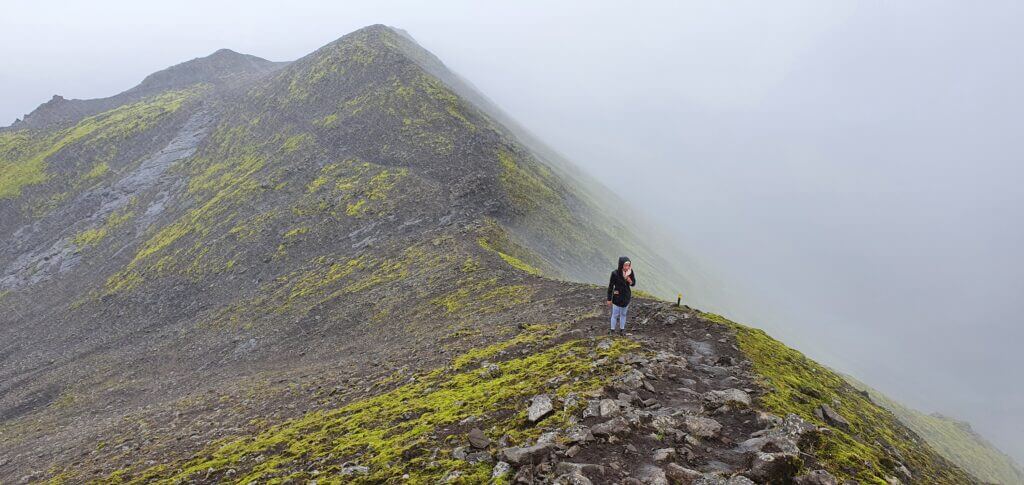
Last but not least, the famous Kattarhryggur pass – the “cat’s spine”, was maybe a bit scary because it was narrow, but otherwise it was not any difficult. The pass has firm and flat ground, so if the wind isn’t too strong it shouldn’t be an issue.
For some inexperienced hikers or visitors afraid of heights (like my wife) this hike may be too stressful. For medium+ experienced hikers used to heights, chains and mountain passes it is definitely doable, some may even consider it to be easy. It’s definitely long, though.
Clothes and equipment
I’m not much of a person who would advise you which jacket you should buy on Amazon 🙂 But I can definitely advise you to dress well for the Fimmvorduhals hike. What does “dress well” mean? Well, dress for any kind of weather – especially rain, wind, and cold. A waterproof layer (pants and jacket) is a must (at least in your backpack). Something to protect you from cold and wind is a must as well (some backup hat, gloves, jacket, etc.). You might not need any of these if the sun shines and the wind is non-existent, but they come priceless if the weather turns to the dark side.
The temperature during the summer hike usually ranges anywhere between 5°C-20°C (51F – 68F). If the wind blows badly and the sun doesn’t shine, you may easily feel like -5°C (23F) even in August, though! On the other hand, without wind, and with the sun shining, there were parts when we hiked in our T-shirts only.
Do you need hiking poles? For 98% of the trail I would say you don’t. BUT. For the steep section after the Baldvinsskali hut, I cannot imagine going without them. My friend Vicente, though, has done it without any hiking poles, but he’s a hiking machine :)). My final advice would be – better take them.
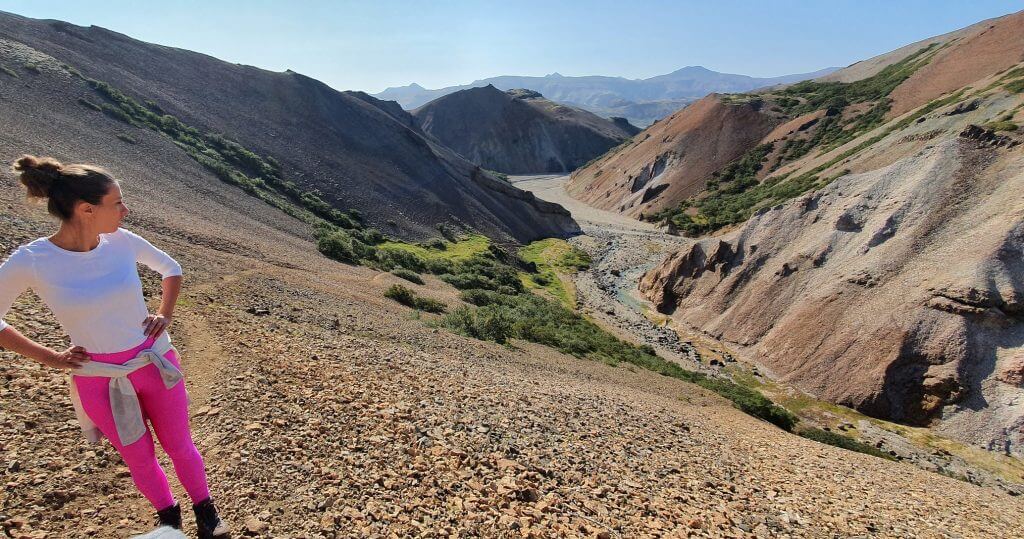
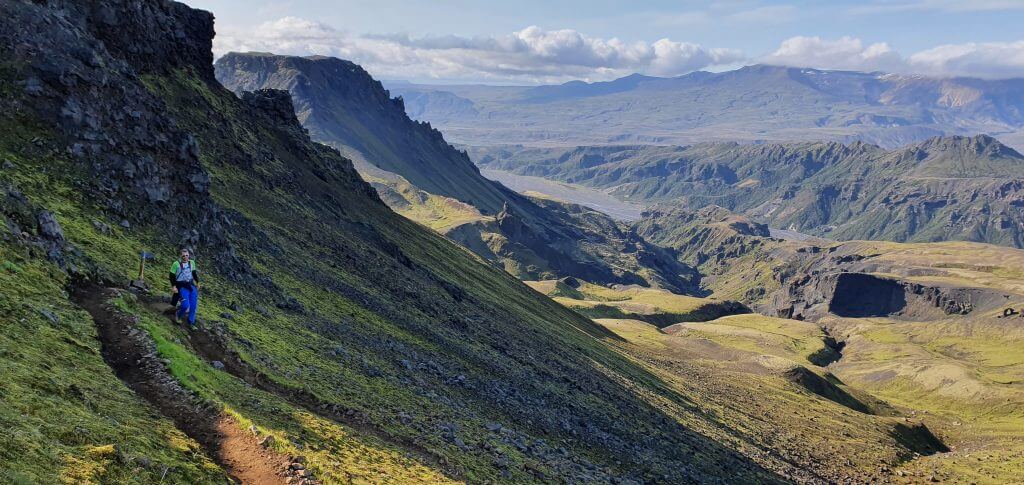
Views from the Fimmvorduhals into the Thorsmork valley
Do you need crampons? During the best time to go (mid-July to the end of August) you don’t need them at all. At other times it really depends. But the parts covered the most by snow are not very steep, so I wouldn’t say you need crampons under normal circumstances.
Anything other to take? Good shoes, sun cream in case of sunny weather, water and food (there’s no place to buy any during the trail and Skogar campsite is not well equipped).
Our experience
Since the day I’ve first seen the Fimmvorduhals hike and read about it, I knew I have to try it 🙂 Planning is crucial for the Fimmvorduhals hike (see above). After many changes, we finally decided to go for the hike on Day 3 of our highlands trip.
A month before the hike I found my hiking buddy via Facebook group Travel Iceland. My wife didn’t feel like going for such a long hike and I didn’t want to push her. My buddy – Vicente – seemed to know what he was doing, although you never know before you really get to know each other 🙂 I took care of the entire organization of the trip – i.e. mainly choosing the specific day, buying bus tickets, and making a bus seat reservation.
The final part of the Fimmvorduhals hike near Thorsmork
Our plan
We had a 3-day window when we could both do the hike (as an intersection of my and Vicente’s schedule). I waited 5 days before the hike and when the weather looked reasonable I booked the bus (10% discount code: in our newsletter) and reserved the seats for Friday. I received the response from the bus company anytime from 1 hour after my email to almost 24 hours – but they always responded and always positively. Vicente travelled from Reykjavik, I travelled from Hvolsvollur.
The plan for our trip was as follows:
- Vicente getting on the bus at 7:00 in Reykjavik towards Skogar
- Me coming by car to Hvolsvollur and getting on the same bus to Skogar at 9:00
- Starting the hike at 10:00 in Skogar
- Finish the hike before 20:00 in Basar
- Take the bus back from Basar hut at 20:00 – me to Hvolsvollur, my friend to Reykjavik
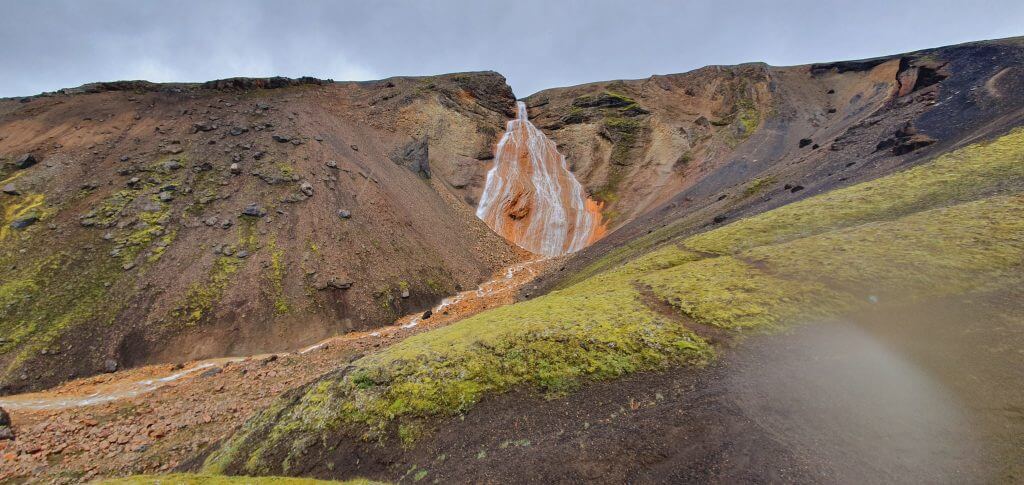
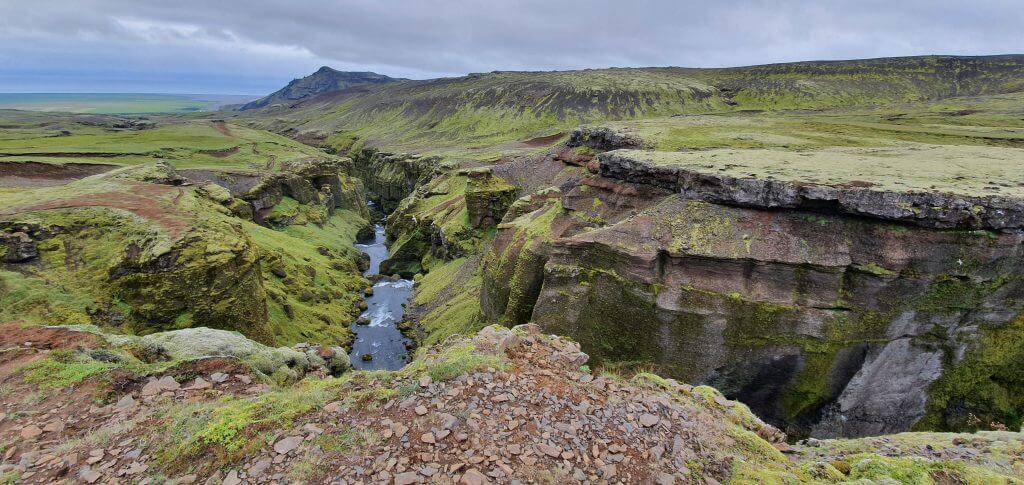
The waterfall way in the first third of the Fimmvörðuháls hike
3 days before the hike the weather forecast changed and it looked much better for Saturday. So, I wrote a kind email to the bus company asking for rescheduling and they quickly replied positively. 2 days before the hike the forecast started to show some strong winds exactly in the worst part of the hike – between the two glaciers. I decided to reschedule again – back to Friday – although I must have looked dumb already at that point in the eyes of the bus company.
On a Thursday evening, I looked at the forecast once again and it showed slight rain for Friday and the wind forecast for Saturday disappeared. I felt like an idiot but I decided to write the bus company once again and reschedule the trip for the fourth time. They replied late in the evening that yes, it’s rescheduled. At that moment I just prayed I had made a good decision. And it turned out I did. The weather on our day was almost perfect.
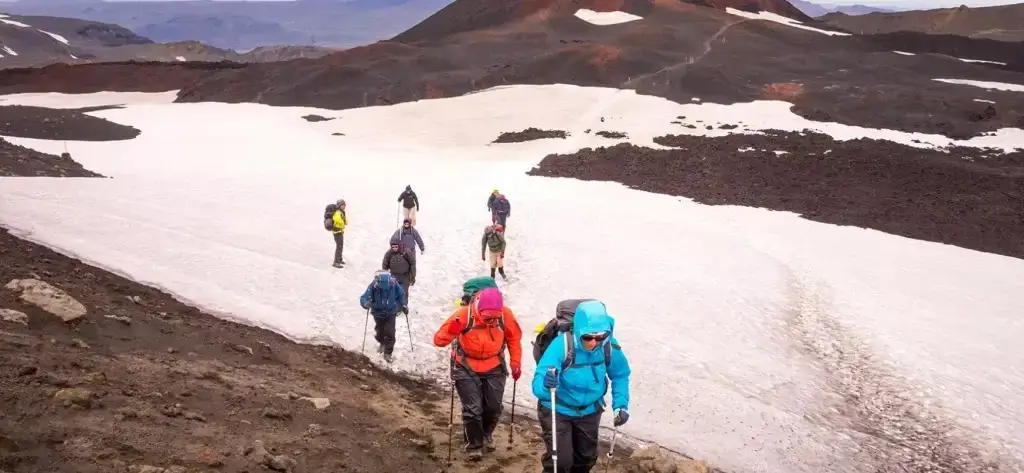
The snowy part of the hike
The Fimmvorduhals trail step by step
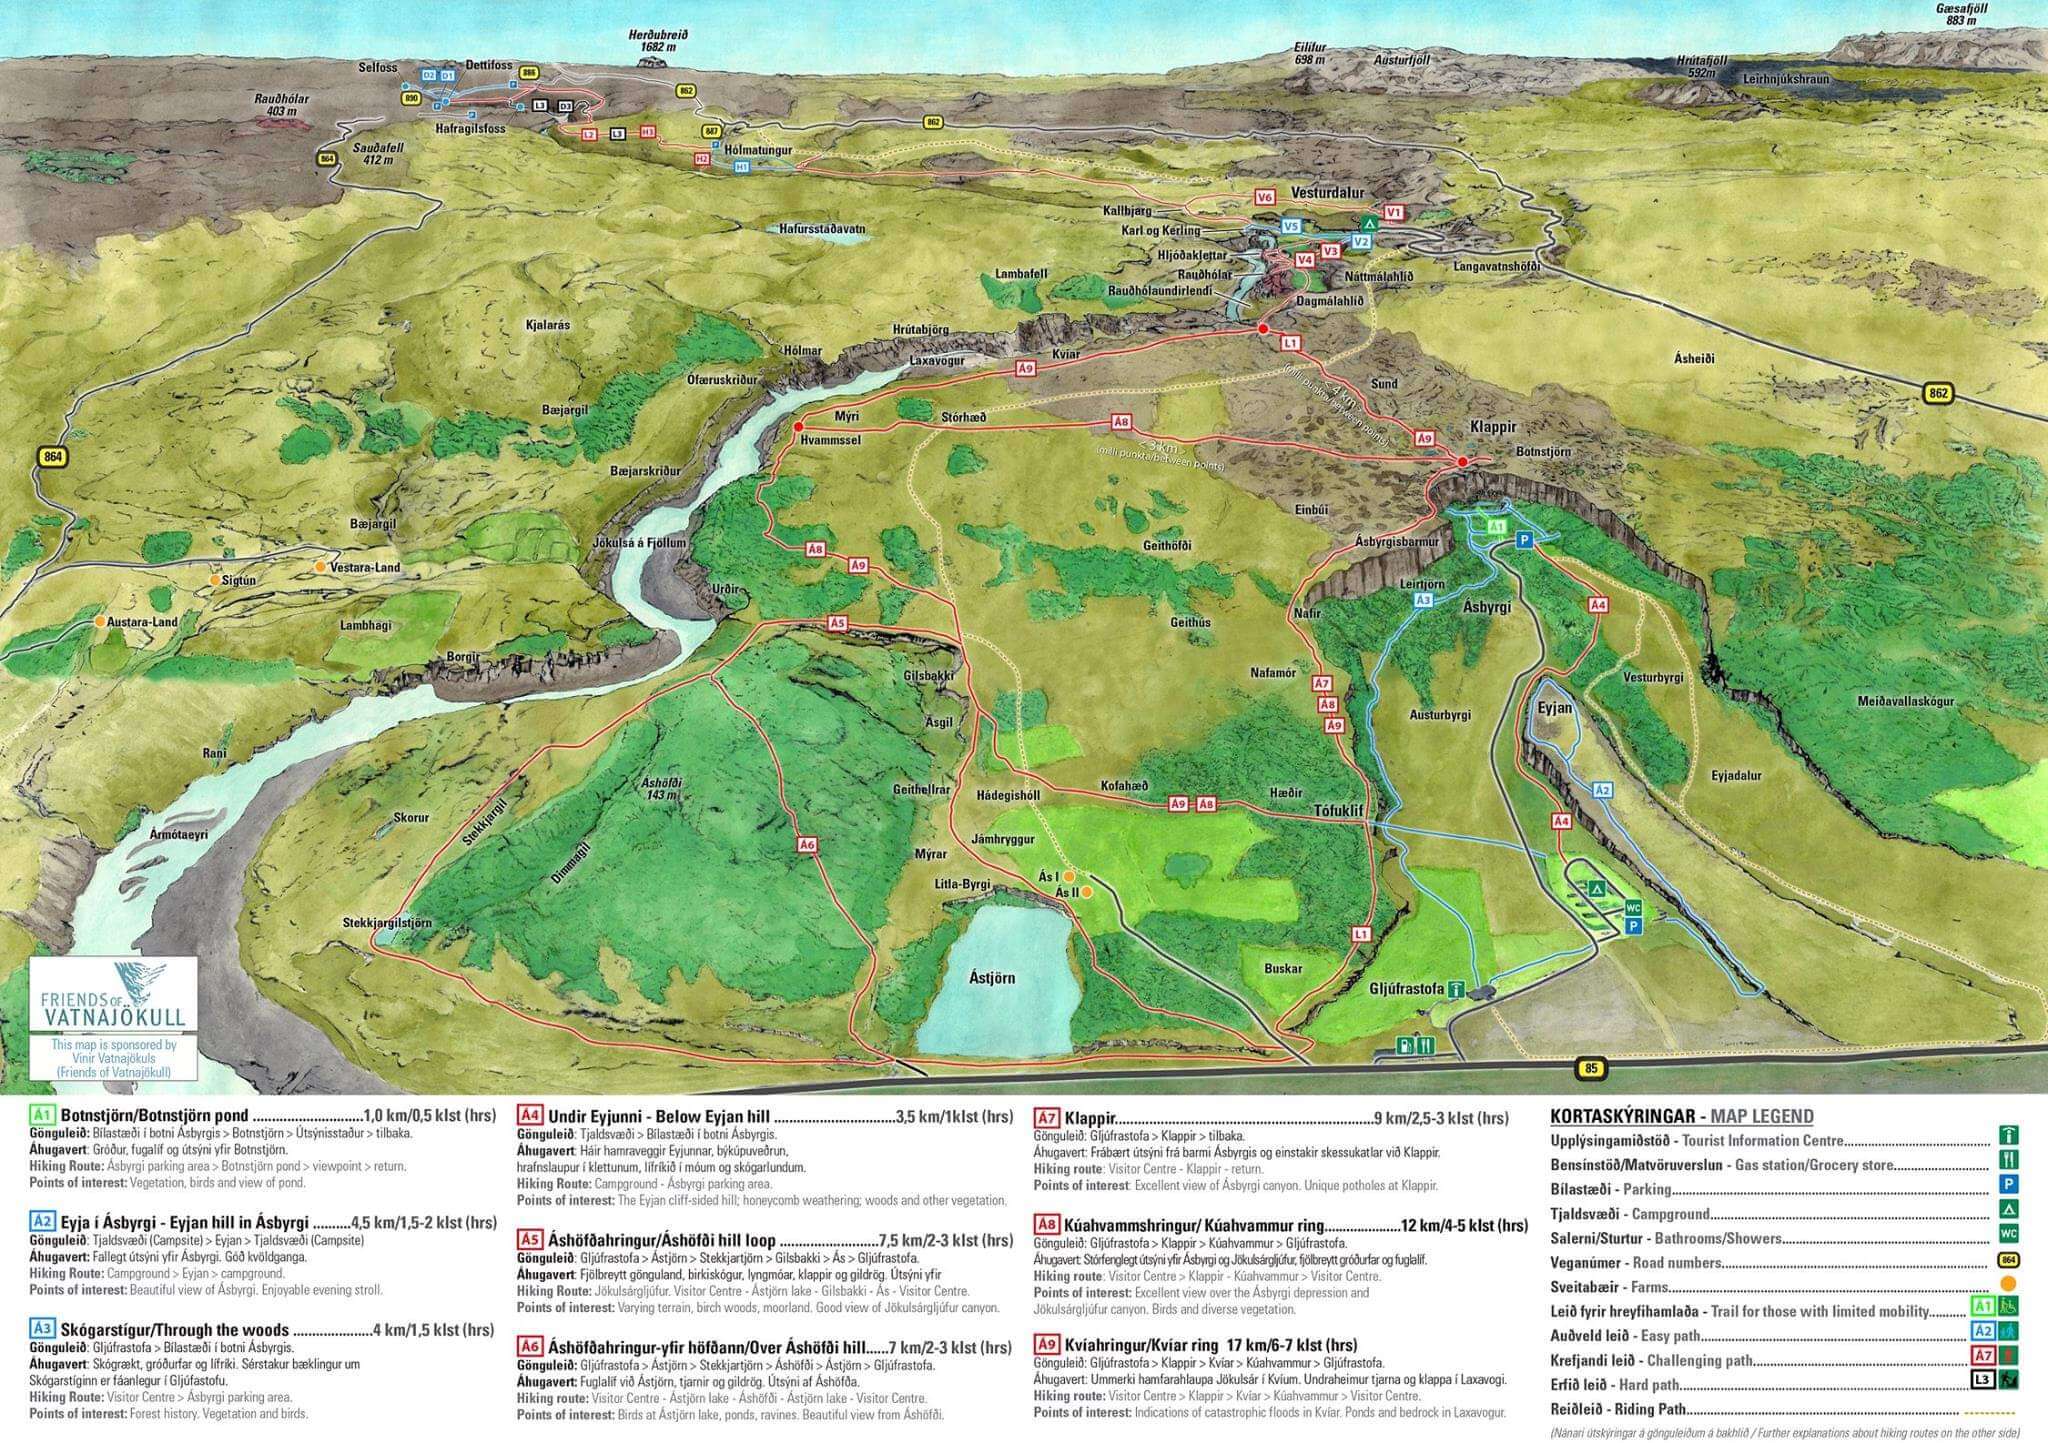
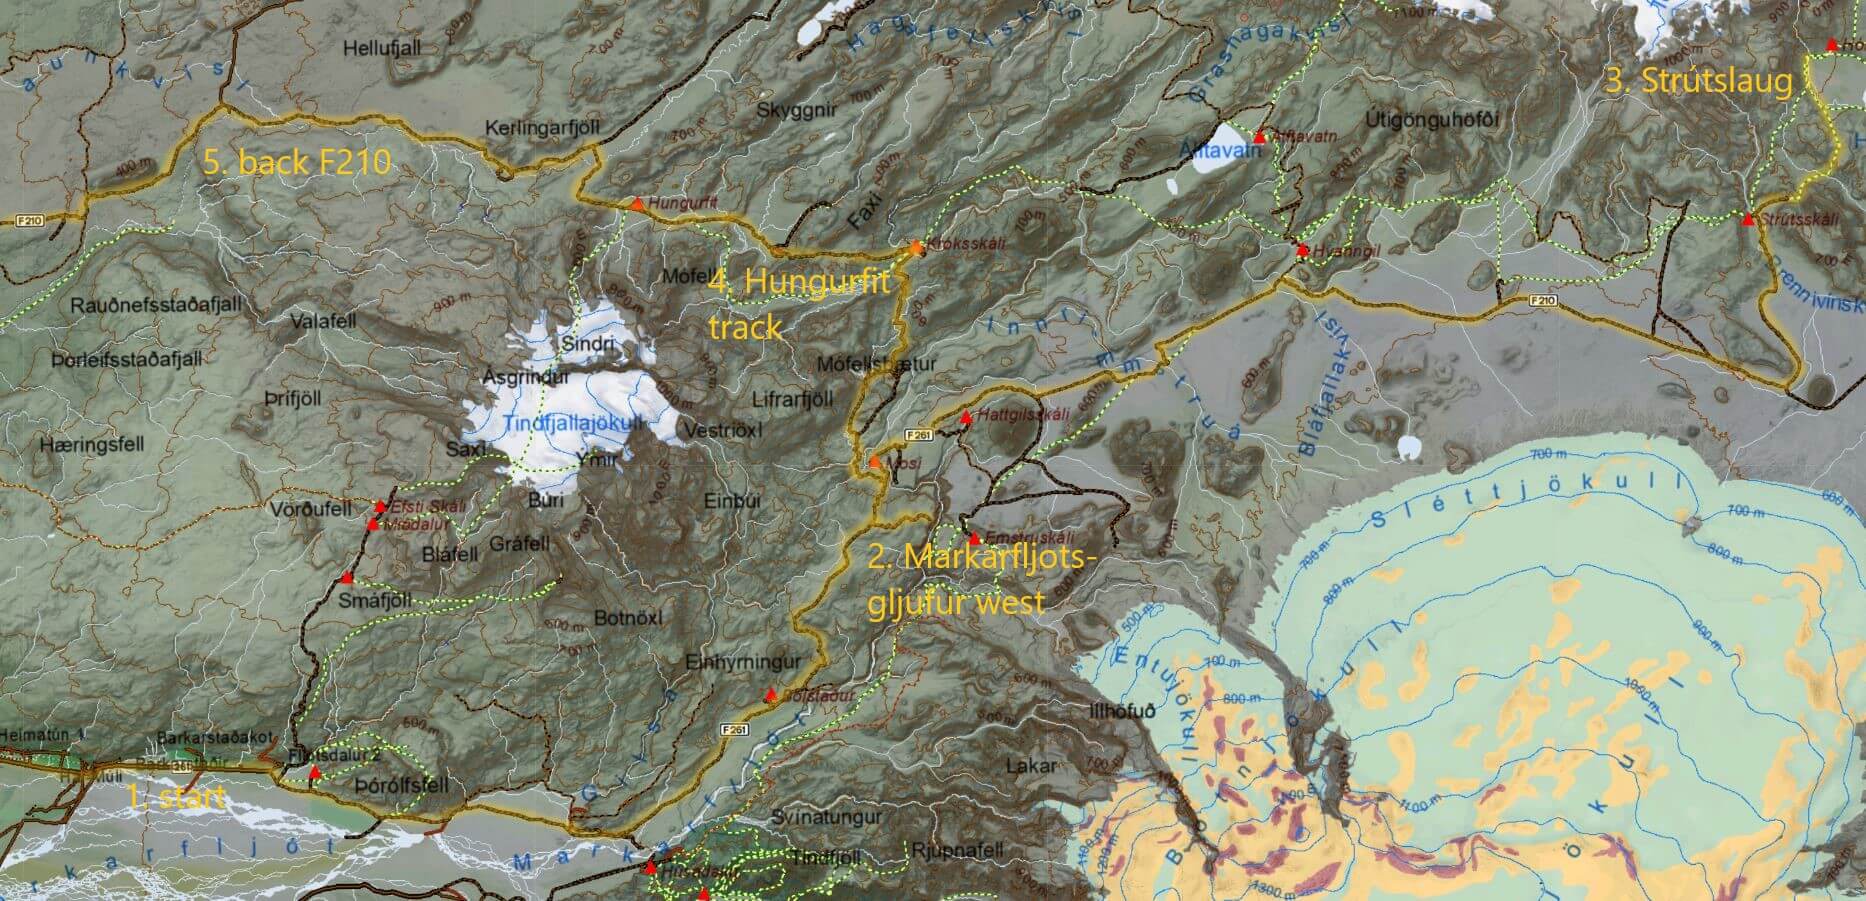
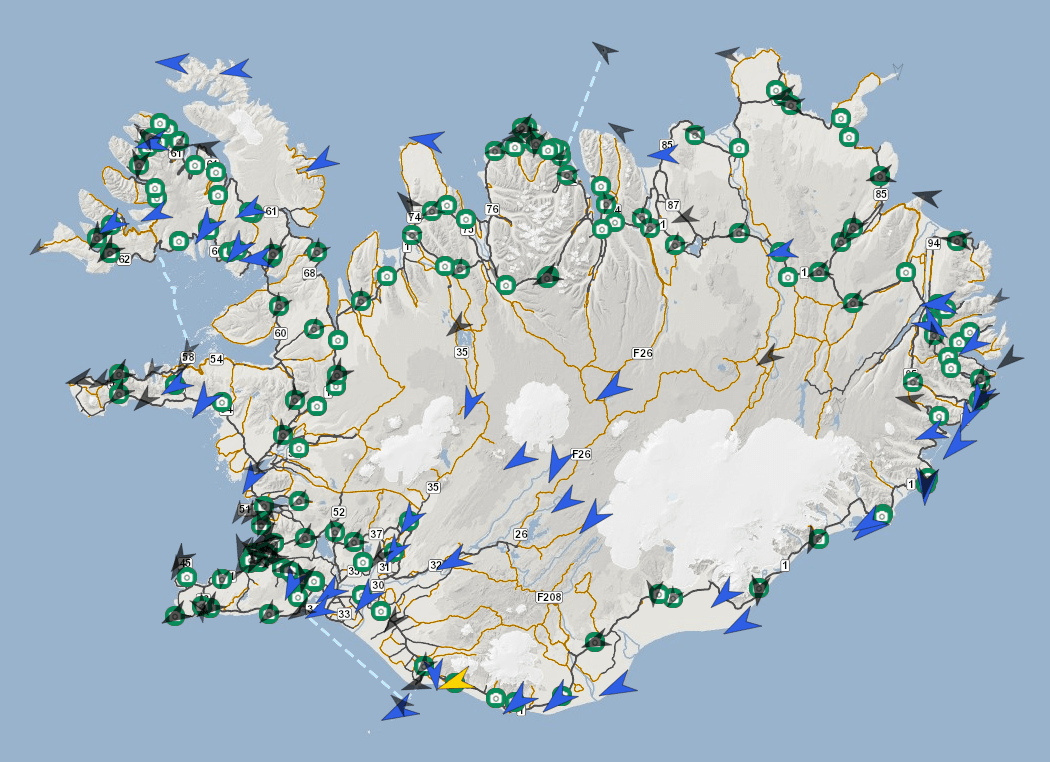
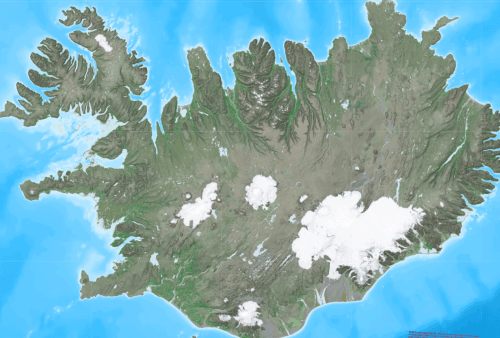
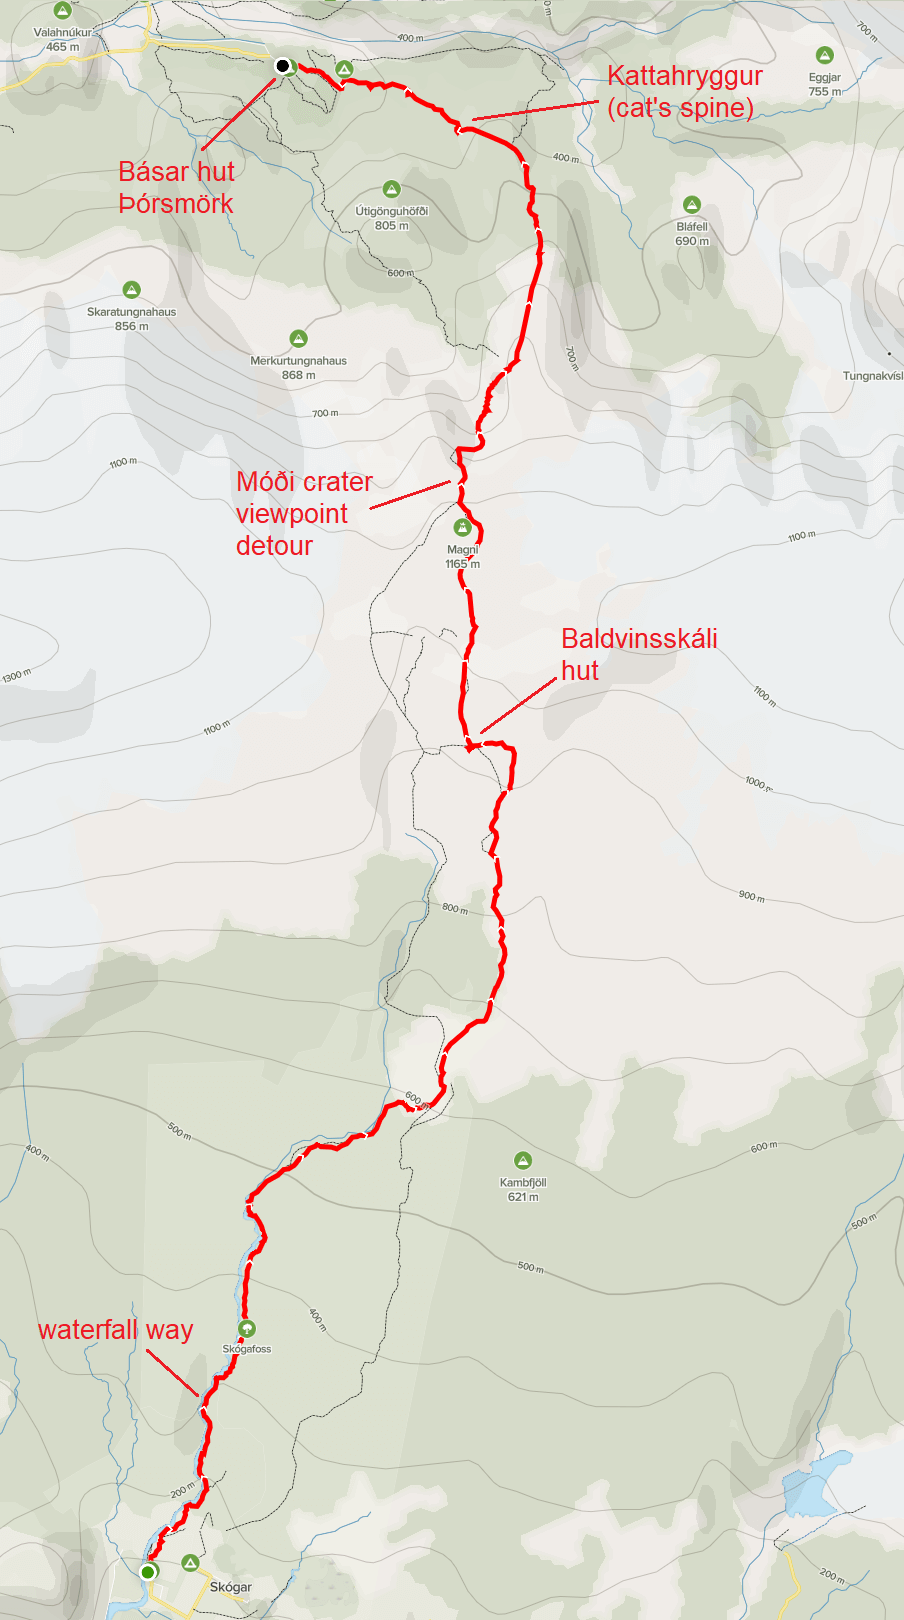
0. Map of the Fimmvorduhals trail
Click to enlarge:
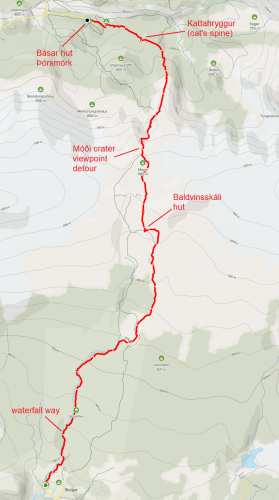
Fimmvörðuháls hike map (from Skógar to Thórsmörk)
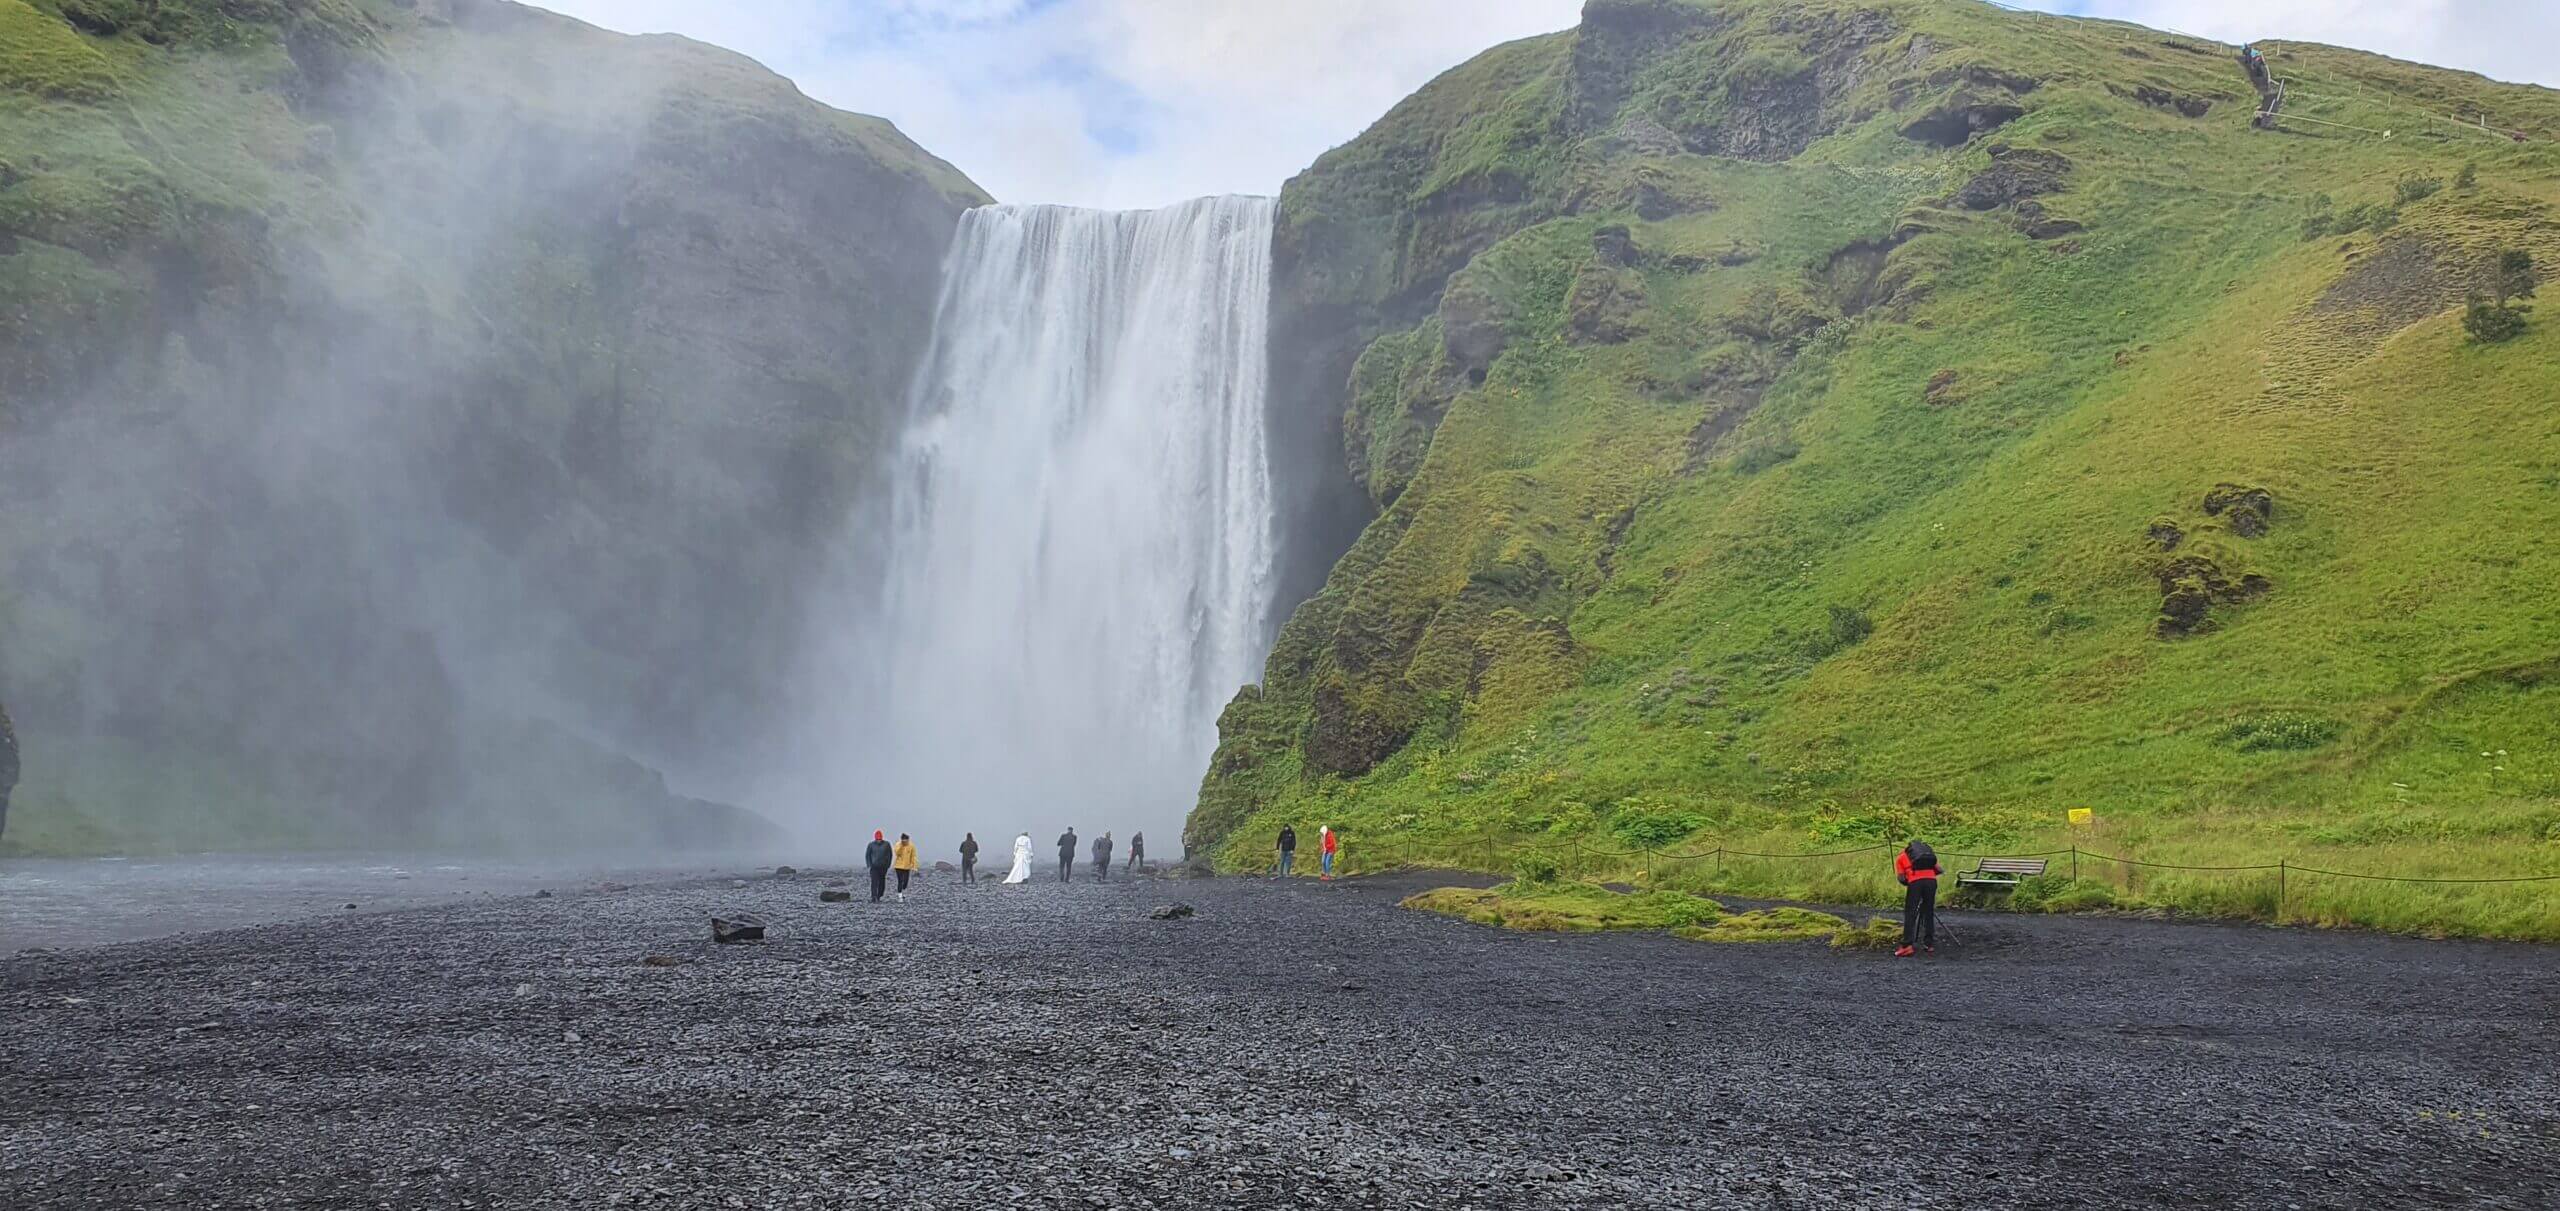
1. Skógar and Skogafoss
The Fimmvorduhals trail starts with the magnificent, giant green scenery of Skogar. This is usually the place where most of the tourists both start and finish, as was the case during our first visit to Skogafoss. While Skogafoss is an admiringly beautiful place definitely worth visiting, it’s a mistake not to continue further up the Skogafoss waterfall trail. It doesn’t take too long to finish it, nor is the trail too hard. So we do recommend you reserve some extra time to see it!

Bottom part of Skógafoss waterfall (and a wedding in the background ☺)
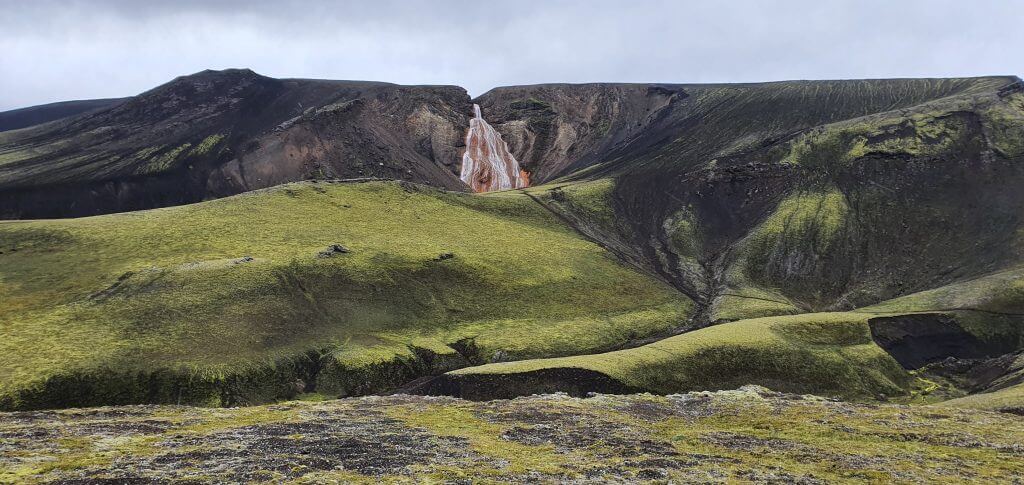
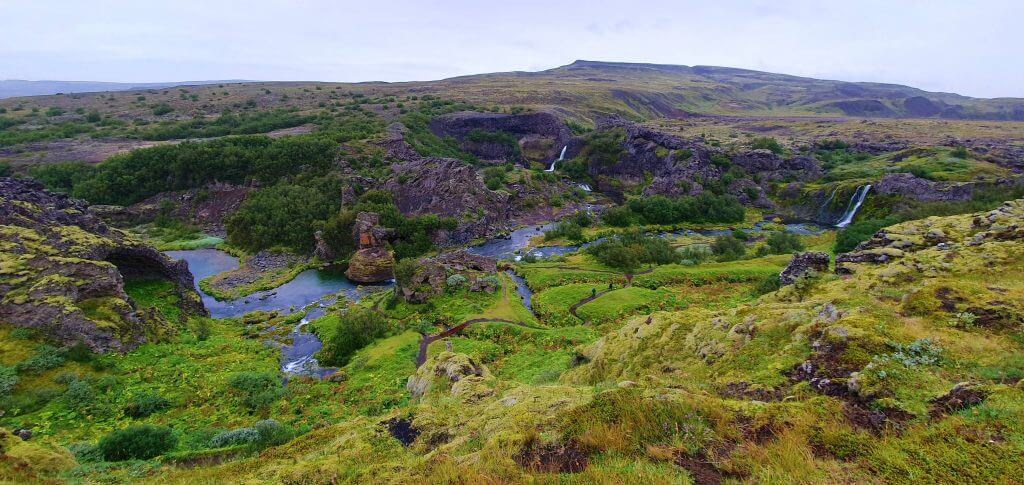
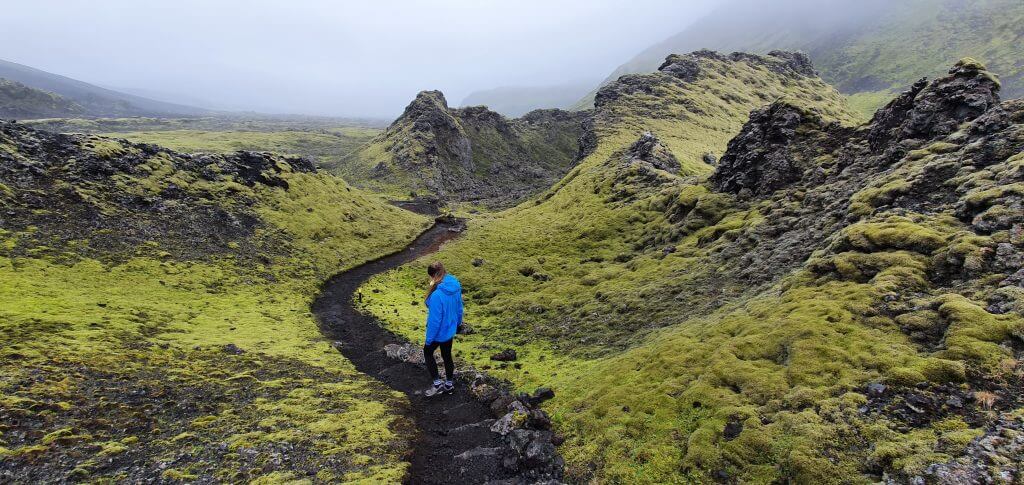
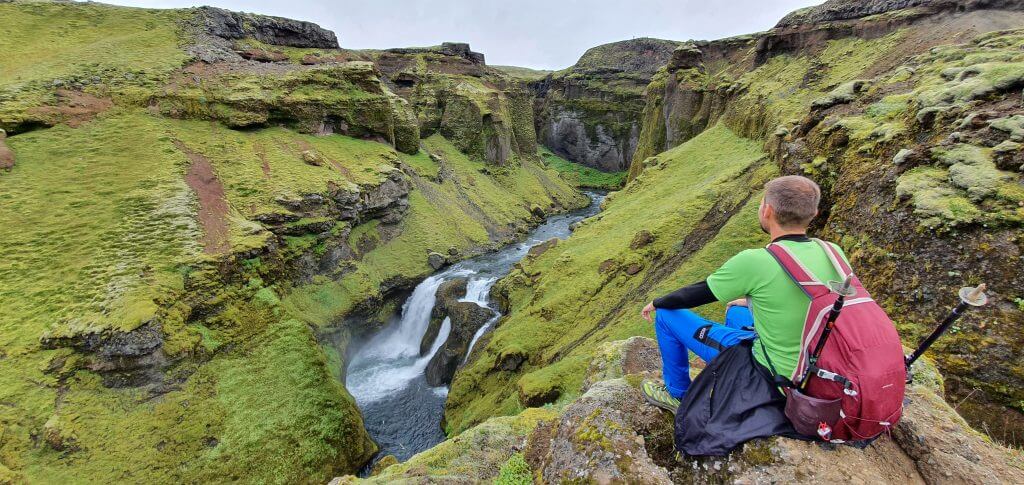
2. The waterfall way
It is the waterfall way that begins with the famous Skogafoss and continues with several other, less known but not any less beautiful waterfalls. The waterfall way is one of the most beautiful short hikes in Iceland I’ve seen. I can highly recommend doing this hike to everyone – even if you don’t want to continue. Just take the waterfall way from Skogar and come back.
The waterfall way looking back to Skogar
The entire waterfall way is around 8 kilometers long and took us around 2 hours to complete from Skogafoss to the last waterfall on the route. That being said, we hiked very quickly with only short pauses for taking pictures. At a relaxed pace, it may take some 2.5-3 hours one way. But you don’t need to take it all the way to the end. The most beautiful part was its first half, i.e. some first 4 kilometers. Doing that as a roundtrip makes for some 3-hour long hike at a relaxed pace that everyone can make.
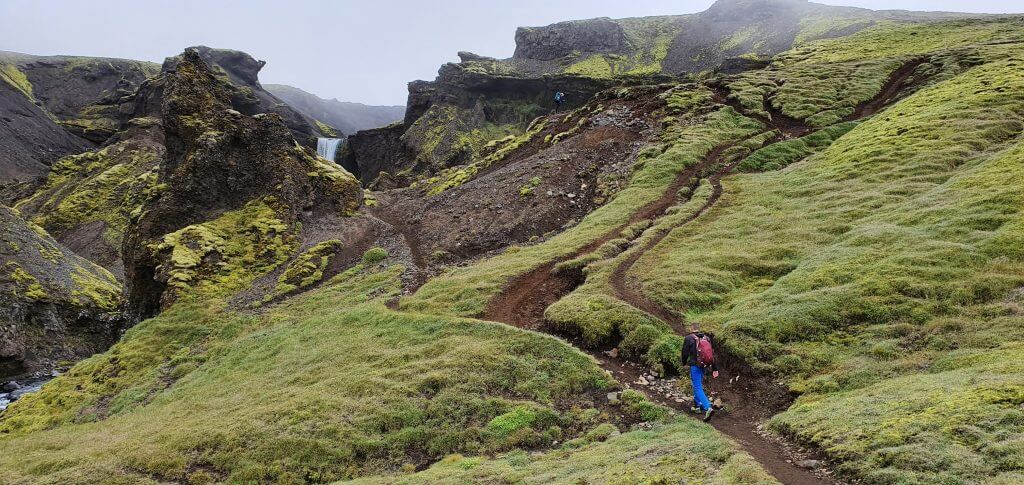
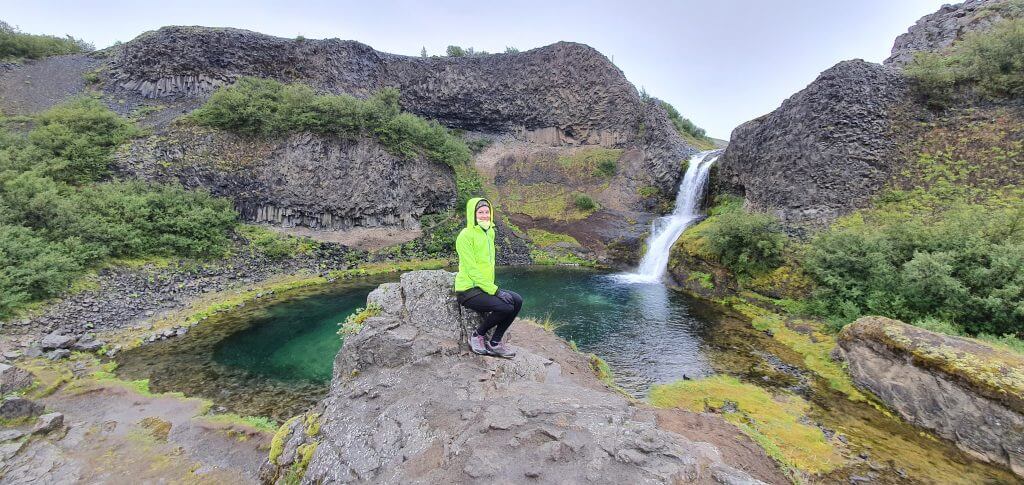
The Fimmvörðuháls hike trail during the waterfall way part
Water and moss are literally everywhere during this part of the Fimmvorduhals hike. We felt as if we were a part of some fairy tale, with hobbits possibly chasing us somewhere. This hike is also doable even if it rains lightly and the visibility isn’t perfect, so it’s a great candidate also for moody days. And what’s one of the best features about Icelandic landscapes – they look very different in the cloudy and in the sunny weather. So, you may even visit them twice and still have a different experience!

One of the largest waterfalls at the waterfall way of the Fimmvorduhals hike
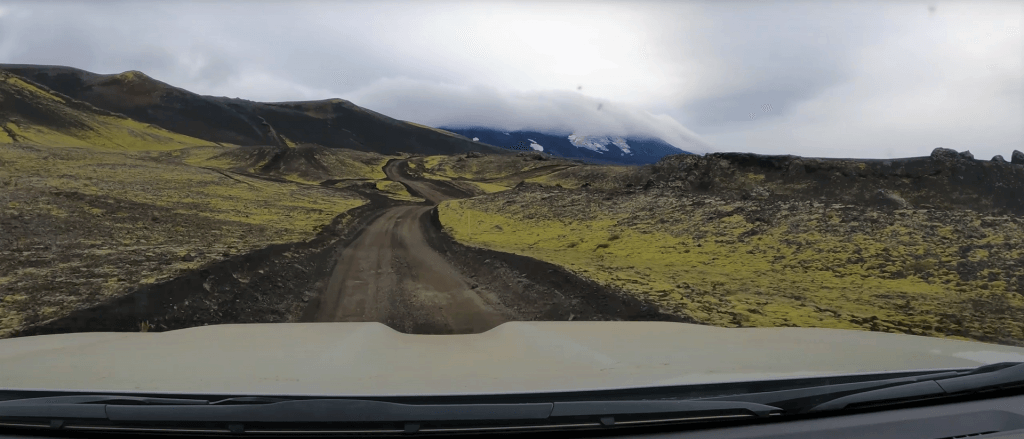
3. The ascent towards Baldvinsskáli hut
The waterfall way ends with a little bridge and roughly marks the first third of the Fimmvorduhals hike. The next part is the most boring one – the first part of the ascent towards Baldvinsskali hut. For around 40-50 minutes there’s pretty much nothing to see and you just have to walk up the gravel road where emergency vehicles can drive to Baldvinsskali hut.
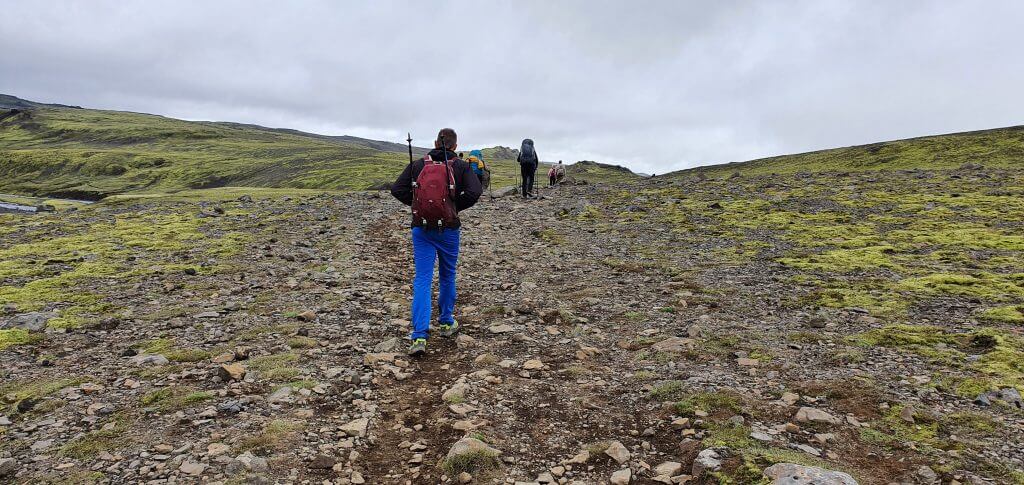
The most boring part of the Fimmvorduhals hike – right after the end of the waterfall way
Then you will reach the area where nice views start to slowly appear – in good weather with good visibility of course. The combination of snow, gravel, and hills in the distance is very nice, though definitely not the best part of the hike. We soon spotted the Baldvinsskali hut in front of us, and, as expected, it was covered in a fog 🙂
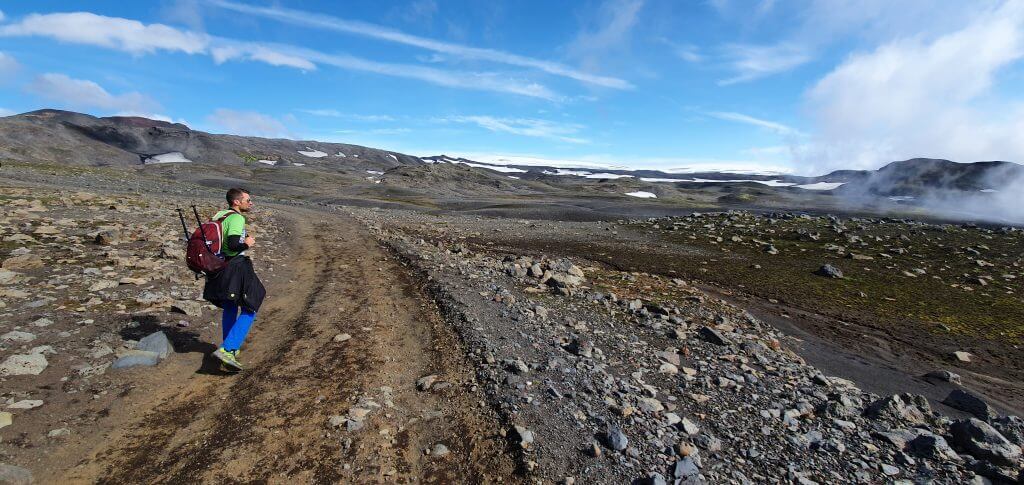
Fimmvorduhals trail just before the Baldvinsskali hut
This part of the hike took us around 1.5 hours to complete, still at a pretty quick pace, including a 10-minute lunch break. After 3.5 hours of quick pace, we were supposed to be already almost halfway through the entire hike. This meant, we decided to slow our pace and enjoy the scenery more and take more pictures.
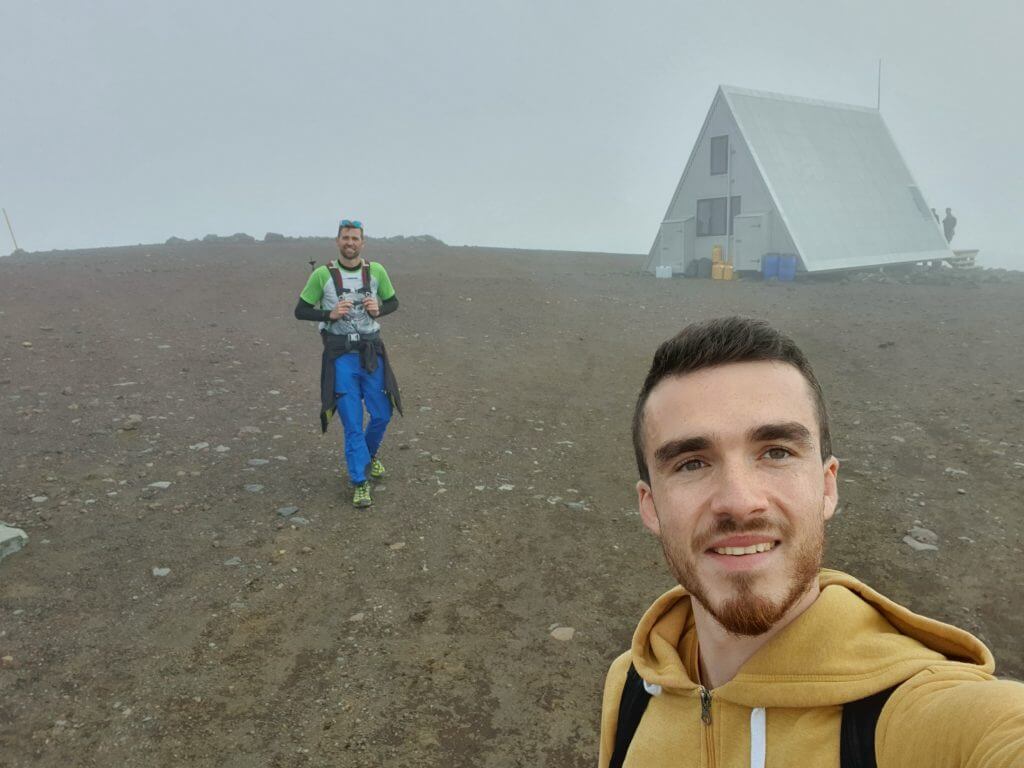
A very bad selfie (and our only picture) of us in front of the Baldvinsskáli hut in a total fog
4. Between the two glaciers
The middle part of the hike – between the Baldivnsskali hut and the Kattarhryggur pass is the most difficult one, yet I still think – not too difficult. This is also where the weather usually gets worse (more foggy, rainy, or windy). We were pretty lucky, though, to have nearly perfect weather with fog only on at a short part near the hut. This middle part is also the one where hiking poles do come in handy.
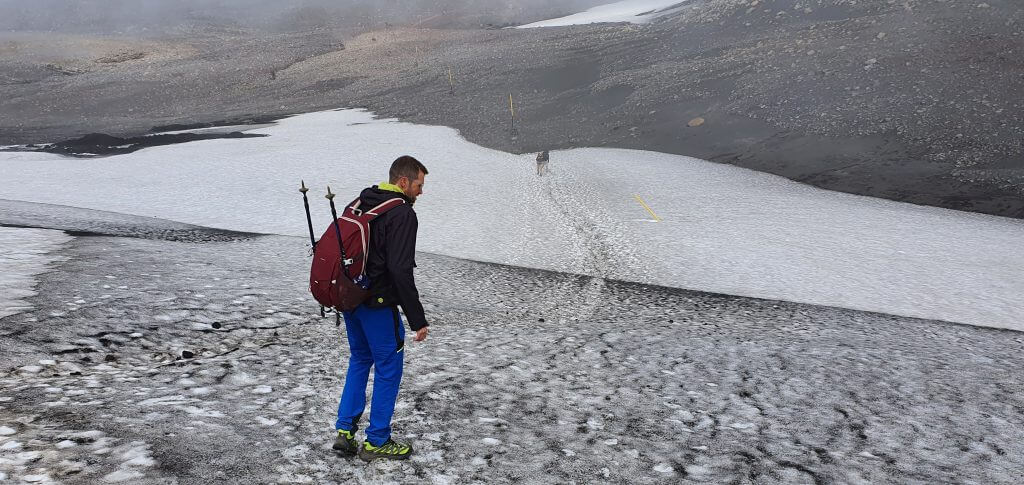
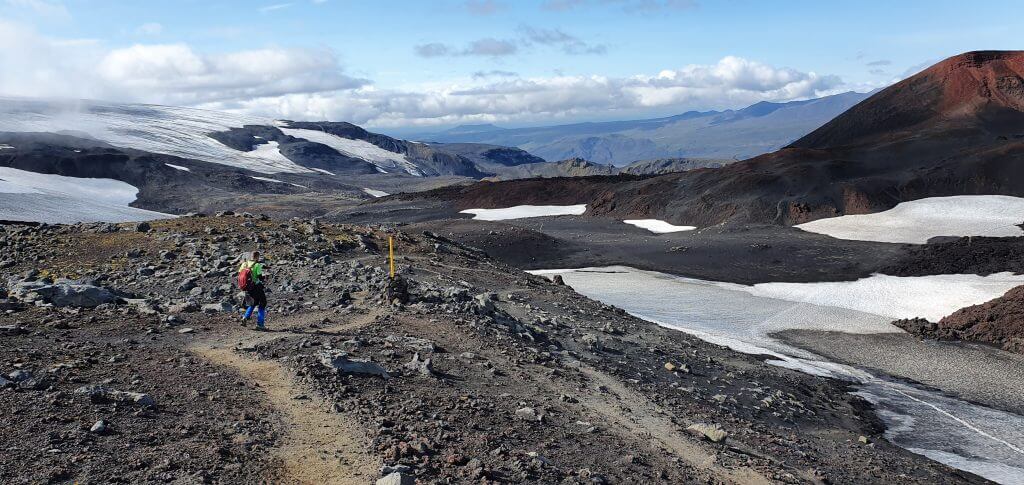
Right after the Baldvinsskali hut, first glacial snowfields of the Fimmvorduhals trail appear
The first snowfield appears right after the Baldvinsskali hut (coming from the Skogar direction) and in our case was pretty easy to walk on. Just remember we had no rain, no wind, and an occasional fog and sun. There are several other snowfields on a way towards the craters of Magni and Modi. None of the snowfields seemed difficult to us and crampons were useless in our opinion. If you walk carefully and follow the steps in the snow (in case they are there), you shouldn’t have a problem crossing the fields. This part of the hike really felt like “ICEland” thanks to all this snow even in the middle of the summer.
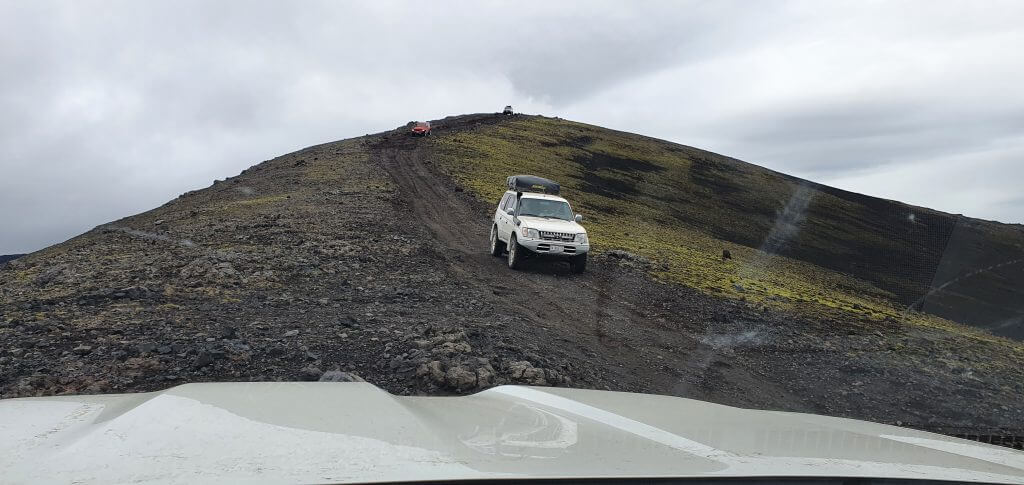
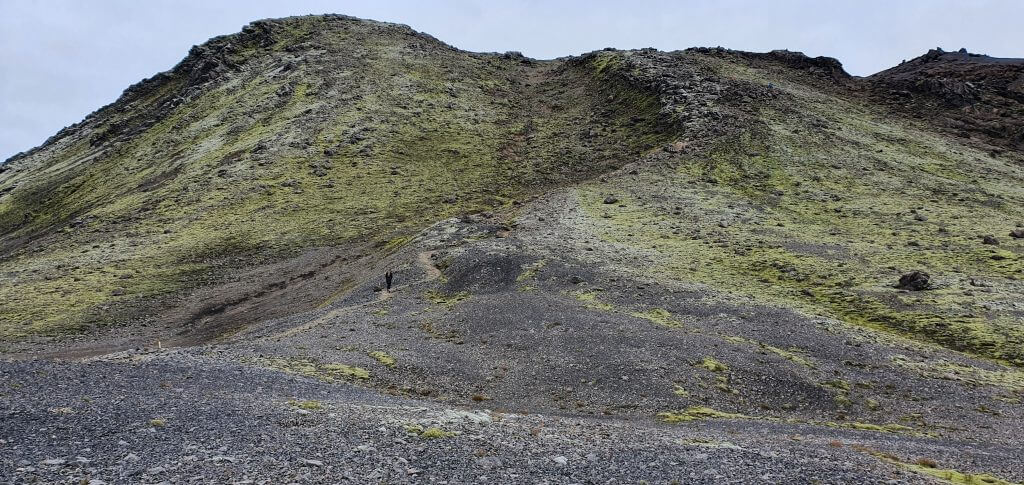
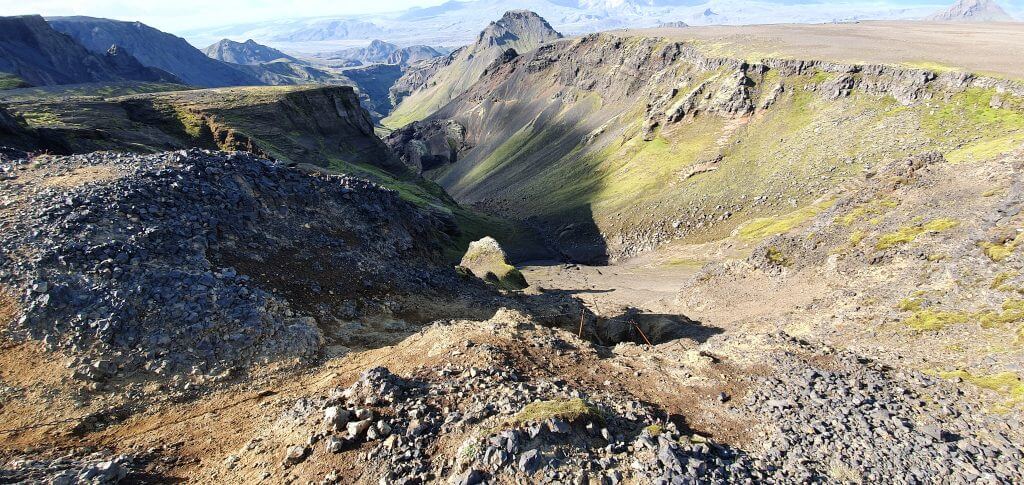
5. The most difficult part of the Fimmvorduhals hike
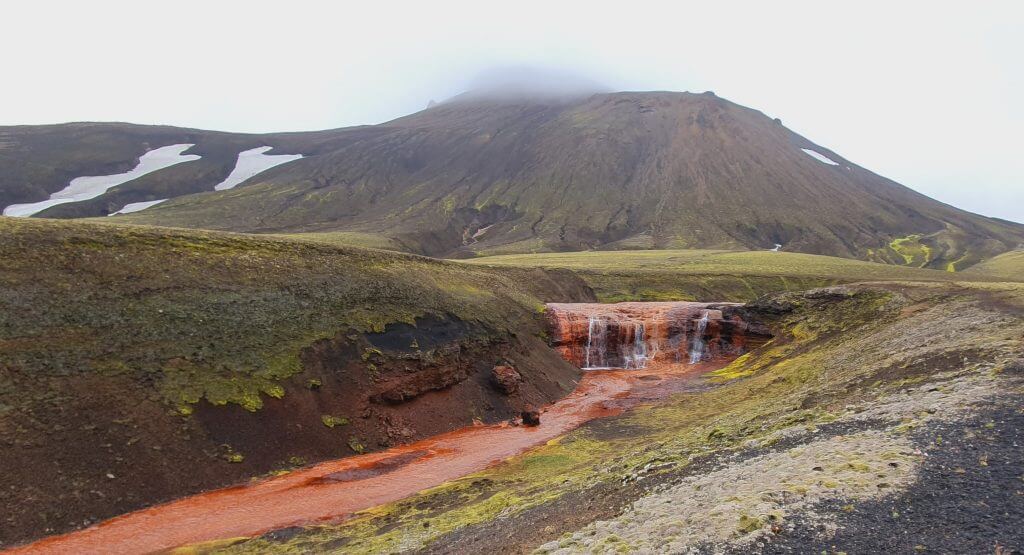
After a few snowfields, the most difficult part of the hike (at least for me) followed. We descended into the small valley full of ash, clay, and melting ice and snow. Firstly, we had to descend down through the slippery path consisting of ice and ash. It was unclear where exactly the path led and we had to find our own. OK, done. But next, we had to climb the very unpleasant hill. We had already seen several hikers in front of us struggling at this part and in a while, I completely understood why.
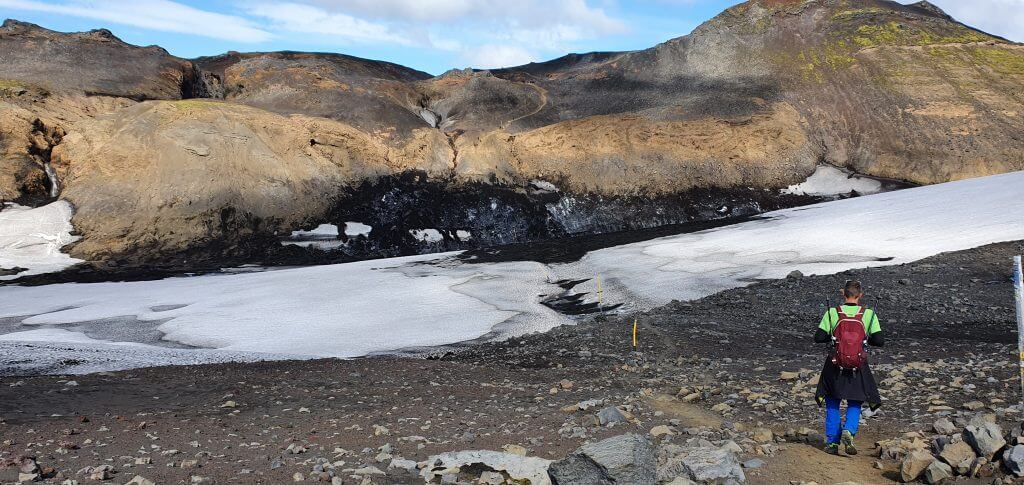
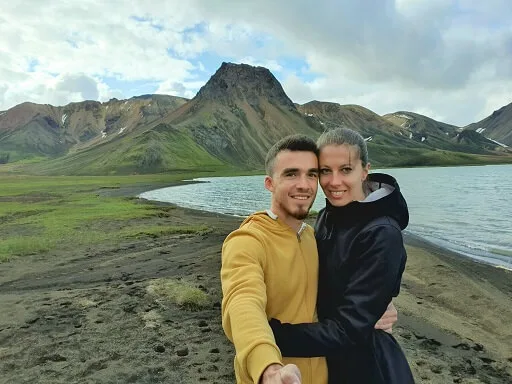
For me the most difficult part of the Fimmvörðuháls trail in front of us
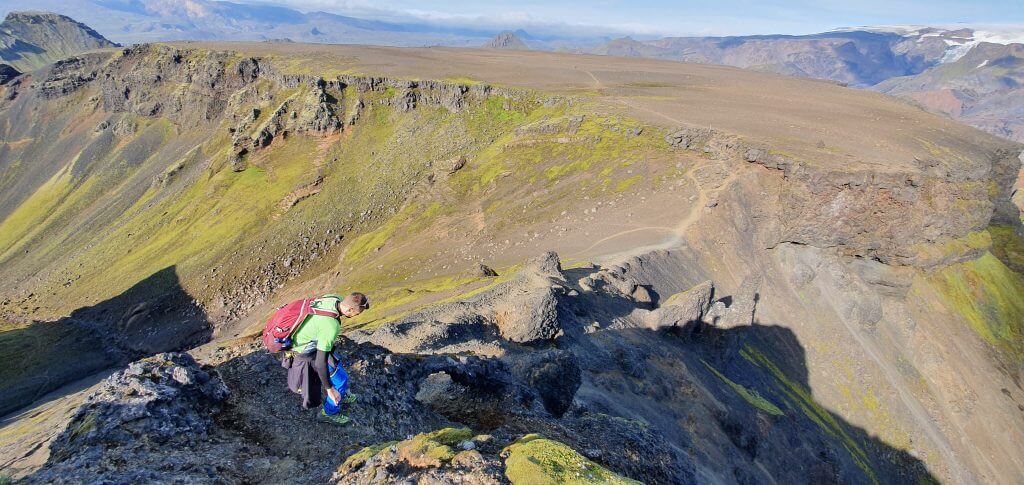
The hill in front of us was pretty steep and had a pretty bad grip. It reminded me of the slippery part of the hike to Bláhnjukúr in Landmannalaugar, but this one was much worse. This hill again consisted of black ash, melting ice, gravel, and clay. None of them was any firm and I felt like slipping and falling with each step. And this didn’t feel very pleasant given that you were on a steep slope. This part was the only one where I was a bit scared and which seemed dangerous to me. But that may be only me – I just hate places where I can’t stand firmly on the ground.
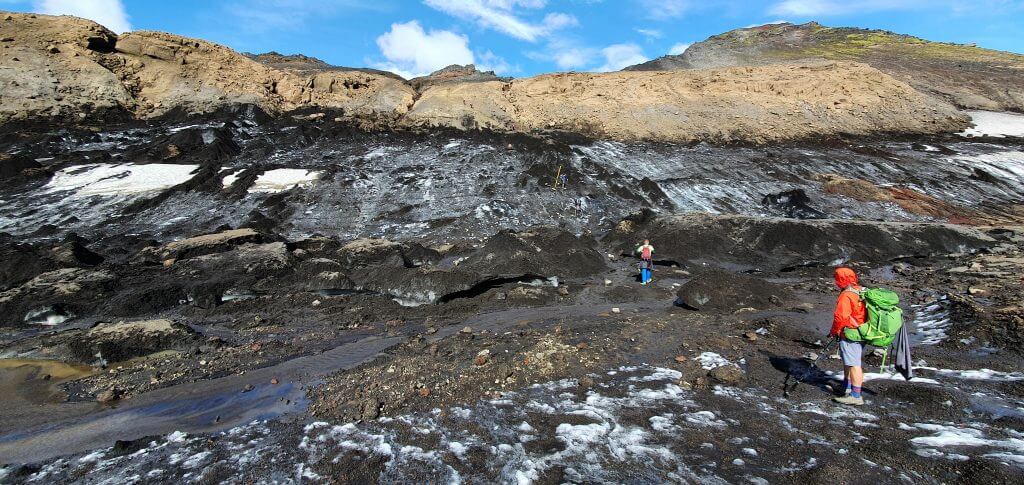
The steep and slippery trail made of ash and dry clay. Hiking poles saved my life.
Hiking poles literally saved my life at this part and thanks to them I was able to finish it without stumbling. I cannot imagine hiking this part in rain or strong wind, that must be terrifying.
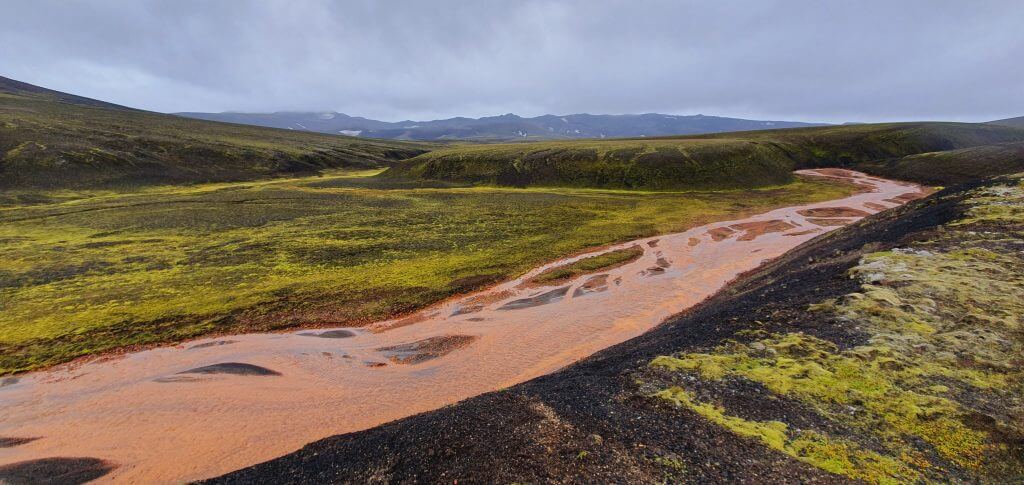
6. Almost two thirds into the hike
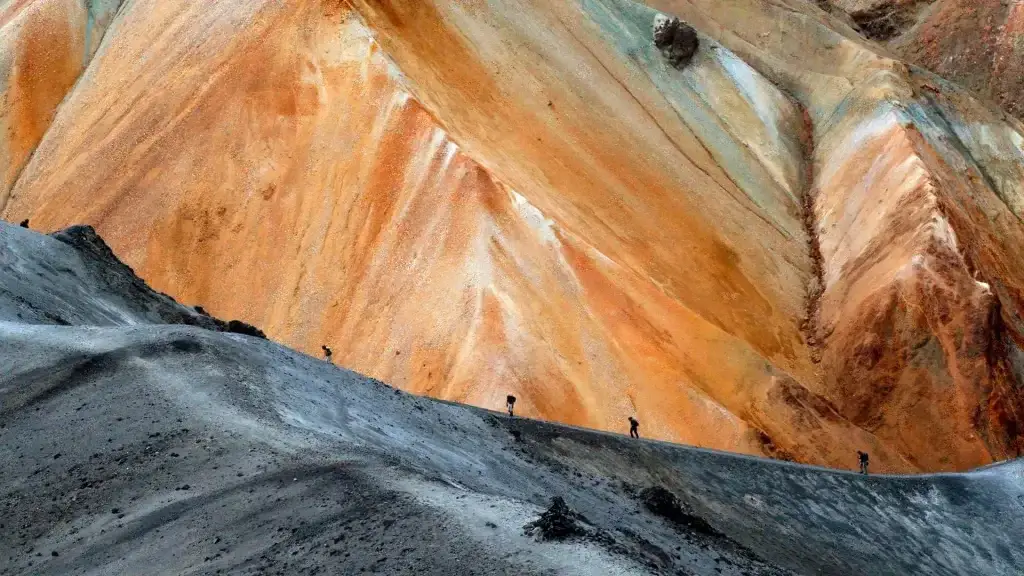
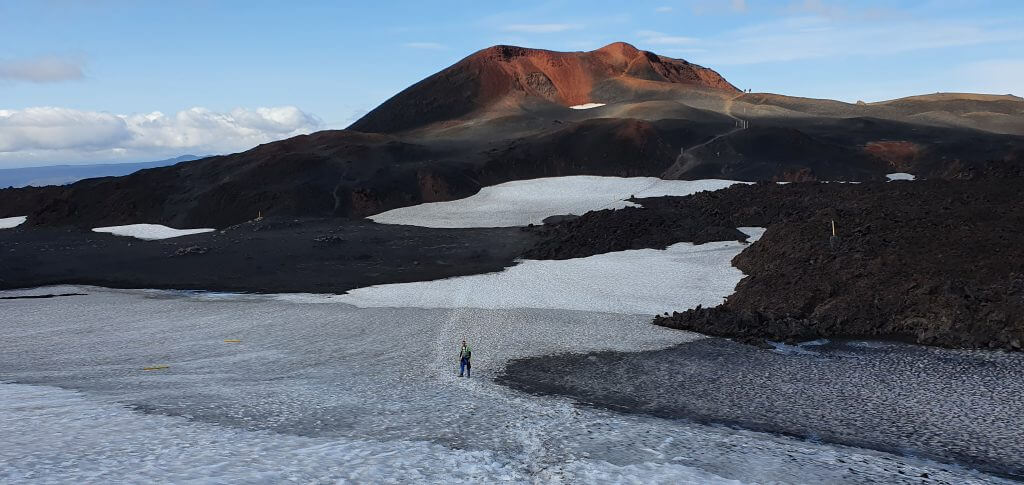
Afterwards, several lunar landscapes followed. Red ash, black ash, moon-like hills, really a once-in-a-lifetime experience. The terrain wasn’t difficult anymore at this part. The only spot where we were slightly confused was a crossroad where you had to decide to go on a big snowfield or climb through big black lava stones. We decided to go for the stones and then followed to the nearest yellow stick-mark.

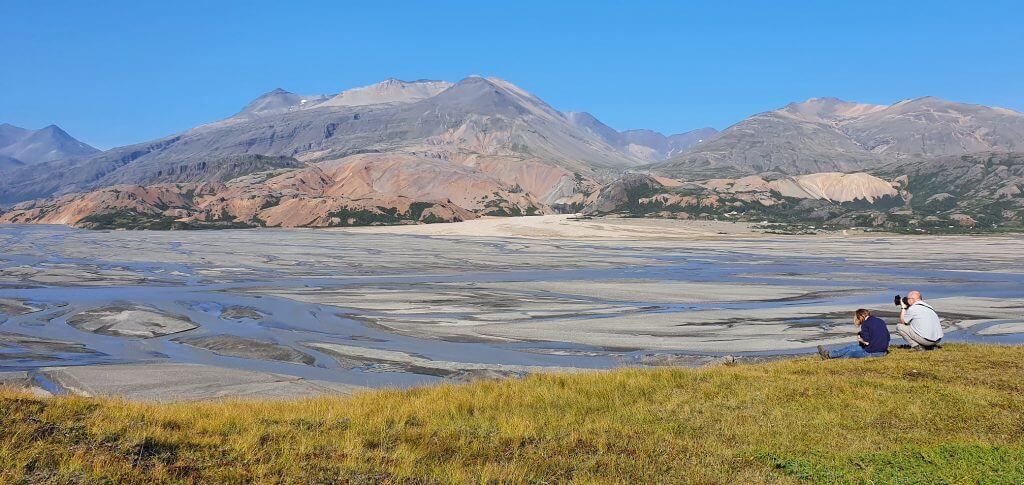
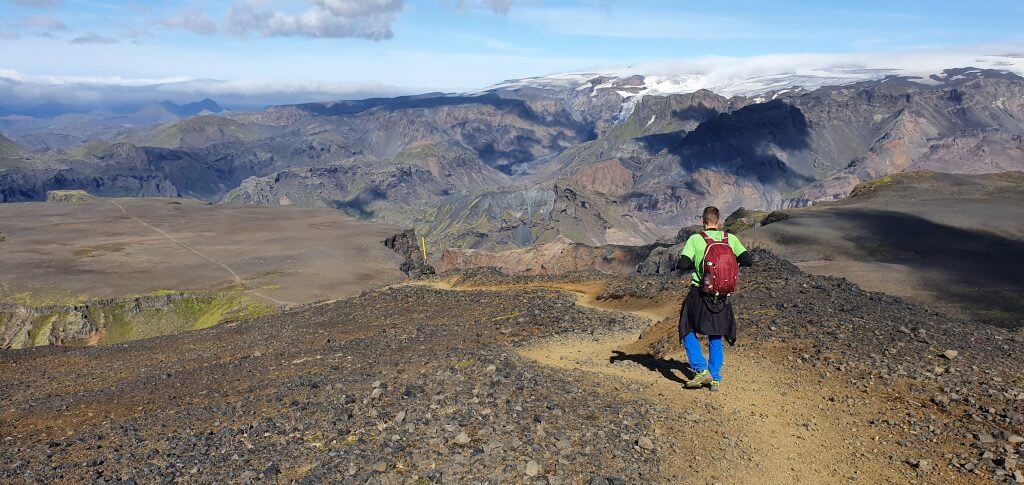
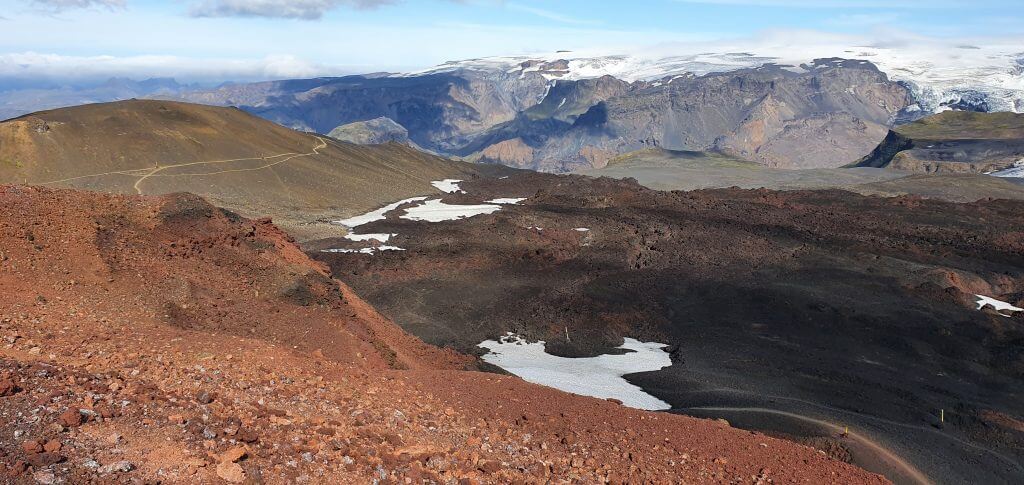
For me one of the 3 most beautiful parts of the Fimmvörðuháls hike
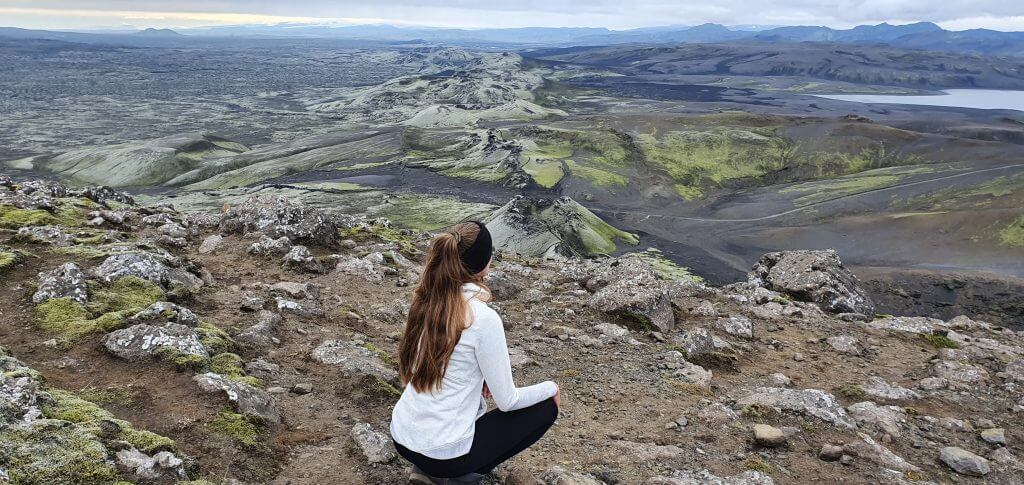
What follows is a beautiful picturesque lunar area around the craters of Magni and Modi. The views are getting better at this part and in nice weather, you are able to already see a bit into Thorsmork valley as well as into the other beautiful valleys in the distance.
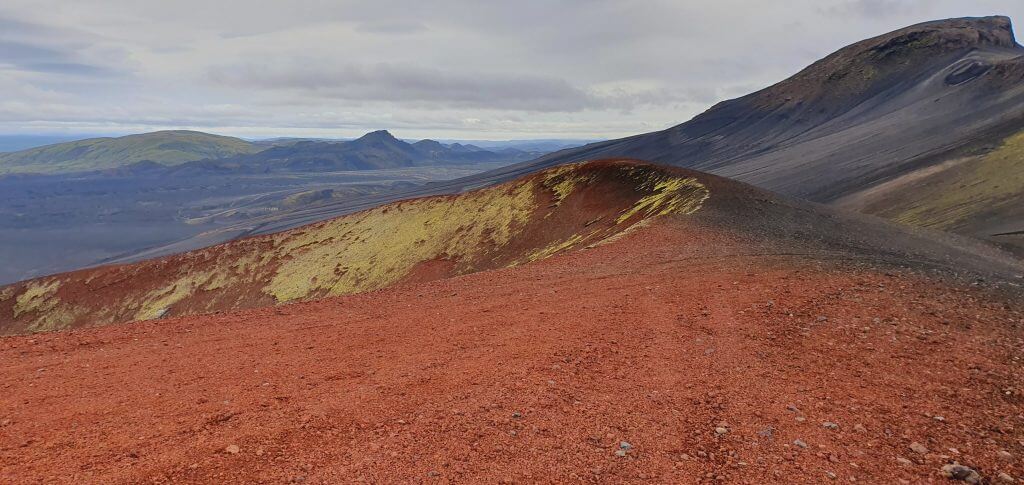
7. Magni and Modi craters
If you have time, definitely go for the little detour up to the Móði crater. It takes less than 10 minutes to reach the top (turn left in the direction of the red peak, coming from the Baldvinsskali hut).
Unforgettable views from the peak of the Móði crater
If the visibility is good, views from the top of the Móði crater are entirely stunning. 5 hours have passed and we were already two-thirds into the entire hike, so we took our time and stayed for a while on top of the Móði, enjoyed the views, and slowly descended back.
One of the highest points of the Fimmvorduhals hike with stunning views
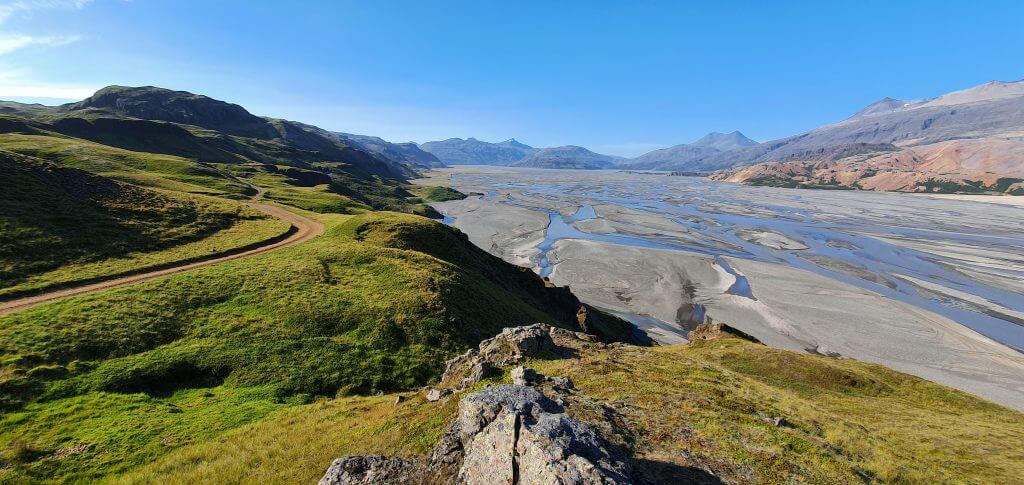
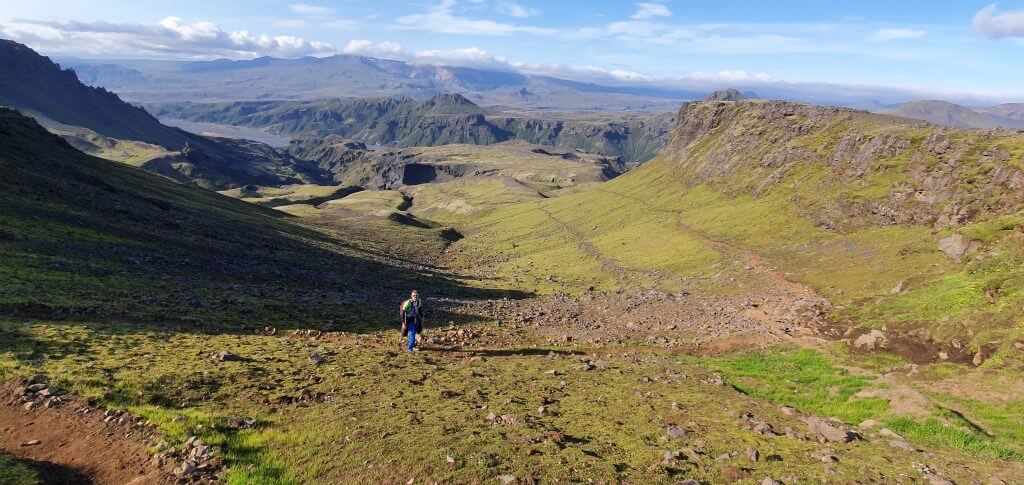
Shortly after reaching Magni and Modi craters, the magnificent Thorsmork valley starts to reveal itself in front of you. This was one of my favorite views of the entire hike. A huge green valley, mountains, rivers, and different valleys are everywhere in the distance. From this point onwards, only the descent follows – no more climbs 🙂
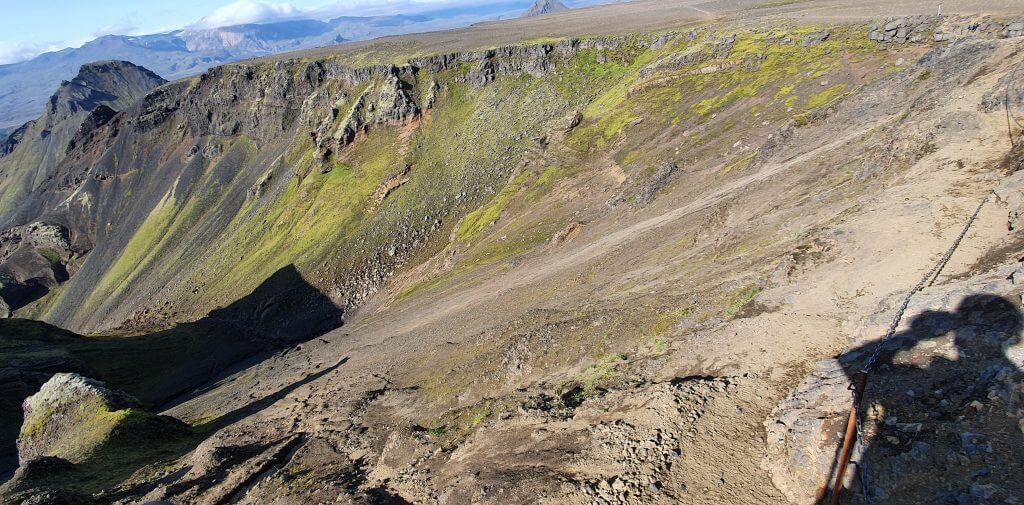
8. The only chains of the hike
The only chains at Fimmvörðuháls trail
As you approach Thorsmork, views are getting better and better. Eventually, we reached the only technical passage of this part of the hike – chains. The descent continues next to the steep ravine and to make it more safe chains were tied into the nearby stones. Take care though, some of them are moving. This passage is a little bit scary when looking at it but otherwise isn’t dangerous because you just walk on the firm flat ground, holding onto chains (and the ravine is below you).
This is the wrong way. The right path leads to the left via chains.
My friend mistakenly took the wrong way and had to literally jump a bit from the cliff to be able to proceed. Do not take this way, it’s dangerous. After seeing him struggling, I took the right path described above. Chains are the right part. Take chains.
The part many find the most dangerous. Not me. Chains to the right, valley to the left.
These chains at Fimmvorduhals are the part many people described as the scariest one. I definitely didn’t think so. The worst part for me was the one in the middle of the hike with slippery ash and clay without any chains.
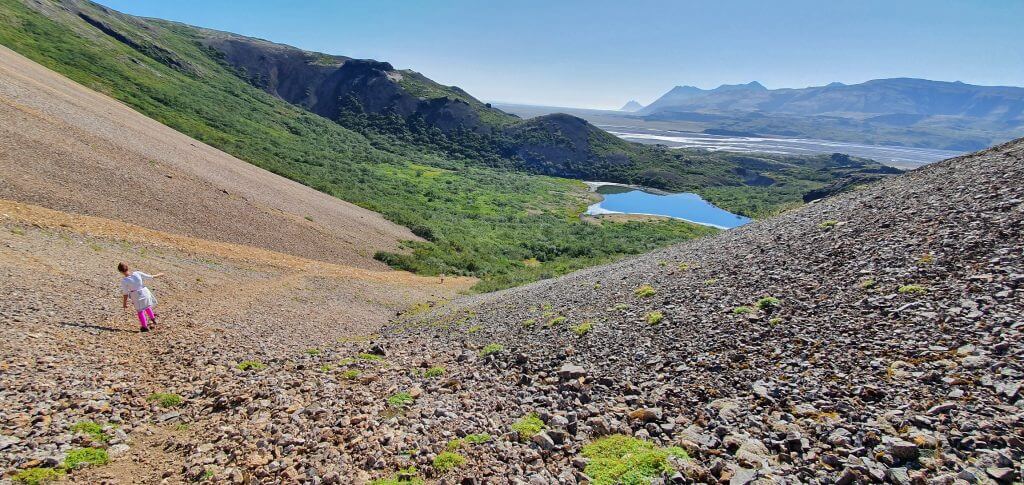
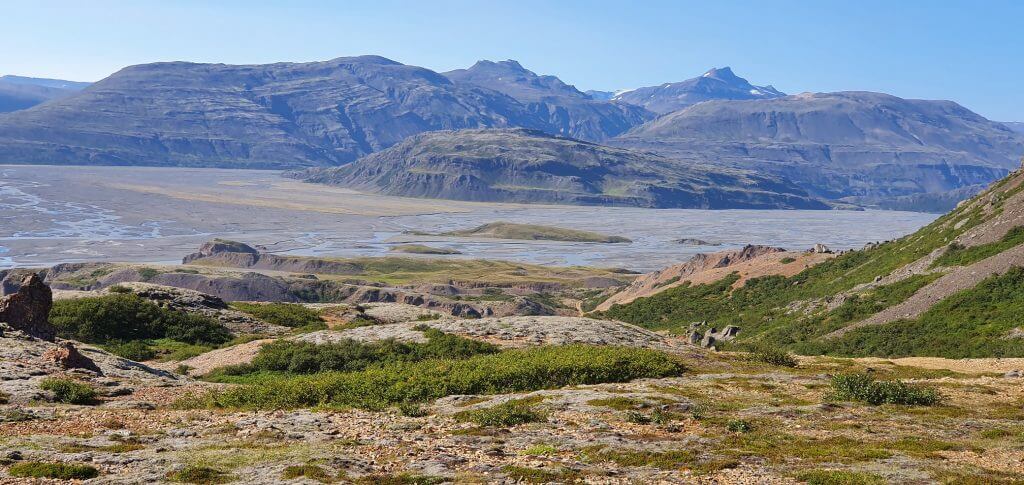
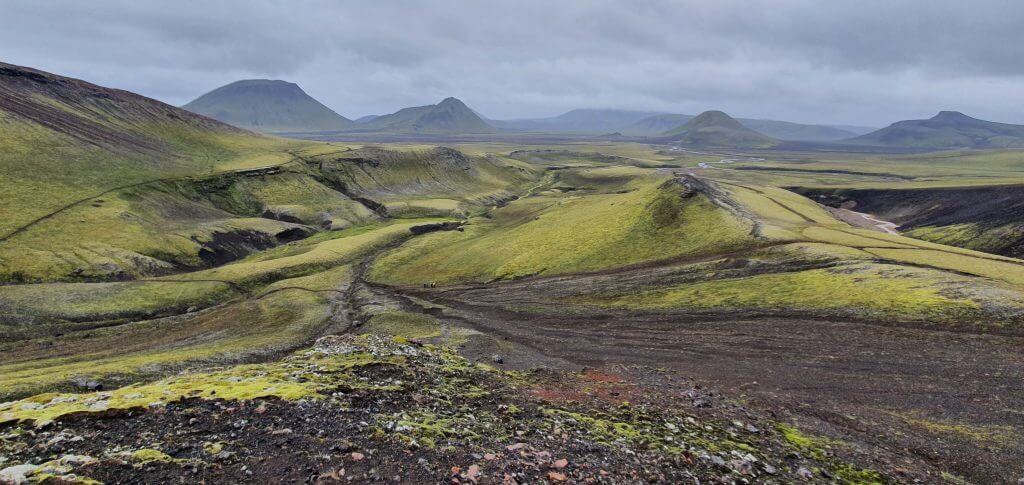
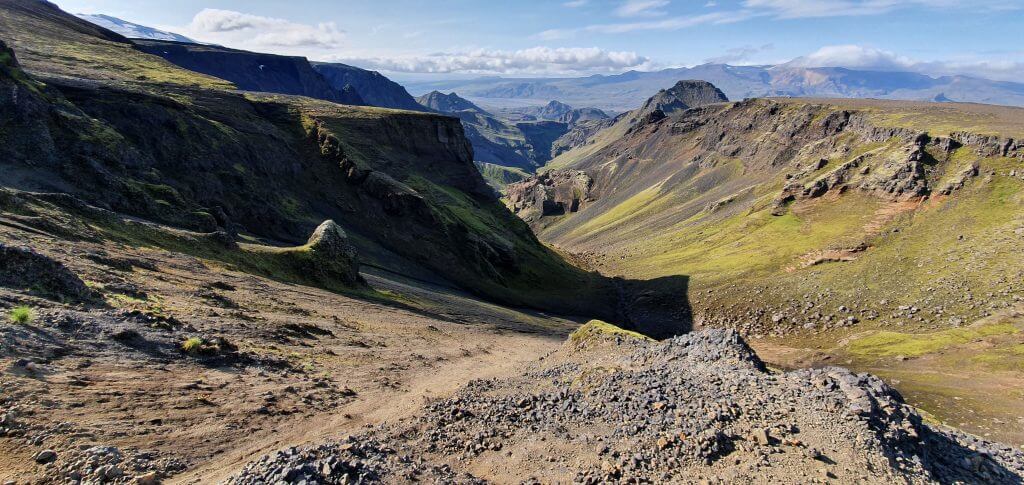
9. Thorsmork valley descent
Views of Thórsmörk from the final part of the Fimmvörðuháls trail
The final slightly technical part of the entire hike is the famous Kattarhryggur, or “cat’s spine” pass. It’s a narrow pass where there’s a steep ravine both on your left and on your right. There are no chains, but the pass is pretty flat with firm ground. Unless the weather is very windy or otherwise unpleasant, hiking this part shouldn’t be any problem.
A famous Kattarhryggur (cat’s spine) pass was not that bad in a beautiful weather
The gradual descent into the Thorsmork valley continues afterward. Huge green areas with views towards Thorsmork, Krossa river, and its arms. We made roughly a 1-hour long break before Kattarhryggur to admire the surroundings and arrived down at the Basar hut at 7 PM. Without the break, the hike would take us 8 hours at a medium-to-quick pace, including photo pauses and short food pauses. Our bus was supposed to leave from the Basar hut so we stayed at Basar and waited for it.
Coming back
If you have time, energy, or you simply don’t go for the bus from Basar, you may continue on foot to other campsites which are further away. The closest one is the Langidalur campsite (another bus stop), which is roughly 30 minutes by walk from Basar. And then there’s also the Husadalur campsite with well-known Volcano huts, which is another 20-30 minutes by walk from the Langidalur campsite. We took the bus from Basar to Hvolsvollur (and my friend to Reykjavik) at 8 PM and ended our beautiful day.
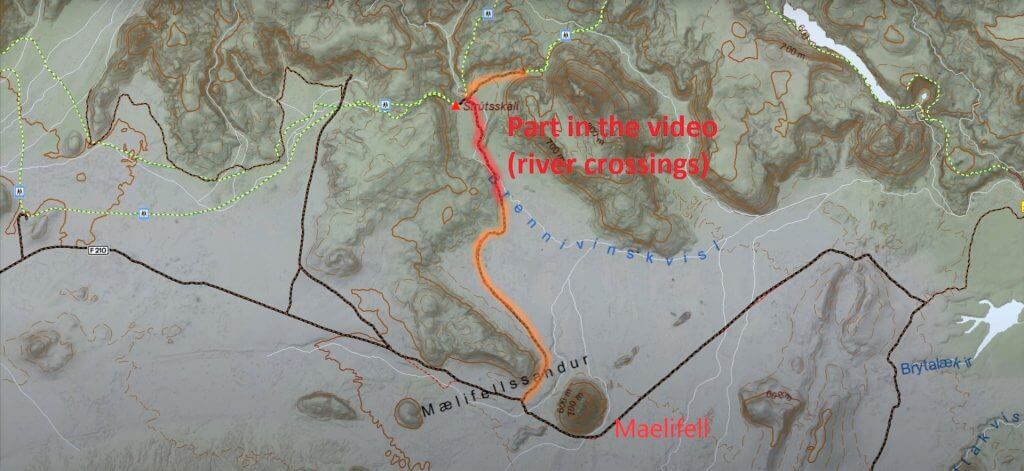
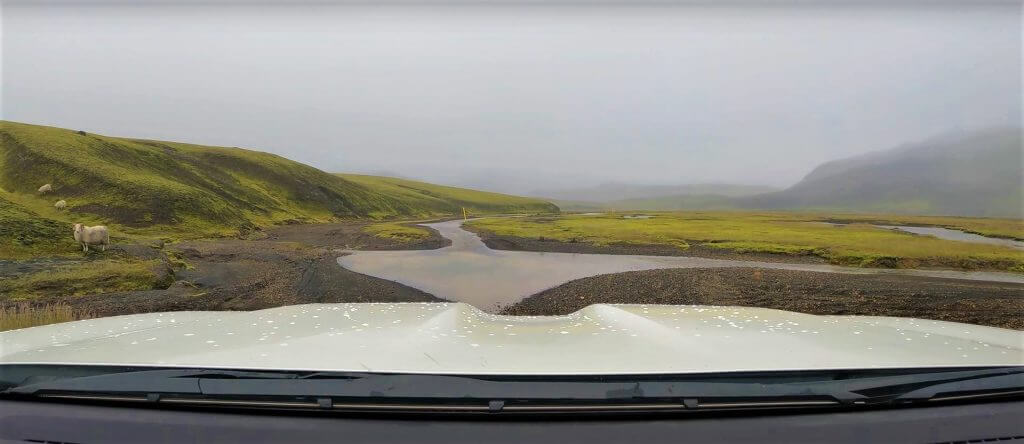
Fimmvorduhals hike Videos
YOU MAY ALSO LIKE:
 ask questions or get inspired in our community