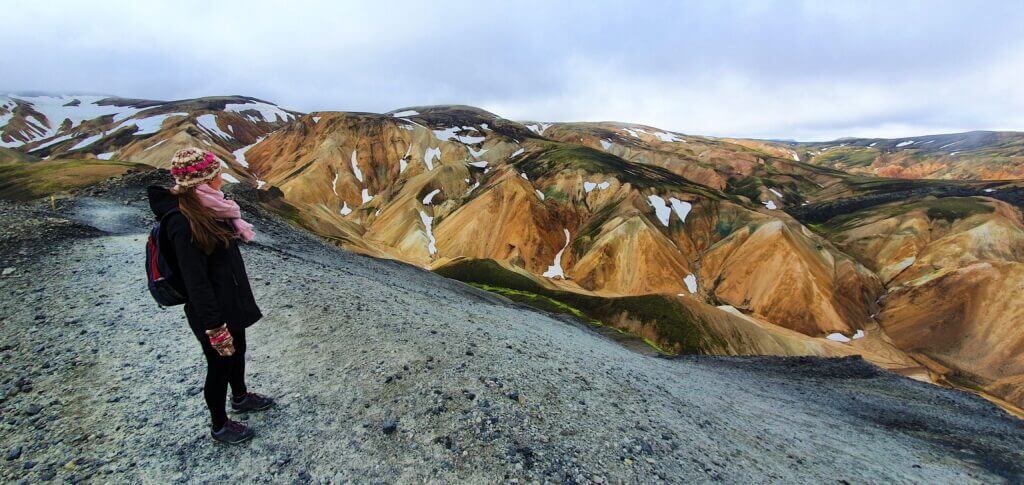
What is the best hike in Landmannalaugar? When to visit it and how to get there? These are the question we asked when visiting Landmannalaugar for the first time. Below we describe what we think are the most beautiful hikes in Landmannalaugar.
We have visited Landmannalaugar many times and explored all the hikes. That’s why we decided to create the most detailed guide for first-time visitors you can possibly find. Let us know in the comments if we were successful!
How to get to Landmannalaugar?
Landmannalaugar is located in the Fjallabak Nature Reserve, in the southern Highlands of Iceland.
You can get to Landmannalaugar by car, by bus, or by a super jeep tour. Highland Buses (5% discount code: in our newsletter) run only during the main season, typically from mid-June until mid-September. Outside of the main summer season, it’s highly recommended to take the super jeep tour instead. The roads leading to Landmannalaugar are often full of snow and impassable at that time.
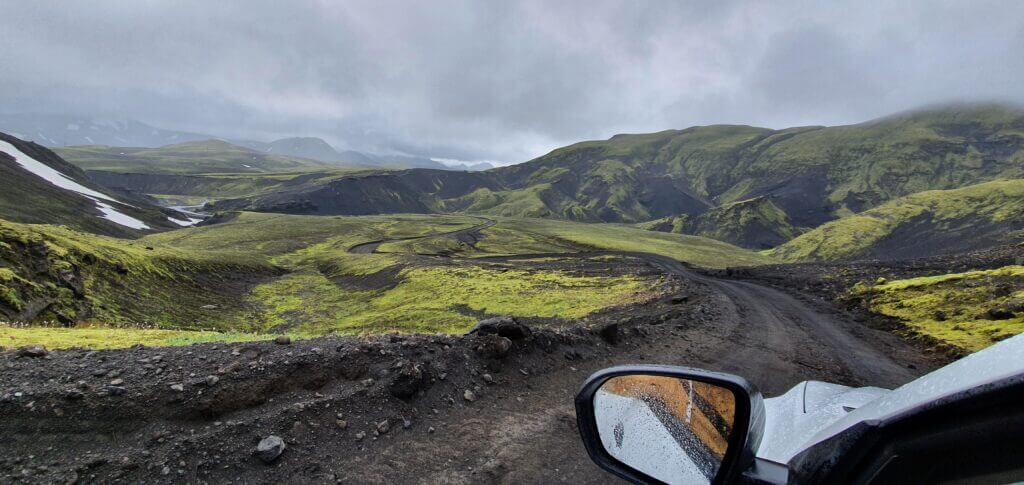
Landmannalaugar by car
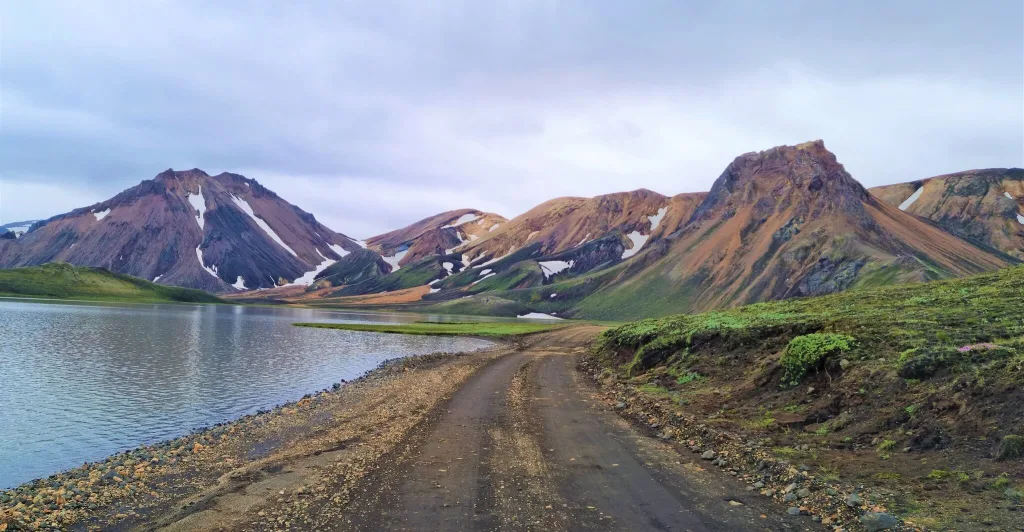
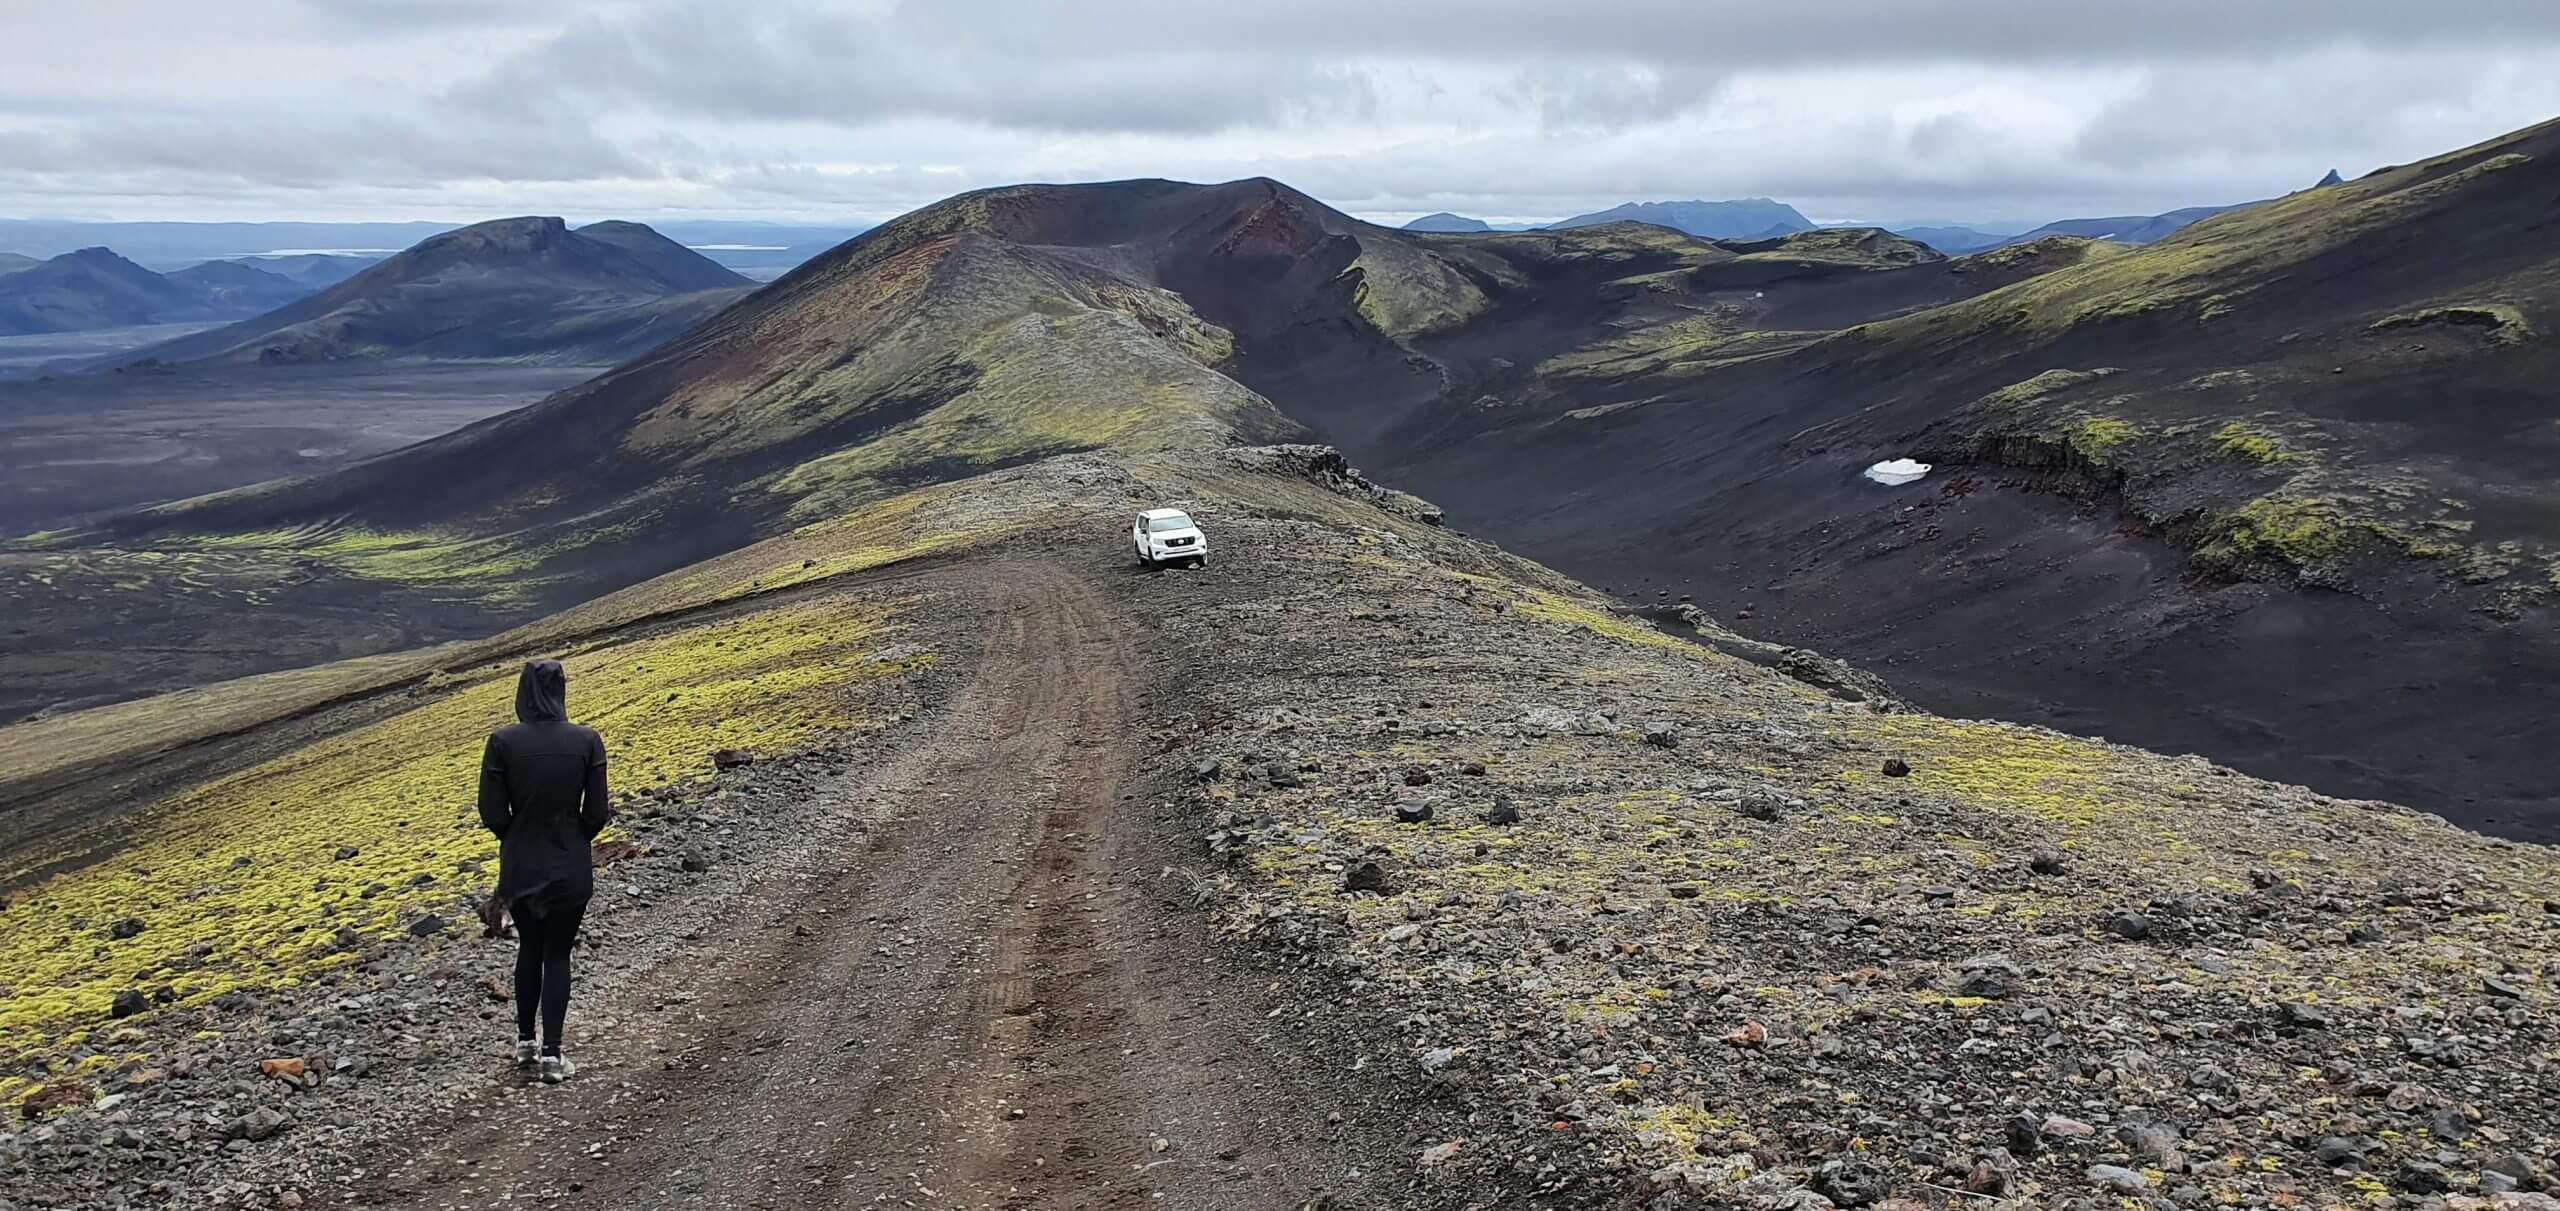
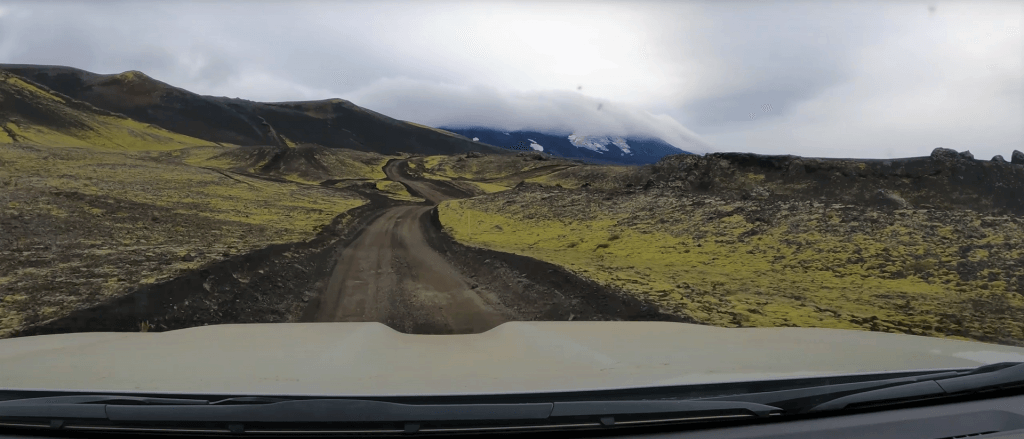
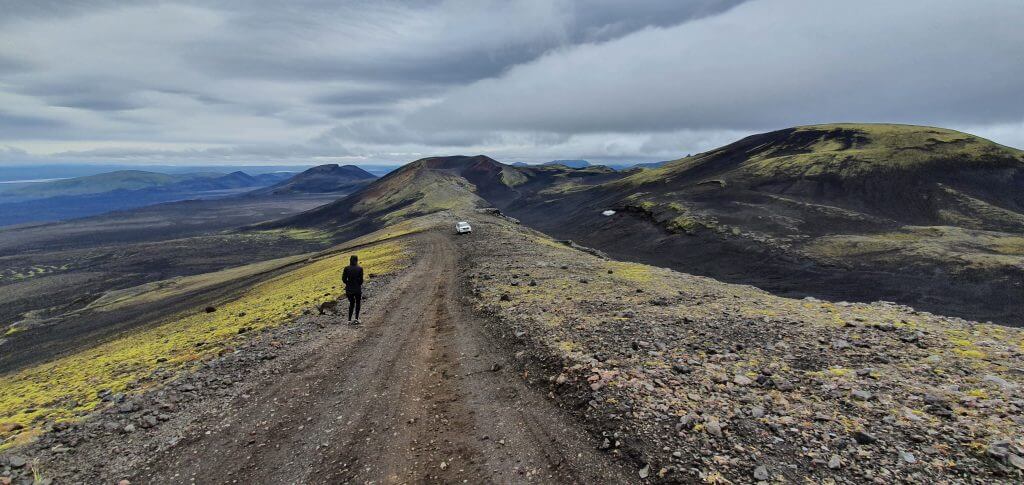
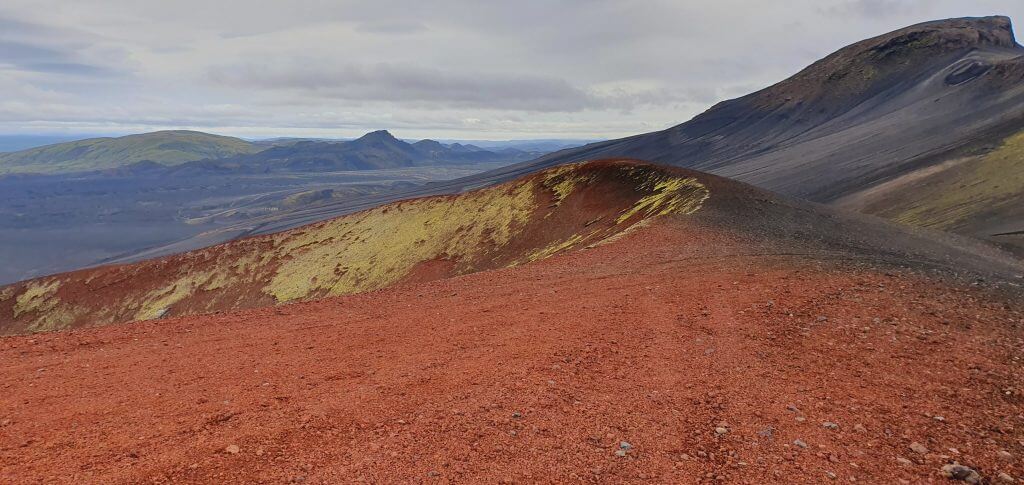
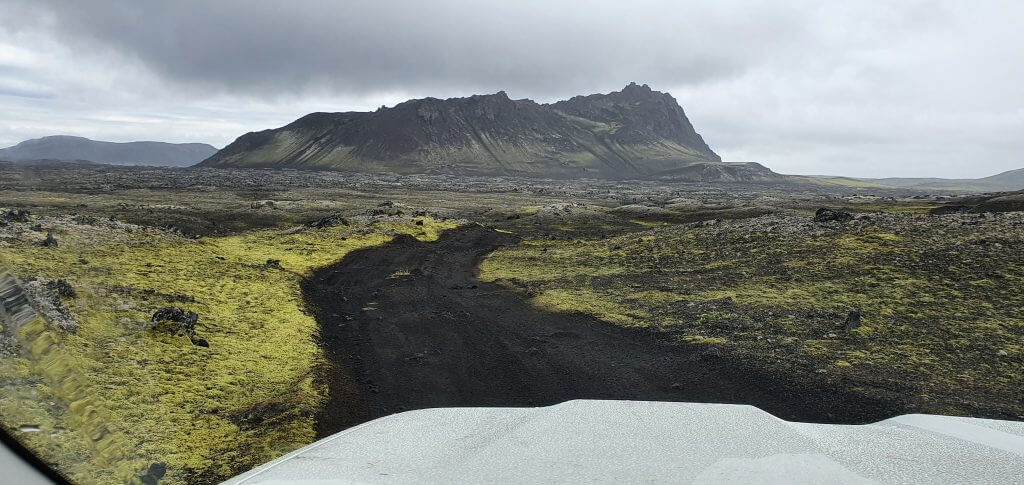
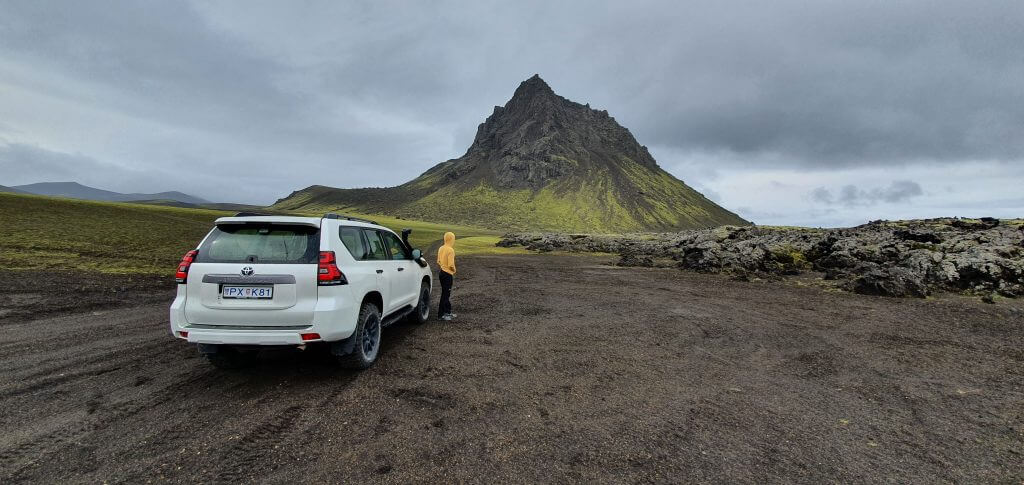
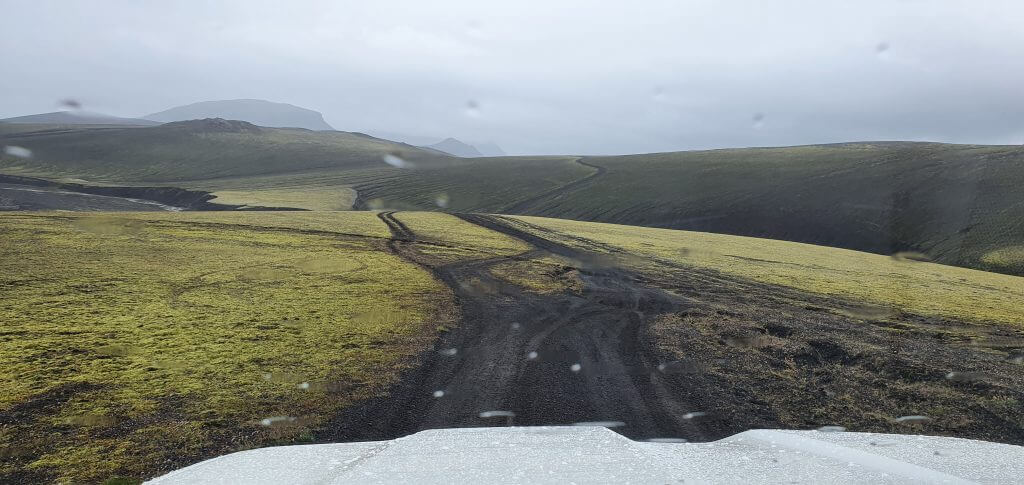
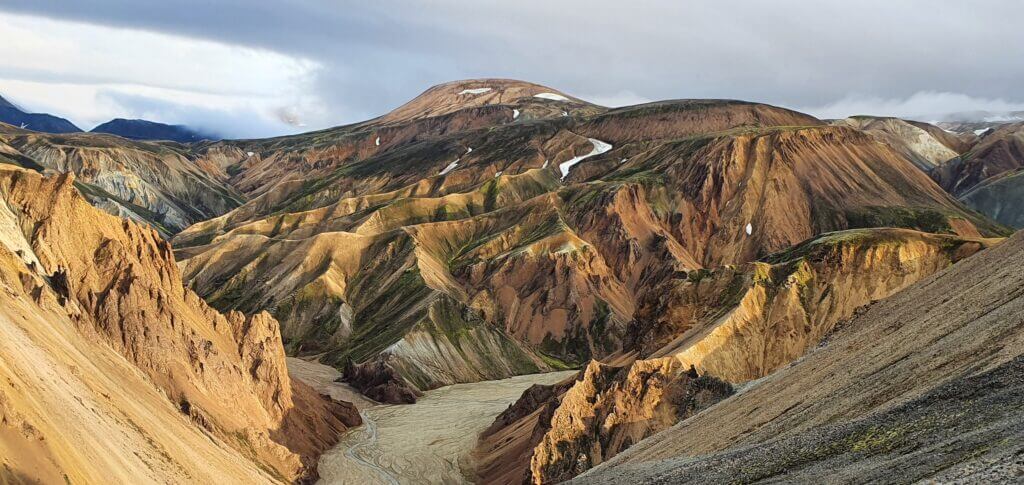
Amazingly beautiful roads around Landmannalaugar
How to get to Landmannalaugar by car? You have 3 options on how to reach Landmannalaugar. You can either take the southern route (the most beautiful and difficult), the western route (something in between), or the northern route (easiest).
Firstly, you can drive to Landmannalaugar only when the roads leading there are open. Roads to Landmannalaugar typically open in June and usually close in September. This can vary depending on the toughness of the past and the upcoming winter. Secondly, you need to rent a 4wd car to reach Landmannalaugar.
1. From the south (Road F208)
The southern road to Landmannalaugar is the most difficult and also the most beautiful one. The route leads via an F-road called Fjallabaksleið Nyrðri, or southern F208. This is one of the most beautiful F-roads in Iceland. There are several small and medium-sized river crossings along the way. Dacia Duster or a medium-sized 4wd car is a minimum for this road.
F208 south is our favorite road to and from Landmannalaugar. It’s a once-in-a-lifetime experience to drive it. There are also multiple wonderful detours along the road like Eldgjá or F235 towards lake Langisjór. Take a proper car, study the proper river crossing techniques, and go for it! If you don’t feel like doing these things then take an easier road or a guided tour.
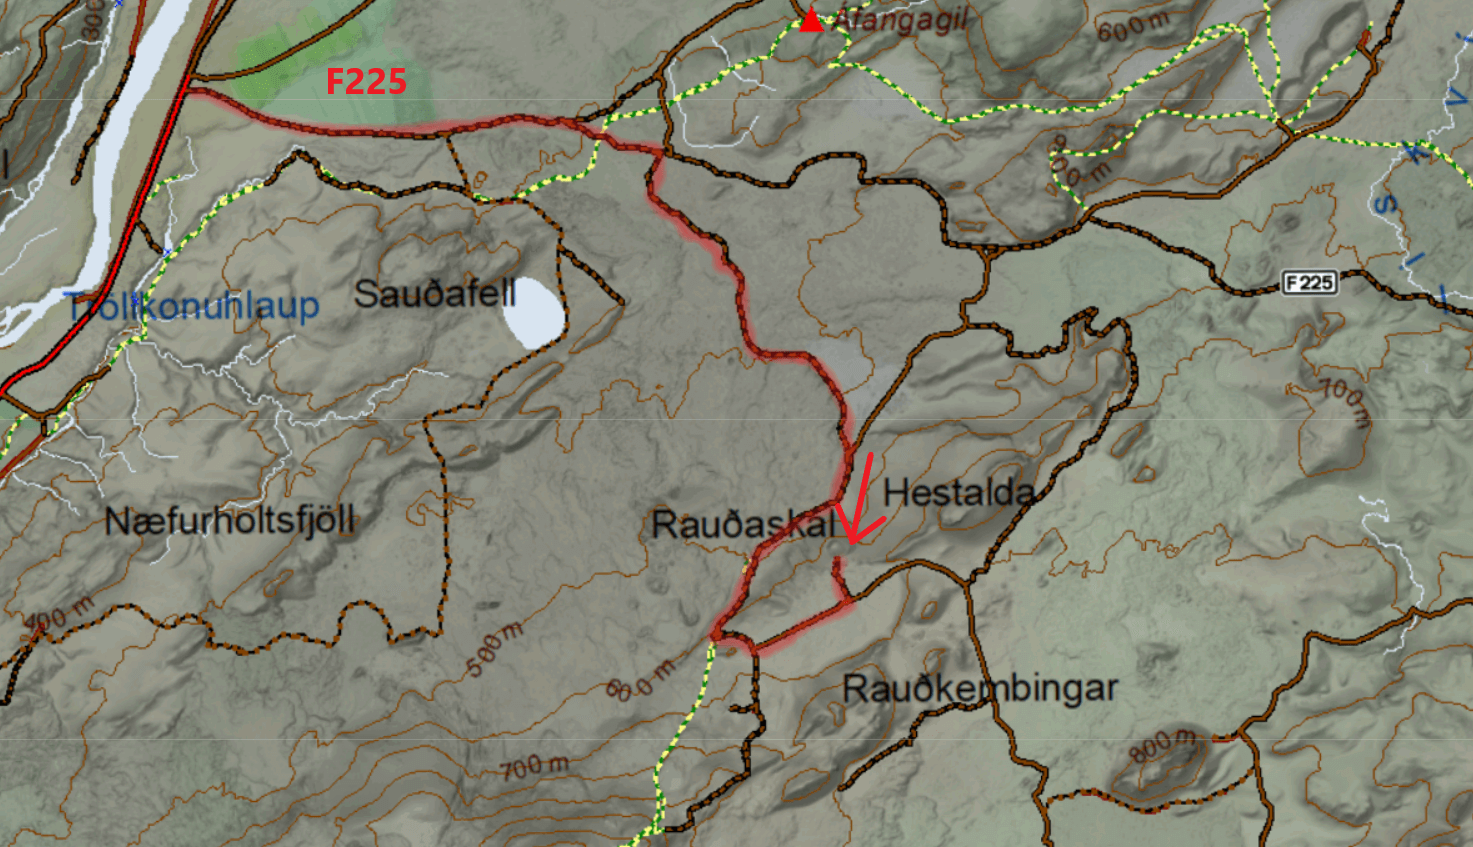
2. From the west (Road F225)
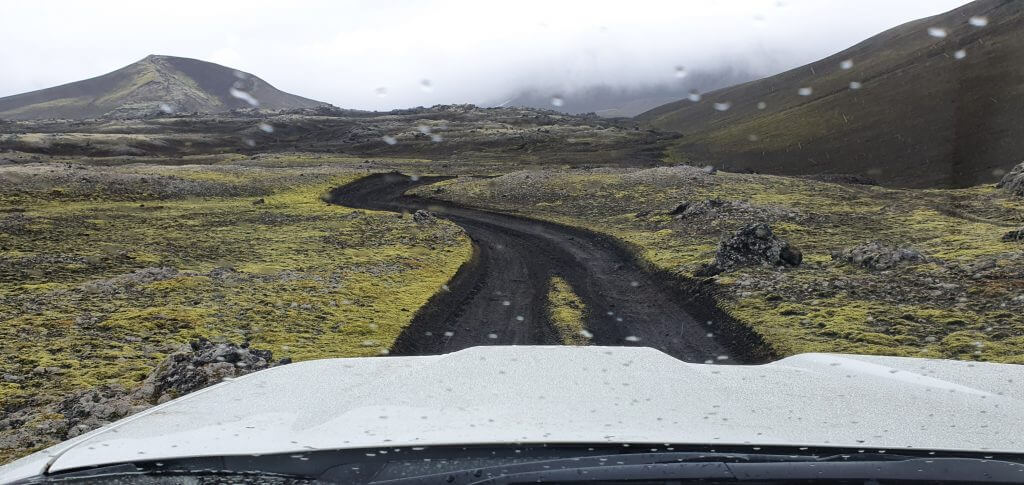
The western route to Landmannalaugar is a good compromise between the beauty of the surroundings and the difficulty of the road. To get to Landmannalaugar from the west, you have to take the paved road 26 and then turn east to an F-road called Landmannaleið or just F225. This is one of the easiest F-roads with one small-to-medium river crossing. This river crossing is great for practice because it’s quite easy to pass.
The road F225 is also the quickest option to drive to Landmannalaugar. The road is shortest by distance and the quality of the road is alright, with no major obstacles. Even Icelandic buses use F225 to drive to Landmannalaugar! The surroundings of Landmannaleið are picturesque and much nicer compared to northern road 208.
3. From the north (Road 208)
The northern road to Landmannalaugar is the easiest and the most boring one. There are no river crossings on this route, just the one final river crossing right before the Landmannalaugar campsite. Officially, you don’t even need a 4wd car for the majority of the route, only for the last part – road F224.
This route consists of driving via road 26, road 208, and road F224. Road 26 is paved and road 208 is a bumpy gravel road with pretty monotonous surroundings. We recommend taking this route only if you are really afraid about driving to Landmannalaugar.
4. Road F224
The last part of the road to Landmannalaugar is a short F-road Landmannalaugavegur or F224. It’s very bumpy and full of potholes, and there is one medium river crossing right at the end of the road, before the campsite. There’s also a car park before the crossing, so you may leave your car there and continue by footbridge to the campsite.
Landmannalaugar by bus
You can get to Landmannalaugar by bus from Reykjavik, Selfoss, or Hella. Buses run only during the main summer season, typically from 15th June until 15th September. See Landmannalaugar bus schedules below. Two main Landmannalaugar bus companies are running the so-called Highlands buses:
The main disadvantage of the buses is that they typically arrive at Landmannalaugar at lunch and leave around 4 pm or 6 pm at the latest. This means you will have only around 4 to 6 hours to explore the area if you want to come back the same day.
Don’t want to go on your own? Take an epic Landmannalaugar super jeep tour! 10% discount code: EPICICELAND10
Landmannalaugar by guided tour

Landmannalaugar super jeep tour by Midgard Adventure, 10% discount code: EPICICELAND10
There are 3 types of guided tours going to Landmannalaugar:
So which one is our personal choice number one? The most authentic way to reach Landmannalaugar is to take a super jeep tour. The experienced local driver will take care of everything and you can just sit and take pictures on the seat of a huge super jeep with a snorkel.
There are many Landmannalaugar super jeep tours, but if we have to recommend just one, it would be a super jeep Landmannalaugar tour by Midgard Adventures. They are a small, local, family company, with 5* reviews only. Their guides are funny, personal, and knowledgeable and their jeeps are majestic. Our readers can also enjoy a 10% discount on all tours by Midgard Adventure with the discount code: EPICICELAND10
There are also many stunning places in the Highlands that are lesser-known than Landmannalaugar.
Parking in Landmannalaugar in 2025
Beginning June 20th, 2024 there’s a new parking reservation system in place in Landmannalaugar. You have to reserve your parking spot in advance when arriving at Landmannalaugar between June 20th and September 15th, 2025, between 8AM and 3PM. Otherwise you may be denied parking.
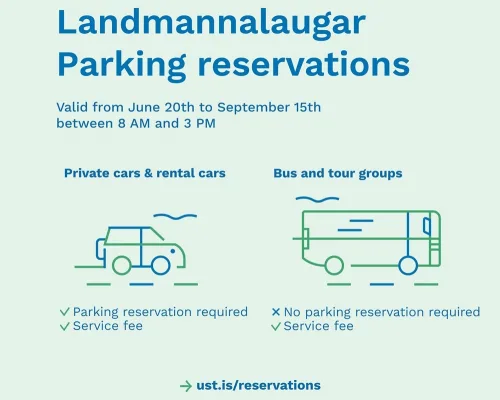
You have to reserve your parking spot in Landmannalaugar between 8AM and 3PM.
You can reserve your Landmannalaugar parking space here.
The reservation is compulsory for any type of a private or rental car. It’s not necessary for guides and bus tours.
This system is a pilot program and has been introduced only very recently (spring 2024) due to parking chaos that ocurred during the summer season of 2023 in Landmannalaugar.
When to go to Landmannalaugar?
The best time to visit Landmannalaugar is during summer. More specifically, from mid-June until mid-September. This is when roads and hiking trails are typically open. If winter is too strong, roads can sometimes open as late as the beginning of July. On the other hand, if the winter is really mild, roads can open as soon as the end of May. Then they typically close anytime between the beginning of September and mid-October.
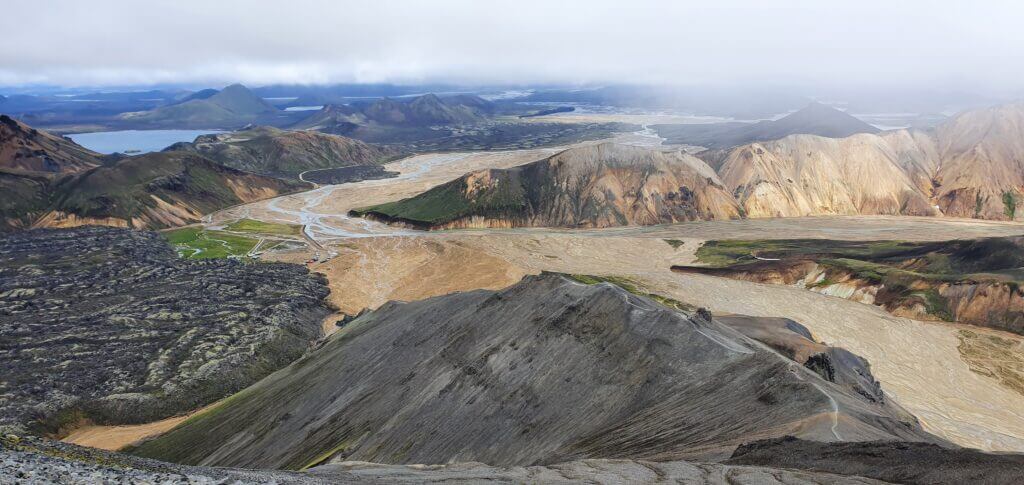
Sunny summer view over Landmannalaugar from the peak of Bláhnúkur
Landmannalaugar in summer
Summer is the only time when you can drive to Landmannalaugar on your own or catch a bus to Landmannalaugar. It’s also a time when you can safely hike in Landmannalaugar because the hiking trails are snow-free. Last but not least, the colors of Landmannalaugar are most beautiful exactly in summer, or on the edge of spring/summer or summer/autumn.
Summer weather in Iceland is usually the most merciful. There’s much more to say about Icelandic weather though. In very short words – never underestimate the harsh Icelandic weather and overestimate your physical condition.
Landmannalaugar in winter
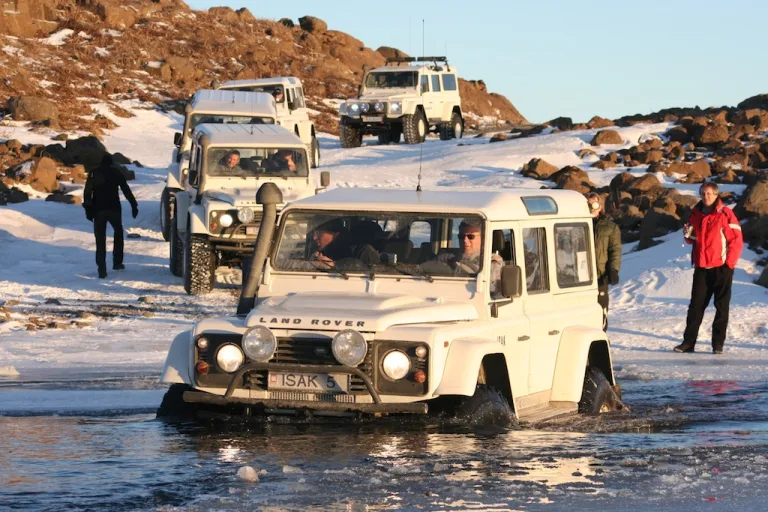
Private super jeep tour to Landmannalaugar in winter
It’s possible to visit Landmannalaugar also in winter, but only by a super jeep tour. Winter conditions in Icelandic highlands are very harsh and often life-threatening. This is where you simply need a super jeep and the experience of the local driver. Even they may decide not to go if the weather and road conditions are unfavorable.
That being said, visiting Landmannalaugar in winter is a very unique experience and you will 100% be alone there only with your tour guide. We can highly recommend the winter Landmannalaugar super jeep tour by Glaciers and Waterfalls, for which you can enjoy a 10% discount with the discount code: EPICICELAND
10 best hikes in Landmannalaugar
There are many beautiful hiking trails in Landmannalaugar. If you are really into hiking then Landmannalaugar is a place where you should spend more than just a few hours. Hiking trails in Landmannalaugar range from as short as 30 minutes to as long as 3-4 days. Below are summarized the 10 most popular hikes in Landmannalaugar.
Note: In this article, we list only the best 10 Landmannalaugar hikes in the main area around the Landmannalaugar campsite. There are many other hikes in a wider area called Fjallabak nature reserve and also around Hekla volcano! Be sure to read our articles on these too!
Landmannalaugar hiking map
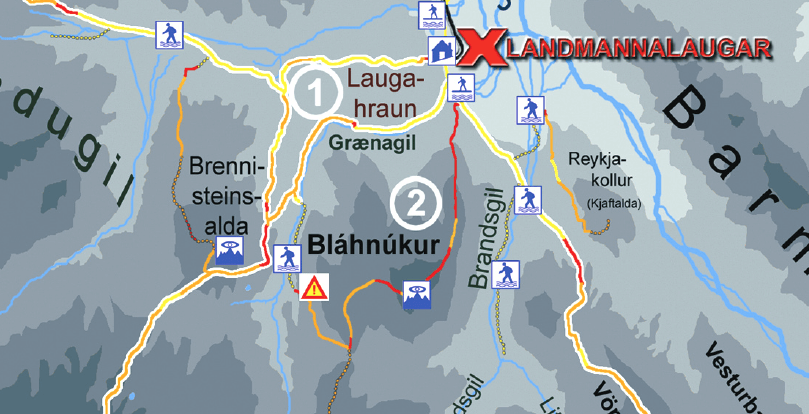
The most important slice of the Landmannalaugar map for your 1-day trip
Above is the map of the most popular hikes in Landmannalaugar – Blahnukur, Brennisteinsalda, and Laugahraun. These are the hikes accessible right from the Landmannalaugar campsite. This Landmannalaugar map helped us a lot with orientation. I wonder why it’s so hard to find this map online, but this map is basically all you need to know.
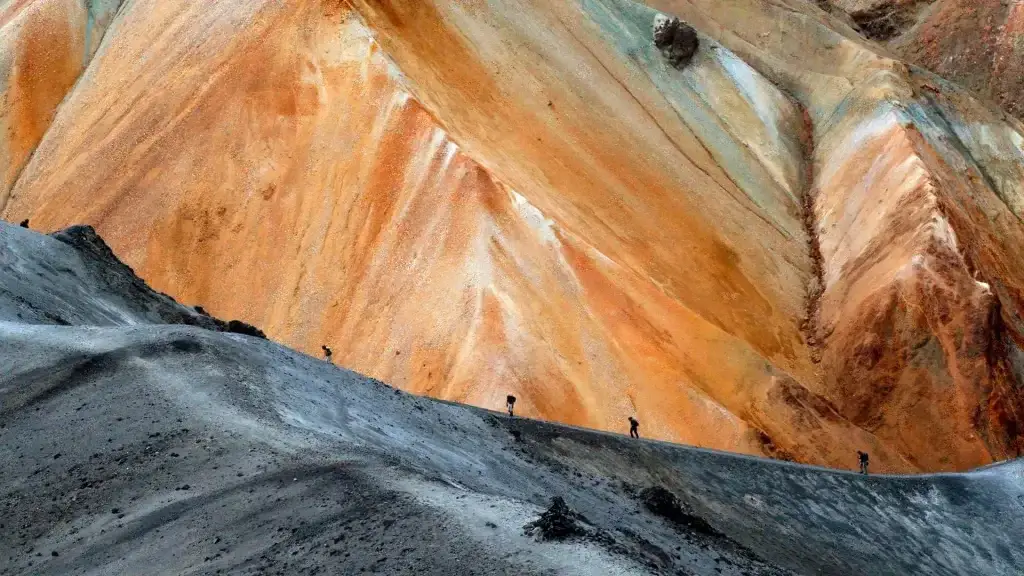
1. Brennisteinsalda
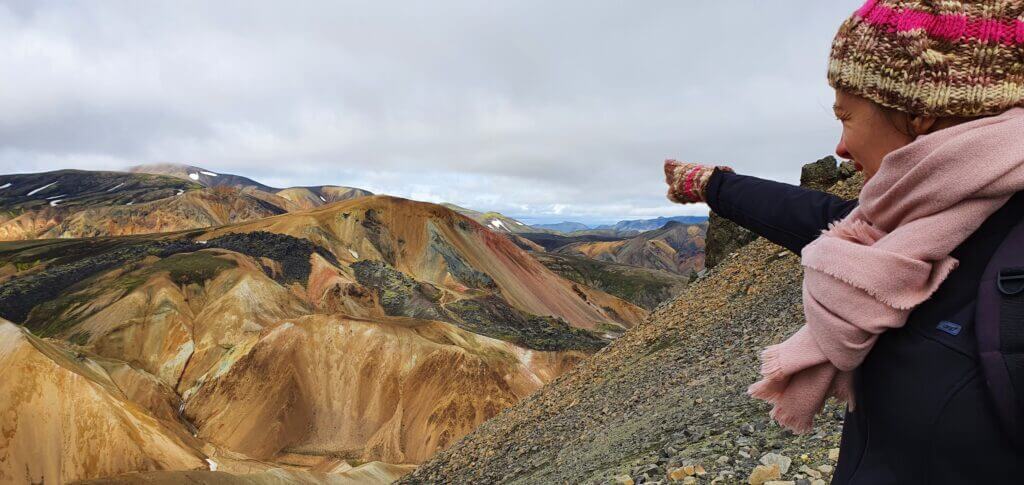
Pointing at Brennisteinsalda from the Bláhnúkur hiking trail
Distance from the car park: 5/10 minutes (to the start of the trail, from camping/car park in front of the camping)
Hiking time: 1 hour to the top (one-way)
Worth visiting in bad weather: depends
Difficulty: moderate
Hiking trail: Brennisteinsalda hiking trail
There are two main, most beautiful, one-day hikes you can do from the Brennisteinsalda campsite. And it can be a bit confusing to understand the difference between them and how to get to each trail. At least for us, it was in the beginning. So let’s get to the point.
The first of the hikes, the easier and quicker one, is the hike ending at the top of the Brennisteinsalda volcano, or “orange mountain”. It takes about an hour to reach the top and some 30 minutes to come back. The ascent is of normal difficulty and everyone should be able to make it.
2. Bláhnúkur
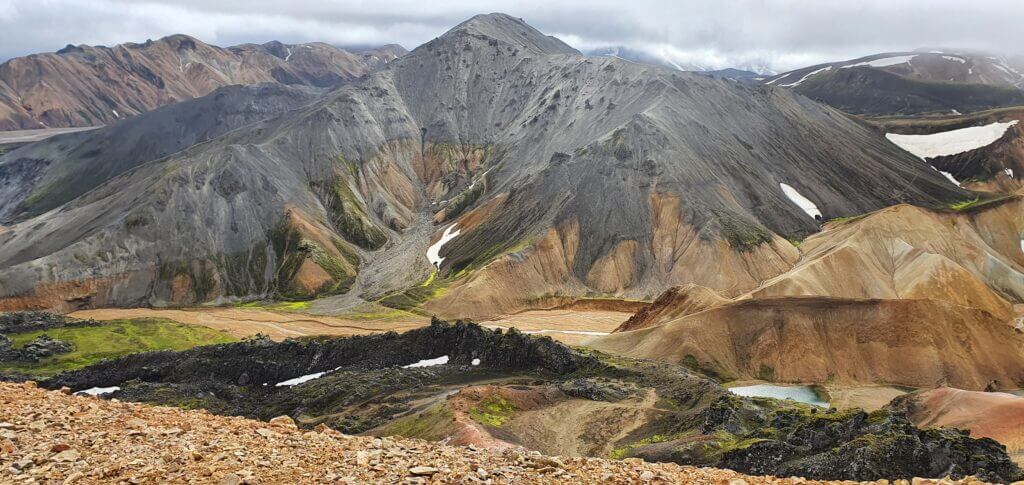
View from the top of Brennisteinsalda towards Bláhnjúkur
Distance from the car park: 15 or 40 minutes (if you want to go only for Blahnukur or if you first want to go for Laugahraun lava field)
Hiking time: 1 hour to the top by the eastern trail, 2 hours by the western trail (both one-way)
Worth visiting in bad weather: no
Difficulty: moderate
Hiking trail: Bláhnúkur hiking trail
The second hike, for me even more beautiful, is the hike to the Bláhnúkur peak or “Blue peak”. It’s a bit longer hike, it took us 1,5 hours to get to the top and some 1 hour to get back to the campsite and you should be in good physical condition to make it, at least compared to other places in Iceland where you just step out of your car and make a 5-minute walk. But it’s definitely doable for everybody and more than just worth it as it’s one of the most beautiful views in entire Iceland. Just be prepared for a mountain hike.
If you are in good physical condition and the weather is good, I definitely do recommend you to go for both peaks – Brennisteinsalda and Bláhnúkur as well. It’s a beautiful loop trail, so you don’t go twice via the same trail and all the views around it are breathtaking. On halfway to Brennisteinsalda, you’re going to cross a lava field called Laugahraun which is interesting as well, although compared to the other peaks it’s not that special.
3. Brennisteinsalda Bláhnúkur loop

View from Bláhnúkur over Landmannalaugar
Distance from the car park: 5/15 minutes (to the start of the trail, from camping/car park in front of the camping)
Hiking time: 4-6 hours round-trip depending on your pace
Worth visiting in bad weather: usually no
Difficulty: moderate to difficult
Hiking trail: Brennisteinsalda Blahnukur loop hiking trail
If we had only 1 day in Landmannalaugar, and if we had to choose just 1 hike, then the single best hike in Landmannalaugar is undoubtedly the Brennisteinsalda Bláhnúkur loop hike. Why? Because you can see the majority of the most beautiful parts of Landmannalaugar from the peaks of Brennisteinsalda and Bláhnúkur and the hike is nicely doable in just one day.
Bláhnúkur Brennisteinsalda loop, or the “orange mountain – blue mountain” loop, is not for the elderly or small children, but you can surely do it if you are at least in average shape. Reserve a whole day for this hike and don’t go if it rains considerably or if the wind is too strong. Some parts of the hike are rather steep. We wrote a step-by-step guide to hiking Brennisteinsalda Bláhnúkur loop below.
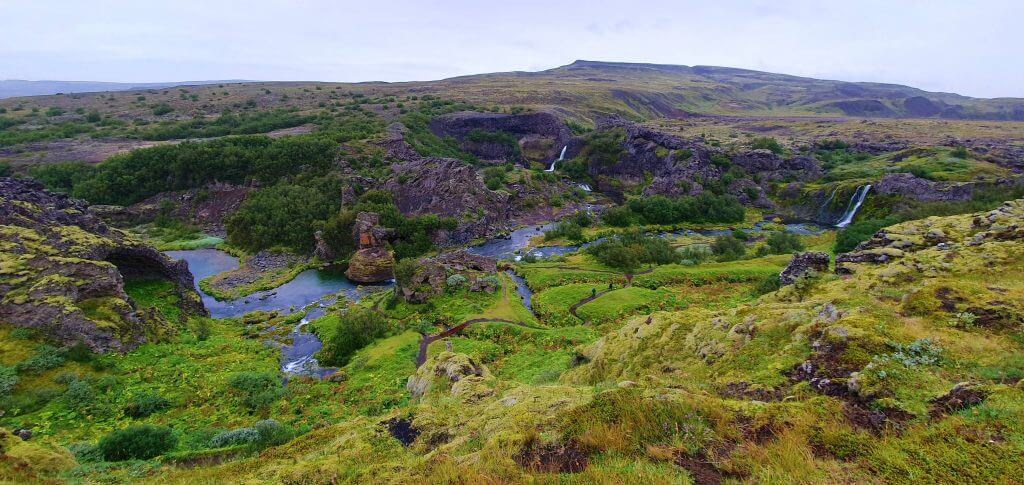
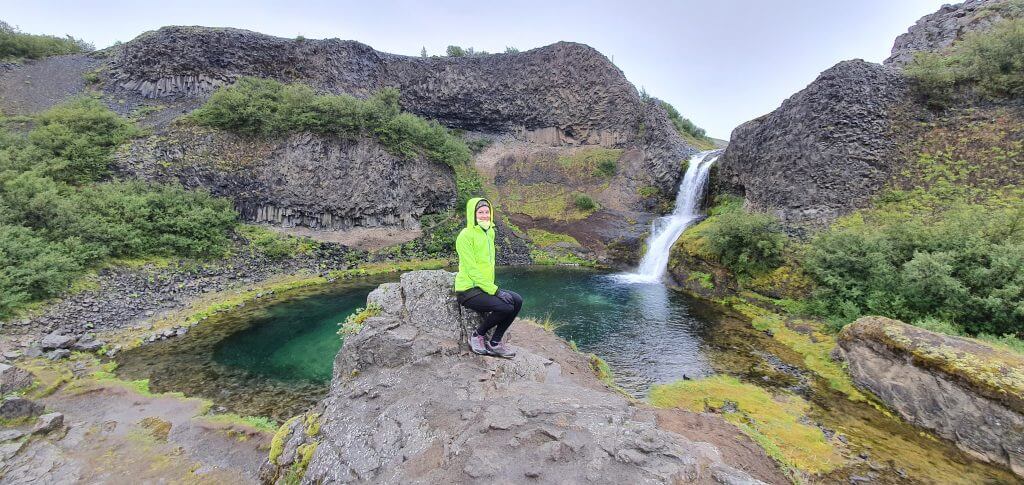
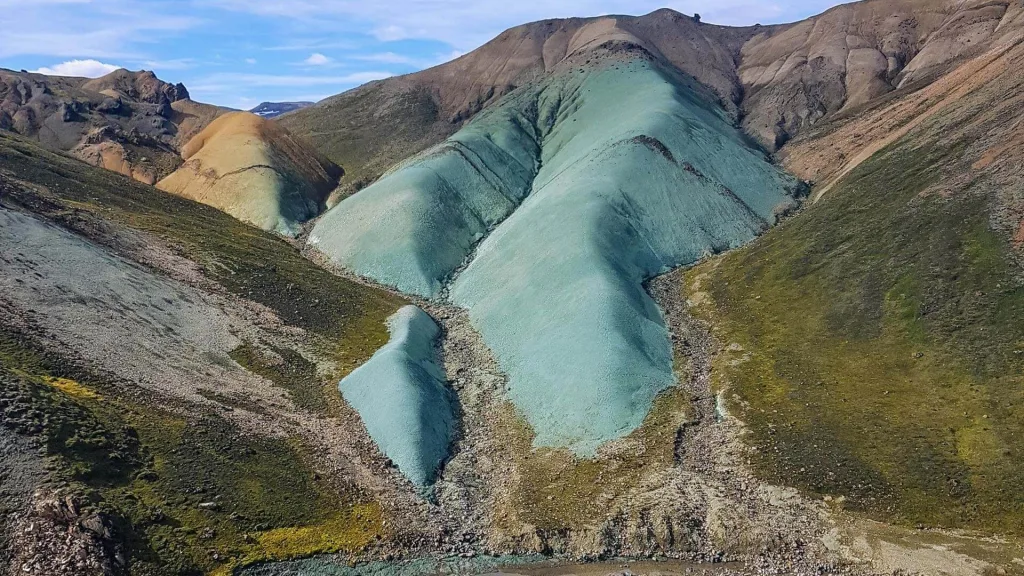
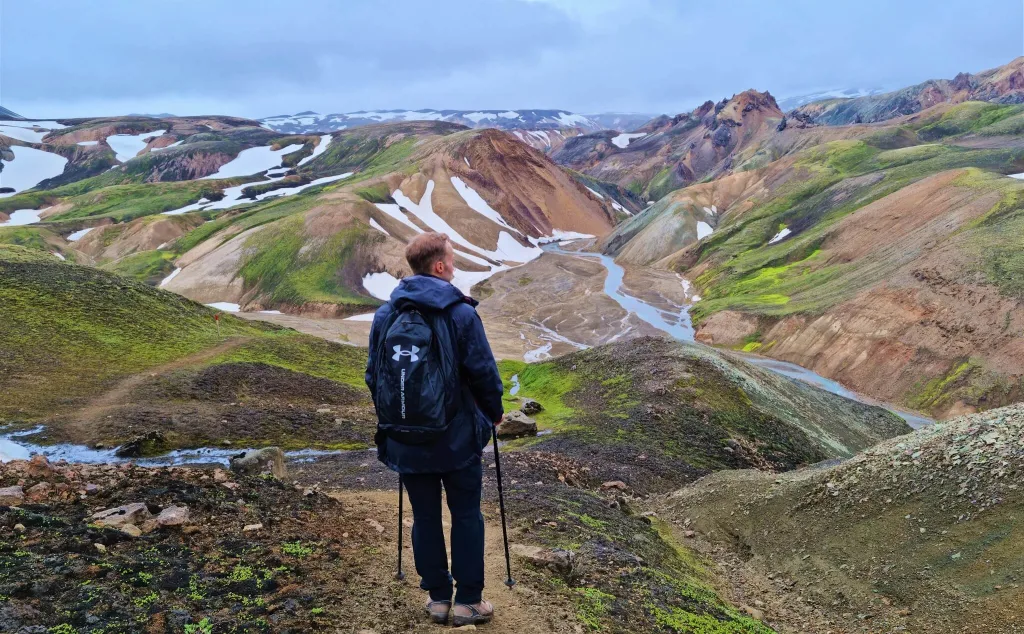
4. Grænihryggur
Distance from the car park: 5 minutes (to the start of the trail, from the roadside car park)
Hiking time: 6-8 hours round-trip depending on your pace and how far you go
Worth visiting in bad weather: usually no
Difficulty: moderate to difficult
Hiking trail: Grænihryggur hiking trail
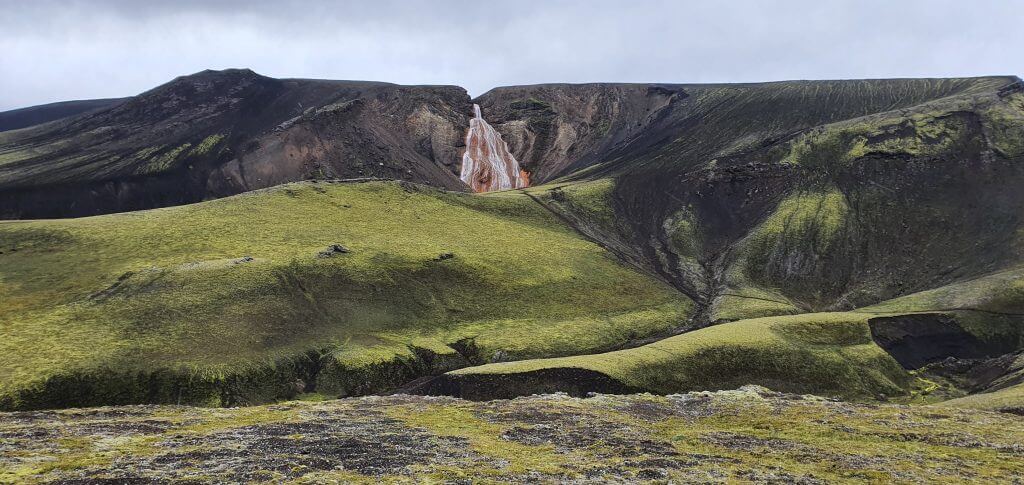
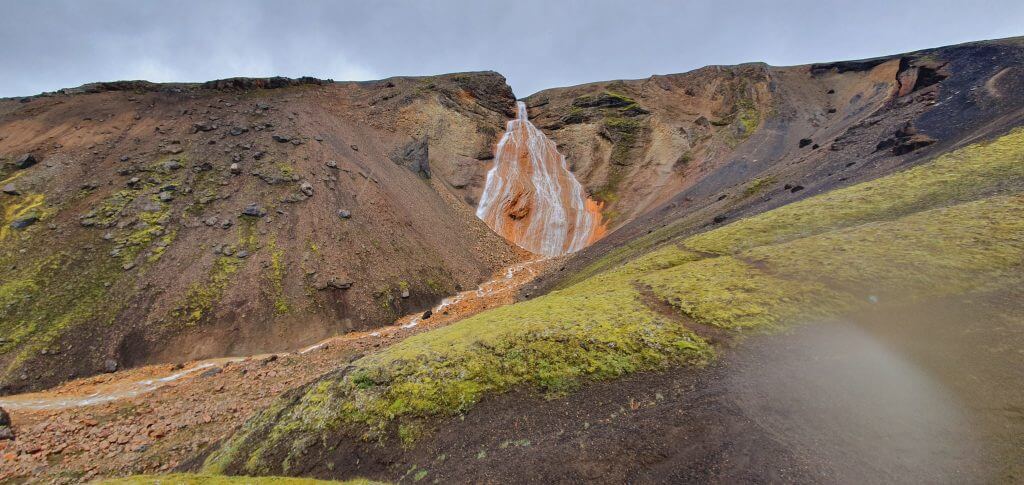
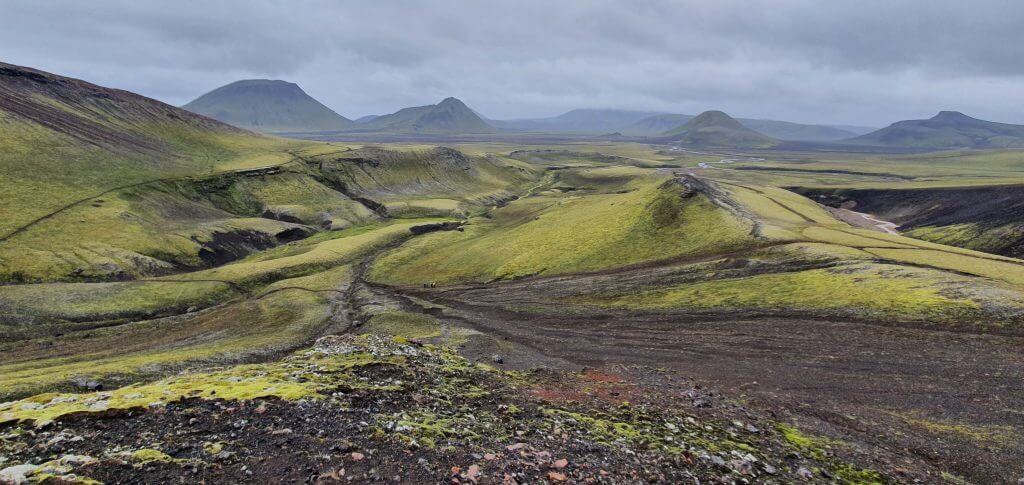
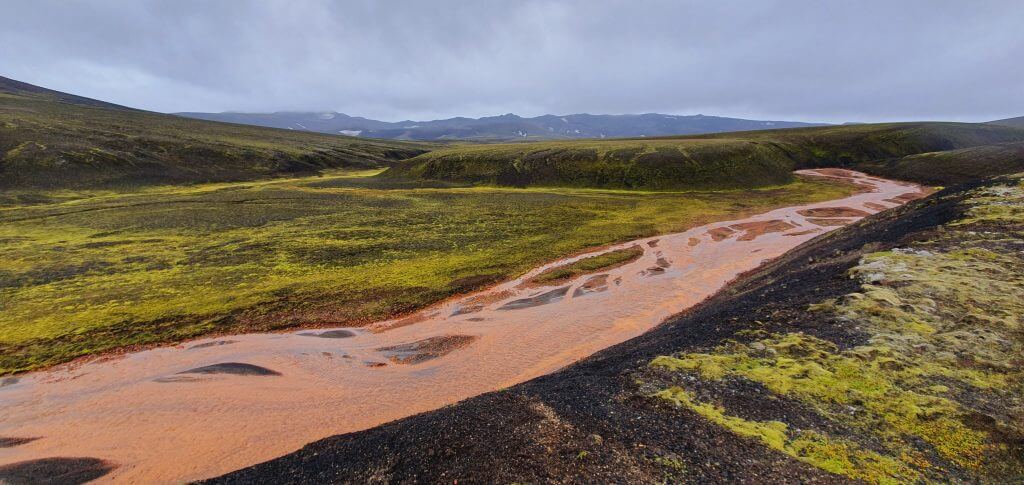
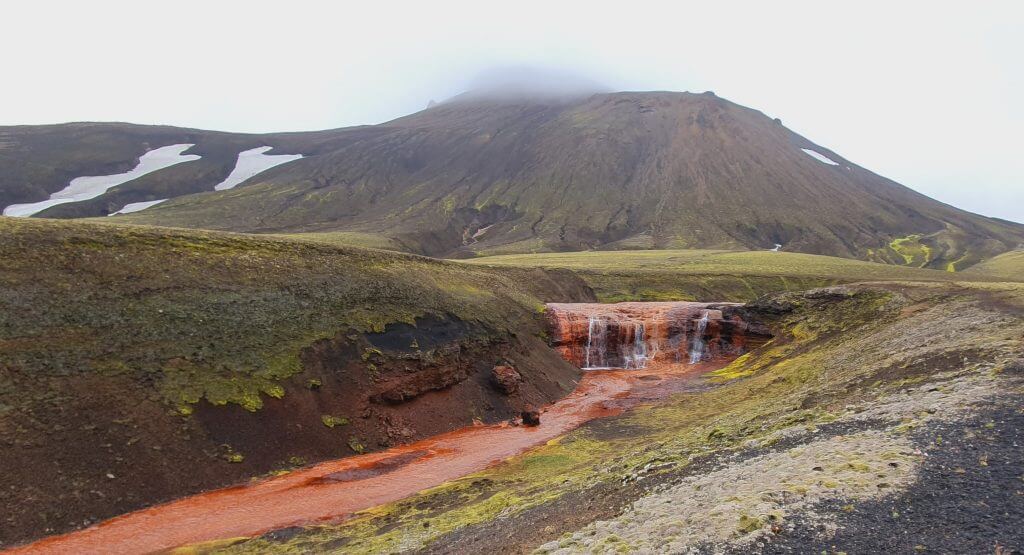
Our personal favorite in Landmannalaugar is the Grænihryggur hike. This is a true hidden gem almost nobody knows about. Yet, it offers some of the most beautiful views in Landmannalaugar with almost no co-hikers! The hiking trail is official and is no secret, and despite this fact, typically only locals hike Grænihryggur, the green ridge.
To hike Grænihryggur you need a full day and preferably no rain and no strong wind. Some parts of the Grænihryggur hiking trail are a bit steep and slippery. It is a one-way there and same-way back hike. Nevertheless, the surrounding landscapes are more than just worth being seen twice! We recently wrote a brand new detailed guide to the Grænihryggur hike. Hope it helps you plan your trip!
5. Laugahraun
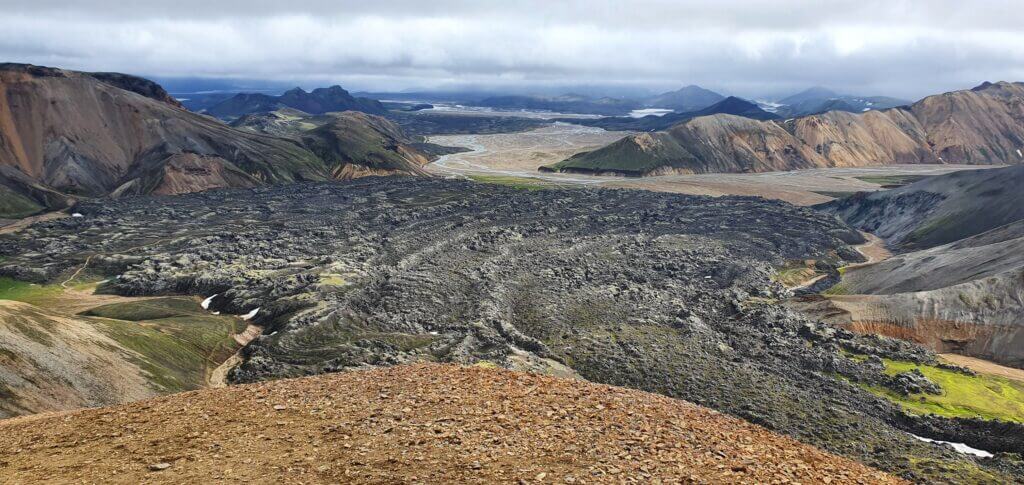
View from the top of Brennisteinsalda towards Laugahraun
Distance from the car park: 5/10 minutes (to the start of the trail, from camping/car park in front of the camping)
Hiking time: 15-20 minutes (one-way)
Worth visiting in bad weather: yes
Difficulty: easy
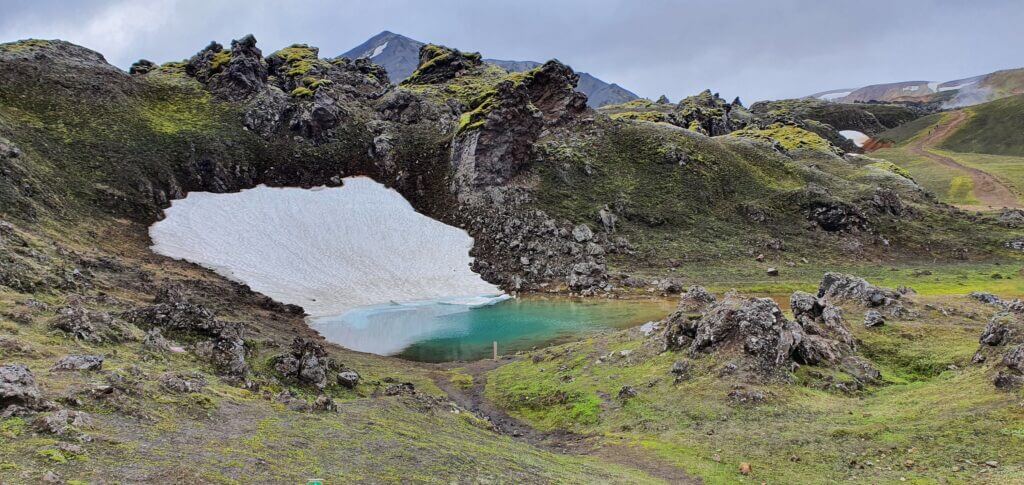
Laugahraun is a lava field with interesting rock formations formed from volcanic lava eruptions. It takes some 30-40 minutes to hike it from the campsite and it stands halfway to Brennisteinsalda mountain. It’s a nice place to see but it was not that amazing for us compared to other sights like the peaks of Bláhnúkur or Brennisteinsalda.
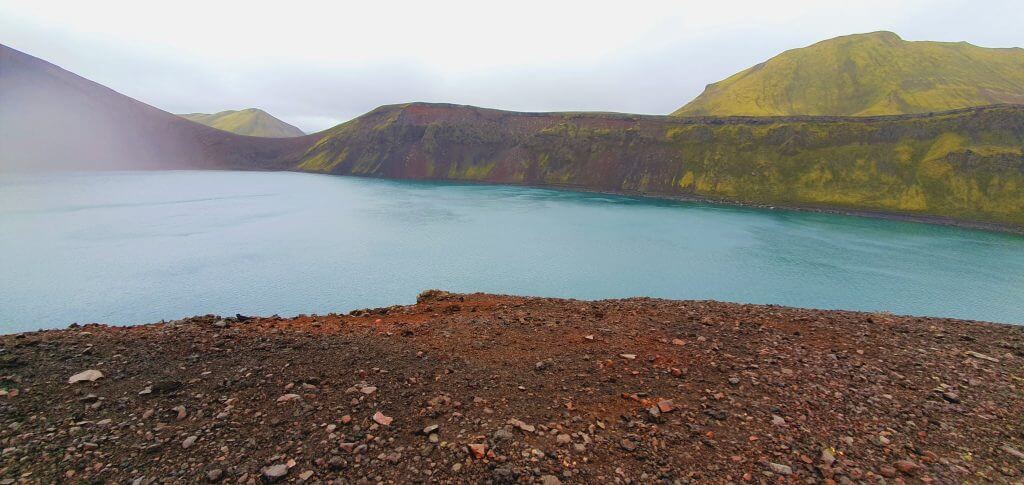
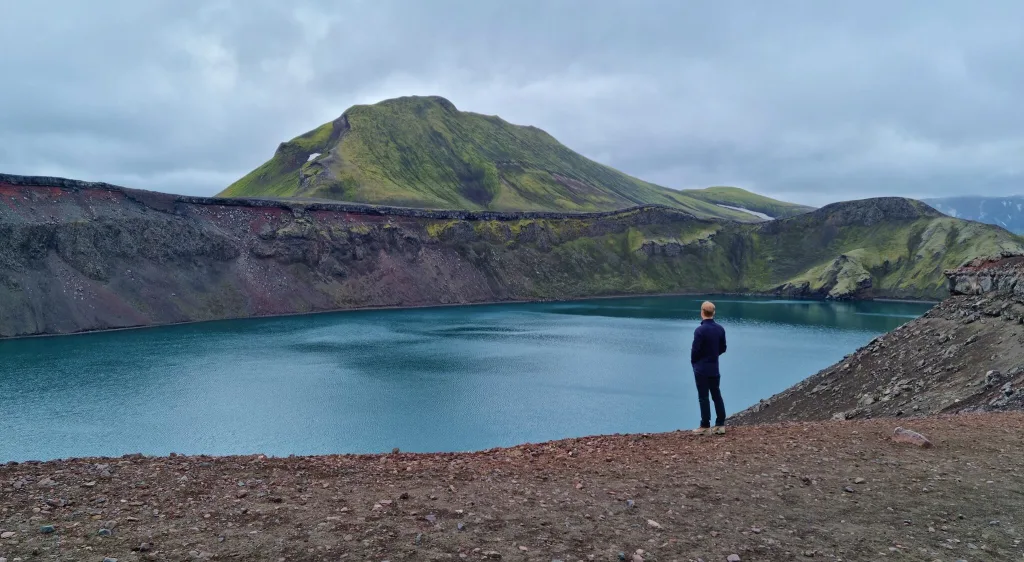
6. Ljótipollur
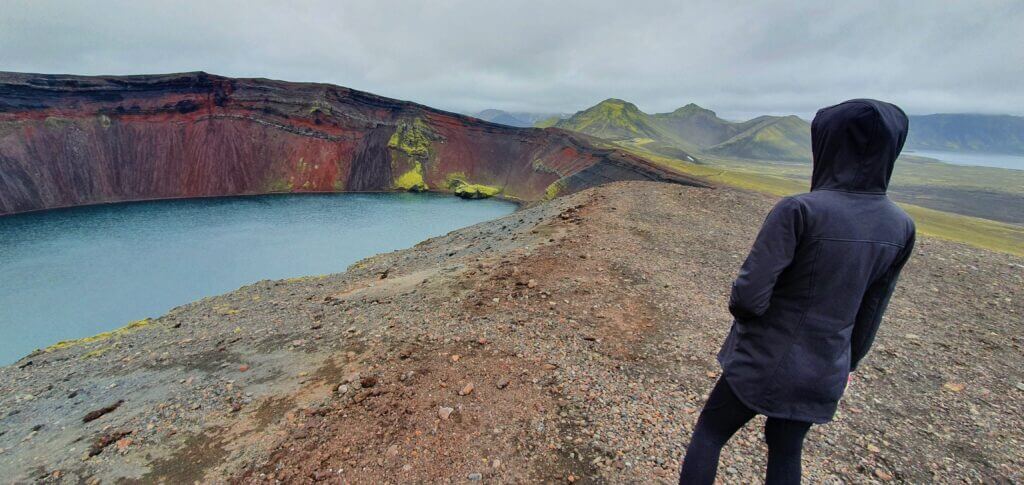
Ljótipollur
Distance from the car park: right next to it
Hiking time: 10 minutes (one-way)
Worth visiting in bad weather: yes
Difficulty: easy
Ljótipollur is a red crater lake with amazingly colored water situated in the moon-like highlands of Landmannalaugar. It’s a nice and short stop close to the campsite. Unfortunately, the place has become pretty popular recently, because it’s very easily accessible and doesn’t require a huge jeep or a long hike to reach. We wrote in detail about our visit to Ljótipollur.
There’s a short F-road leading to Ljótipollur, suitable for almost any 4wd car. At the end of the road, there’s a little black-ash car park. From the car park, it takes just about 5-10 minutes of uphill walking to reach some of the best viewpoints of Ljótipollur. It’s possible to hike even further around the area, but most of the visitors turn back after seeing the crater from above.
7. Hnausapollur
Hnausapollur, or Bláhylur volcano lake in Landmannalaugar
Distance from the car park: right next to it
Hiking time: 1 minute
Worth visiting in bad weather: yes
Difficulty: easy
Hnausapollur, or Bláhylur, is another crater lake that looks like from another planet. It is located right next to road 208 north of Landmannalaugar. It’s possible to drive and park your car right at the edge of the Hnausapollur crater lake. You can then either admire the lake from the viewpoint next to the car park, or the more adventurous souls may take a long walk around the crater. It is almost guaranteed you will be alone throughout your walk. This can’t be said about the main car park, though, where even tour buses stop.
8. Stútur
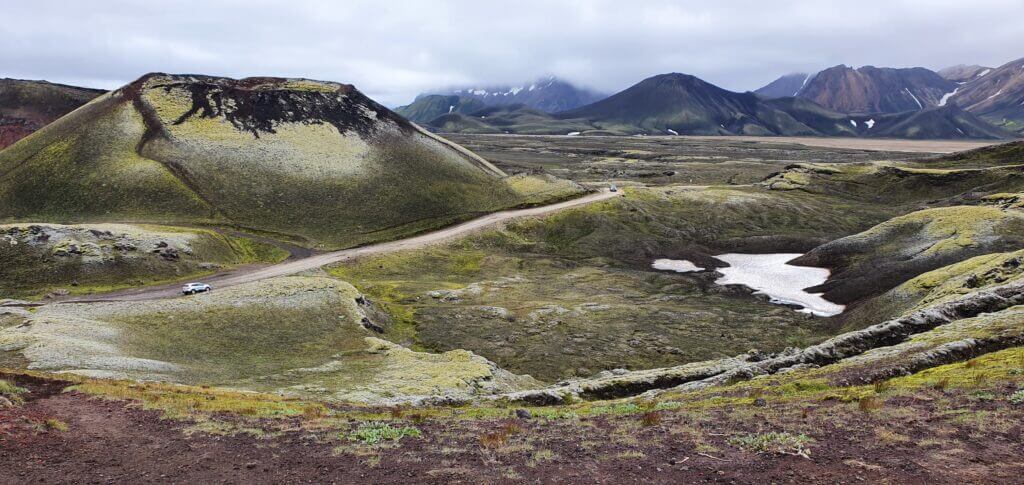
Stútur volcano hike to the left
Distance from the car park: right next to it
Hiking time: 10 minutes (one-way)
Worth visiting in bad weather: yes
Difficulty: easy to moderate
What about hiking a little volcano in 10 minutes? Well, go and hike Stútur then! Stútur is a little old volcano covered by moss, located just a short drive north of Landmannalaugar. There’s a tiny car park with a place for 2-3 cars and a little sign indicating a hiking area. All-in-all, the Stútur hike is nicely hidden from the crowds. Even we didn’t spot it when we visited Landmannalaugar for the first time.
It takes just a short uphill hike to reach the top of the Stútur volcano. Once at the top, you can admire both the 360° views of the area around and also the inner part of the volcano. This is an easy hike that even a family should be able to do. The same can be said about the harsher weather – Stútur can be typically visited even if the weather isn’t ideal.
9. Hrafntinnusker
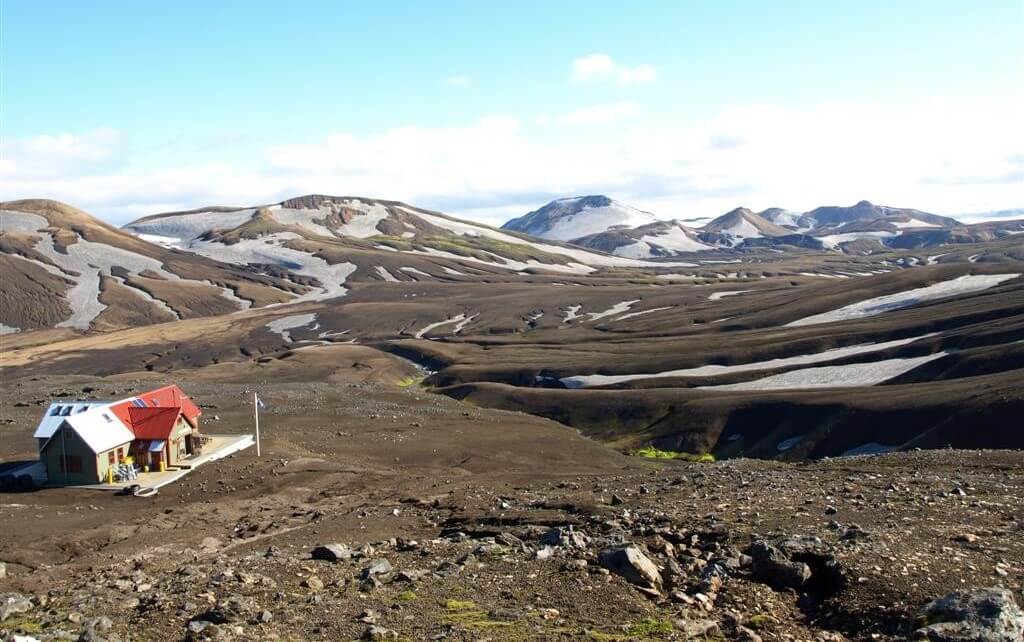
Hrafntinnusker hut in the heart of the highlands
Distance from the car park: 5-10 minutes from the campsite/car park
Hiking time: 4 hours (one-way)
Worth visiting in bad weather: no
Difficulty: moderate to difficult
Hiking trail: Hrafntinnusker hiking trail
Hrafntinnusker is a geothermal area close to Landmannalaugar with an ice cave, a mountain hut, and a lot of hiking trails everywhere around. The only catch is, Hrafntinnusker is a very hard-to-access place. One of the options is to grab a super jeep and drive there. Yes, you need a super jeep to reach Hrafntinnusker even in summer. Don’t even think about winter! Impossible!
The other option is to get to Hrafntinnusker by hiking. Hrafntinnusker is actually a part of the famous Laugavegur trek (see below). The shortest hiking trail to Hrafntinnusker starts at Landmannalaugar campsite and takes about 4 hours (one way) to complete. Once there, you will be rewarded with one of the most remote and highest-altitude corners of Iceland.
10. Laugavegur trek
Distance from the car park: 5-10 minutes from the campsite/car park
Hiking time: 3-7 days (one-way, depends if you include also connecting Fimmvorduhals hike)
Worth visiting in bad weather: no
Difficulty: difficult
Hiking trail: Laugavegur hiking trail
The most epic hike in Iceland is the Laugavegur hike, many would say. The Laugavegur trail typically takes about 4 days to complete. Hikers spend their nights at the mountain huts or at the campsites located right next to the huts. The hike is difficult mainly due to the length and unpredictable weather, but the trail is doable for anyone who is fit and used to hiking.
Laugavegur hike is the most legendary hike in Iceland and even many Icelanders are still taking it every year over and over. During the 4 days of hiking Laugavegur, you will be guaranteed to see the best Iceland has to offer. Little volcanoes, out-of-this-world canyons, magnificent valleys, adventurous river crossings, snow spots even in summer, waterfalls, and hot springs. This is just a very short glimpse of all the spectacular things you will see along the Laugavegur trek.
Hiking the Brennisteinsalda Bláhnúkur loop
We had only 1 day in Landmannalaugar, so we decided to go for the best 1-day hike in Landmannalaugar, the Brennisteinsalda-Laugahraun-Bláhnúkur loop. We first climbed the orange mountain, or Brennisteinsalda, coming from the campsite. Then we turned back towards Bláhnúkur and traversed across the Laugahraun lava field to the blue peak of Bláhnúkur.
Brennisteinsalda hike
This is how the start of the hiking trail toward Brennisteinsalda looks like
Hike for Brennisteinsalda volcano is quite easy and takes around 1,5 hours round trip. If you either don’t have much time or weather is worsening or you simply aren’t into hiking that much, you can definitely make Brennisteinsalda hike. The trail to the top and the view from the top itself is definitely worth it. We experienced it in slightly foggy weather and it was still beautiful.
You start at the main building of Landmannalaugar/Brennisteinsalda campsite where there are red signs pointing to two opposite directions. When coming from the river crossings facing the campsite, the one pointing left is the one for Bláhnjúkur and the one pointing right is the one for Laugahraun lava field and Brennisteinsalda.
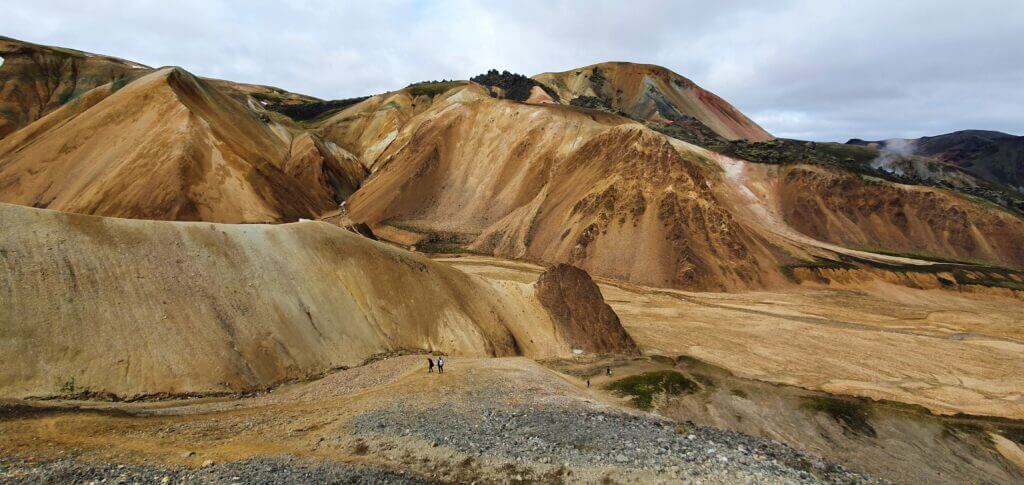
Views from the Brennisteinsalda hike
The other way how to orientate yourself is simply to go in the direction of the mountain (you can see it throughout almost the entire trail) and use common sense. Although the trail is well marked, the signs are not very helpful because they contain just the name of the entire trail and they don’t point specifically to Brennisteinsalda. It’s important to stick to the marked trail to not destroy Icelandic untouched nature and not get yourself fined heavily.
Your first checkpoint would be crossroads with the Laugahraun lava field where you will continue to the upper right, i.e. above the field. Then you will eventually arrive at another crossroad just below Brennisteinsalda where you should turn right, to face the only little steeper part of the hike right towards the peak. Once you reach the peak, you can enjoy 360° views of surrounding landscapes, Laugahraun field from a bird-eye view, and also majestic Bláhnjúkur peak nearby.
View from the top of Brennisteinsalda on a slightly foggy day. Still very windy at the top, despite a calm day.
There was no wind below Brennisteinsalda at the time of our visit, but at the peak, the wind was blowing like crazy. So be prepared for this. After Brennisteinsalda you may either come back to the campsite or continue for the Bláhnúkur peak – as we did. If you have enough energy and the weather is alright I definitely do recommend going for Bláhnúkur as well because the views surrounding that route are even more amazing.
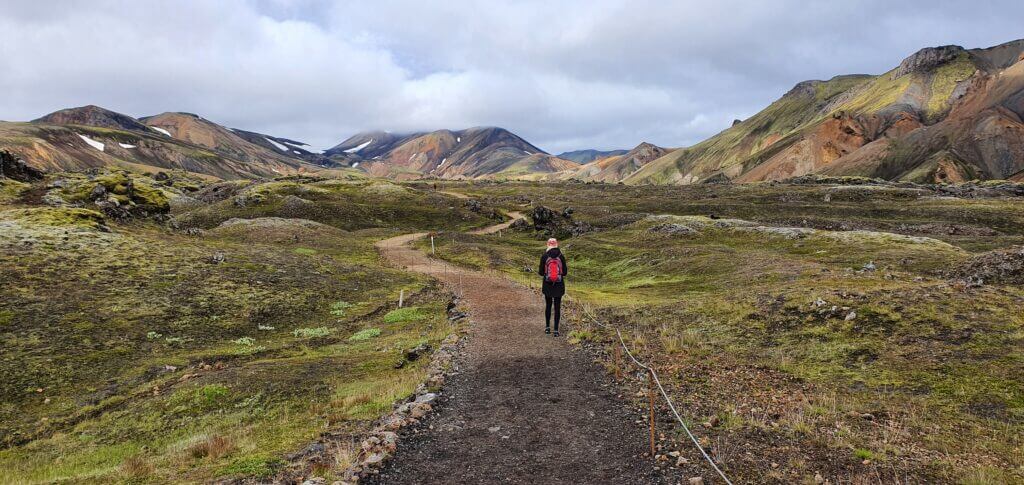
Laugahraun hike
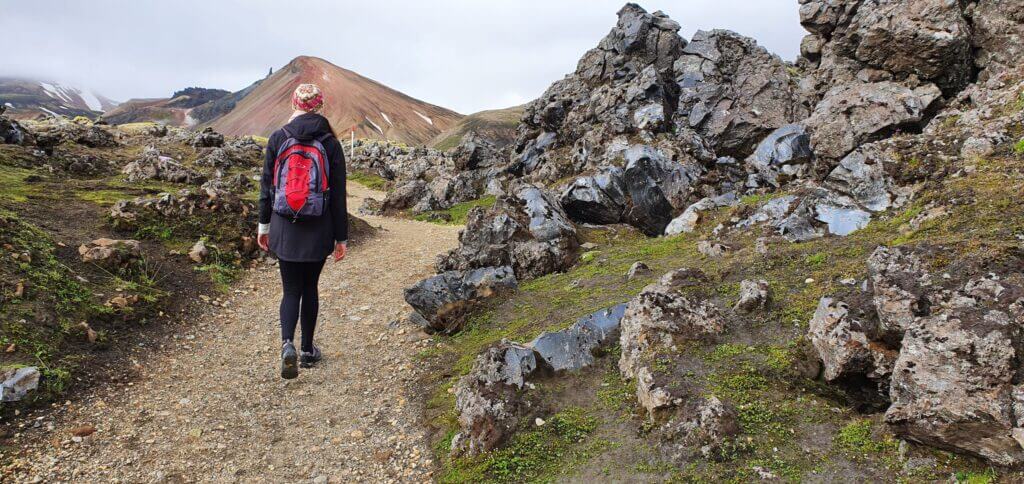
Easy Laugahraun hiking trail
We didn’t go particularly for the Laugahraun hike, but we stumbled upon it on our way back from Brennisteinsalda peak and on our path further towards Bláhnúkur mountain. Laugahraun is a nice and easy family walk through the old black lava field. Coming from Brennisteinsalda, if you leave the Laugahraun field at its top-right part, you will find yourself at the beginning of the trail for Bláhnúkur, the Blue peak.
Bláhnúkur hike
Slippery clay slope at the start of the hike to Bláhnjúkur or Blue peak
For us hike to the Bláhnúkur, or the Blue peak was the most beautiful, the most rewarding, and the most difficult part of our one-day visit to Landmannalaugar. We had to find the beginning of the trail, we had to ford the small river, we had to climb the steep muddy hill and then we had to cope with a strong cold wind at the top.
All of these were definitely worth the experience. Views encompassing the route are amazing if you are lucky with the good weather and the view from the peak is even more breathtaking. So how do you reach Bláhnjúkur?
You have three options on how to reach the top (including the circular round trip we did, starting with Brennisteinsalda and continuing to Bláhnúkur or vice versa). Arriving from river crossings before Landmannalaugar you may either:
- turn left and go directly for Bláhnúkur or
- you may turn right, reach the Laugahraun lava field first and then continue for the Bláhnúkur hike or
- of course, you may choose the order we chose, i.e. after reaching Laugahraun continuing for Brennisteinsalda peak, then coming back to Laugahraun, and then going for Bláhnjúkur.
I recommend the way we did it, i.e. the circular route so that you can see everything.

Spectacular views right from the beginning of the hike on Bláhnjúkur and even on the slightly foggy day
After you leave the upper right part of Laugahraun field (coming from Brennisteinsalda trail), you will arrive at the small river. Despite the river being small, there’s no bridge or designated place where the river should be crossed. We spent almost 30 minutes searching for a spot where to cross the river to not get our feet wet in this cold weather. And up to this day, I don’t know where was the “official” spot meant for this Landmannalaugar river to be crossed.
What we finally did was go almost 10 minutes to the right along the bank of the river coming to the place where the river was shallow enough with enough pebbles to jump on and pass. Then we had to come these 10 minutes on the other side of the river back again to reach the yellow marks marking the trail towards Bláhnjúkur. So, after 30 minutes of struggle, we managed to ford the river without getting wet, although I’m not sure whether this was the way meant for crossing. Probably no.
Bláhnjúkur hike near the top
Afterward, for us, the most dangerous part followed. The trail is well-marked with yellow sticks so you shouldn’t get lost. You will shortly arrive at the steep clay slope going up closer to Bláhnúkur. The ascent is not hard or anything, but it’s quite steep and you don’t have a good grip on the ground because of the clay. So with each step, you feel like slipping on the smooth clay. I was equipped with high-quality La Sportiva hiking shoes and those didn’t help either.
There are neither stairs nor chains so you can only help yourself by going slowly zig-zag to the top. Fortunately, this part is not too long and takes some 10 minutes to complete. What follows next is just a typical gravel hiking trail and you shouldn’t have any problems continuing up the trail. Magnificent views will shortly emerge and will accompany you all the way to the top.
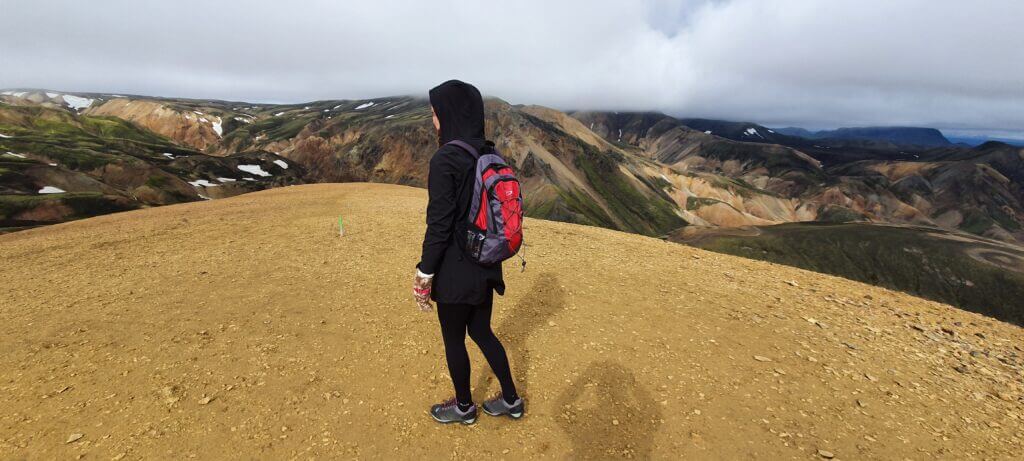
One of the views from the peak of Bláhnjúkur towards Landmannalaugar and 2nd (steeper) hiking trail
We had a semi-clear sky with partially sunny, partially cloudy weather, and light fog. This is still supposed to be good weather so we enjoyed every moment of it. Visibility (although not perfect) was fine and the views were, as I already mentioned, breathtaking. We met just a single-digit number of visitors at the peak, so at the time of our visit, the peak being crowdy wasn’t an issue.
It was really windy and the temperature felt like 5°C even on a sunny summer day like ours, so be prepared for that. Once reaching the top, you will be rewarded with the best views over the area.
Another view from the peak of Bláhnjúkur towards Landmannalaugar camp, Laugahraun, and 2nd (steeper) hiking trail
The way back
We started our descent from the other side of the mountain (the one where you may access Bláhnjúkur right from the campsite), which was supposed to be much steeper, according to guides I’ve read. That definitely wasn’t true and compared to the steep clay part we had to overcome before, this was a piece of cake. I wonder what’s worse – to ascent the clay part or descent? I guess descent would be worse. The path continued without any obstacles until we reached the point where we could see the small river we’d forded before from above.
At this point we’d also seen the campsite from above already, so we continued pursuing that direction. The entire descent wasn’t hard and it took us some 1 hour at maximum to reach our campsite again. We went for a hot chocolate at the nearby snack bar, ate a little, and it was still only before 3 pm so we had enough time to continue with our journey.
Landmannalaugar hot spring
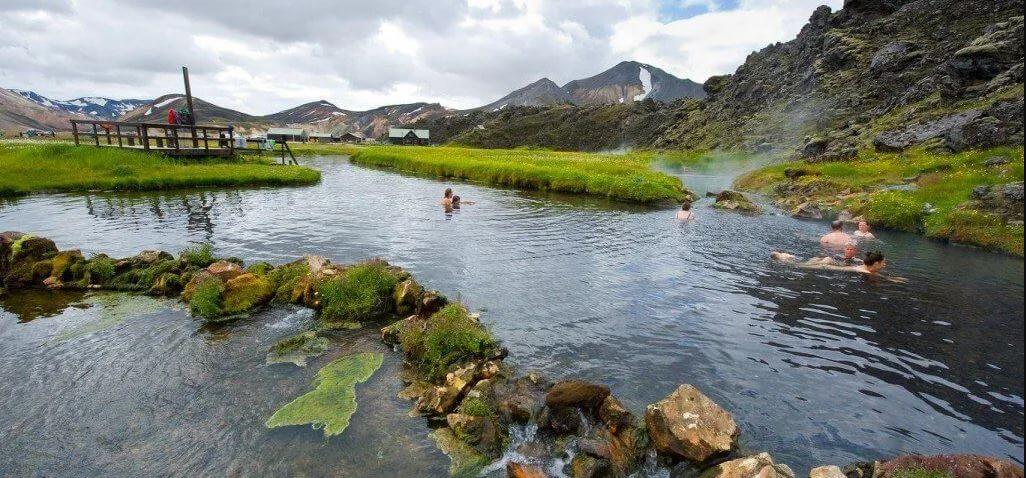
Landmannalaugar hot spring
The hot spring in Landmannalaugar is one of the most popular wild hot springs in Iceland. Landmannalaugar hot spring is located next to the Landmannalaugar campsite and it takes about 5 minutes of walking to reach it. The hot spring is quite big and it forms sort of a hot river.
There are two little caveats, though. The first one is, the Landmannalaugar hot spring is quite shallow, just around 50cm / 1.5 feet. The second catch is, the temperature varies considerably around the hot spring. There are parts, where the water is actually cold (close to the clothes-changing deck), and parts where it’s very warm (next to the spring itself). This means all the people try to come as close to the little spring as possible.
There’s a wooden clothes-changing deck, where you may leave your clothes. It is uncovered, hence, if it rains, be sure to use a rain cover for your clothes. Landmannalaugar hot spring is free of charge and it’s a great way to relax after a long day full of hiking. It is not our favorite hot spring, we think there are many other, much greater hot springs. Anyway, it’s definitely nice, unique, and worth trying.
Landmannalaugar campsite
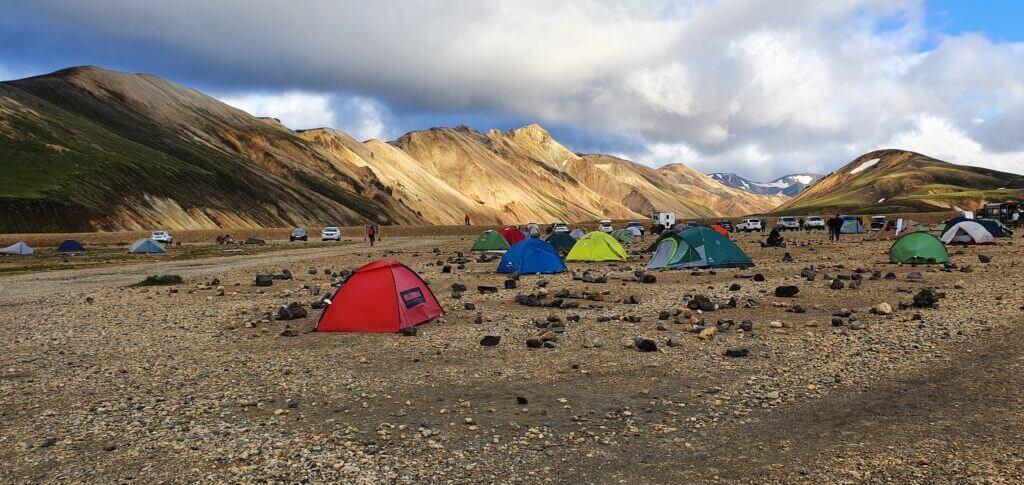
Landmannalaugar Brennisteinsalda campsite on a summer evening
Landmannalaugar campsite is one of the most beautiful campsites in Iceland. It sits right in the middle of the colorful rhyolite rainbow mountains of Landmannalaugar. On a nice day, even the pictures of the tents at the campsite are lovely. The camping costs 2500 ISK per person (as of summer 2023).
Many come to the Landmannalaugar unprepared for the weather. The campsite is located in the heart of the Icelandic highlands and especially the night temperatures even in summer may reach freezing. Not to mention, if a strong wind and/or rain arrives, the fun begins (hint: irony; the campsite is very uncomfortable in bad weather). Keep track of the weather forecast closely!
There are also mountain huts at the Landmannalaugar campsite, where you may spend the night under the shelter. It is highly recommended to book them in advance due to the huge demand in summer. They are of course much more expensive (11 000 ISK per person as of summer 2023).
Weather, Roads, and Trail conditions
Below are the useful links for Icelandic weather forecast, road conditions, trail conditions and many more:
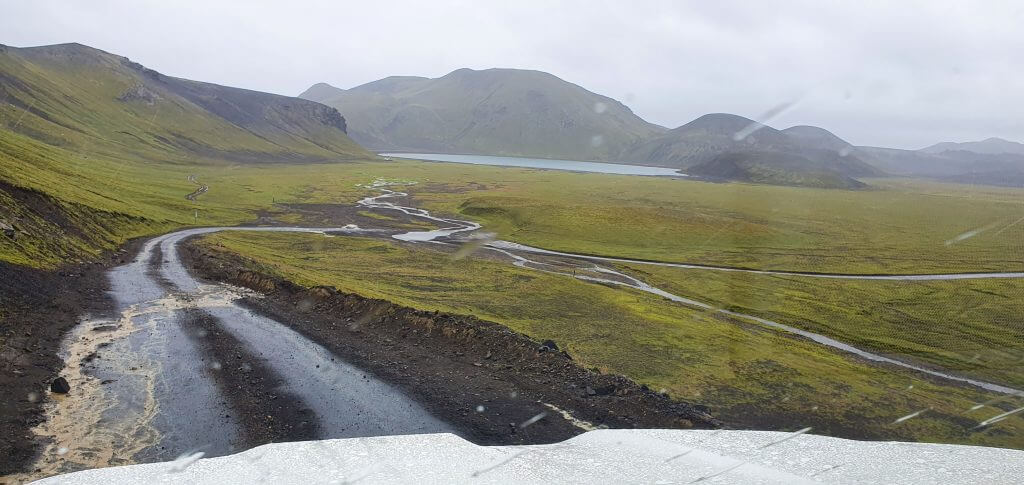
Road F208, or Fjallabaksleið Nyrðri, the southern F-road to Landmannalaugar
FAQ
Below are the most frequently asked questions about Landmannalaugar with the current, up-to-date answers for all of them.
Do you need a 4X4 car to get to Landmannalaugar?
Yes, you need a 4wd car to get to Landmannalaugar. You can get to Landmannalaugar on 3 different roads:
- Northern route (26, 208, F224) – 4wd is compulsory for the last 2km (F224), and road 208 is very bumpy anyway
- Western route (26, F225, F224) – 4wd is compulsory
- Southern route (F208, F224) – 4wd is compulsory, and better take at least a medium-sized vehicle
Do you have to cross the river to get to Landmannalaugar?
Yes, you need to cross the river right before the Landmannalaugar campsite. However, you don’t have to cross the river in your car. You can leave your car at the car park before the river crossing and use the footbridge to walk the last 10 minutes to reach the campsite. To cross the river, it is recommended to drive at least a medium-sized 4wd car.
Below is a video of how NOT to cross the Landmannalaugar river in your car:
What is the easiest road to Landmannalaugar?
The easiest road to Landmannalaugar is the northern route. First, you have to drive the paved road 26, then the unpaved road 208, and finally the gravel road F224. There are no river crossings on this route, but it’s bumpy and rather boring. The only river crossing is located right before the Landmannalaugar campsite and you may leave your car in front of it.
What is the most beautiful road to Landmannalaugar?
The most beautiful road to Landmannalaugar is called Fjallabaksleið Nyrðri. It is an F-road leading to Landmannalaugar from the south. The other name of the road is F208. The landscapes around the road are amazingly beautiful and unique. Southern road F208 is also the most difficult way to reach Landmannalaugar. There are several medium-sized rivers that need to be crossed. You need to drive a medium-sized 4wd car or bigger to safely pass this road.
What are the best hiking trails in Landmannalaugar?
The best hiking trails in Landmannalaugar are:
This list is of course highly subjective, but the hikes above are otherworldly beautiful and there is no doubt they belong to the most beautiful hikes in Iceland.
Grænihryggur hike
What is the easiest hike in Landmannalaugar?
The easiest hike in Landmannalaugar is the short walk around the Laugahraun lava field. It takes only around 30-40 minutes to complete it. One of the easiest and also the most beautiful hikes in Landmannalaugar is the Brennisteinsalda hike. Brennisteinsalda is the orange mountain and the views from the top of it are picturesque. It takes about 1-hour (one way) to complete the hike.
Besides the two hikes mentioned above, there are also many easy and short hiking stops around Landmannalaugar. They involve almost no hiking because you just get out of your car and walk anywhere between 1 minute to 10 minutes to reach your destinations. These include the Stútur volcano, the Ljótipollur crater lake, and the Hnausapollur crater lake.
I arrive by bus, will I have enough time?
You will have around 4 to 6 hours to explore the area if you want to come back the same day. This is enough time to complete only one hike of your choice, like Bláhnúkur or Brennisteinsalda, but no more. If you want to come and leave by bus on the same day, you will definitely be in the rush. It is advised to spend a night and come back by bus the next day.
How much time do you need for Landmannalaugar?
If you want to fully enjoy Landmannalaugar you need to spend there at least one full day. Avid hikers will not make a mistake by devoting 2 or more days to Landmannalaugar. There are enough beautiful hiking trails to fill your schedule. But to have a good overview of Landmannalaugar, one day with nice weather is usually enough.
Landmannalaugar Videos
YOU MAY ALSO LIKE:
 ask questions or get inspired in our community