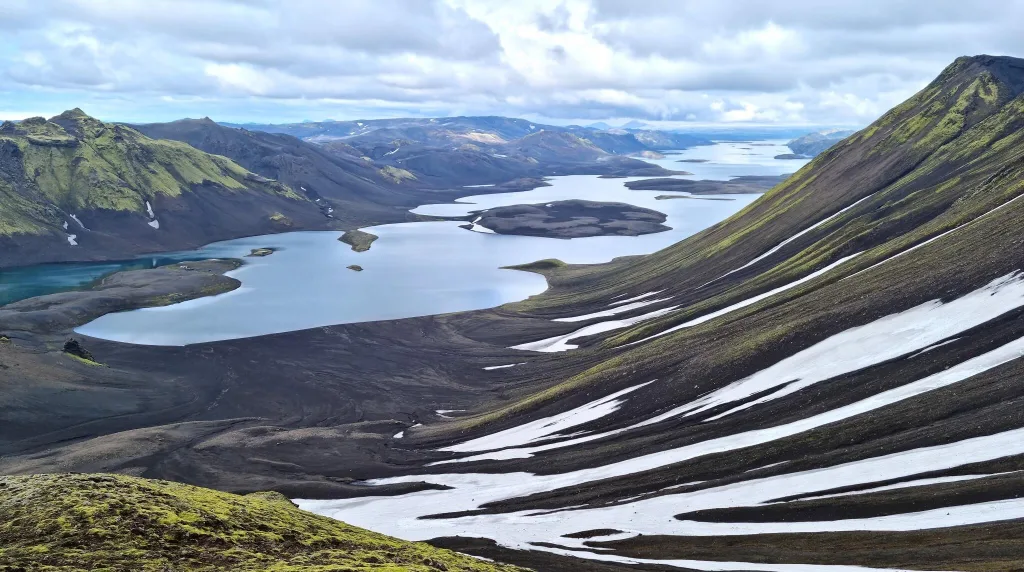
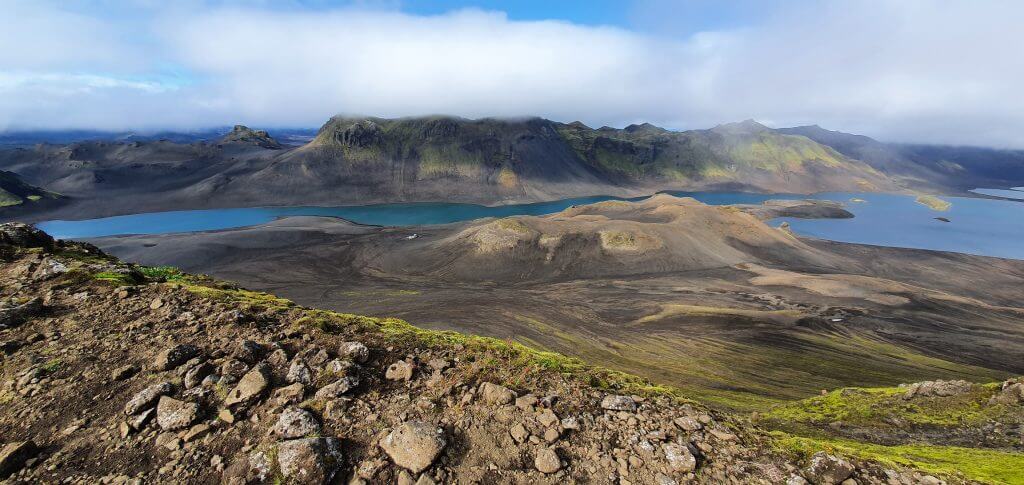
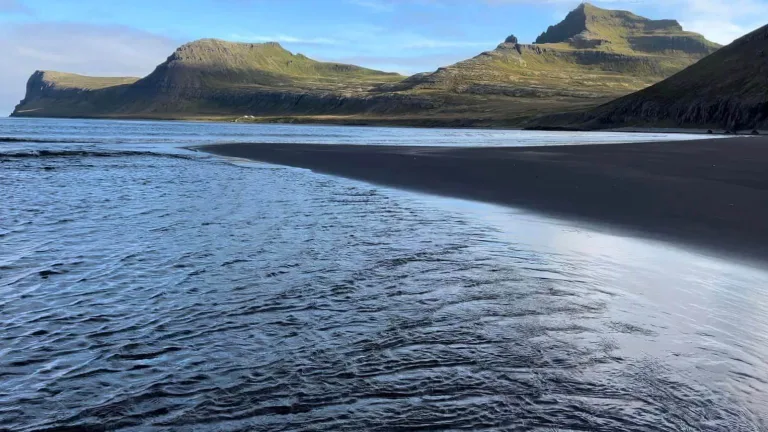
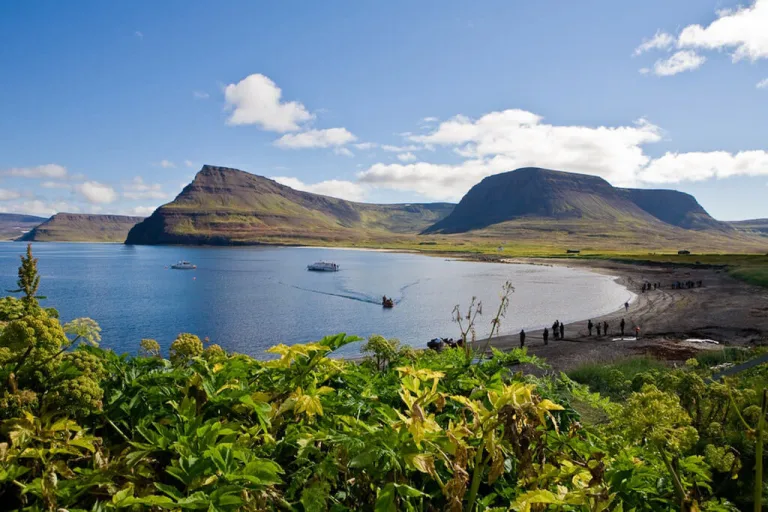
Lake Langisjór is one of our favorite areas in Icelandic highlands. Langisjór may not be the most beautiful place in Iceland, but its vibe is very special to us. A crystal clear, giant lake in the middle of a moon-like desert surrounded by somewhat scary silence has earned a place in our hearts.
Visiting Langisjór is actually not that hard. It belongs to the more accessible parts of the highland. There are many ways to reach Langisjór, and each one is a bit different and exciting.
We have visited the lake many times, and we believe it is a bit underrated. That’s one of the reasons why we write this Langisjór guide, where we sum up all our experiences about the roads, hikes, and beautiful spots around Langisjór.
Contents
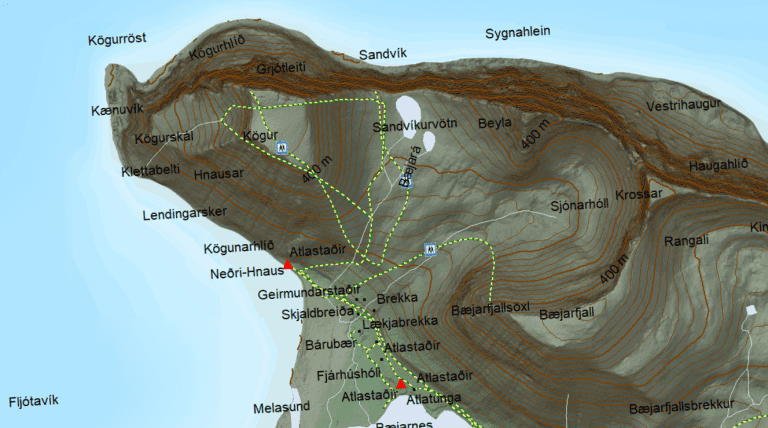
Langisjór Map
How to get to Langisjór
In short, the easiest way to get to Langisjór is by taking the mountain roads F208 and F235. You can reach it only in summer when the roads are open for visitors, and you have to drive a 4×4 car. No buses, no guided tours and also no super jeep tours visit Langisjór. Well, unless you take our private super jeep tour.
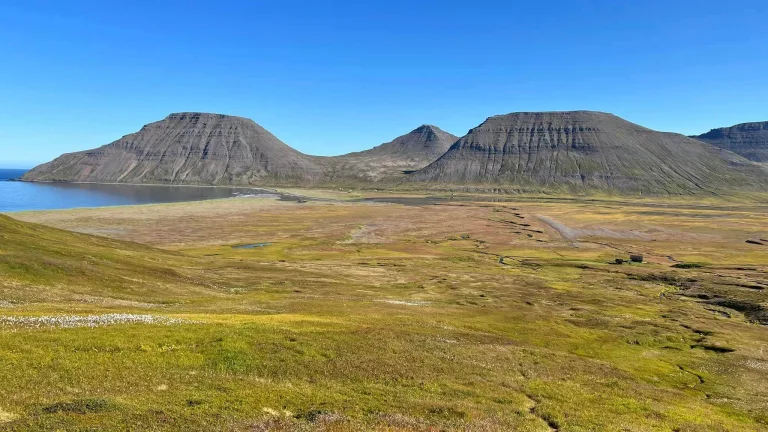
In more detail, Lake Langisjór is well hidden on the edge of the southern and central Icelandic Highlands. The only way to reach the lake is by the so-called F-roads or highland roads. Besides F-roads, there are also several dirt tracks leading to Langisjór, but these are even harsher and tougher to drive than F-roads.
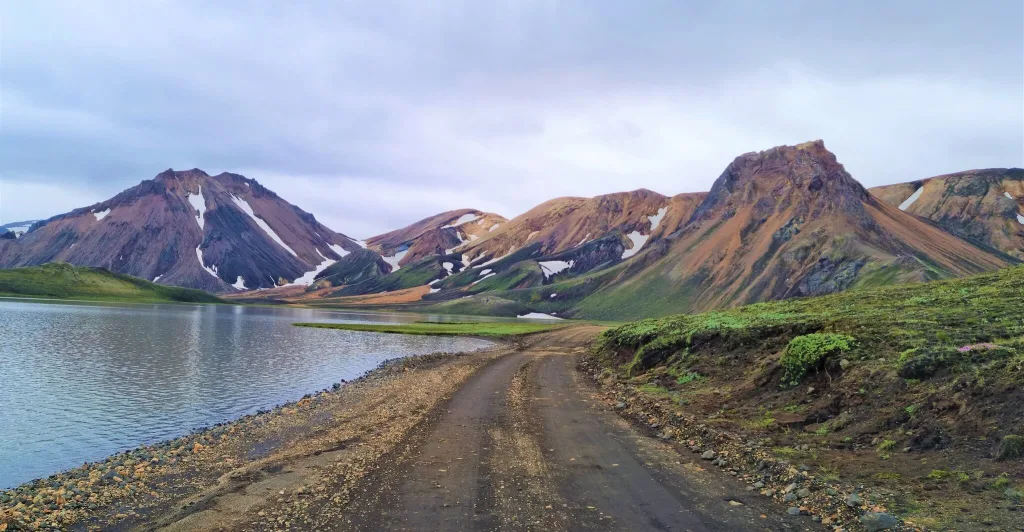
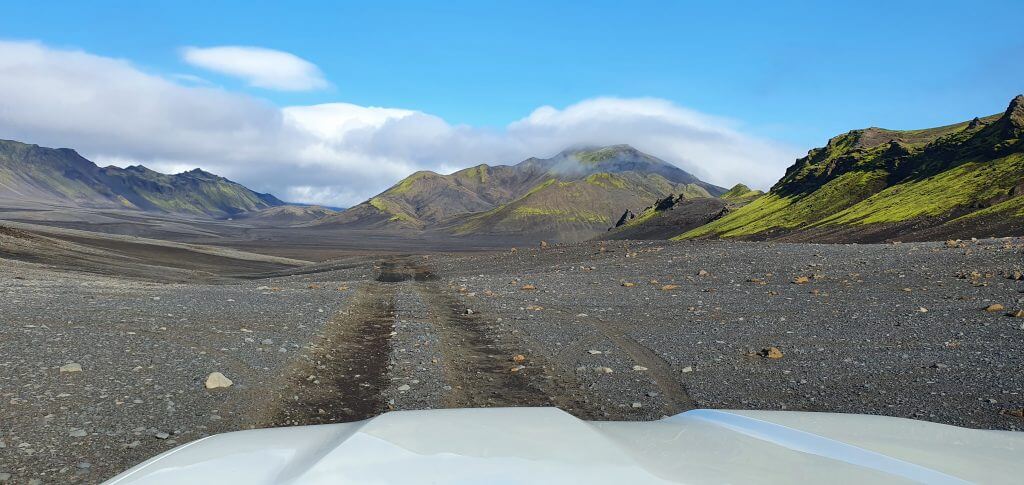
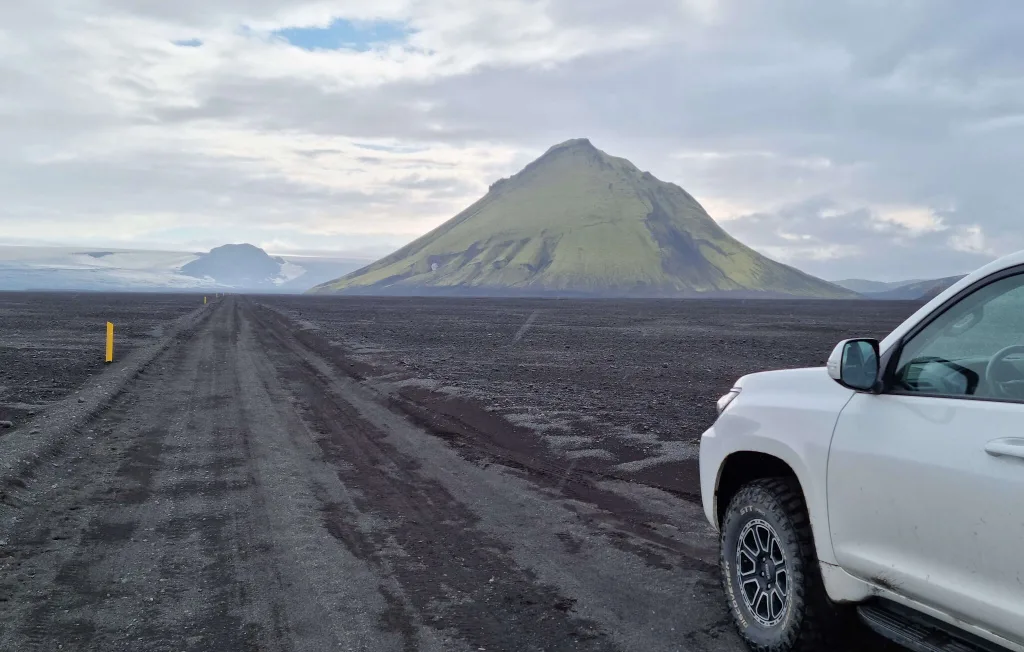
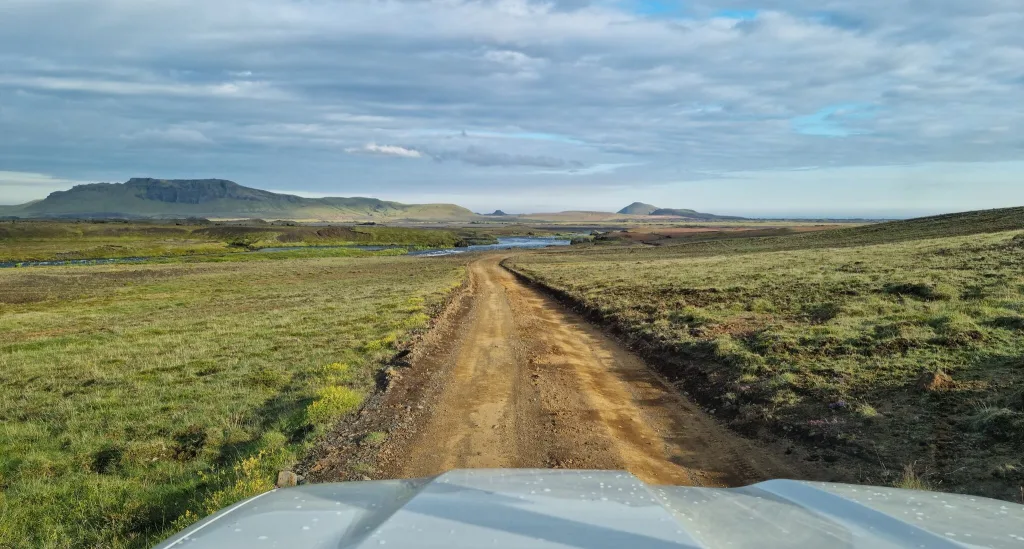
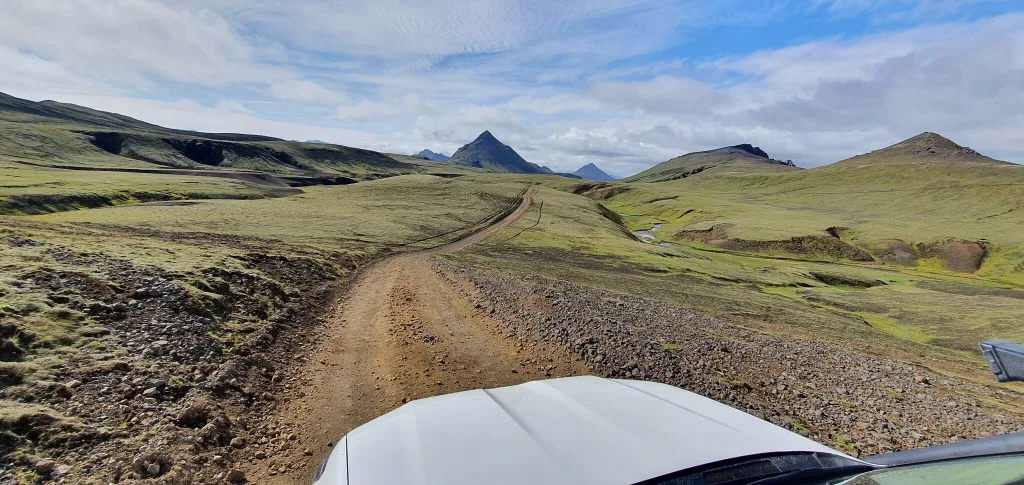
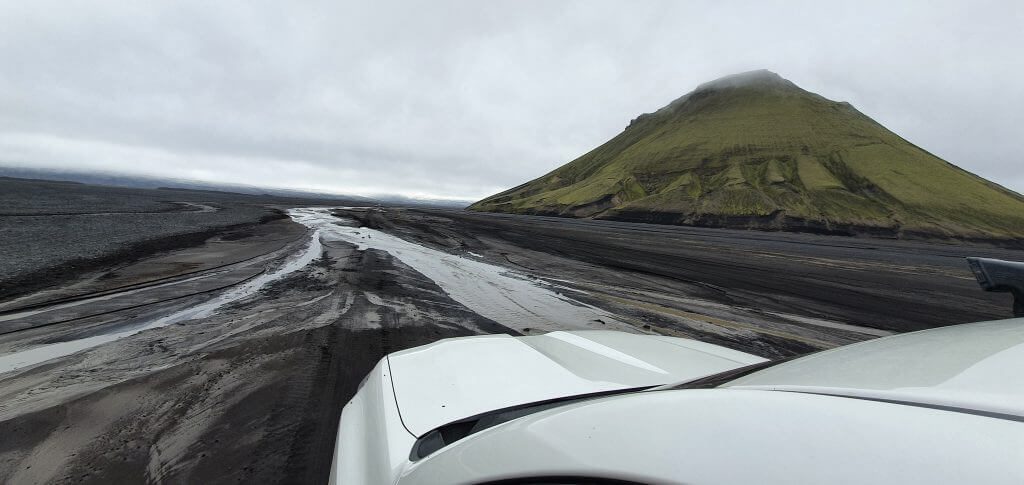
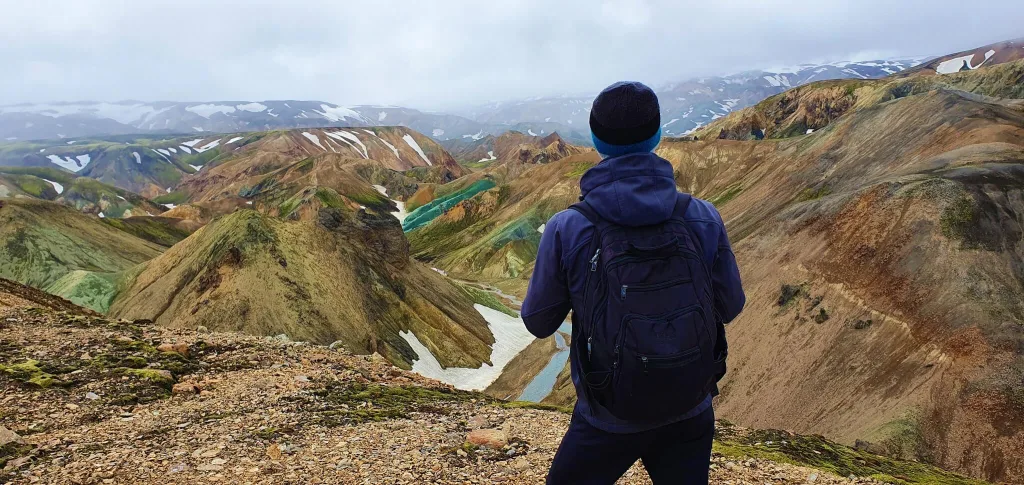
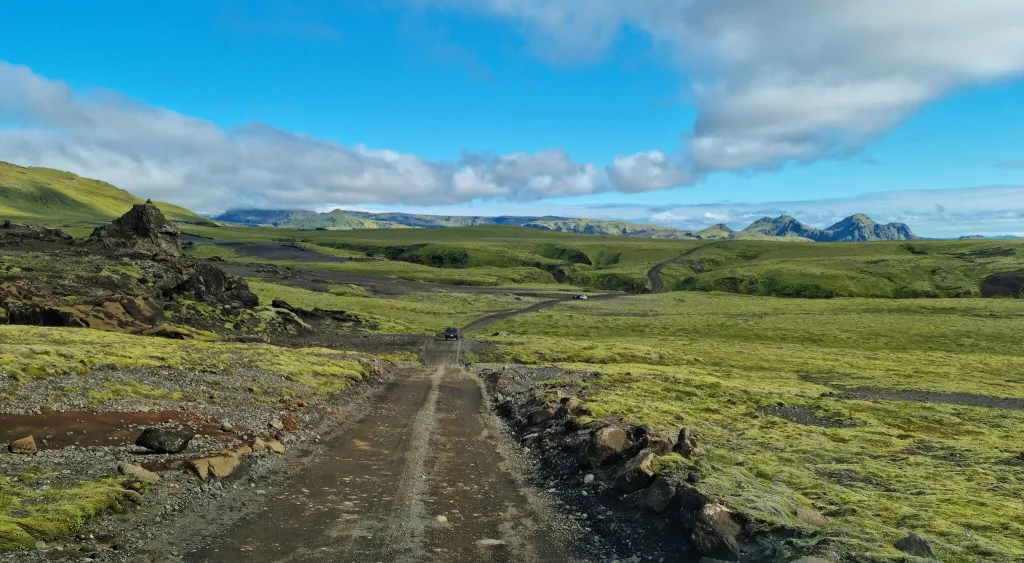
Out-of-this-world landscapes surrounding the F235 road towards Langisjór lake
The easy way – F235
The least problematic access road to Langisjór is the F-road F235. It’s a beautiful road that never gets boring for us, and it’s also one of the easiest F-roads in Iceland.
There are only small river crossings and streams or puddles on F235, so it doesn’t require an extensive river crossing experience. The road quality is very good, with no huge potholes or any other traps. Any 4WD car is fine for F235.
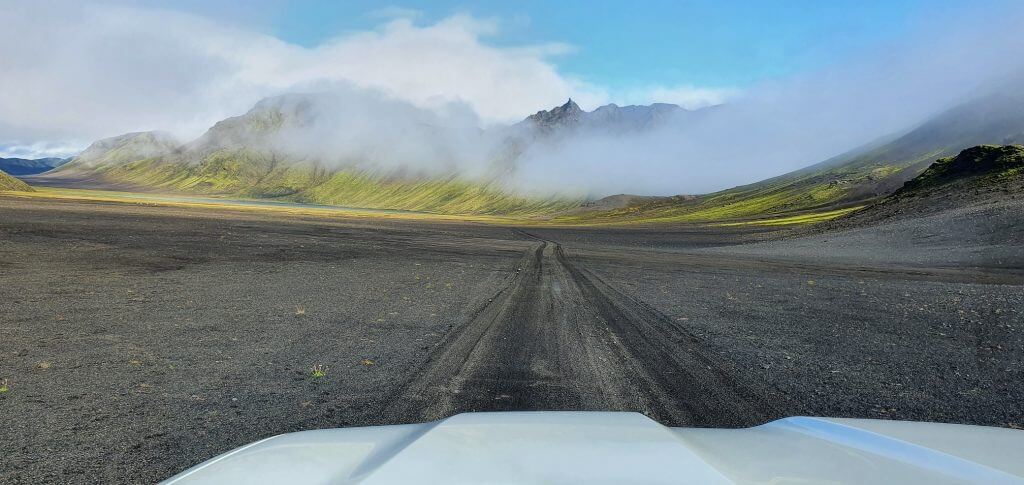
However, you first need to get to F235 somehow. The only connecting road to F235 is a bit more difficult F-road F208. Now, F208 is a long highland road connecting the south coast with central Iceland, leading east of Landmannalaugar. F235 is located exactly in the middle of F208.
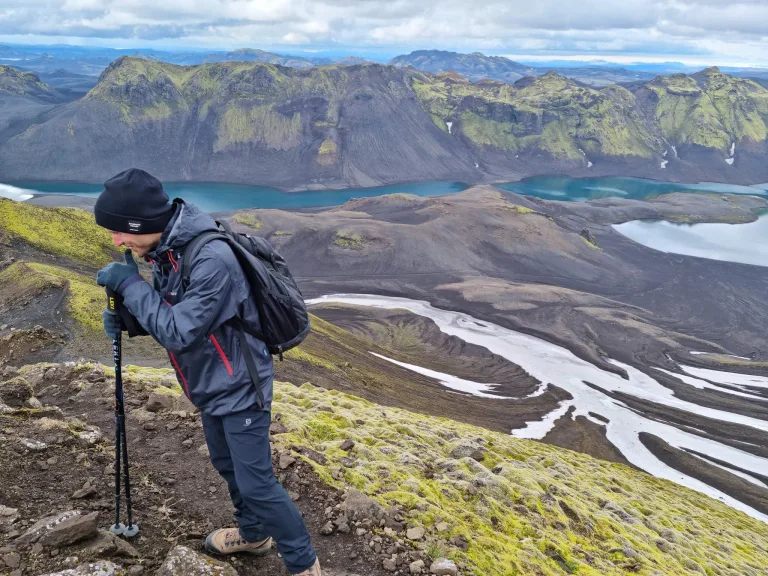
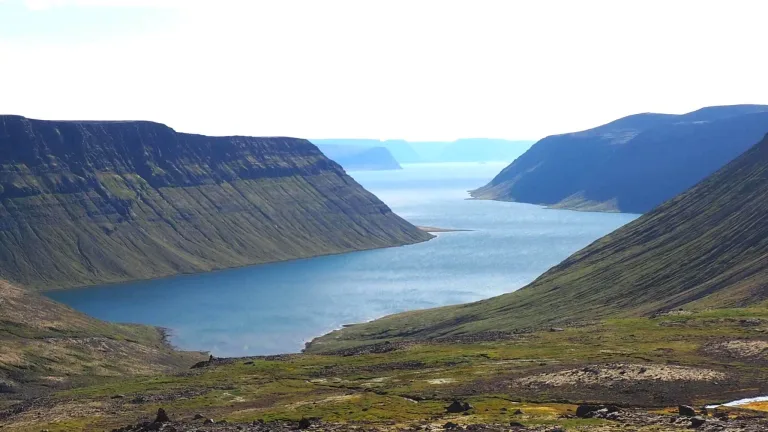
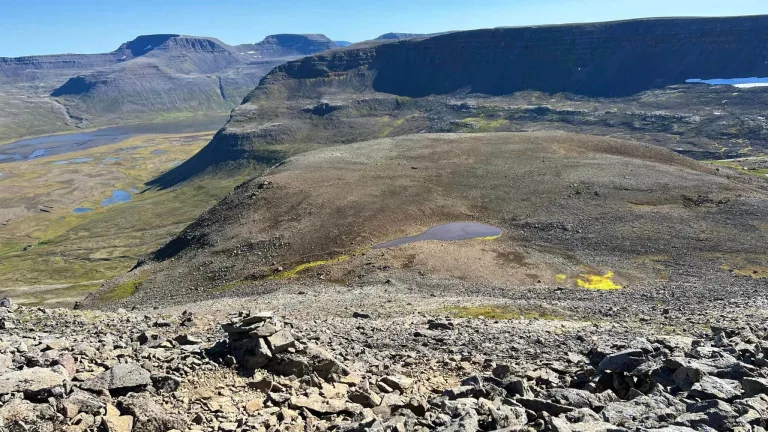
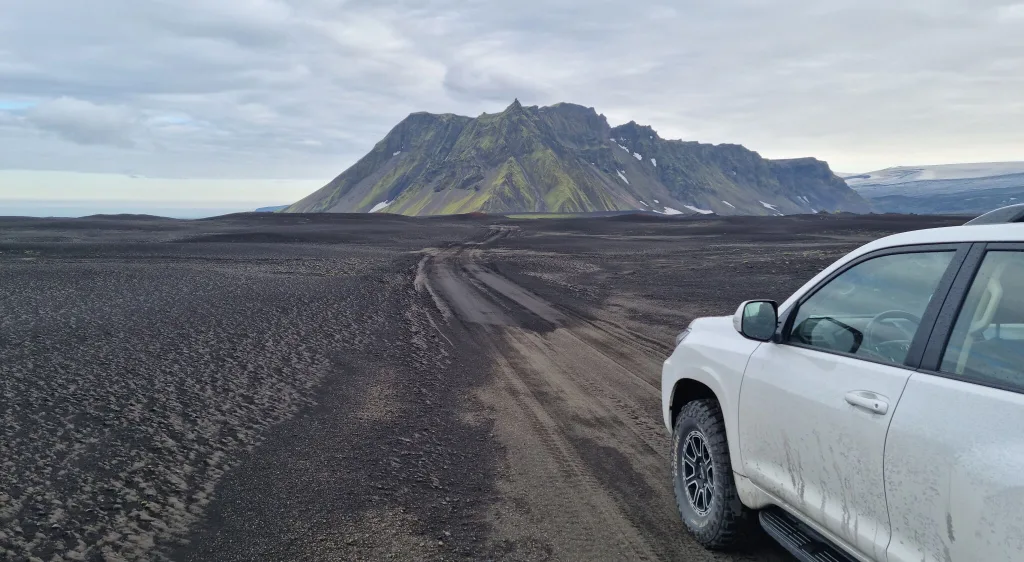
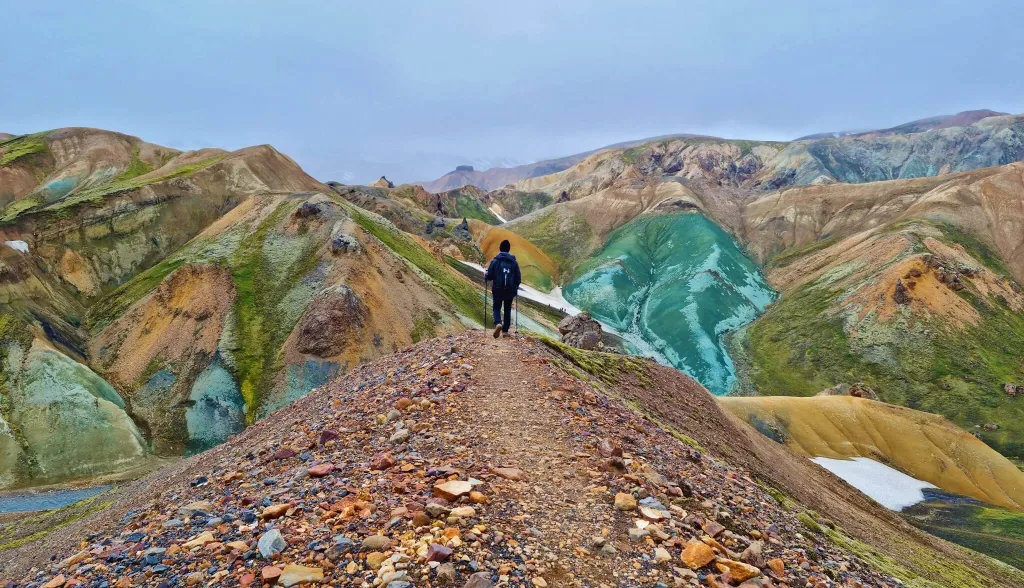
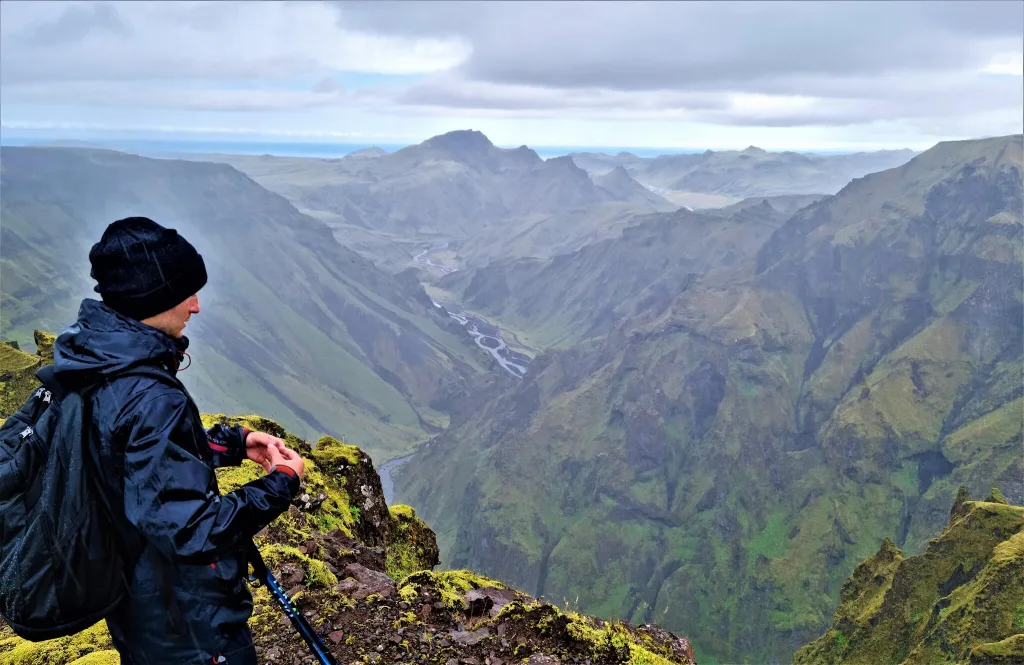
Views over Langisjór lake from the Sveinstindur hike
This means you have two options:
- Get to F235 from the northern F208 – several small to medium river crossings
- Get to F235 from the southern F208 – one medium river crossing next to Hólaskjól hut
Both of these F208 route options require crossing small to medium-sized rivers and hence also some river crossing experience and adhering to river crossing rules.
It’s best you drive at least a medium-sized 4×4 car, like the Dacia Duster, and not the smallest 4WD cars, like the Toyota Yaris Cross or Kia Sportage. In good weather conditions, you may pass in any car, when driving well. However, when it rains a lot, you may have problems. Thus, our recommendation is at least a medium-sized 4WD car.
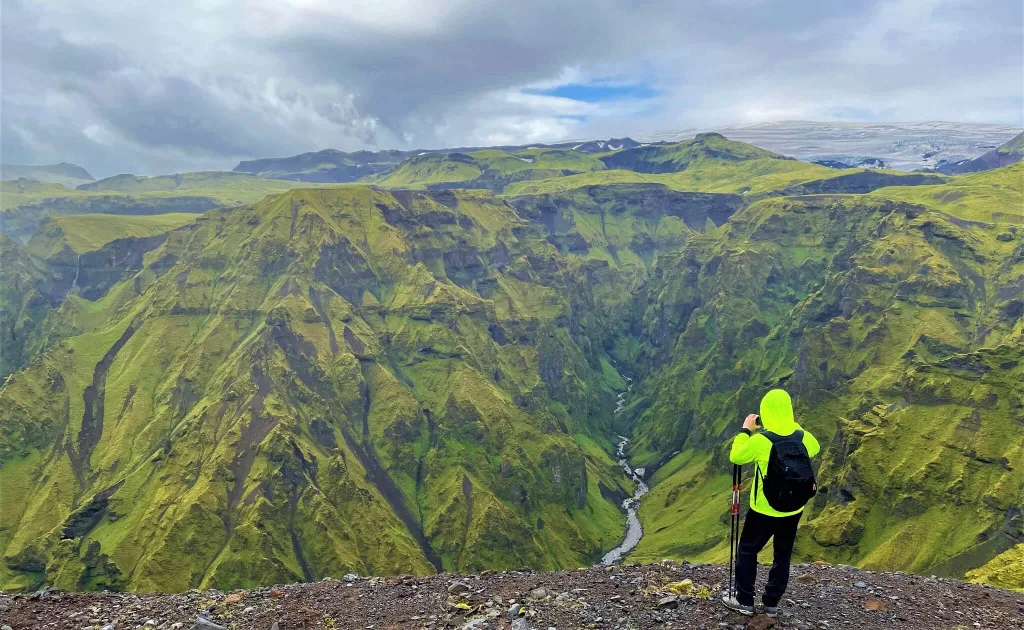
Langisjór lake offers amazing hiking trails for any hiking enthusiast
The hard way – other roads
Besides the relatively smooth F235 road, there are also other ways to reach Langisjór. None of them is easy, though. They all require former 4×4 driving experience, crossing medium-sized rivers, and are more for 4×4 enthusiasts rather than someone who wants to get quickly to Langisjór.
All of these alternative routes are actually not even F-roads. They are just dirt tracks. This means they are harder to drive, and your car rental insurance may not apply. So either consult your rental company before driving them, or you have to take the risk if something happens, paying for it yourself. We‘ve driven all of these tracks, and as 4×4 enthusiasts, we love them!
Skælingar Blautulón track
Skaelingar Blautulón track is the only track leading to Langisjór from the southeast. There’s one significant river crossing right in the beginning, close to Hólaskjól highland center. Afterward, Skælingar gets a bit rough, with some steeper inclines and declines. We even encountered snowfields on the track a few times in July!
The main highlight and, at the same time, an obstacle of Skælingar Blautulón track is the picturesque lake Blautulón. Spoiler alert – you have to cross the lake with your car! How? Read further below, and you will get to know it 🙂
You have to drive at least a large 4×4 car on this road, ideally a super jeep.
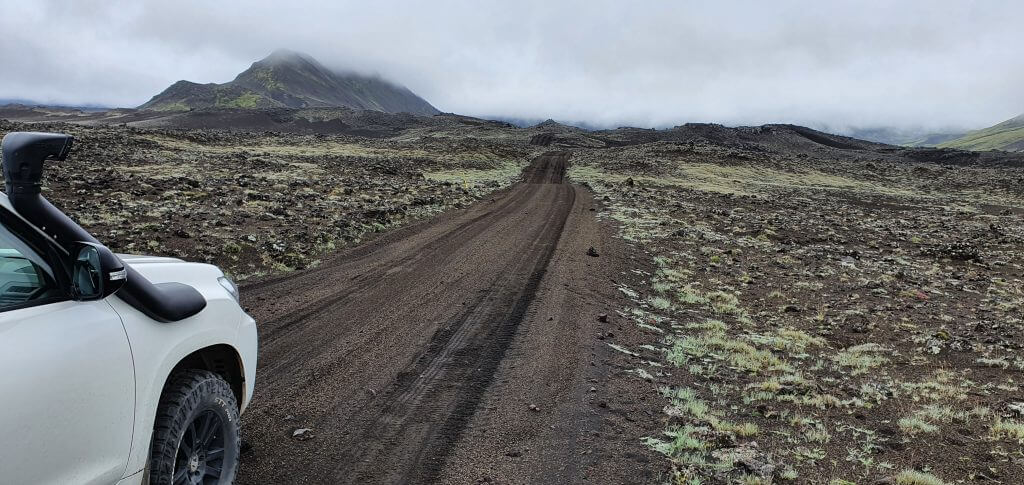
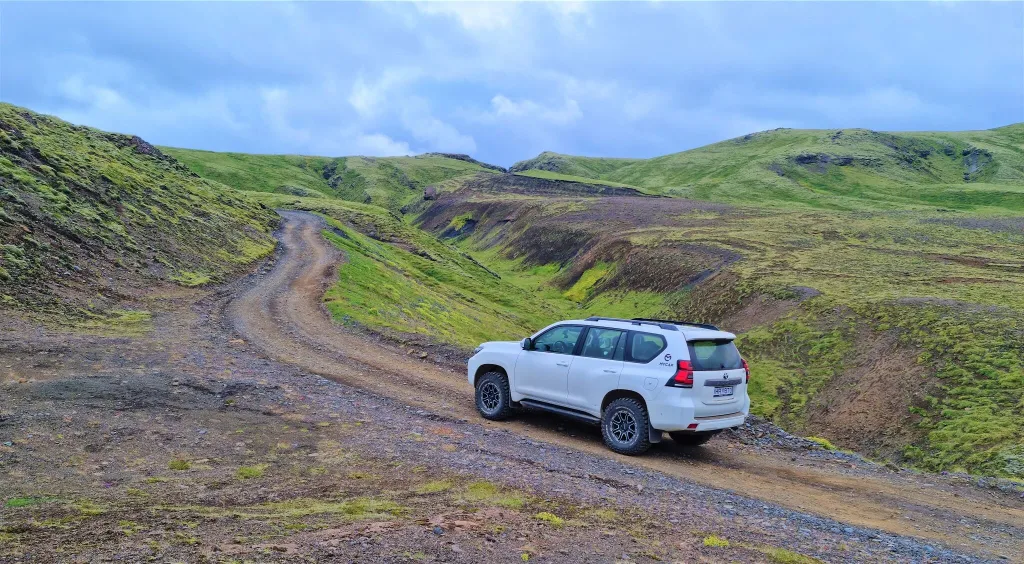
Faxasund track
Faxasund track is a challenging dirt road leading to Langisjór from the northwest. It’s a beautiful and versatile track, great for 4×4 lovers. You will have to overcome small to medium-sized river crossings, and there are several steeper hillside sections.
The most difficult part is close to the junction with F208. It consists of millions of sharp stones, and you need to take special care not to damage both your tires and undercarriage. When we drove the track in July, part of it close to Langisjór was also severely damaged.
You have to drive at least a large 4×4 car on Faxasund, ideally a super jeep.
Botnlangalón track
By far, the most difficult track that will get you to Langisjór is Botnlangalón, named after the lake that it leads to in the first place. It’s the northernmost and westernmost track. This is the track only for super jeeps. We drove it in a 33” modified Land Cruiser and barely made it!
Botnlangalón track crosses harsh, moon-like landscapes and is mostly unmaintained with tons of bigger holes, bumps, very steep ascents and declines, and, of course, river crossings as well. It took us a long time to finish the track, and I’m not sure I would drive it again.
However, there’s one fantastic highlight right at the end of this track. Which one? Read about our experience below, and you will get to know 🙂
When to visit Langisjór
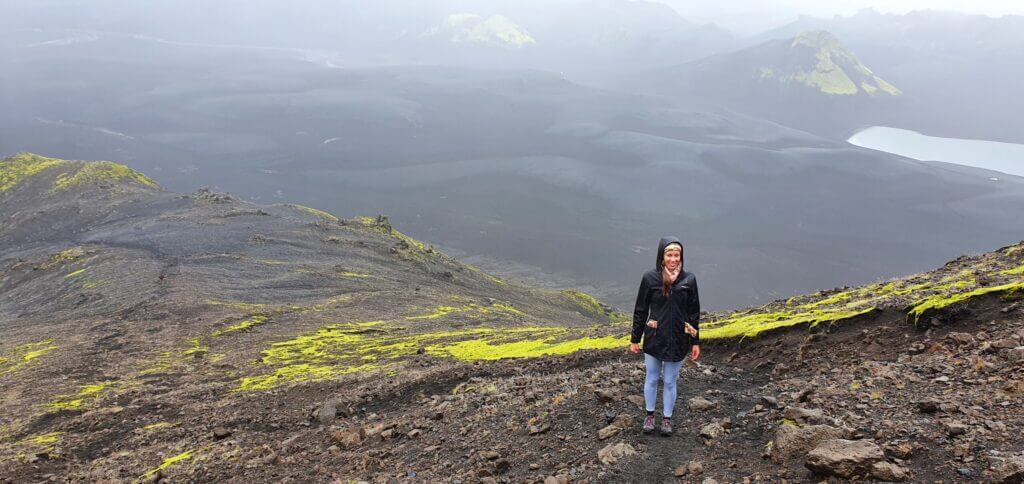
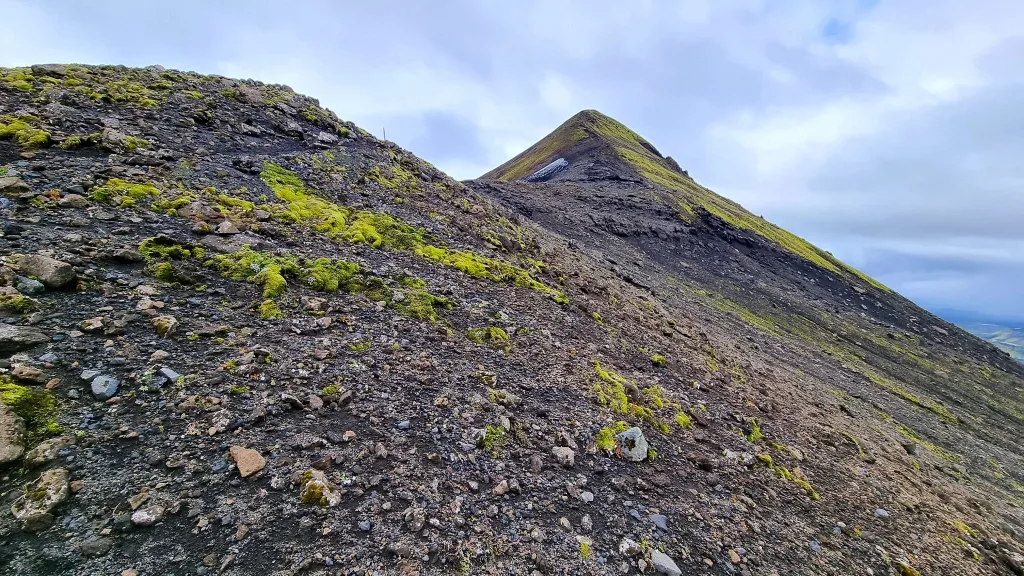
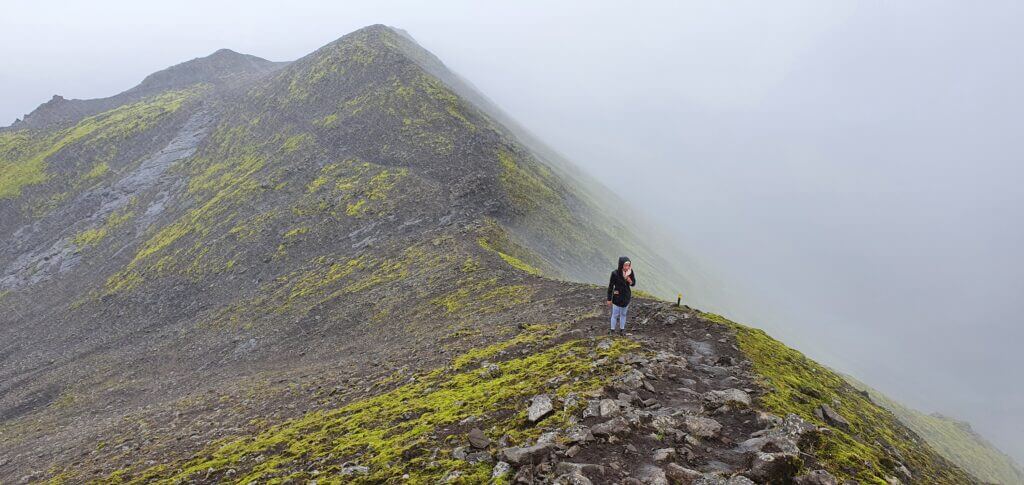
Sveinstindur hiking trail, somewhere around half towards the peak. Fog and rain are typical for this area.
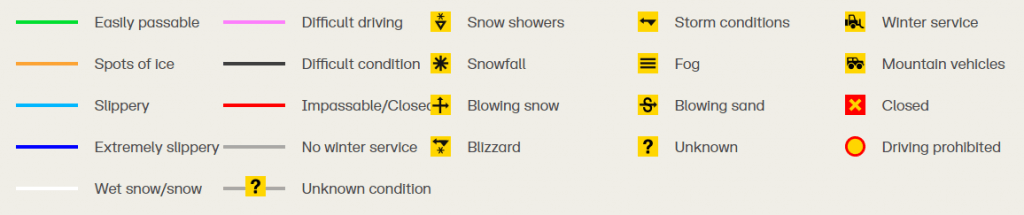
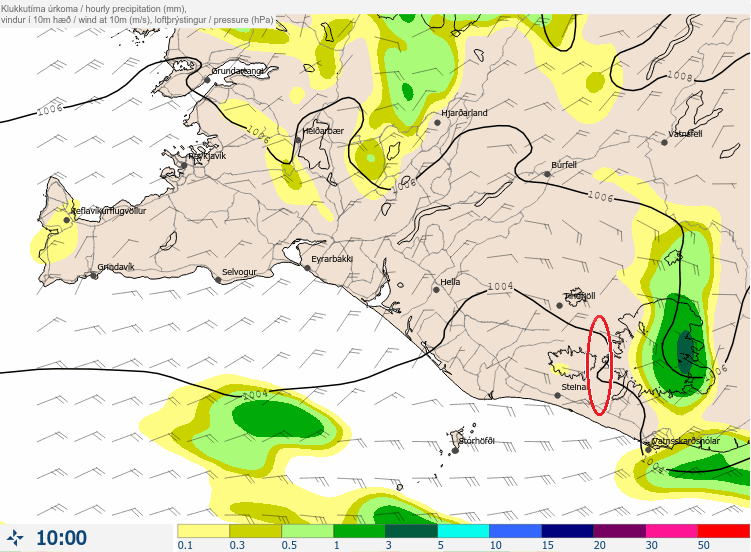
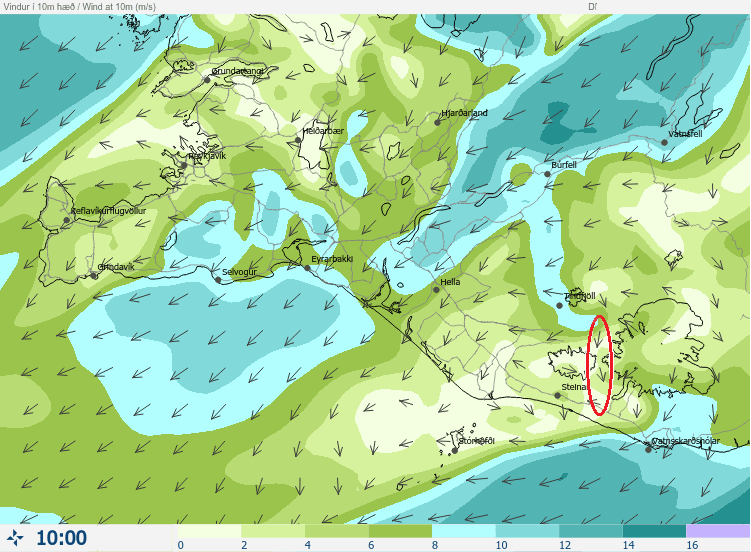
You can visit Langisjór only in summer, when the roads F208 and F235 leading to the lake are open, i.e. marked green or dashed green on Icelandic Road Map. The roads typically open sometime between mid-June and mid-July, and they become impassable during the course of September.
To have the highest chances of open roads, it’s best to visit Langisjór between mid-July and early September. This period coincides with the peak of Icelandic summer and dryness of the highland roads.
Things to do at Langisjór
The area around the lake is no Disneyland. It’s a remote part of the highlands with no special attractions, however, with countless remarkable natural sceneries. Those who enjoy isolated places and untouched desolate landscapes will fall in love with Langisjór.
Hike
Hiking is the best way to enjoy a visit to Langisjór to the fullest
There’s no wonder the main attraction in the area is hiking. Langisjór is also close to other popular hiking areas of the highlands, like Eldgjá or Laki craters. Most likely, the most beautiful hike here is a trek to the peak of Sveinstindur.
Drive rough roads
Off-road and 4×4 enthusiasts will love the area around Langisjór, which has many wonderful and difficult roads to try. Be careful, though, what you mean by a word “off-road”. It’s illegal and strictly punished to drive off any road in Iceland.
It has to be an official road or track with a name you plan to drive on. So, if we use the term “off-road” for driving on Icelandic tracks like Blautulón, because they are rough, it’s OK. But never drive off the road in Iceland, it damages the soil, often even forever, and it’s strictly prohibited!
In other words, off-road driving is forbidden in Iceland, but off-road lovers will enjoy countless Icelandic F-roads and dirt tracks due to their versatile terrain and surroundings!
Lake Langisjór
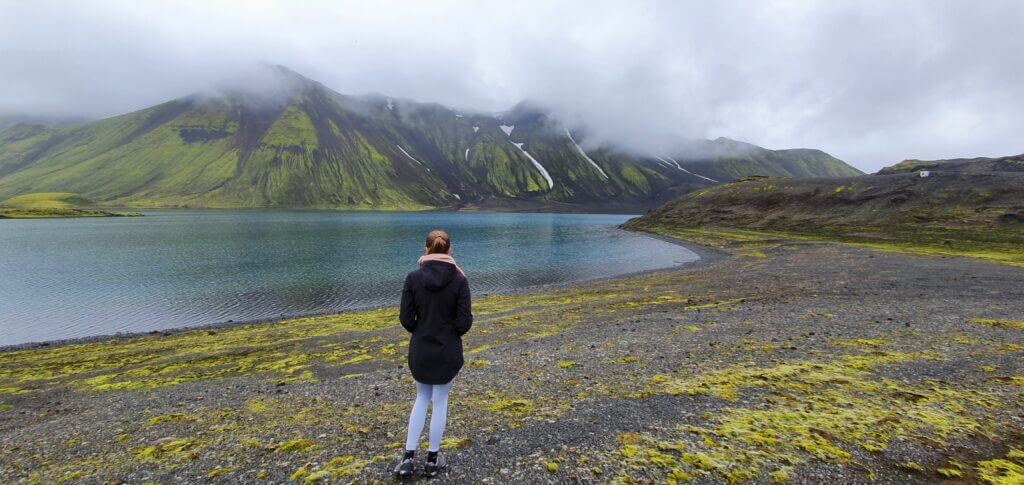
What else could possibly be the main highlight than the lake itself? Lake Langisjór is beautiful and fascinating. When we saw the lake for the first time, we were surprised by the absolute silence in the area. The word tranquil is weak to use. If we talk about Langisjór, it’s even calmer than that.
The lake itself is also quite well accessible. You could drive pretty close to the lake and leave your car at the adjacent designated car parks. Then, you can either walk around the lake, climb a nearby hill to get a view of the lake, or take one of the longer Langisjór hiking trails to admire it from more angles and viewpoints.
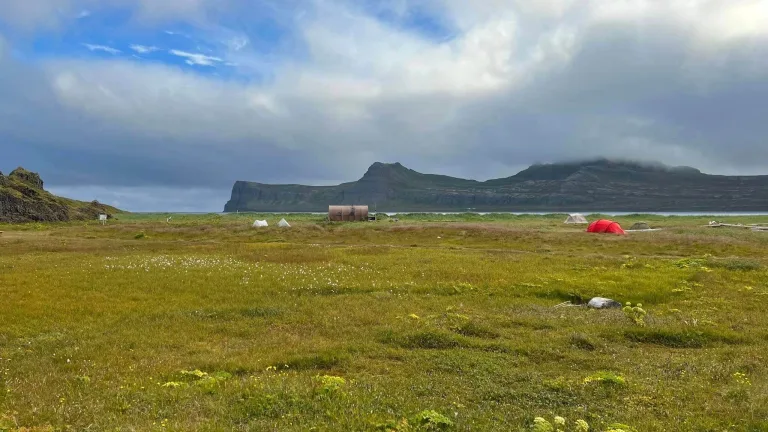
Lake just next to the Langisjór campsite mark on the map. Langisjór is a fishing paradise.
Fishing
On our first visit to Langisjór, we quickly realized this is a sought-after area also due to its incredible fishing opportunities. Crystal clear water of the lake is not only mesmerizing to look at, but it also seems to be loved by the lake’s inhabitants – some tasty fish.
Be sure to study the Icelandic fishing rules well and get all the necessary permits before fishing in Iceland.
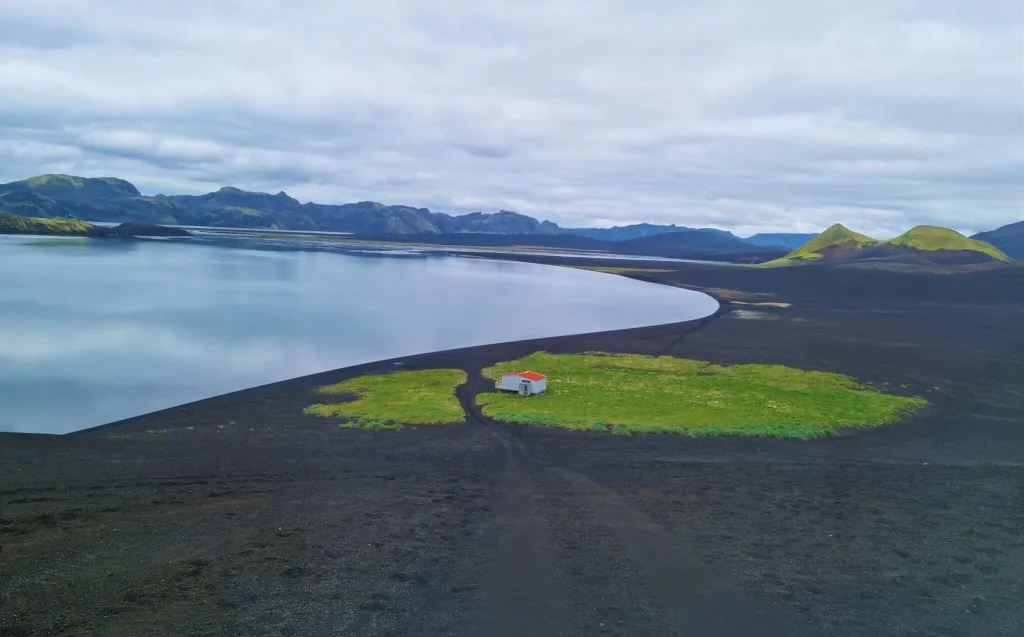
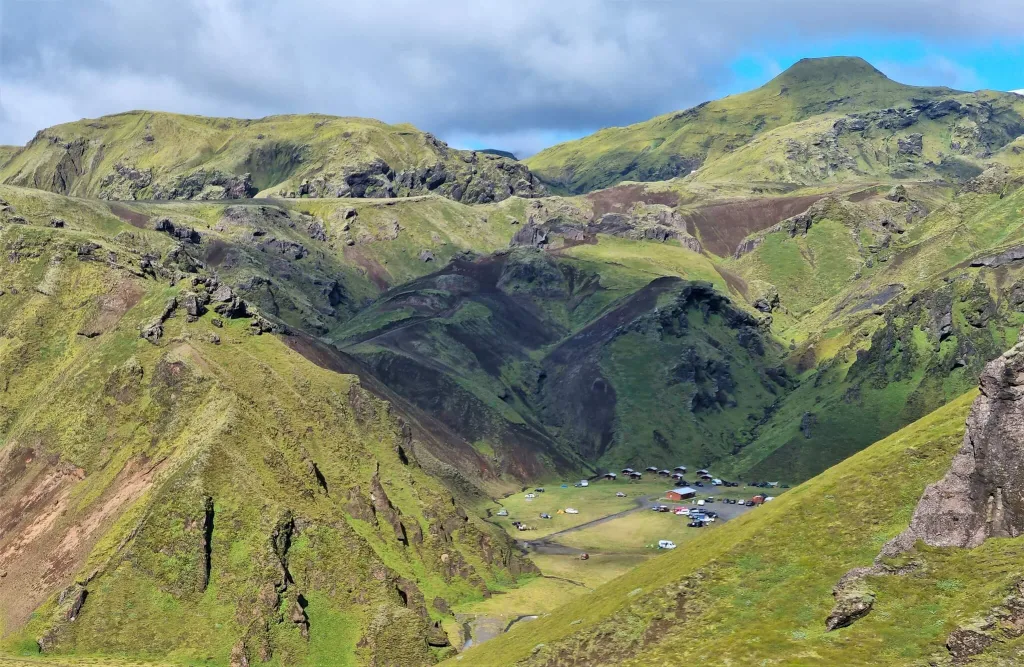
Camping
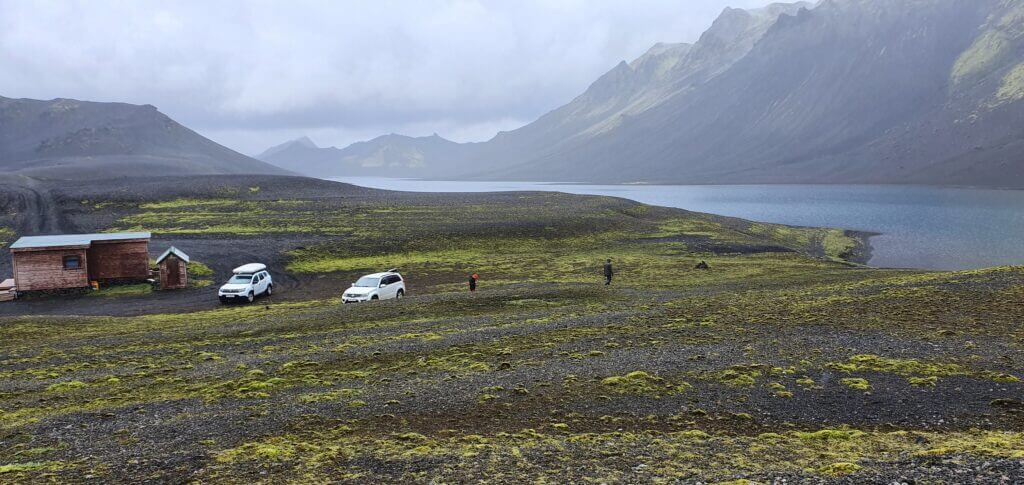
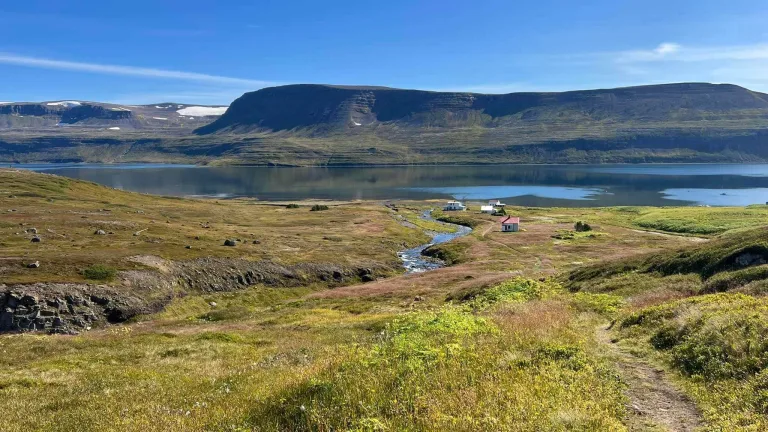
This was supposed to be Langisjór campsite according to maps. It just turned out to be a remote place with nobody being there.
Langisjór campsite is not huge in size but fits nicely in the simple and harsh surroundings of the lake. It’s great mainly for those who plan on embarking on some of the multi-day hikes around the lake.
There’s a car park, a warden’s hut, typically occupied only in summer, and also two standard, modern flush toilets 🙂
Langisjór hiking trails

Lake Langisjór hiking trails map (click to enlarge)
There are three main Langisjór hiking trails:
- the Sveinstindur trail
- the trail around Langisjór lake
- the trail leading around Uxatindar mountains to Eldgjá.
Sveinstindur
Length: 4km
Time: 2 hours
Difficulty: moderate
Hiking trail map: Sveinstindur trail
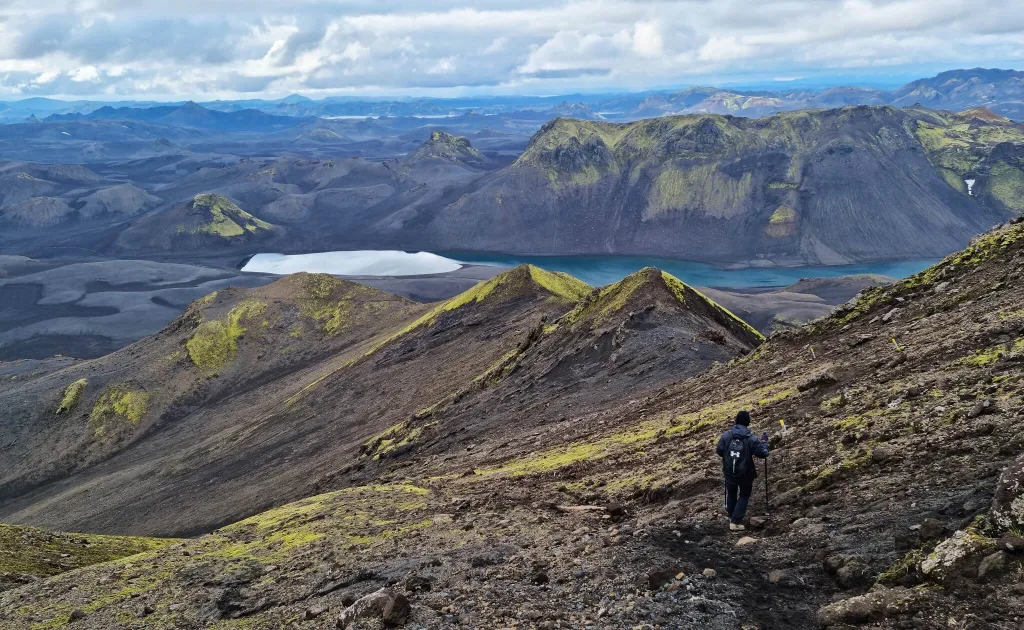
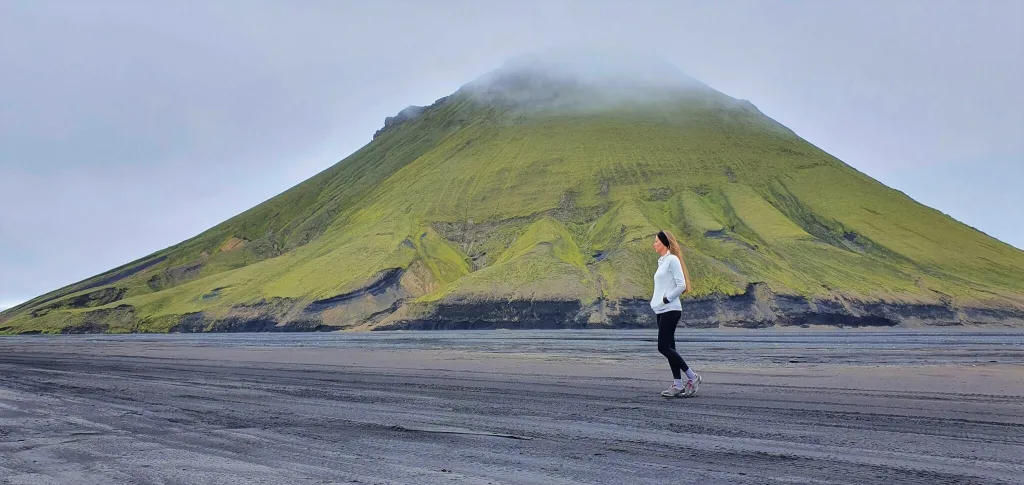
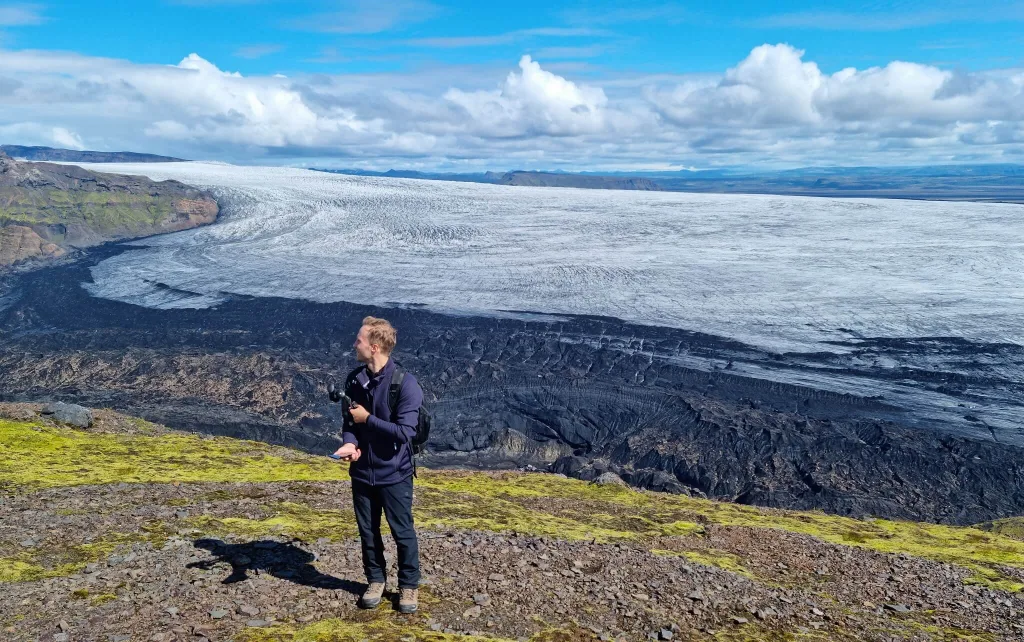
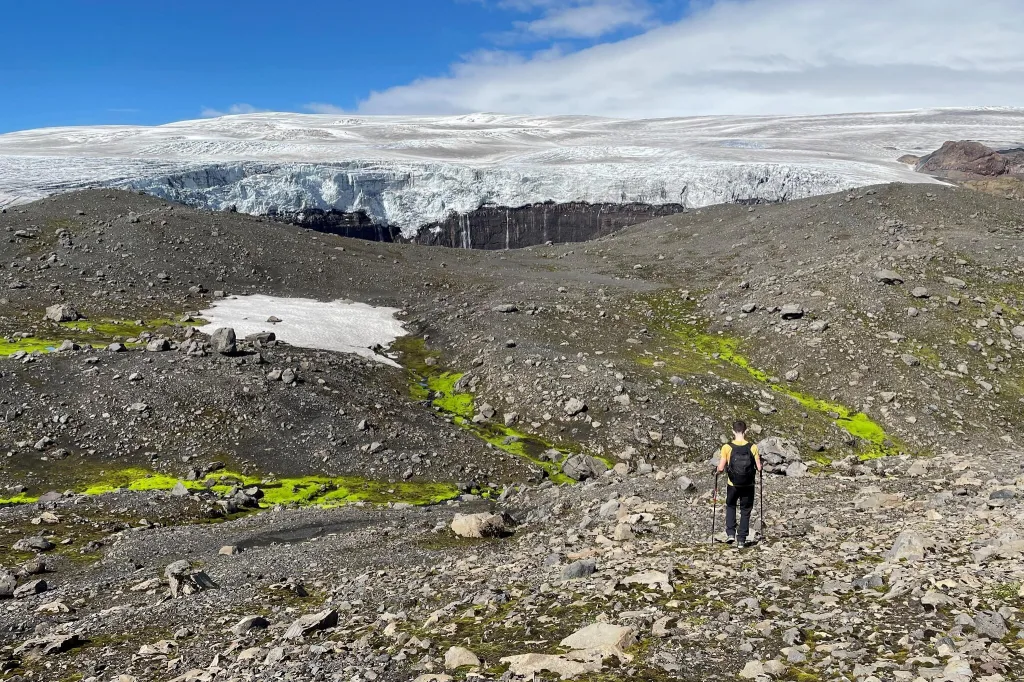
Sveinstindur is the tallest peak right next to the Langisjór lake. It offers the most spectacular views of Langisjór as well as the entire moon-like area. It’s more than just worth a short but intense, roughly 1 hour long climb up the narrow and rocky path. This shortest trail to Sveinstindur is a well-marked out-and-back hike.
Sveinstindur is an Icelandic hidden gem almost nobody writes about, and we highly recommend hiking it if you are in good physical shape. The summit of Sveinstindur is one of the most magical places in Iceland. Make sure you visit it on a clear day, though otherwise you won’t see a thing.
Around Sveinstindur
Sveinstindur peak in the distance
Length: 11km
Time: 4 hours
Difficulty: difficult
Hiking trail map: Around Sveinstindur trail
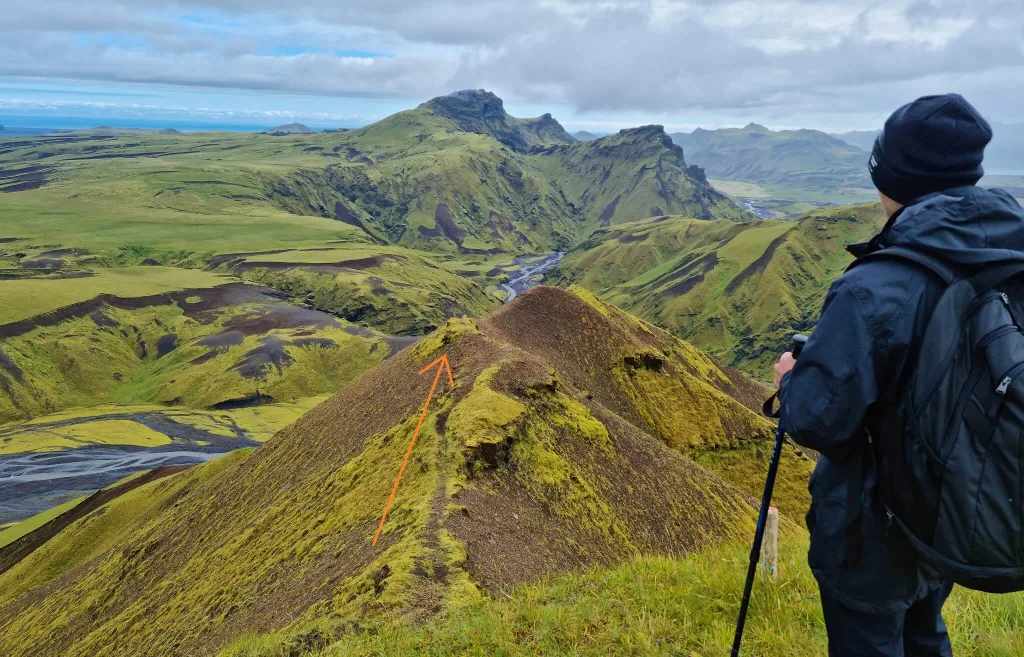
If you want to spend more time around Sveinstindur and Langisjór, you can take a Sveinstindur loop trail. This circular trail copies the southern edge of the lake and then turns south as an ascent to Sveinstindur.
This part of the trail is not well marked, and it’s best hiked later in the season when you can see at least some steps you can follow. It’s only for seasoned hikers who are not afraid to trek off the beaten path.
Around Langisjór lake
Hiking around the entire Langisjór lake isn’t easy and should be prepared well in advance
Length: 50km
Time: 2 to 3 days
Difficulty: very difficult
Hiking trail map: Around Langisjor trail
If you are looking for a totally deserted multi-day hike in a scenic area, you can hike around the entire lake! The trail is not well marked, and you should have some experience with multi-day hikes in cold climate countries before taking it.
You may also encounter lake and river crossings, so it’s crucial you’ve already done some before. Ideally, you don’t want to be alone on this hike as well. We’ve also heard that online maps like Alltrails or Wikiloc are not precise in this area, so please be aware of that!
Uxatindar – Eldgjá
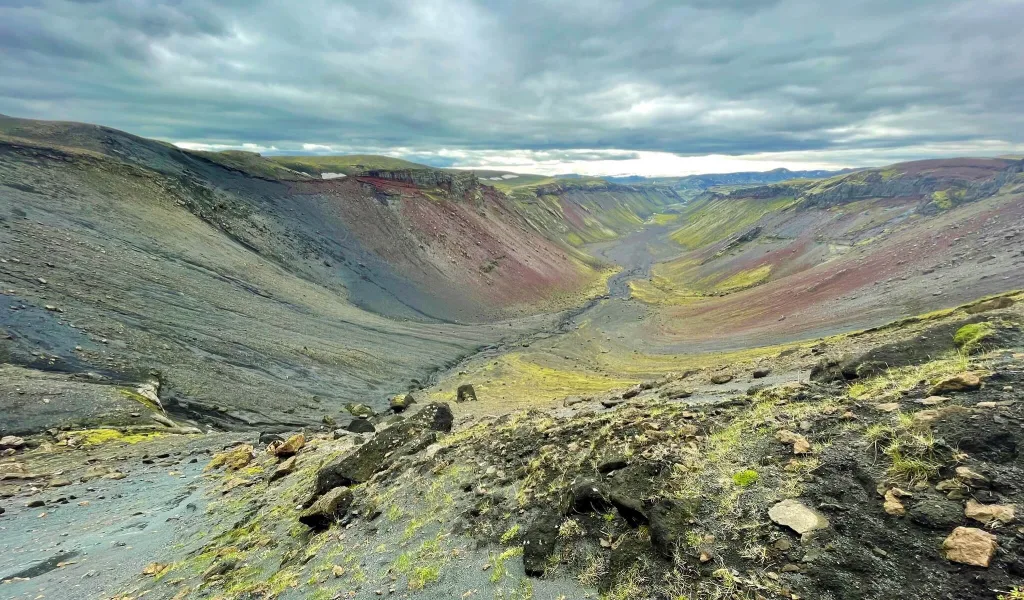
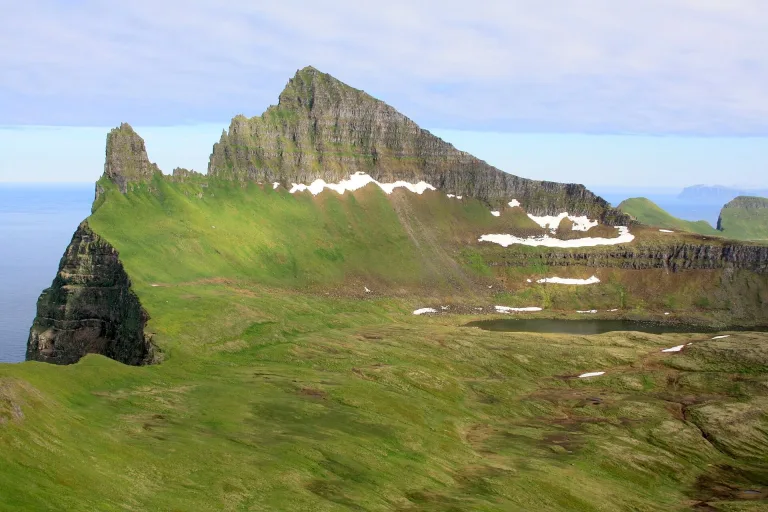
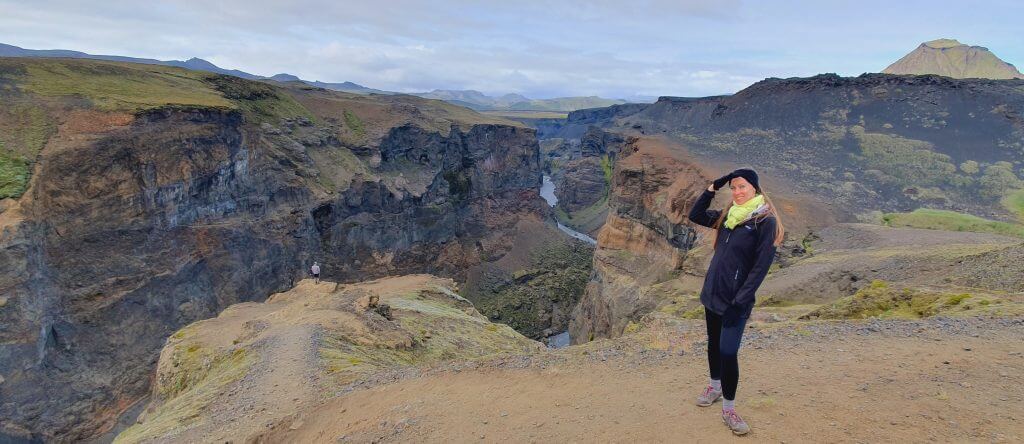
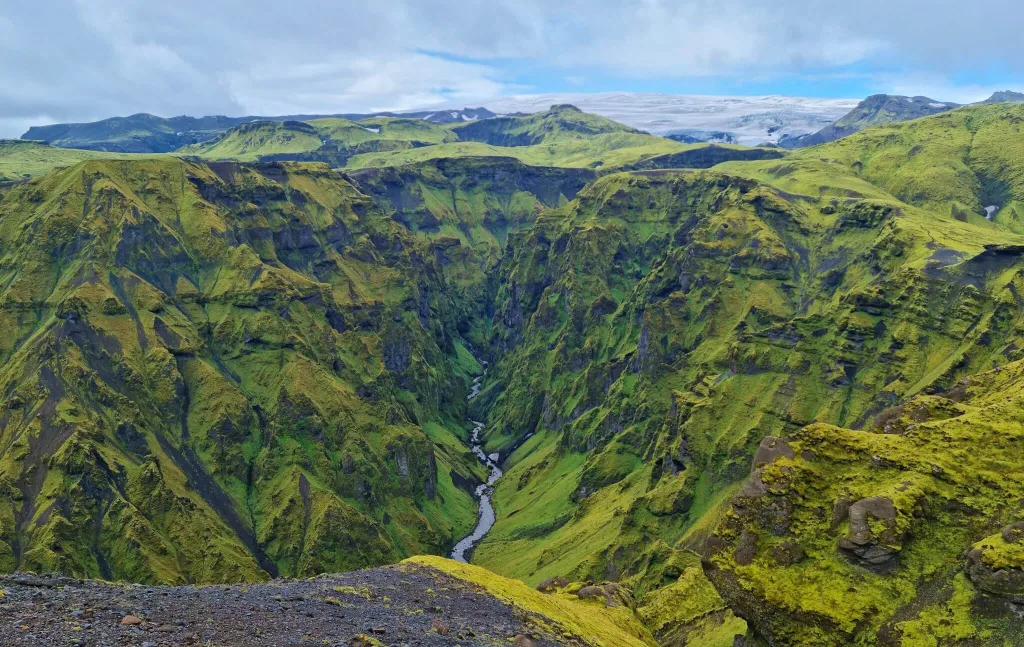
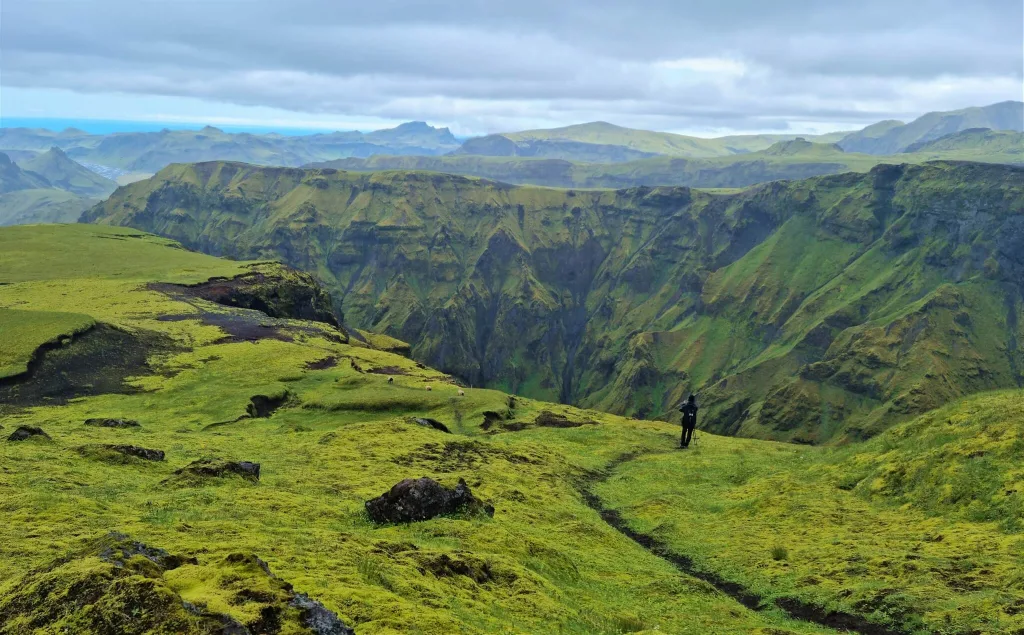
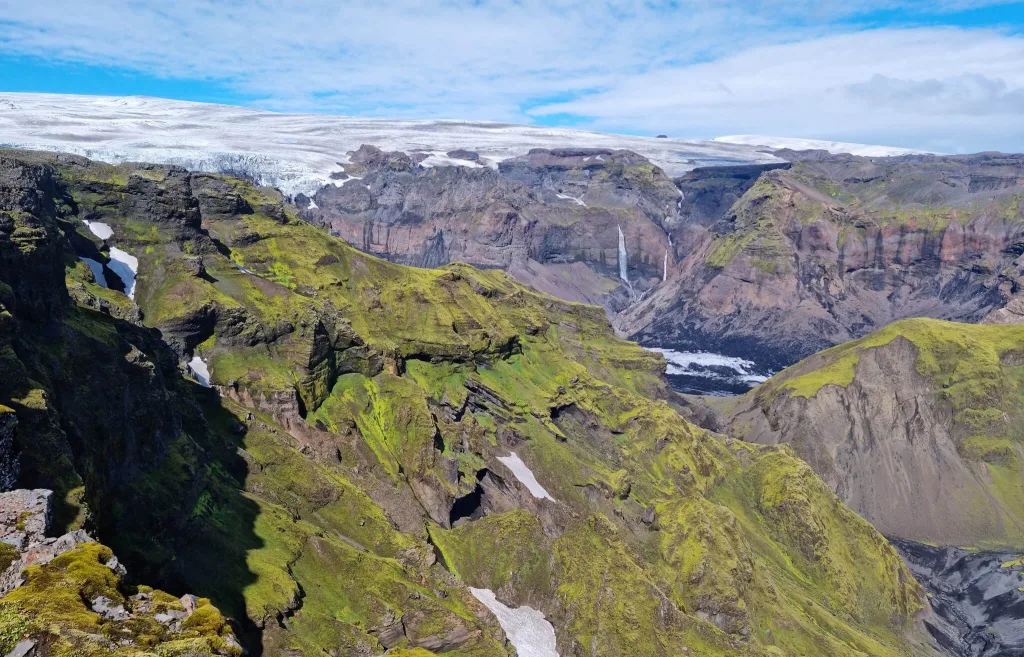
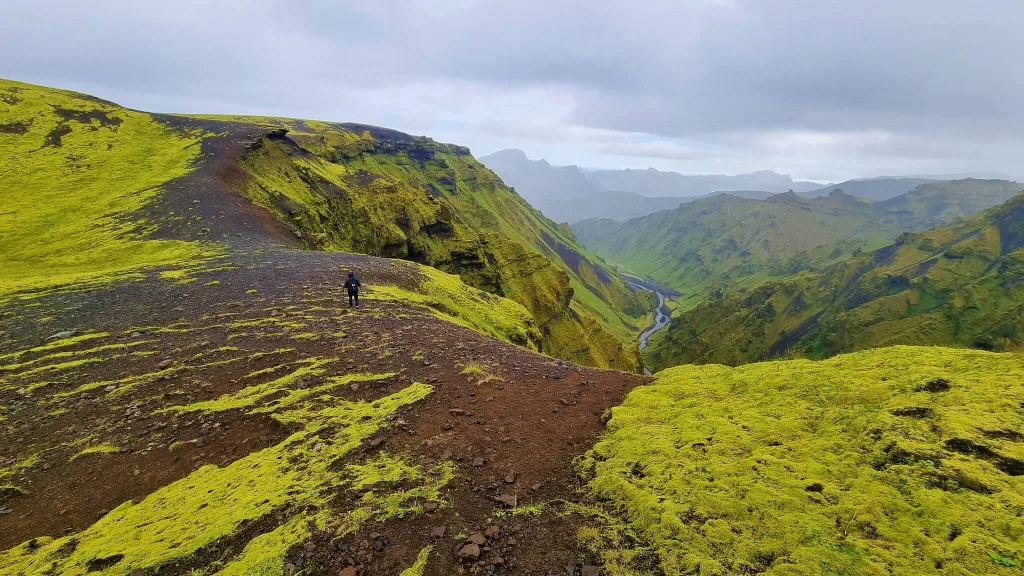
Bird’s eye view over the Eldgjá Canyon when hiking to Gjátindur
Length: 30-40km
Time: 2 to 3 days
Difficulty: very difficult
Hiking trail map: Uxatindar Eldgja trail
The last hiking option is to traverse all the way to Eldgjá. This is a multi-day hike that requires sleeping over in a mountain hut. The nearest huts are located at Sveinstindur, in Stóragil at Skælingar, or at Hólaskjól. You have to reserve the accommodation in advance at either Útivist or Hólaskjól.
The hike follows the Skaftá river along Skælingar and ends up in Eldgjá. It’s an excellent option for those who want to experience the wild surroundings of the Skælingar track, plus the scenic Uxatindar mountains on top of it, but don’t want to drive this rough road.
Our Tips
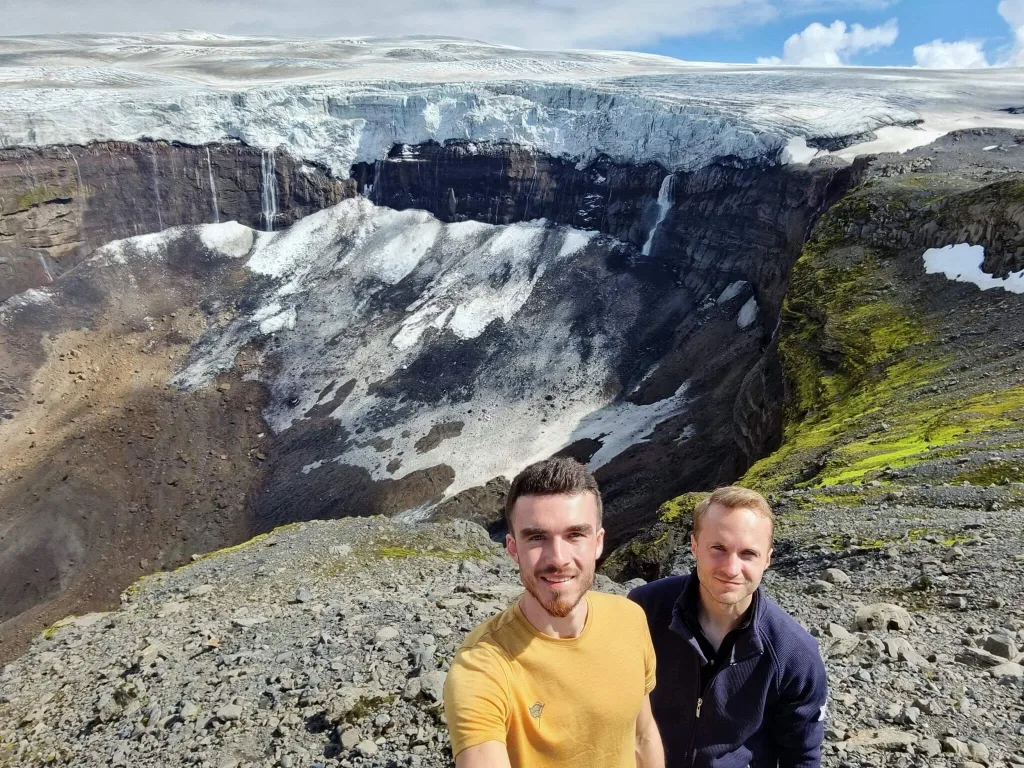
Sveinstindur peak selfie
- Plan the trip to Langisjór outside of heavy fog. If it’s too foggy, you will not see a thing, and it will not make much sense to drive all the way here.
- Take hiking poles if you plan to try any of the regular hikes, like Sveinstindur. They are pretty useful basically for any longer hike in Iceland.
- If it’s your first time in the Icelandic Highlands, take the easiest route, F235, both on your way to and from Langisjór.
- If you are in good shape and you catch a clear day, be sure to hike to the top of Sveinstindur! It’s a once-in-a-lifetime experience!
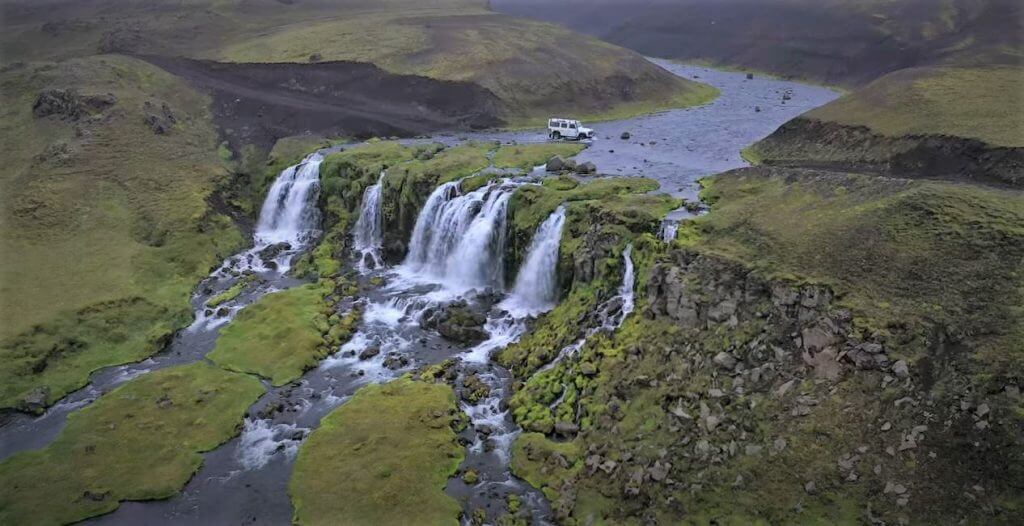
- If you have enough time and like to pack a lot of things into one day, you can combine a trip to Langisjór with visiting Eldgjá. Go and see Ófærufoss, at least; it’s gorgeous!
Our Langisjór experience
We’ve been to Langisjór many times. Below we chose our three most memorable experiences you may find helpful.
First trip: F235 to Lake and 1st Sveinstindur Attempt
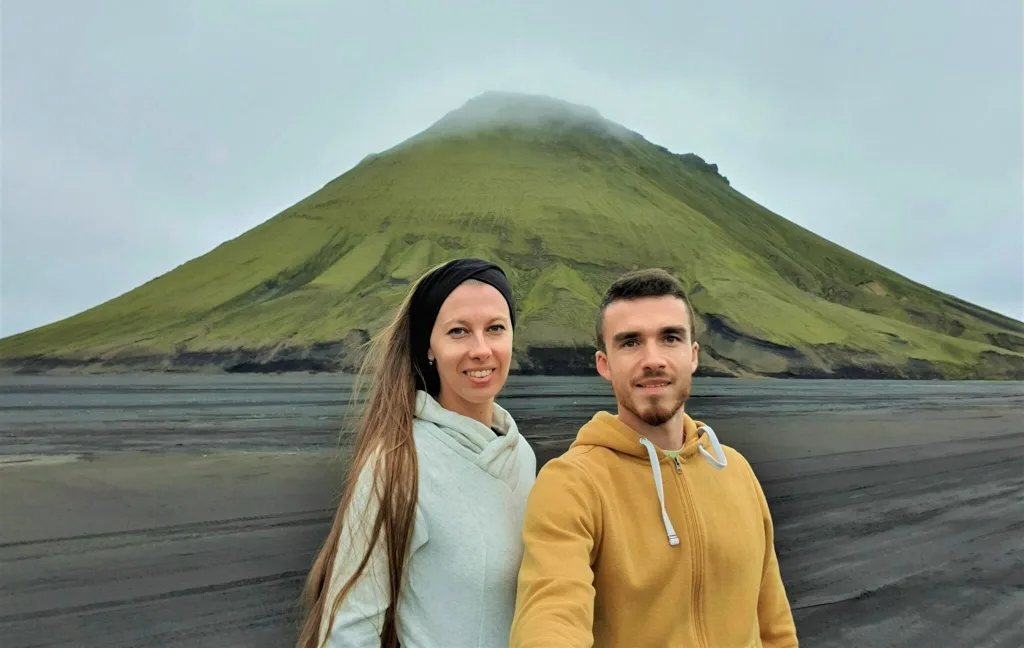
We visited Langisjór for the first time during the summer of 2020. Yes, exactly during huge Covid lockdowns. And it was magical. Enchanting. Otherworldly. Tourism in Iceland was down by 90%, and we were basically the only ones driving the roads on that day. And we were a bit scared, to be honest.

Surreal landscapes on road F235 towards Langisjór lake
This was the first time we’d driven an F-road. And we weren’t sure what to do. We followed all the theoretical river crossing advice to the last point but were scared anyway. That being said, we gained a lot of helpful experience throughout the trip. You can read in detail about our first trip to Langisjór and the Icelandic Highlands.
Long story short, we took an F208 south from Vik and then an F235 to reach Langisjór. F235 is the easiest and pretty harmless way to get to Langisjór, as it contains only small to medium-sized river crossings and no other real obstacles. Still, we remained in awe throughout the entire day. The surrounding landscapes were simply amazing.
The upper part of the hike on Sveinstindur near Langisjor lake on a foggy day with slight rain
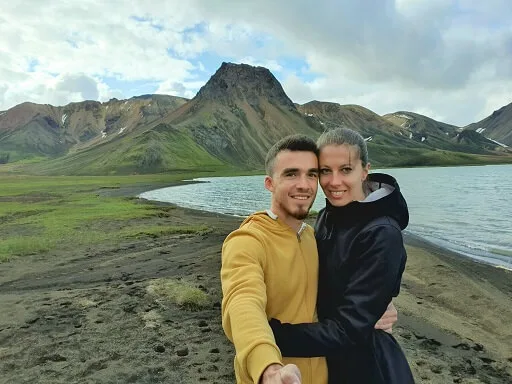
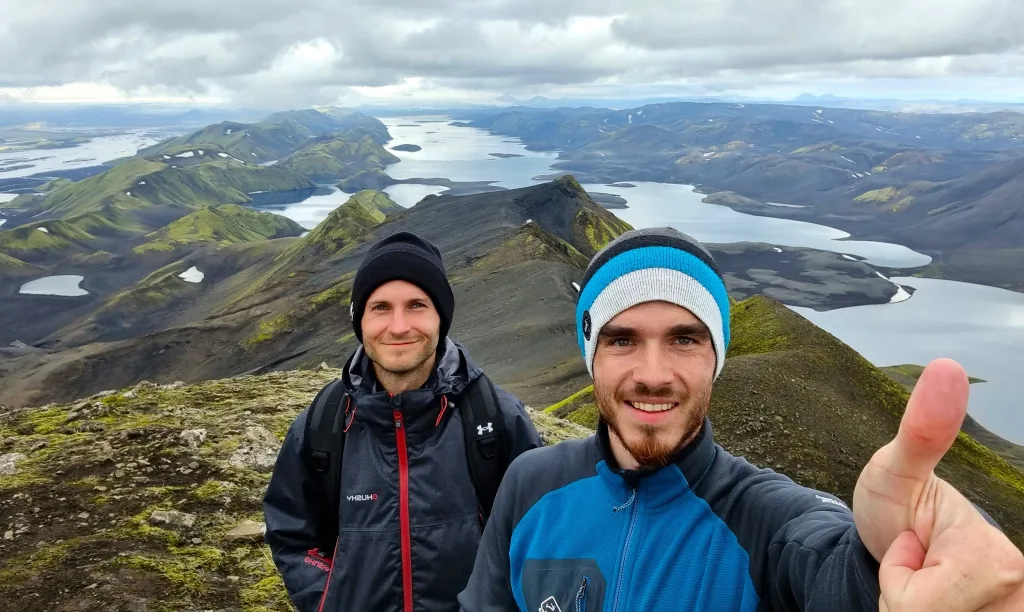
Proposing on Sveinstindur
Our (or better said, mine) ultimate aim was to hike the tallest peak of the Langisjor area called Sveinstindur, where I wanted to propose to my then fiancé, now wife, Katka. The hike started well. However, as is often the case in Iceland, the weather changed rapidly and turned into a pouring rain. This, combined with a rather steep ascent seemed a bit dangerous and very uncomfortable.
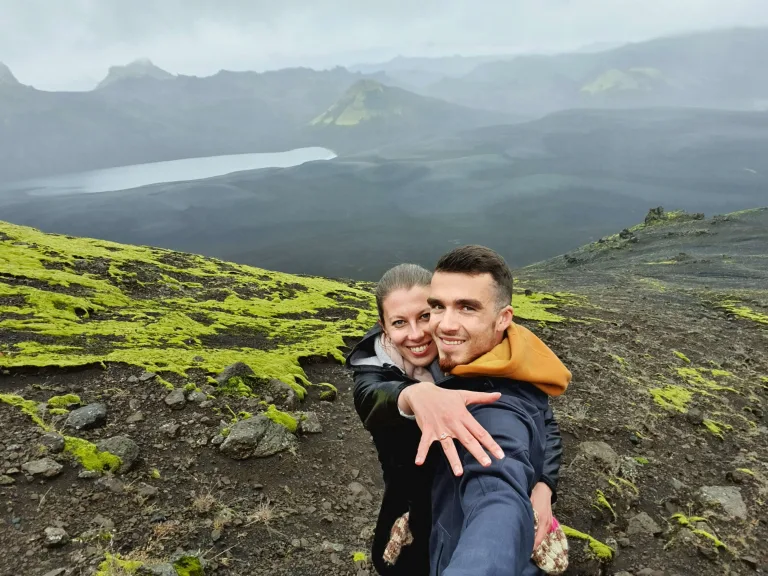
A few seconds after the (successful) marriage proposal on the way to Sveinstindur
At some point, Katka had enough and turned back. My plan to propose at the top went to pieces, so I had to improvise. Hence, I proposed right there on the ridge. And yes, you can guess, she definitely didn’t expect that 🙂 And a sour hike quickly evolved into one of the happiest memories of our lives. If you are interested in more details of our first-time Langisjór itinerary feel free to read our detailed article on it.
Second trip: Rough Roads and 2nd Sveinstindur Attempt
This time we wanted to try even more remote places and roads. Langisjór, Skælingar track, Blautulón track and Sveinstindur hike. That was our schedule for our last day in the highlands of southern Iceland.
I really wanted to drive the scarcely visited Skælingar dirt track to Langisjór 🙂 Thus, we went for Langisjór!
Beware, the Skaelingar and Blautulon tracks we drove are just dirt tracks. Not even F-roads. This means they are even harder to drive than F-roads. Always check with your rental company to see if it allows for such roads, choose your car wisely, and study the roads in advance. Mostly, only super jeeps are permitted to drive the dirt tracks.
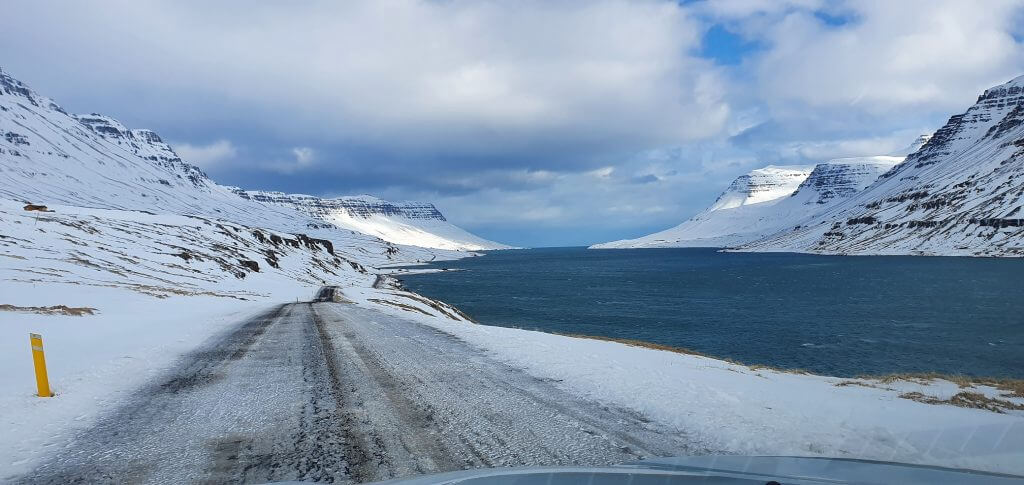
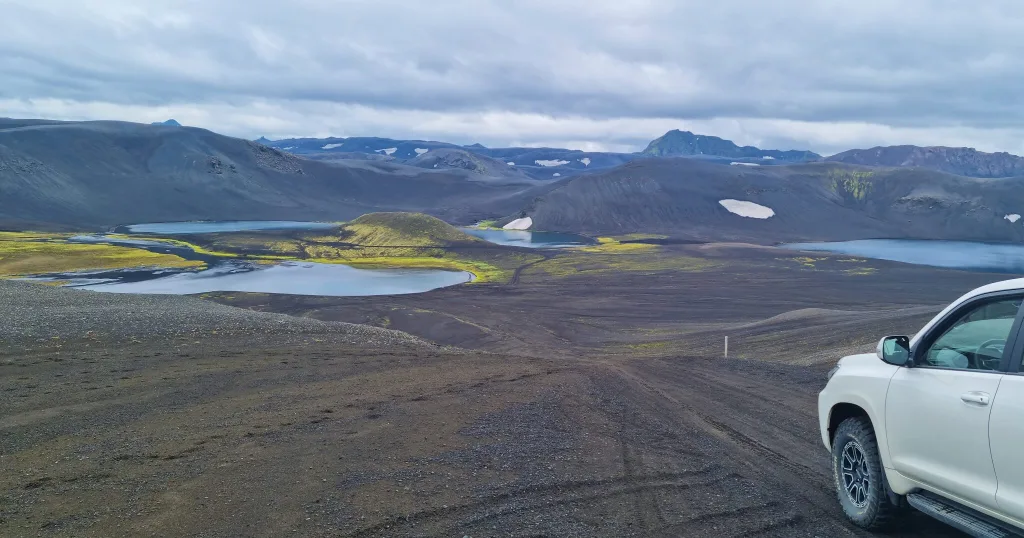
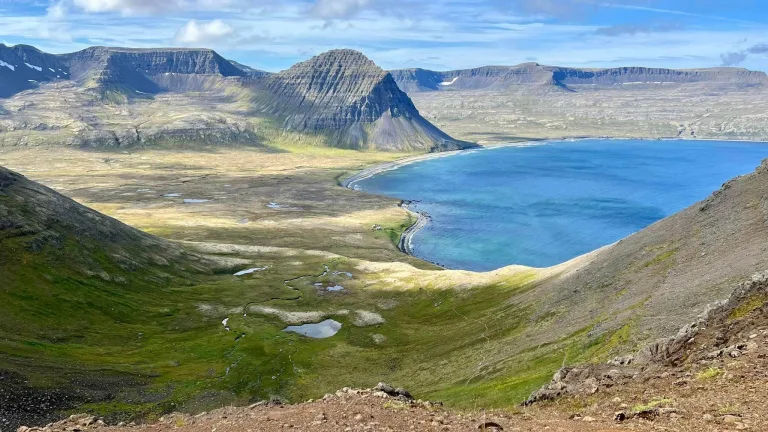
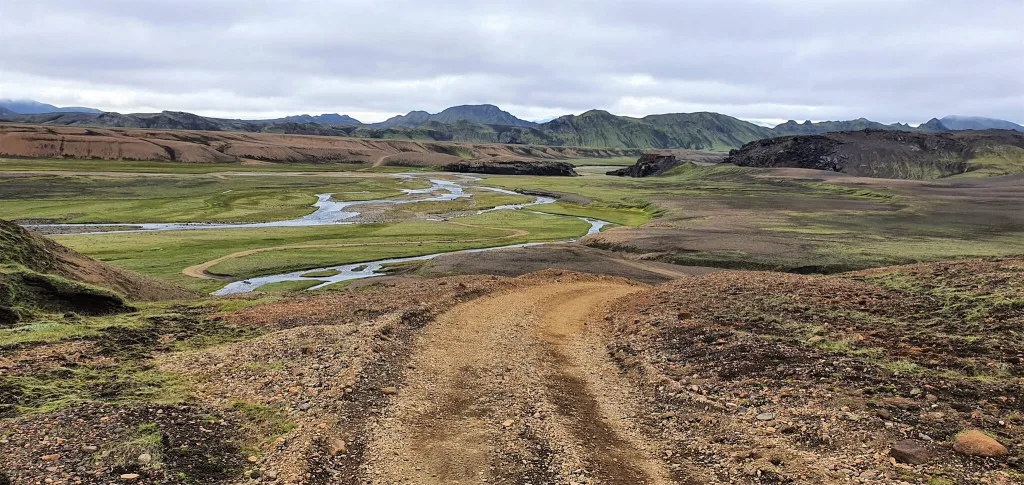
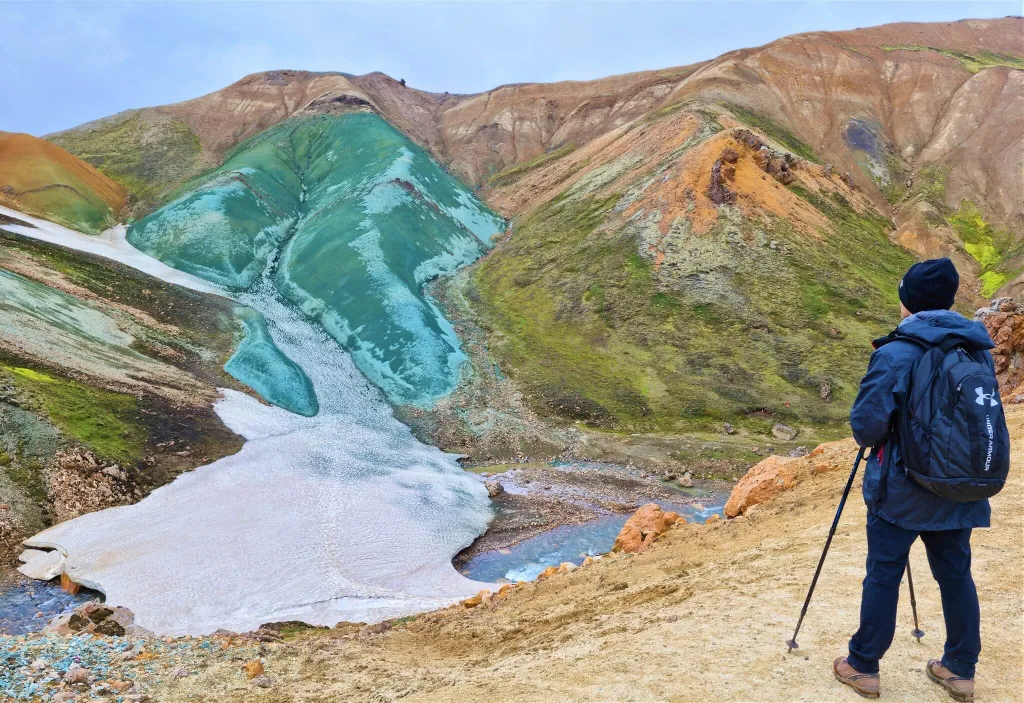
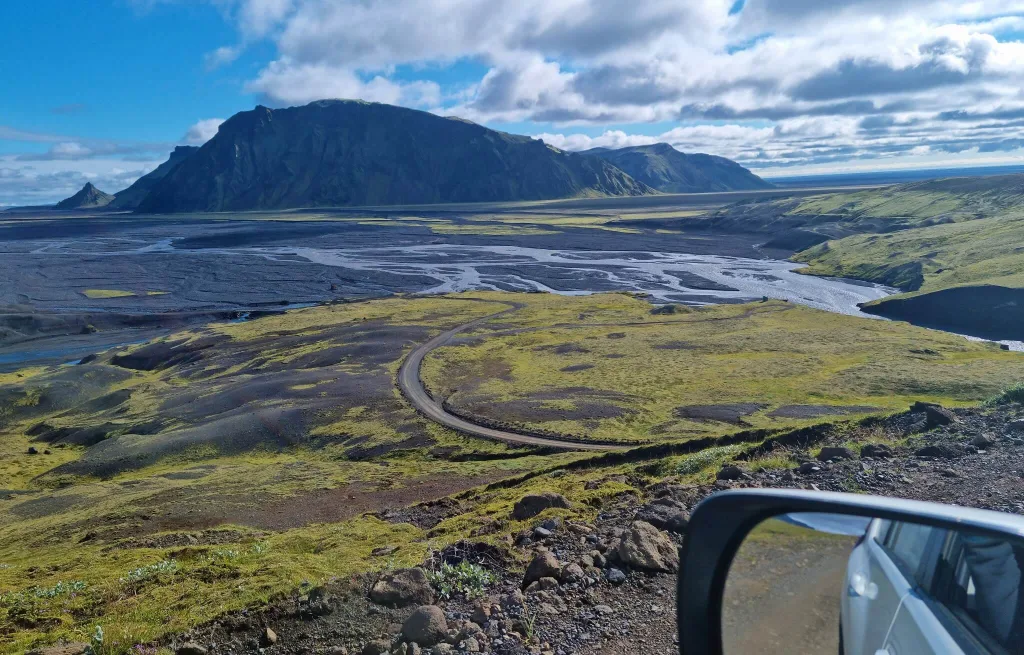
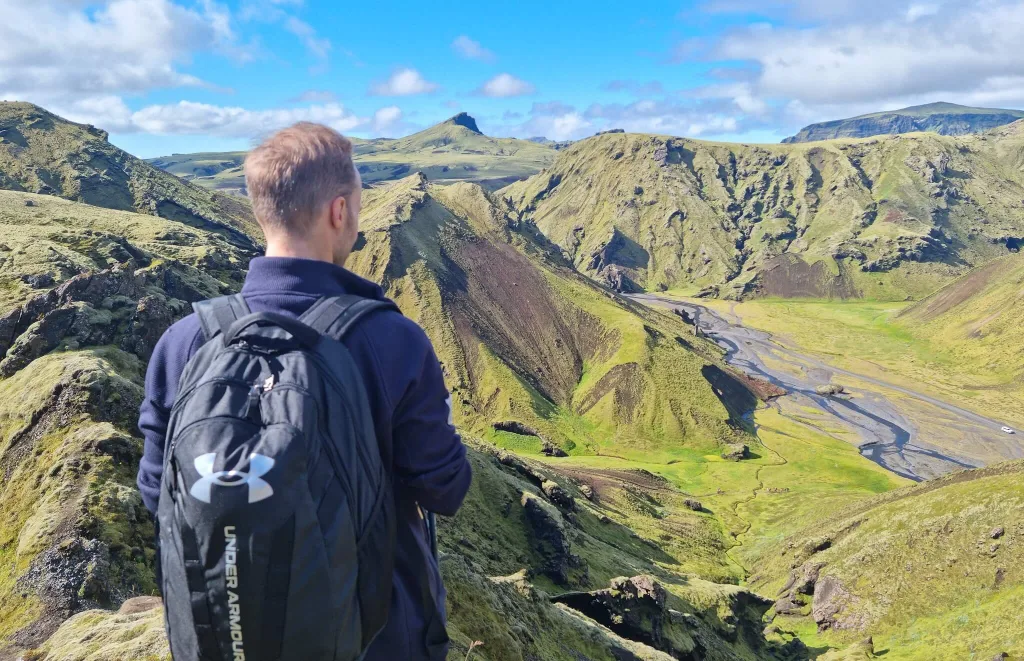
Langisjór Blue River Valley Viewpoint
The weather was merciful to us, and the day turned out to be pretty nice along our road despite the mixed forecast. We didn’t experience any rain, and the fog was present only at some spots (like Sveinstindur once again…). That night, we were based near Hekla, so it didn’t make sense to drive to Langisjór from the south (F208 south), so we drove from the north.
F225 and F208
I was sure I didn’t want to drive the boring, bumpy, and full of tourists Road 208 (F208 north). We turned to F225, Landmannaleið, which is an “F-road highway” —a very good quality F-road and a bit underrated road—at least compared to 208, which is much worse in both the views and the quality. Landmannaleid is also shorter than 208 north, so we soon reached the Landmannalaugar area.
The weather at Landmannalaugar was amazing. It actually seemed like the only place with clear blue skies and the sun shining everywhere. The views from our drive around the Landmannalaugar mountains were amazing. And, we faced a tough dilemma – whether to go for an unknown (and probably worse) weather at Langisjór or whether to hike again at Landmannalaugar. We’d been there already and done the hikes, though not in such great weather. Finally, I decided to risk it and go for Langisjór.
Amazingly beautiful roads around Landmannalaugar
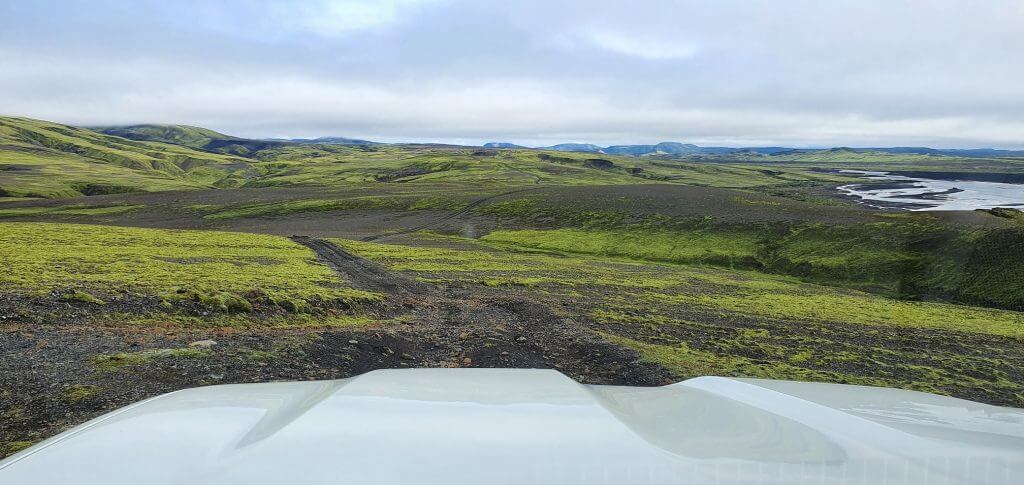
Instead of the harmless F-road of F235, I wanted to try more adventurous tracks this time. The track I chose is called the Skaelingar track and it’s located north of Holaskjól highlands centre, just next to the river crossing (and the ranger’s hut). Skælingar track is a not much-known detour from F208 south that not many travelers pursue due to it not being well-known. Great highlands destination 🙂
The visibility got much worse 10 minutes south of Landmannalaugar already, much sooner than expected. We drove in a giant fog and couldn’t see more than a few meters ahead of us. However, we knew that all of the river crossings on F208 should be harmless – we’d done them a year before in Dacia Duster, and this year, the water level was even lower. This was exactly the case – no problems at all with the fords at F208 and really shallow rivers.
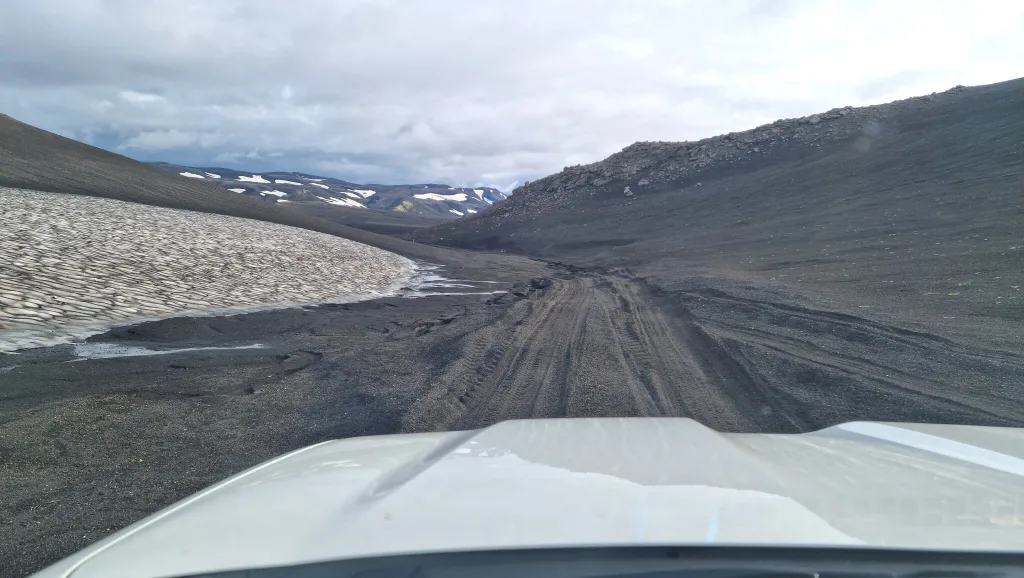
Skælingar dirt track
Skælingar track before Skælingar hut
After some foggy driving, we first arrived at the junction of F208 and F235. We continued driving the F208 and drove by another hidden detour – Faxasund track – which is actually a third track (along F235 and Skaelingar) leading to Langisjór. Faxasund is, however, said to be the most difficult out of these three paths, so this time, we chose the second one – the Skælingar track. Lastly, we crossed the first river at F208 south, next to the ranger’s hut and north of Holaskjól, and finally arrived at the hidden detour towards the Skælingar track.
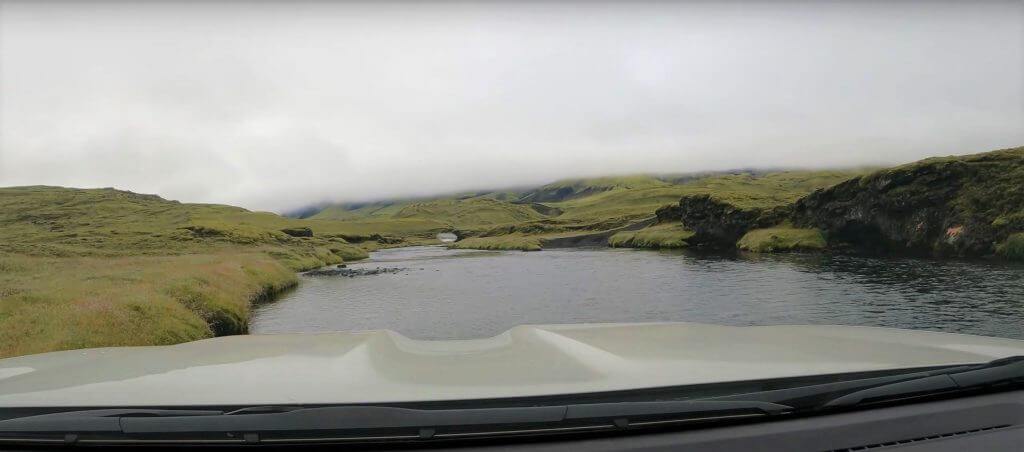
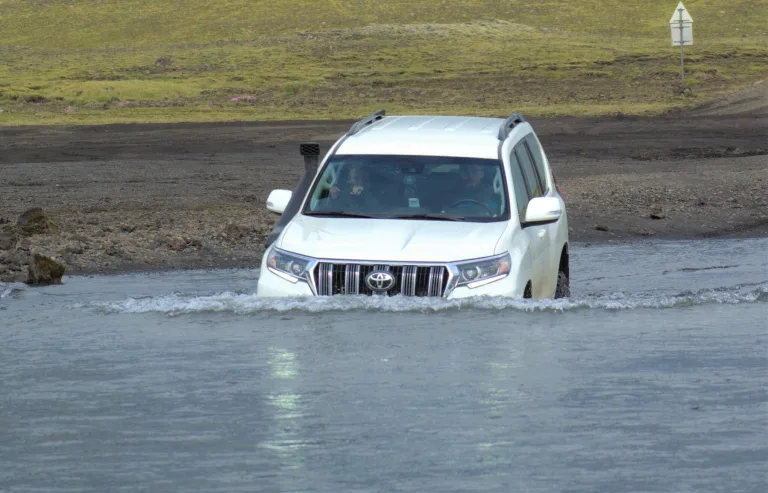
Skælingar track river crossing
There’s an exciting medium to big river crossing (more medium at the time of our visit) right at the beginning of the track. So, if you don’t feel like doing it, you may turn back right at the beginning. For this kind of river crossing, you should have past experience with river crossings and take the proper car, i.e., at least a Land Cruiser size or some kind of super jeep. Of course, it may be doable with Dacia Duster if you are lucky, but you may also fly with Dacia Duster if you are lucky – this doesn’t mean it’s recommended, nor responsible!
Skælingar track
The first river crossing on the Skaelingar track is also the only river crossing. To arrive at the other bank, you have to actually drive tens of meters IN the river bed (similarly to e.g. F210 river crossing or Strútur track river crossing). This is always a fascinating and memorable experience. With our 33” Land Cruiser with snorkel, we didn’t have any problems with completing the ford.
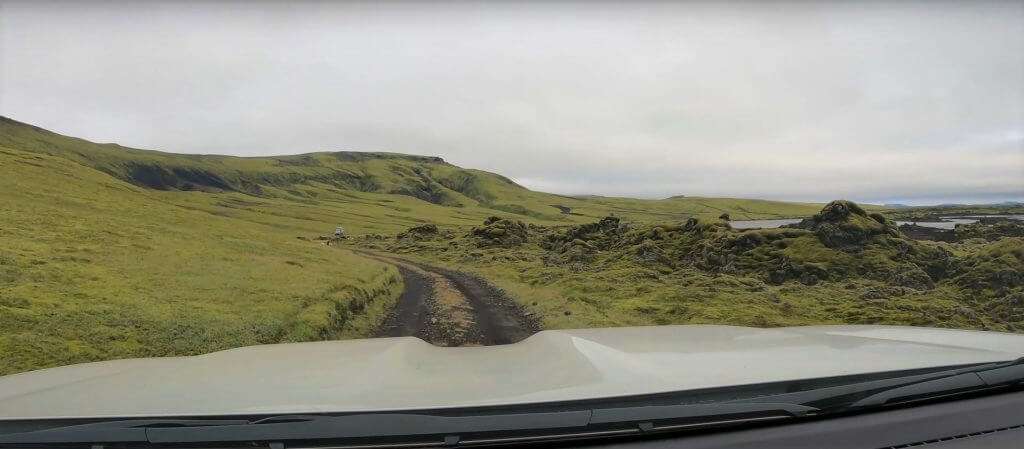
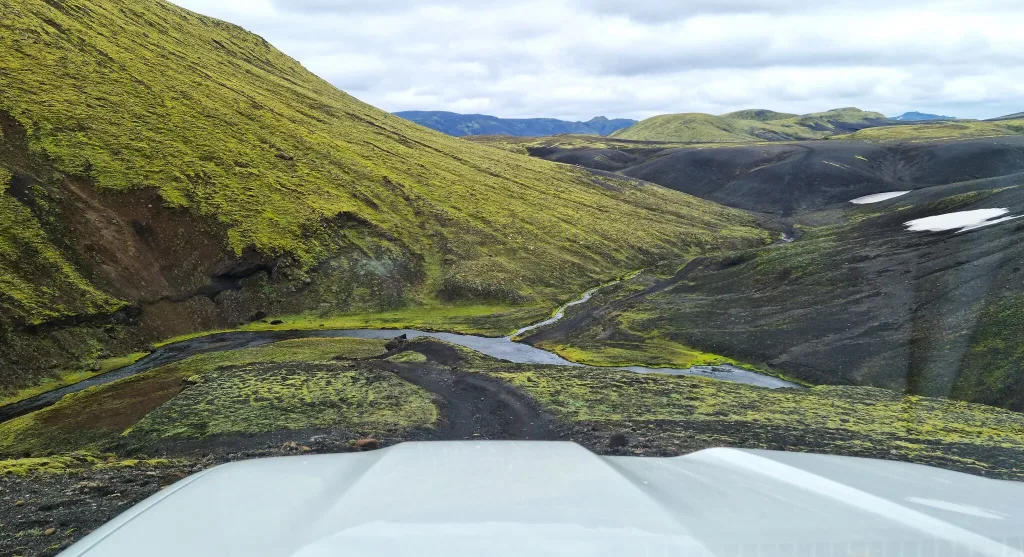
The Skælingar track then continued in the form of the narrow dirt tracks in green surroundings of grass and moss. We passed along the big Mercedes Unimog, which was struggling a bit driving these very narrow tracks, but the driver looked to be really enjoying the drive anyway 🙂 He was kind enough to let us overtake him at the earliest convenience.
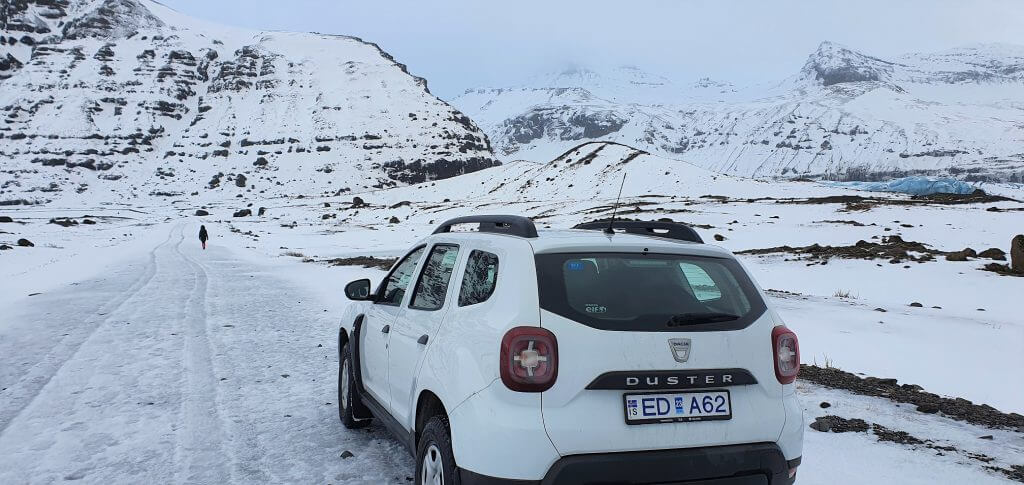
Between Skælingar track and Blautulón track to Langisjór
The landscapes were picturesque, almost along the entire road. After some 30 minutes of driving we arrived at the Skaelingar hut situated remotely in beautiful surroundings. It’s possible to take 2 different paths towards Langisjór from here. I already knew I wanted to take the longer, but much more exciting and picturesque route leading not next to the, but THROUGH Blautulón lake. Yes, through. More about that soon.
Blautulón lake track
Blautulón track shortly before the Blautulón lake
The dirt track towards Blautulón lake led in between little hills and was a track consisting of both the gravel and the volcanic ash without any major obstacles nor river crossings. It was steeper at times but definitely manageable. The most exciting part of the Blautulón track was about to come. Once you arrive at the lake, the road suddenly disappears. Where it leads, I already knew because I had studied it and was really looking forward to it 🙂
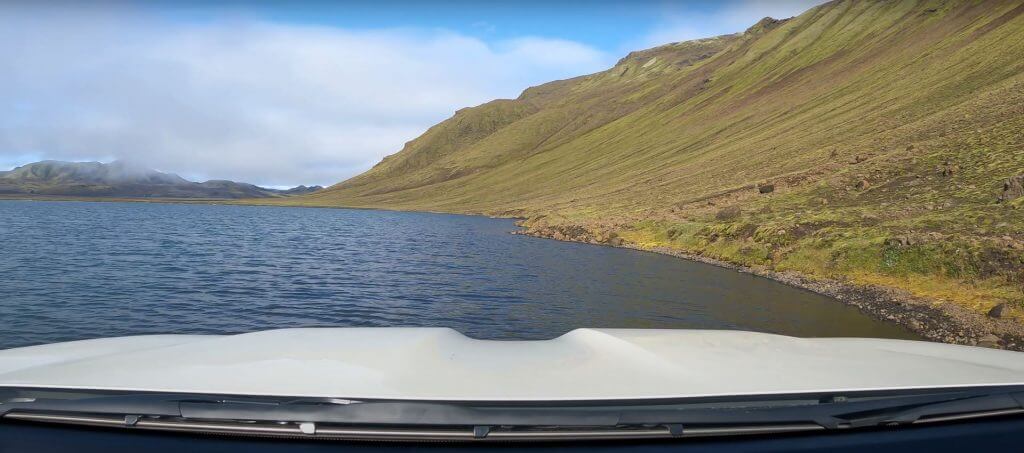
Unforgettable drive on the edge of the Blautulón lake.
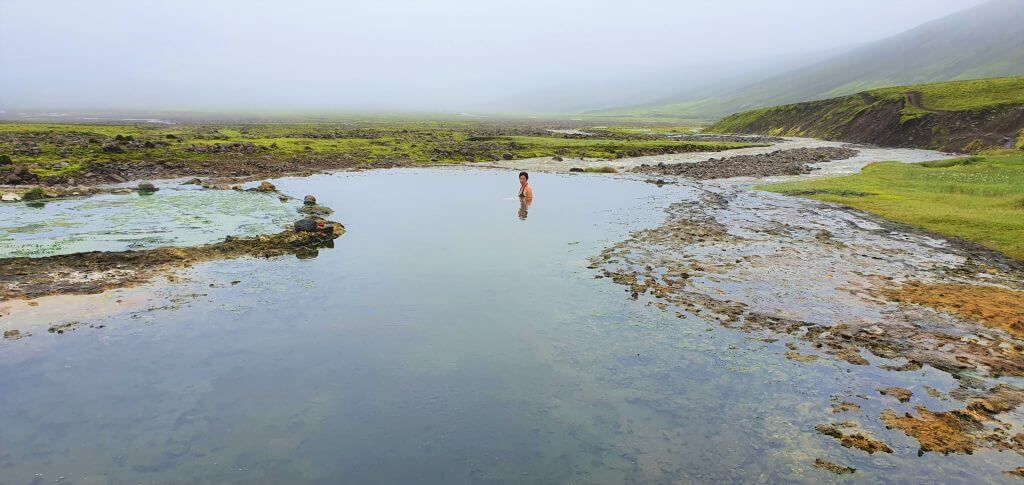
We were lucky to have amazingly beautiful weather at Blautulón with partially blue skies, little fog, no wind at all, and an occasional sun. We were even able to have a picnic at Blautulón wearing just T-shirts! God bless this kind of Icelandic summer. And all of that in between stunningly beautiful mountains and the blue lake just in front of us. And us being entirely alone there. A once-in-a-lifetime moments for us.
As I already hinted, after we moved on from the front of the Blautulón lake, the road didn’t just continue in an ordinary way. The Blautulón track leads through the edge of the lake itself. You have to drive inside the lake, at the bank of the lake, for several hundreds of meters. For me, as a road enthusiast, this was an amazingly unique drive. After passing Blautulón, the track soon connects to the final part of F235.
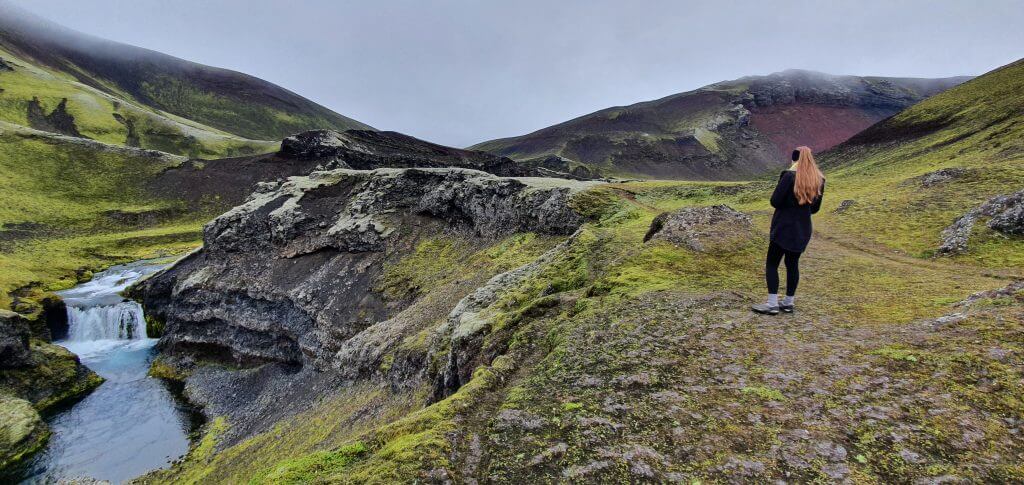
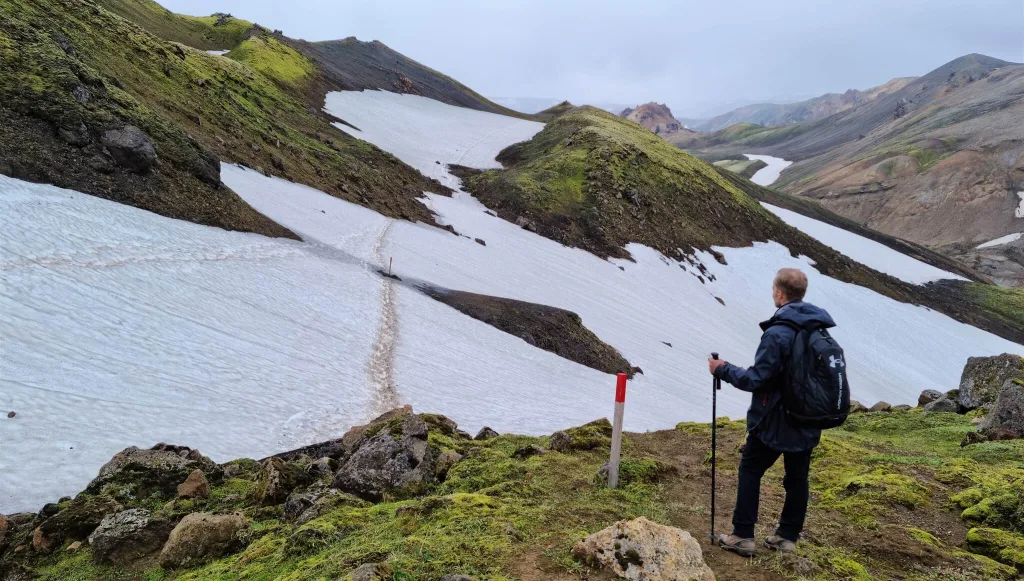
Sveinstindur hike attempt No. 2
Hiking to Sveinstindur peak next to Langisjór lake
Sveinstindur is the highest accessible peak in the Langisjór area with amazing views around the surrounding landscapes in every direction. When the visibility is good. And this was the catch once again for us. A year ago, I had a plan to propose to my (at that time) girlfriend after climbing up the Sveinstindur. However, the weather had different plans 🙂 There was no visibility at all, and it started to rain a lot roughly around midway towards Sveinstindur. Hence, we decided to turn back. Hence, I proposed (just) on the hiking trail.

Sveinstindur hiking trail ridge
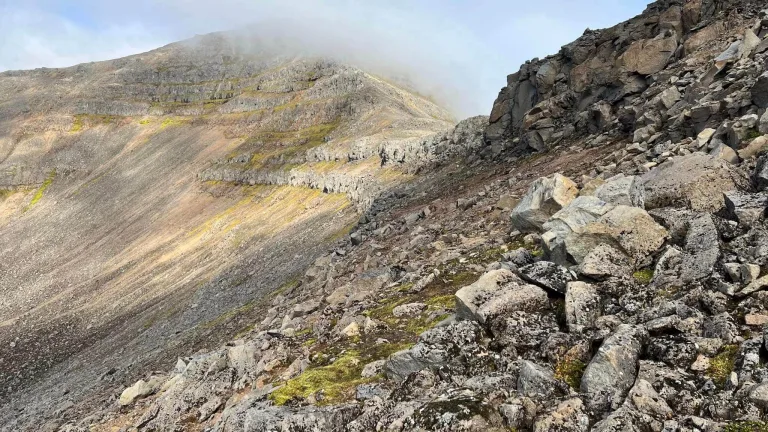
A year later, our weather was much better. Blue skies with occasional clouds and even a shining sun. However, the peak of Sveinstindur, as the only one, was covered in fog for the entire time we drove and hiked around. We gave it a try anyway and climbed a few meters further than last time, but we still arrived at the point where everything above this point was entirely covered in fog. And it wasn’t getting any better. The trail from this point above is also pretty exposed, with massive falls on both sides. Thus, for the second time, we gave up on our plans to reach the top.
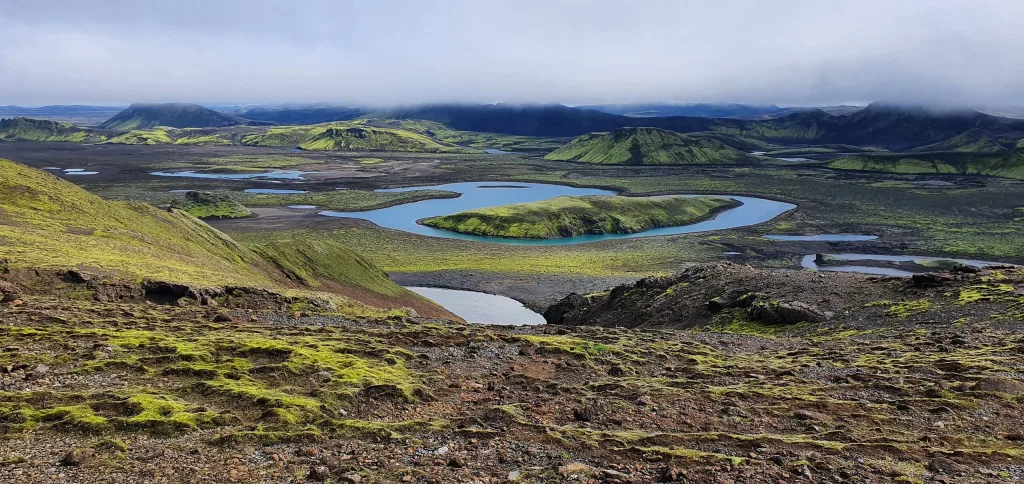
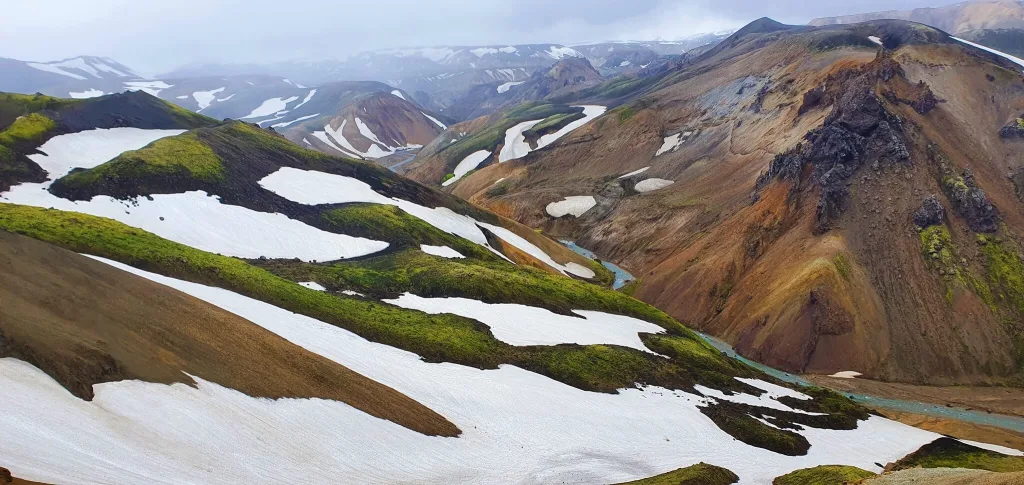
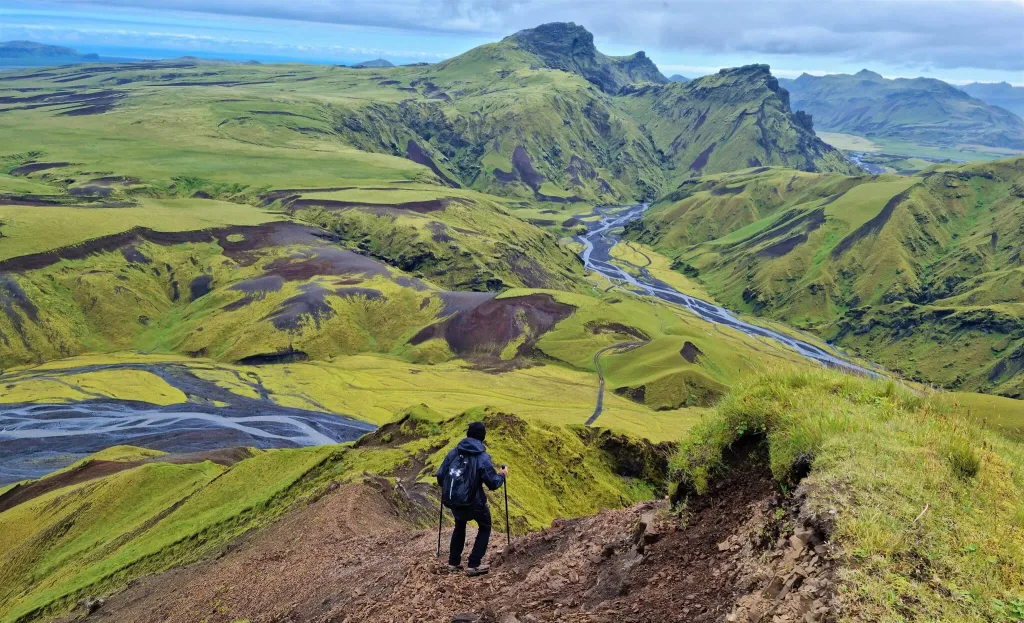
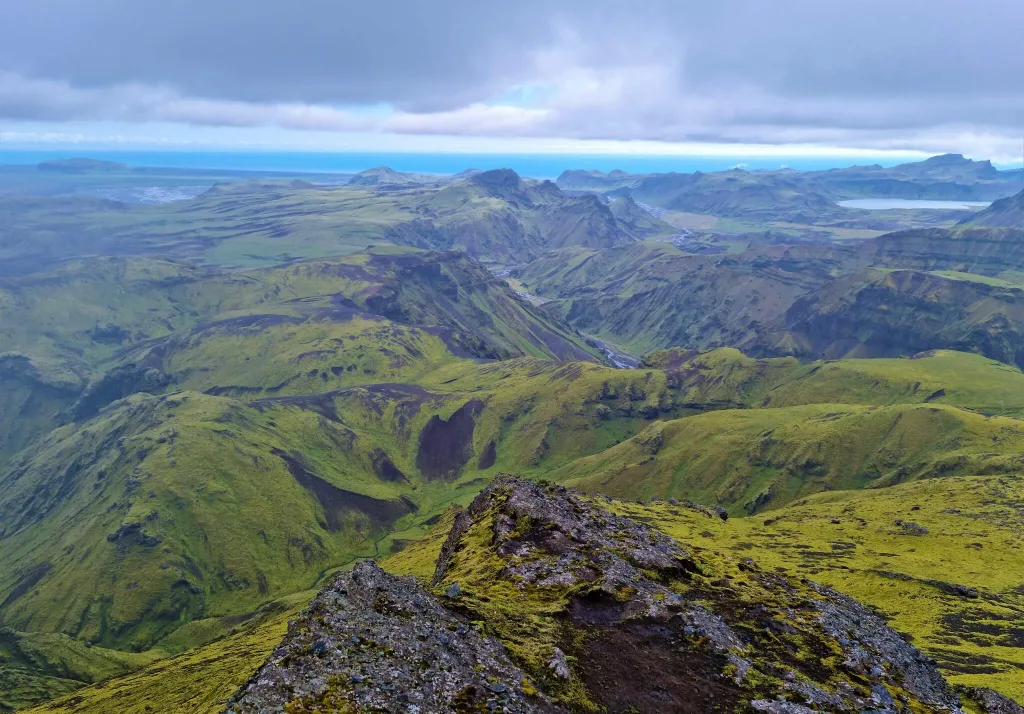
View over the Langisjór lake from Sveinstindur trail
Nevertheless, the views around the area were still stunningly beautiful. Judge it yourself, here are the pictures 🙂 This time we were lucky enough to see almost the entire Langisjór lake.
Sitting in the car for almost the entire day, we were still hungry for a nice hike. However, the weather at Sveinstindur started to worsen. The fog was falling down, and the clouds were coming. We hiked back to our car when it started to rain. We decided to drive back towards Landmannalaugar to see if the situation was still as good there weather-wise as was the case in the morning. On our way there, it started to rain considerably, and an entire area was covered by fog. Luckily, we had already seen an amazing F235 a year before.
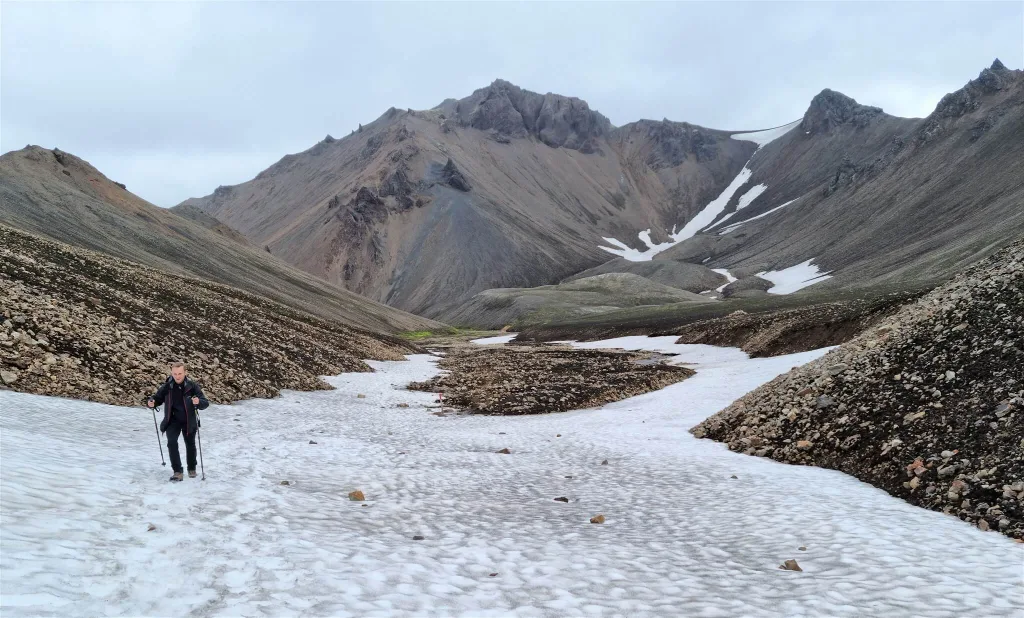
Third trip: The Roughest Tracks and Sveinstindur hike
This time, we wanted to take adrenaline one step further and decided to drive the most difficult road combinations to Langisjór. We drove via the Botnlangalón track and Faxasund track.
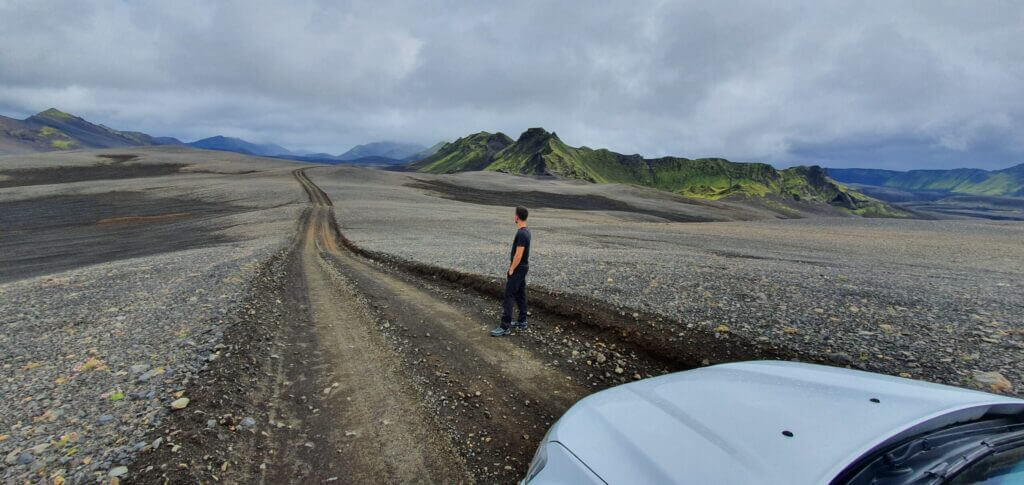
Botnlangalón track
Botnlangalón track – can you see the road? We often had to stop and search for it for quite some time.
Botnlangalón track is one of the most demanding tracks I’ve driven in Iceland, maybe even the most difficult one. Yes, there are some notoriously known dangerous river crossings, like Krossá on F249 to Thórsmörk or Skyndidalsá river on F980. These are undeniably both treacherous and impassable, even for large cars like Land Cruiser. However, none of these roads have such rugged terrain as the Botnlangalón track has.
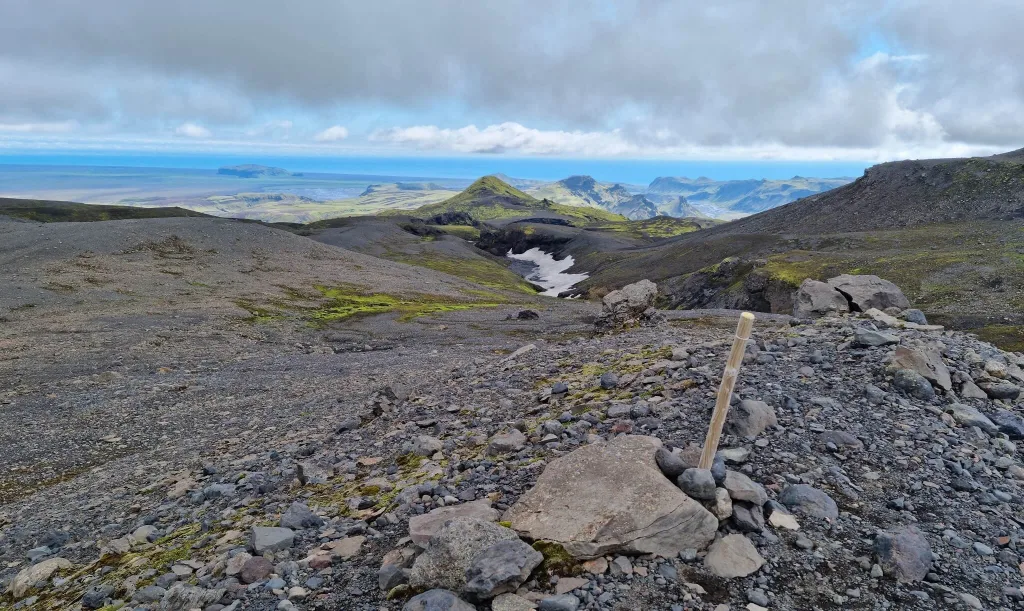
Botnlangalón track is very scarcely maintained, and the road quality, pardon me, sucks. The track begins roughly 10km northwest of F235 and connects southern F208 with the lake Botnlangalón. Firstly, you will also encounter another lake along the way, which is called Grænalón.
Once you reach the Botnlangalón lake with the tiny (and usually closed) mountain hut, you have two options. You can either turn back and drive the same road again, or you can traverse east and connect to Faxasund track (another “pearl” road). From Faxasund, you can take it even more to the east and arrive at Langisjór, which we did in the first place.
What makes it so difficult
Here it is – the Botnlangalón lake with a private hut
But let’s come back to the Botnlangalón track. Why do I consider it one of the most difficult tracks in Iceland? Well, first and foremost, there are countless huge potholes and uneven road parts, often a 1 foot deep or even deeper (20-40 centimeters). This means you need to have a ground clearance corresponding to this height to pass the road. Or, an infinite patience to drive around these spots at 3km/h (2mph) speed. I’m not exaggerating. This is the speed at which you will be driving most of the time so as not to damage your car.
We drove the Botnlangalón track with our 33” modified Land Cruiser, and I’m more than sure we’ve hit the limit of our car on this road. We made it only so-so and luckily managed not to scrap anything on the car, nor hit any obstacle.
That being said, the road was both magical and annoying. Magical, because the remote surroundings, valleys with river crossings, steep uphill followed by steep downhill every once in a while, all made it totally unique and unforgettable. Annoying because it felt like a never-ending road when driving on average at 5-10km/h (3-6mph). Pictures don’t do this track justice. It looks easy in the photos, but it is not!
River crossings
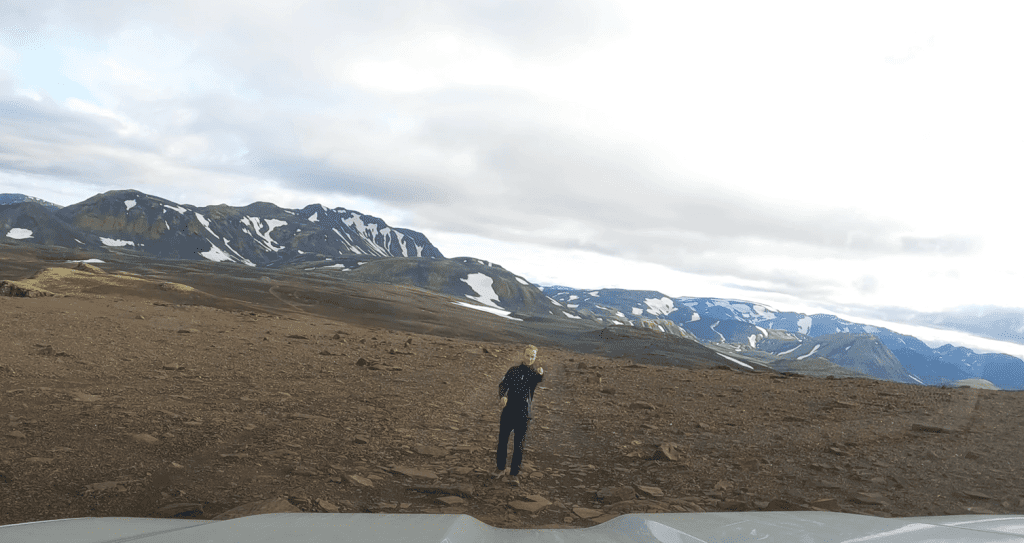
Here we were searching for where the road actually was supposed to be. Not an easy search:
Besides tough terrain, there are also several river crossings, most of them with medium-sized rivers. The main problem with Botnlangalón river crossings, though, is not the depth of the rivers, but the unclear path/road.
Often, we had a problem identifying where the road actually leads because there were no marks indicating that. We had to get out of the car and study where the road was about to continue almost every time we encountered some river crossing. This only added to both the adventure and also the time needed to finish the track.
It finally took us more than 1.5 hours to finish this 22km (13 miles) long piece of s… track. I would say, it was definitely worth the adventure. On the other hand, I wouldn’t drive this road again. Botnlangalón track is, as Icelanders used to say, one of these roads you drive only once in your life.
Driving in the river bank
Once we reached the Botnlangalón lake, we stopped for a lunch break, entirely alone with no one in the radius of tens of kilometers. This is both great but also a bit terrifying, in case any problem occurs. We borrowed a satellite device, just in case any emergency happens in places like this. After our lunch, we headed towards lake Langisjór. This meant we had to traverse east, firstly to reach the Faxasund track and secondly to reach Langisjór itself. And the first traverse is a very special one!
The part of the track from Botnlangalón Lake to Faxasund track actually leads through the canyon, which is full of water! The track leads in the river bank, and you will be driving at the bottom of the river canyon. Once again, nothing is impossible in Iceland when it comes to weirdly beautiful roads right? Driving through this river bank was again a once-in-a-lifetime experience for us we totally enjoyed.
Traverse track to Langisjór
Botnlangalón is one of the hardest F-roads in Iceland (it’s actually not even an F-road, just a dirt track)
After finishing the incredible river drive, the traverse track towards Langisjór continues via harsh, deserted, stony roads with frequent uphill and downhill drives. We remember 1 or 2 more river crossings, none of them being that deep, though, with at maximum medium-sized river crossings. This part of the drive was the easiest one, though also very remote and rough.
To drive the Botnlangalón track, you need to have a modified jeep, a.k.a. super jeep. Our 33” Land Cruiser from MyCar was a minimum, and we’ve almost hit the limits of our car. Other examples of vehicles being capable of this road are Land Rover Super Defender, and, maybe with a lot of caution also a good old 31’’ Land Rover Defender with snorkel. Other than these cars, go only for tires of size 35” and bigger.
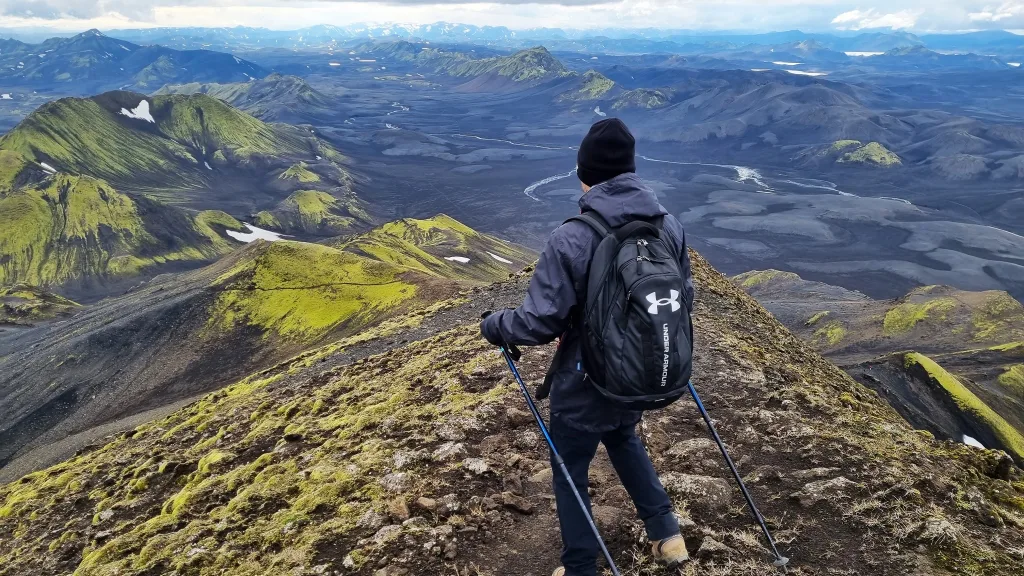
Sveinstindur hike experience
On a third attempt, we finally managed to reach Sveinstindur without it being completely covered in fog. The weather wasn’t ideal, with a lot of clouds and also a mixed weather forecast, i.e. definitely not a forecast of a sunny day with clear skies.
Nevertheless, once we arrived at the bottom of the trailhead to Sveinstindur, we could see the summit clearly, indicating good chances of no fog at least for some while. Having said that, we immediately got out of the car and hurried up to hike Sveinstindur for the 3rd time.
Sveinstindur hiking trail on a clear day
We had no rain and no strong winds, so when it comes to Iceland, almost an ideal weather. The ascent all the way to Sveinstindur took us, with a pretty quick pace, only around 45 minutes. The trail to Sveinstindur is well marked and the ascent is steep and demanding, but not very long.
The first part of the hike is easier, while the second half becomes narrower and steeper. I can’t imagine hiking it in strong winds or during strong rain. I recommend the hike only to those fit enough. But, it’s not technical, no chains, no sharp ridges, just steep ascent. We highly recommend you use hiking poles.
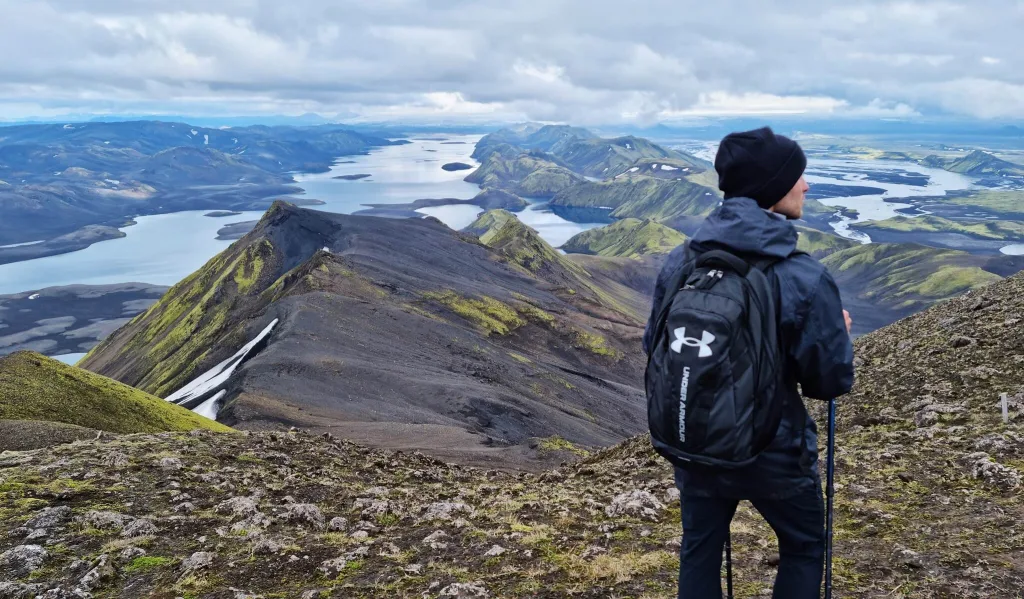
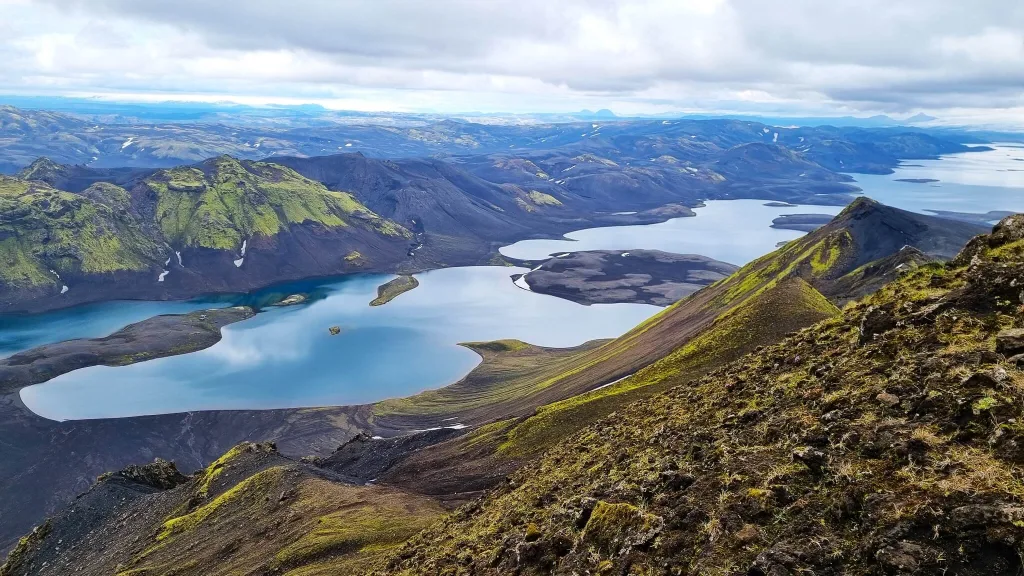
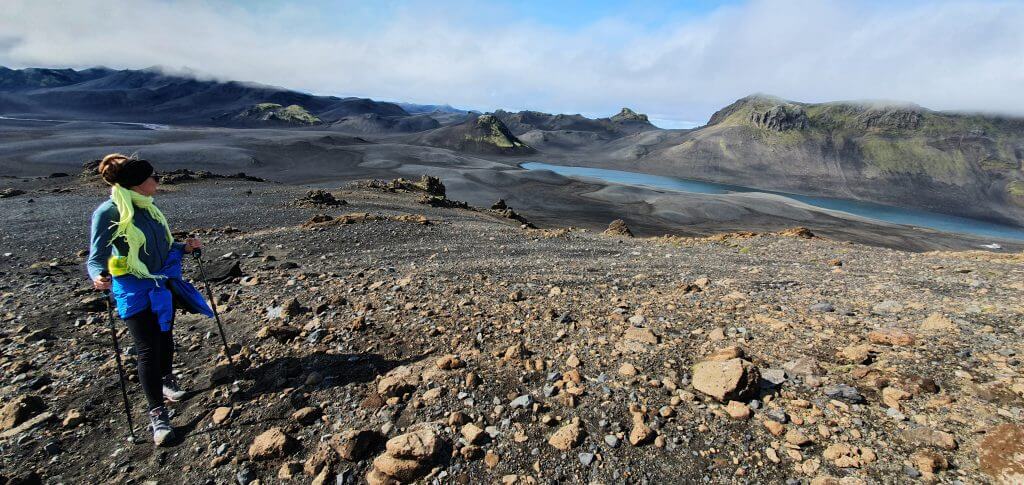
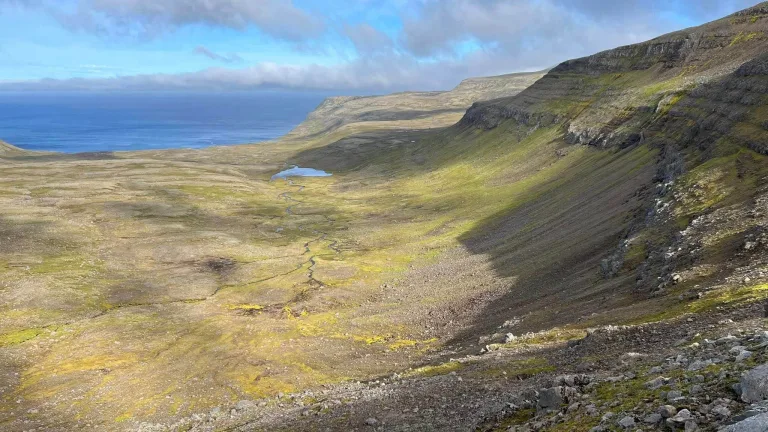
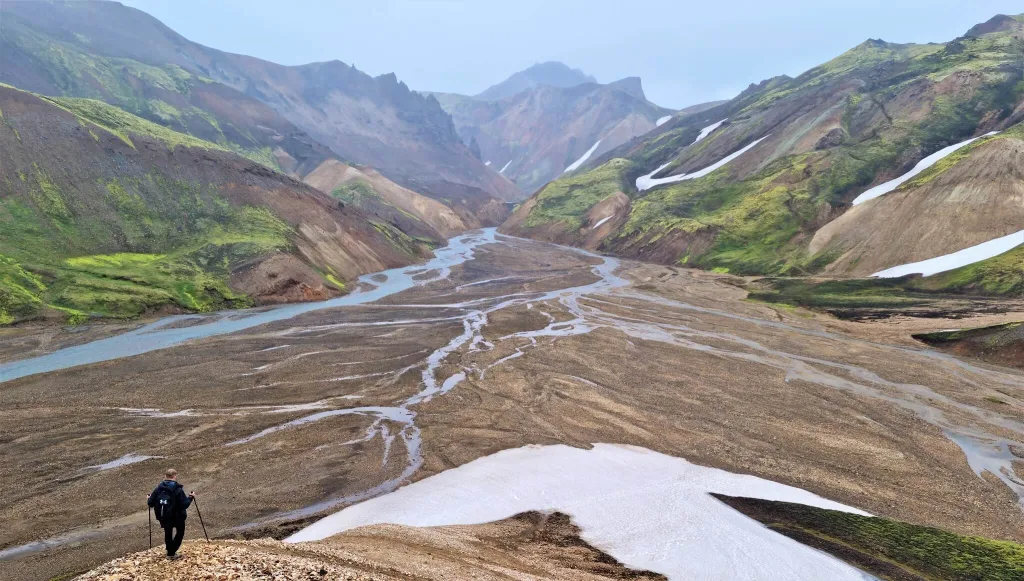
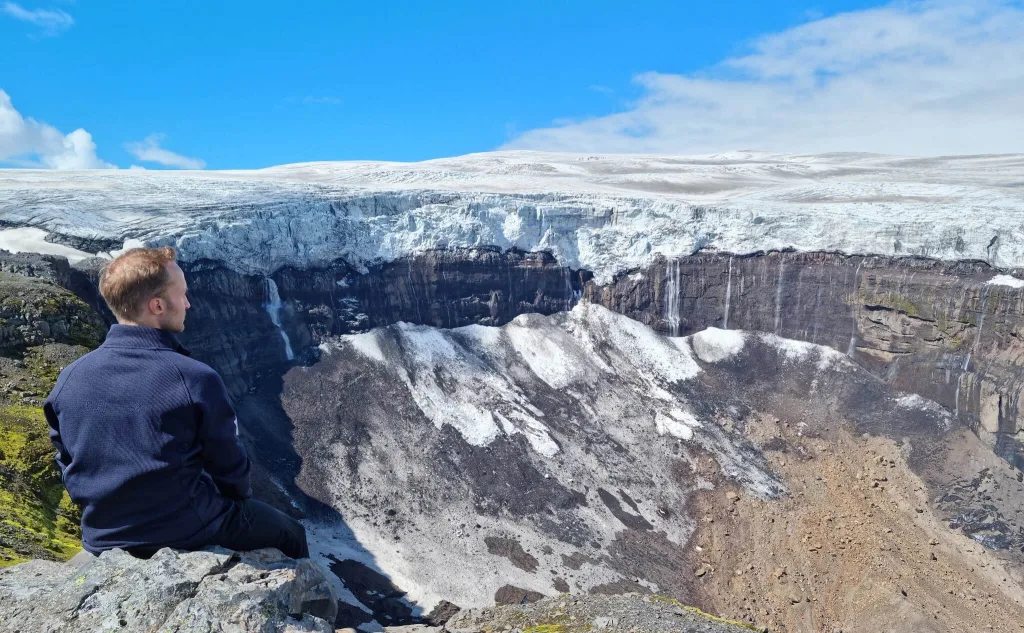
Views got better and better with every additional meter climbed. Once we reached the top, we were finally able to admire one of the most beautiful views of Iceland, views from the peak of Sveinstindur. On a day with good visibility, you can enjoy the sight of the entire colossal lake of Langisjór together with all of the surrounding areas. If you zoom well enough, you can also spot many of the unbelievable tracks and roads like Faxasund, F235, or Blautulón track.
Near the top of the Sveinstindur hike, overlooking the Langisjór lake
The entire hike took us 2 hours as a roundtrip, including a 30-minute stop at the summit. Remember to dress well, even on a nice and seemingly warm day. It’s much colder up at the top, and you can easily get sick when a cold wind blows at you being sweat after the climb. It was only around 7°C / 45°F up at Sveinstindur, with the wind making the cold feeling even stronger.
The descent from Sveinstindur was in my opinion even nicer than ascent, because we had all these amazing views right in front of us, along the entire trail. I would definitely come back to Sveinstindur again on a sunny day. It’s more than just worth a long drive and a quite short hike.
Faxasund track
On our way back, we still hadn’t had enough of the difficult dirt tracks, so we took even the last one we hadn’t yet, the Faxasund track.
Faxasund track is a beautiful alternative to F235 to Langisjór. Just a lot rougher, tougher, and longer. It’s the third track in the series of more difficult roads leading to Langisjór. The first one is the Skælingar Blautulón track, the Botnlangalón track comes second, and the Faxasund track is the third. Faxasund connects southern F208, about 8km (5mi) northwest of F235, with lake Langisjór.
Damaged Faxasund track with a lot of deep holes. Pictures don’t do it justice.
Faxasund is a very rough track with a lot of sharp stones and small to medium-sized river crossings. I’ve read on other websites that Faxasund has treacherous river crossings – this definitely isn’t true, and only illustrates the point that other websites often just simplify too much.
River crossings are not the main problem of this track. The biggest obstacle is the part of the track close to F208 with many sharp stones. There, you have to drive very carefully and take huge care of your tires.
Faxasund combines all kinds of different terrains and sceneries. Starting from the south, you will first encounter some steep ascents and descents on a very rough terrain consisting of billions of pieces of broken stones. This is the most challenging part of the Faxasund track – you need to have huge tires with lower air pressure and high ground clearance to pass without damaging your car. The views at this part of the track are one of the most beautiful ones – with many remote and lonely hills and valleys all around you.
Navigating through sharp stones of Faxasund track at 5mp/h
To drive Faxasund, we highly recommend driving at least a Hilux/Land Cruiser style jeep, ideally an even bigger/modified super jeep with tires 31” and bigger. Never with Dacia Duster, Subaru Forester, or any similar small to medium 4wd city SUVs.
What follows are some small to medium-sized river crossings, definitely doable with a large 4WD car. When it comes to scenery, even more hills and valleys appear everywhere, and you have to drive through many of them. In our case, in the second half of July, we even witnessed a lot of snow on nearby hills. The winter before our visit was a very hard one, though, leaving many snowfields everywhere in the highlands, even in August.
Thirdly, the terrain will change into driving in volcanic ash and on clay/mud tracks. Nearby mountains slowly start to resemble the Langisjór area – black ash hills with green tops. Driving on Mars? Almost. Definitely some out-of-this-world landscapes. Finally, you’re gonna drive on several hills composed of little stones, so this will be yet another different surface to drive on. Faxasund is a very versatile track.
YOU MAY ALSO LIKE:


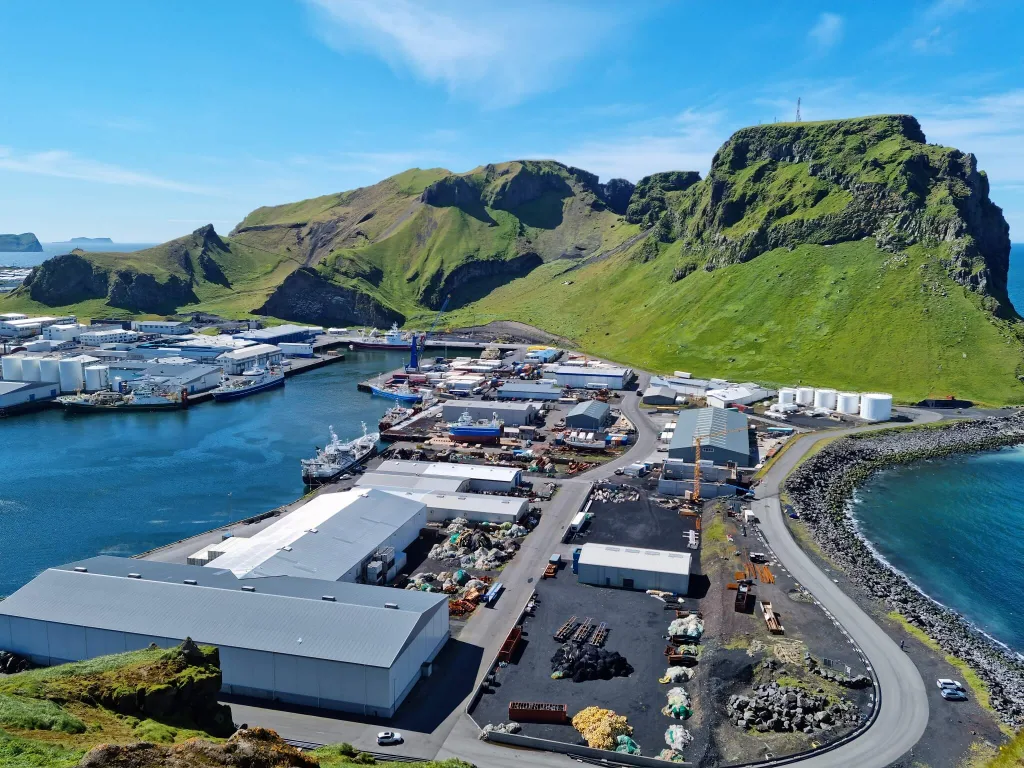
![Westman Islands – Full Guide + Top Things to Do [our experience]](https://epiciceland.net/wp-content/uploads/2022/12/westman-islands-guide.jpg)