Highlands

How to Visit Langisjór lake: Full Guide

How to Visit Langisjór lake: Full Guide

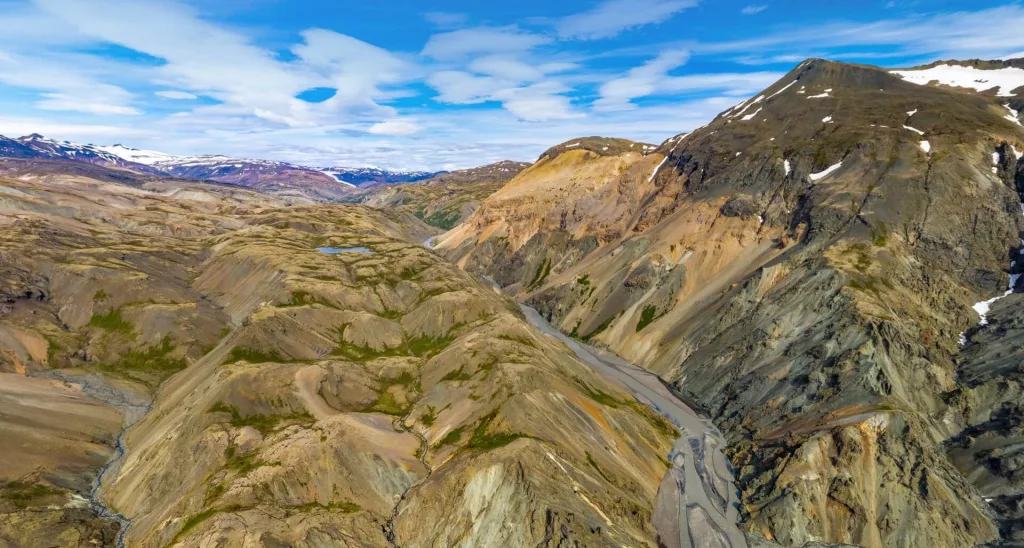
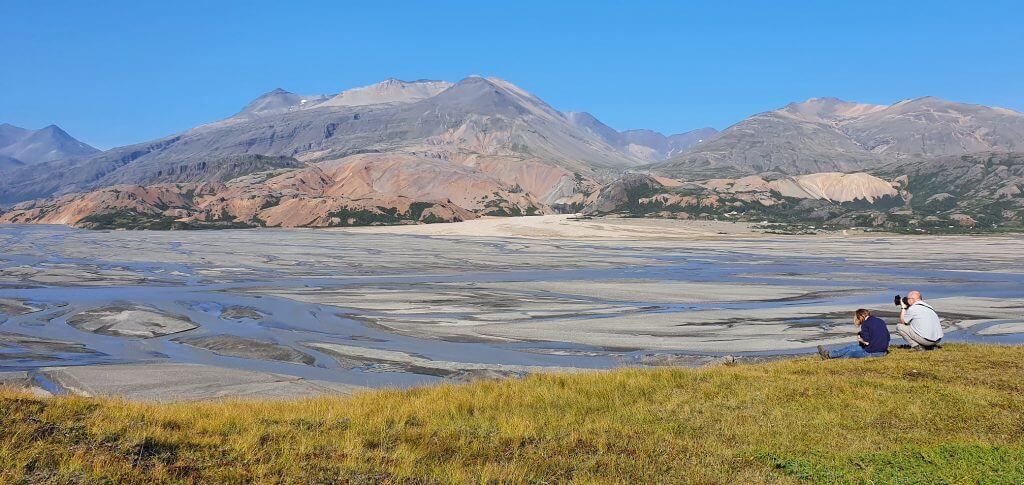
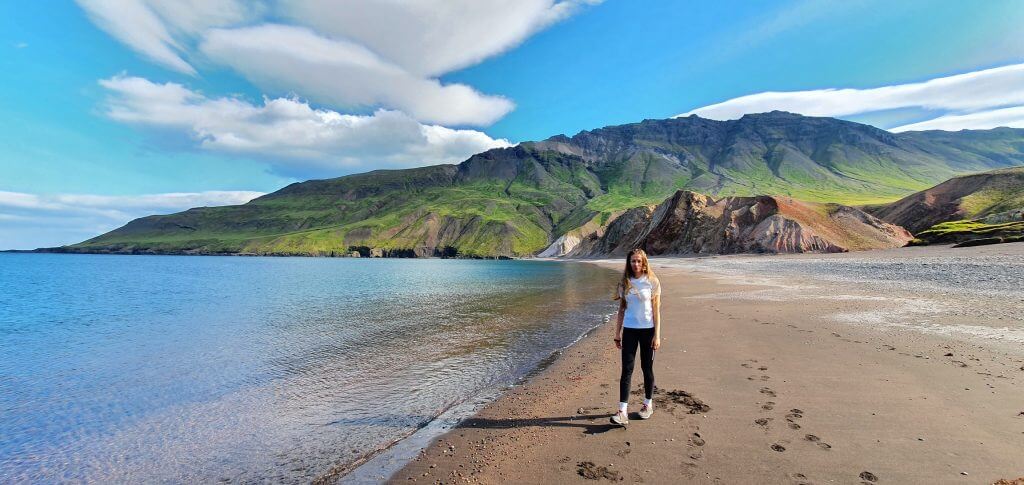
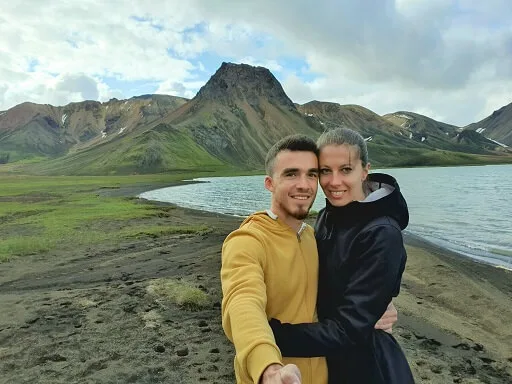
Lake Langisjór is one of our favorite areas in Icelandic highlands. Langisjór may not be the most beautiful place in Iceland, but its vibe is very special to us. A crystal clear, giant lake in the middle of a moon-like desert surrounded by somewhat scary silence has earned a place in our hearts.

Visiting Langisjór is actually not that hard. It belongs to the more accessible parts of the highland. There are many ways to reach Langisjór, and each one is a bit different and exciting.

We have visited the lake many times, and we believe it is a bit underrated. That’s one of the reasons why we write this Langisjór guide, where we sum up all our experiences about the roads, hikes, and beautiful spots around Langisjór.

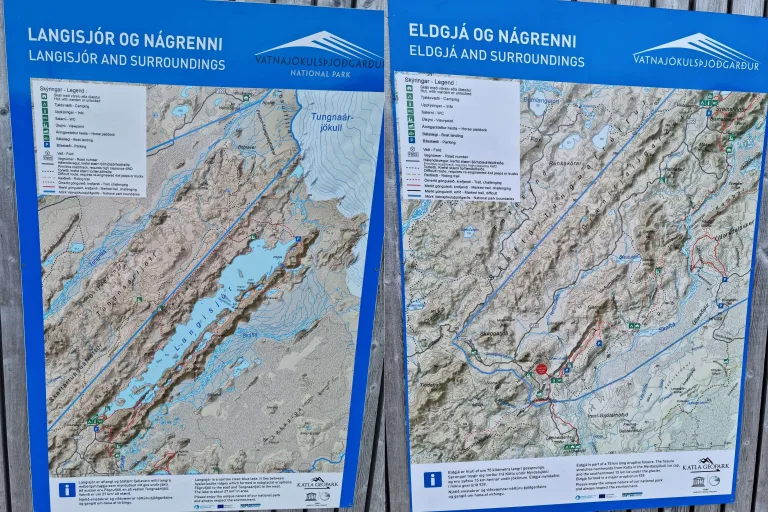
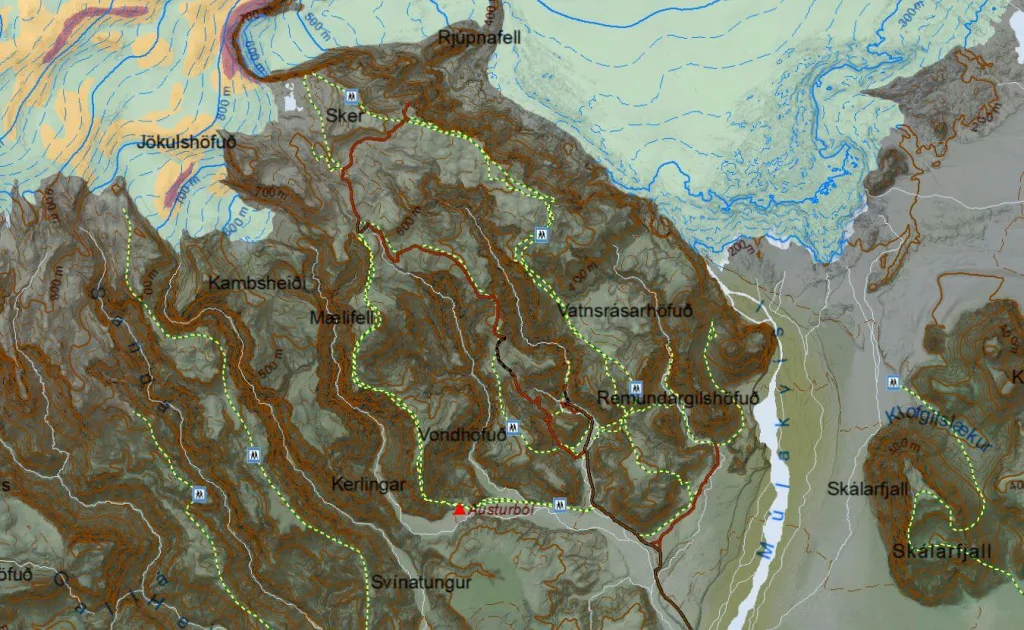
Langisjór Map

How to get to Langisjór

In short, the easiest way to get to Langisjór is by taking the mountain roads F208 and F235. You can reach it only in summer when the roads are open for visitors, and you have to drive a 4×4 car. No buses, no guided tours and also no super jeep tours visit Langisjór. Well, unless you take our private super jeep tour.

In more detail, Lake Langisjór is well hidden on the edge of the southern and central Icelandic Highlands. The only way to reach the lake is by the so-called F-roads or highland roads. Besides F-roads, there are also several dirt tracks leading to Langisjór, but these are even harsher and tougher to drive than F-roads.
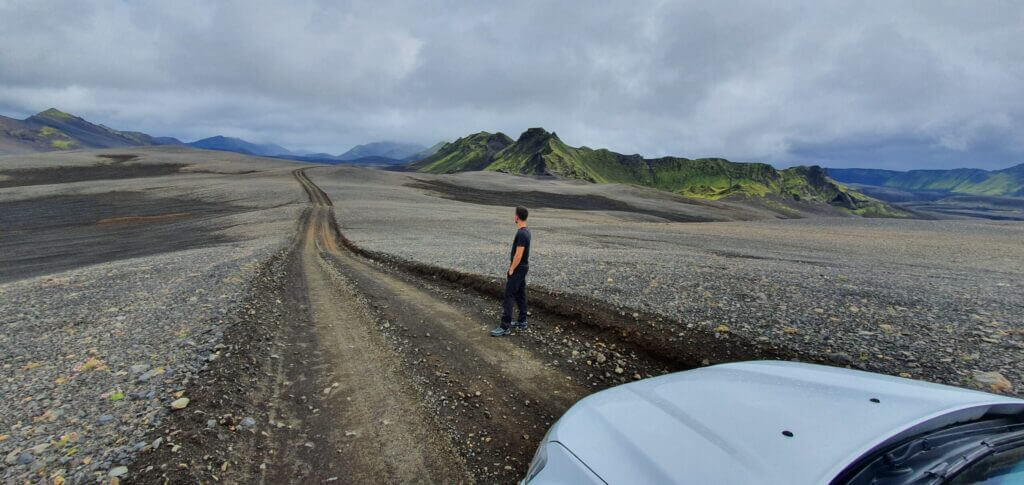
F235 to Langisjor

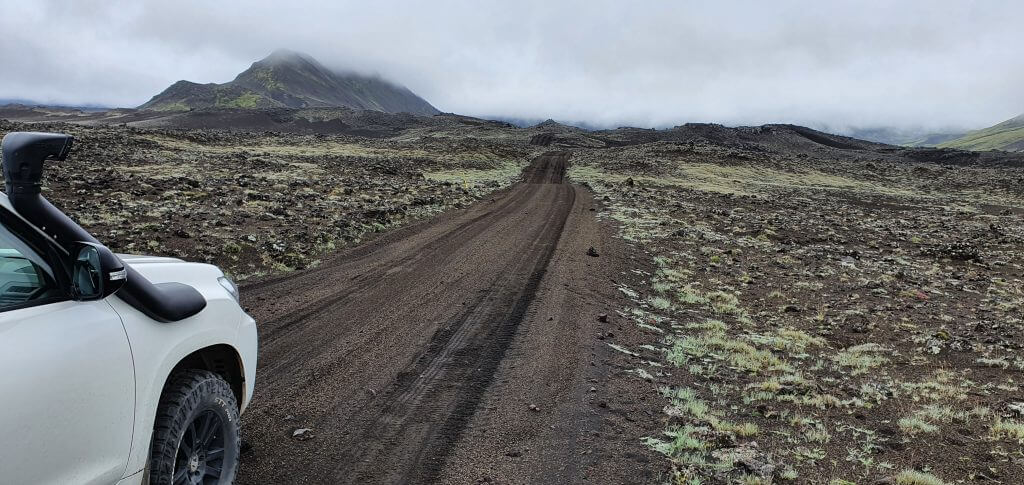
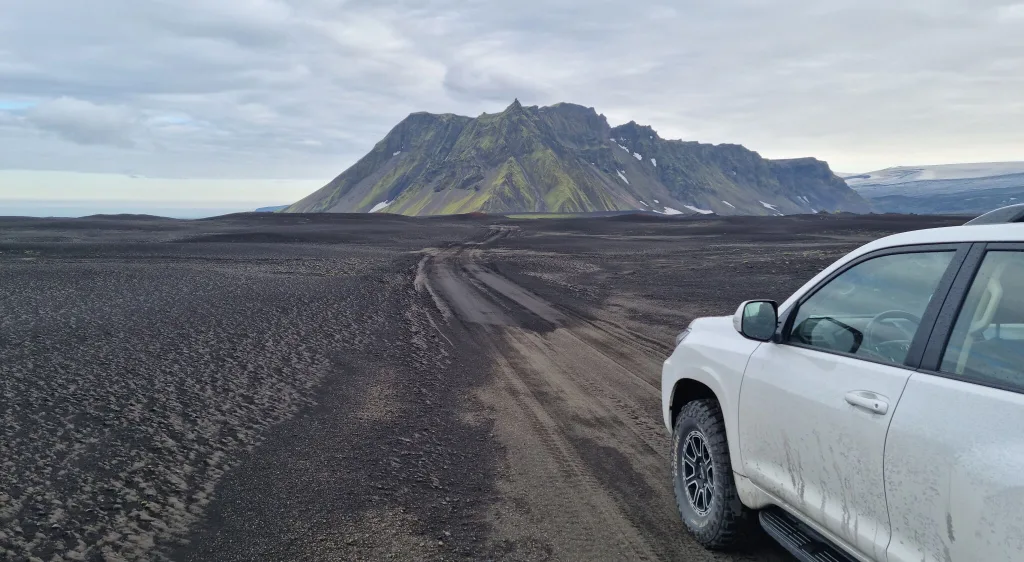
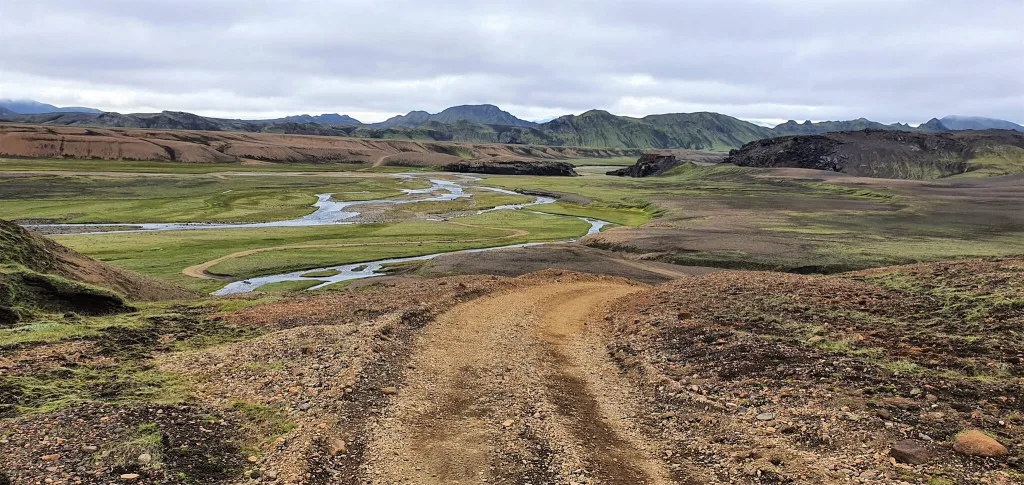
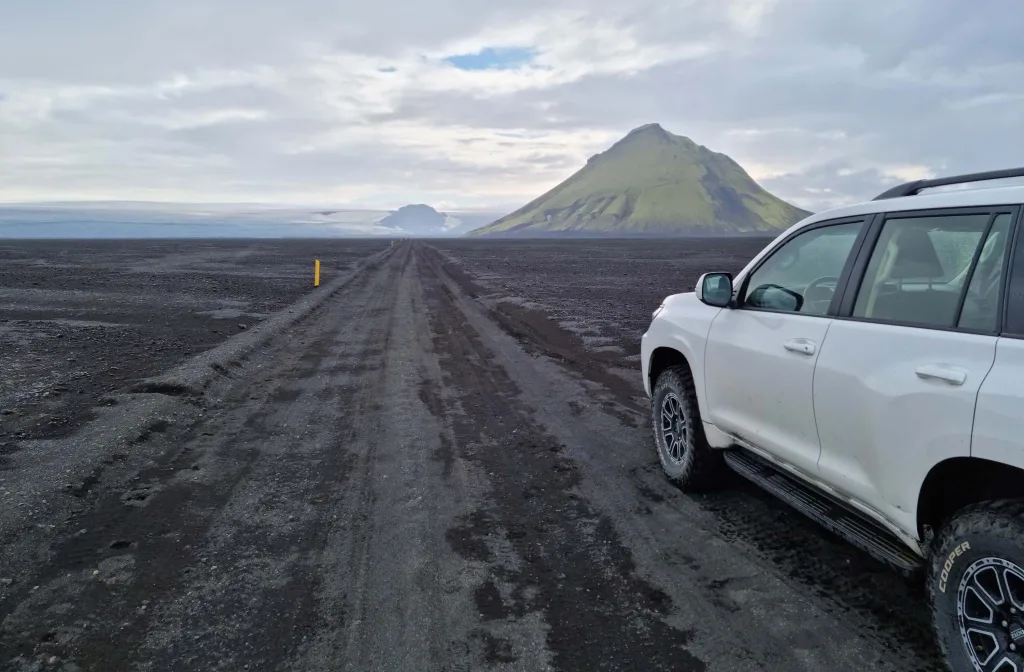
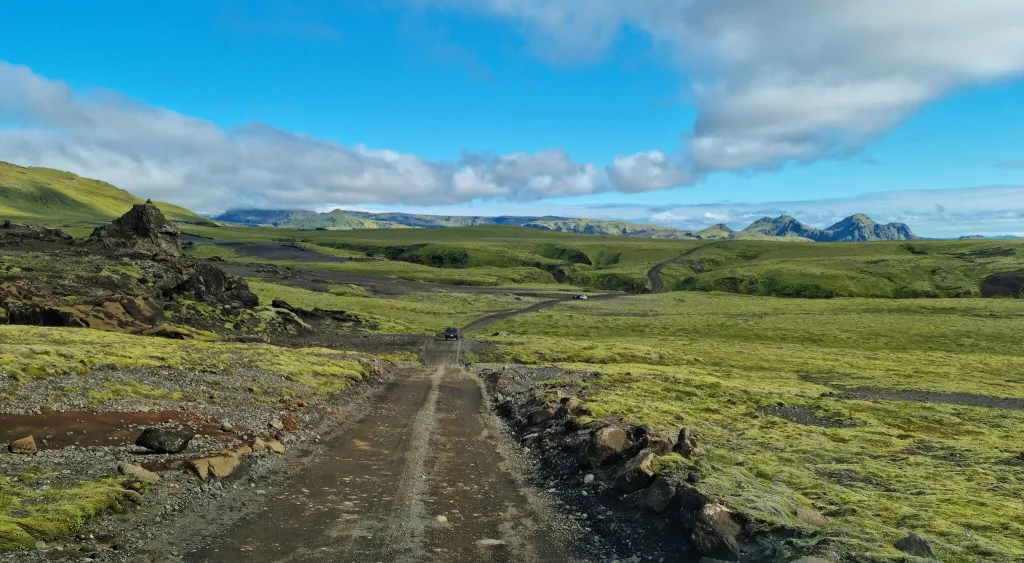
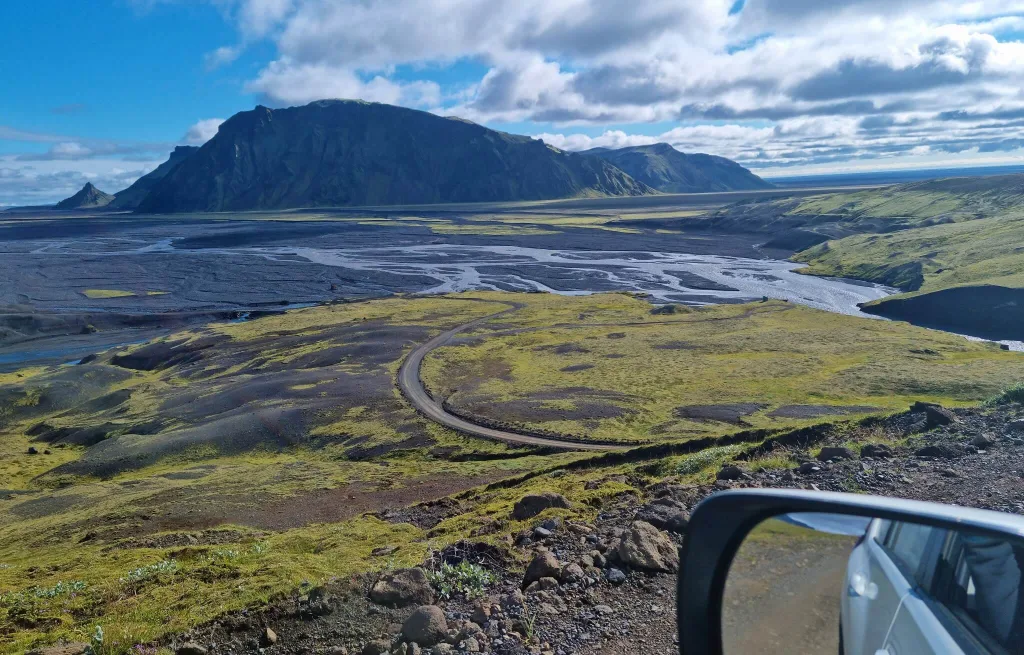
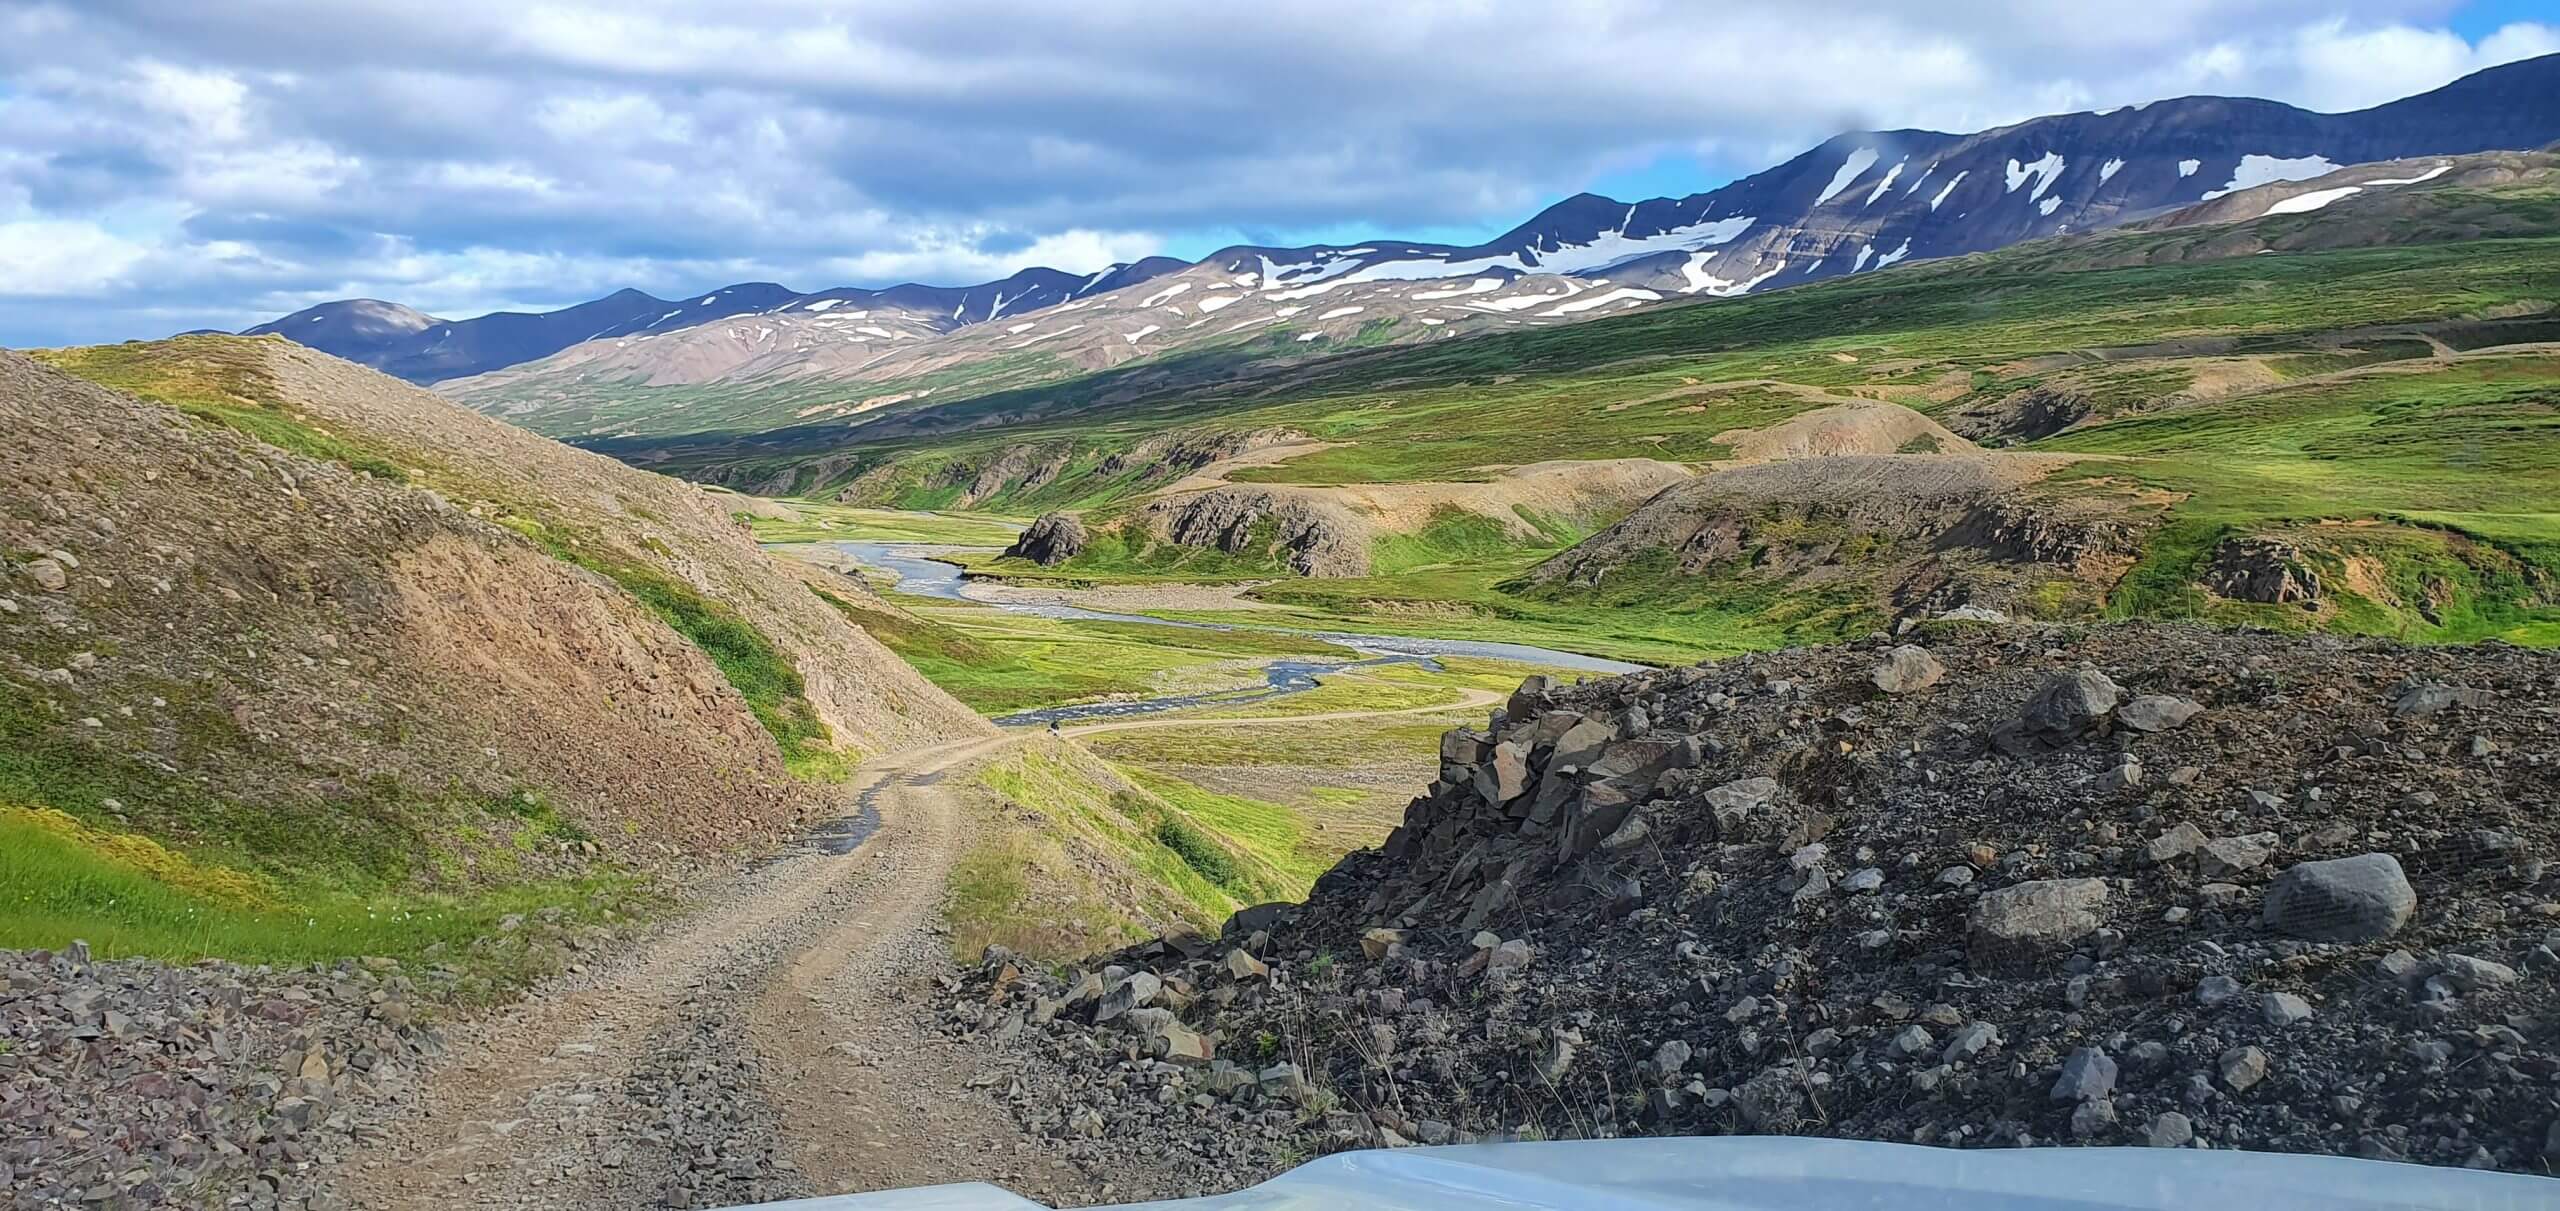
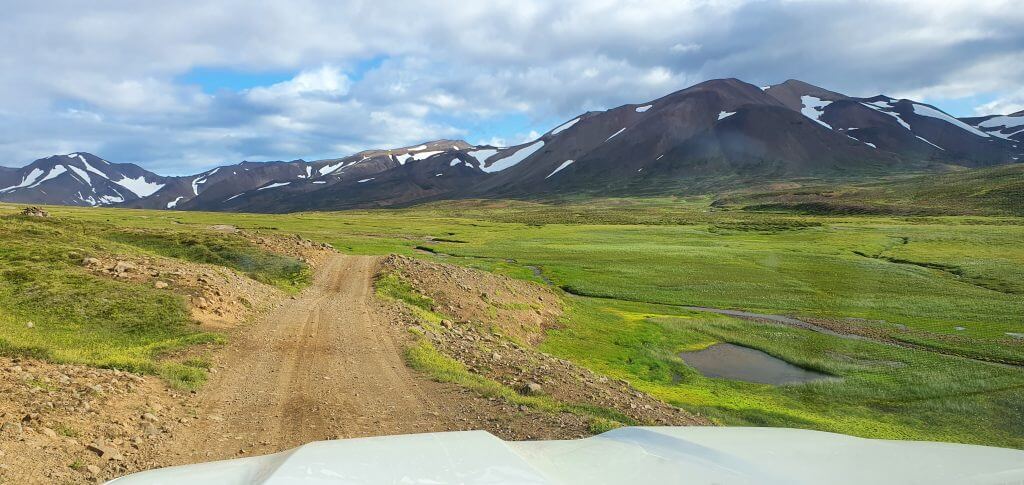
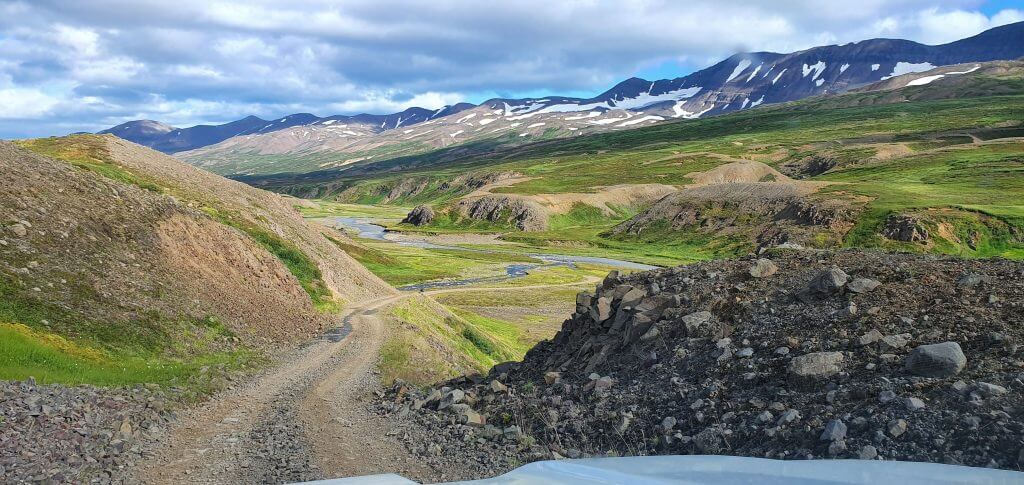
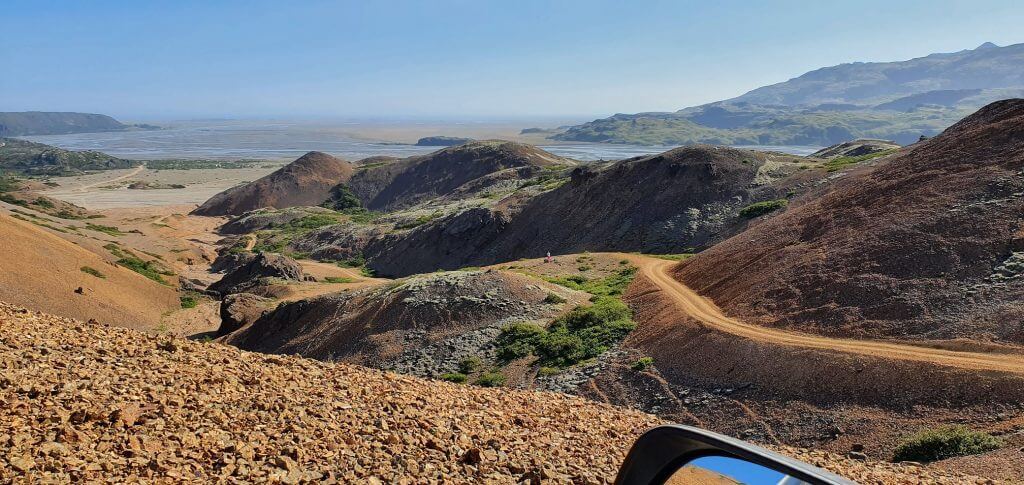
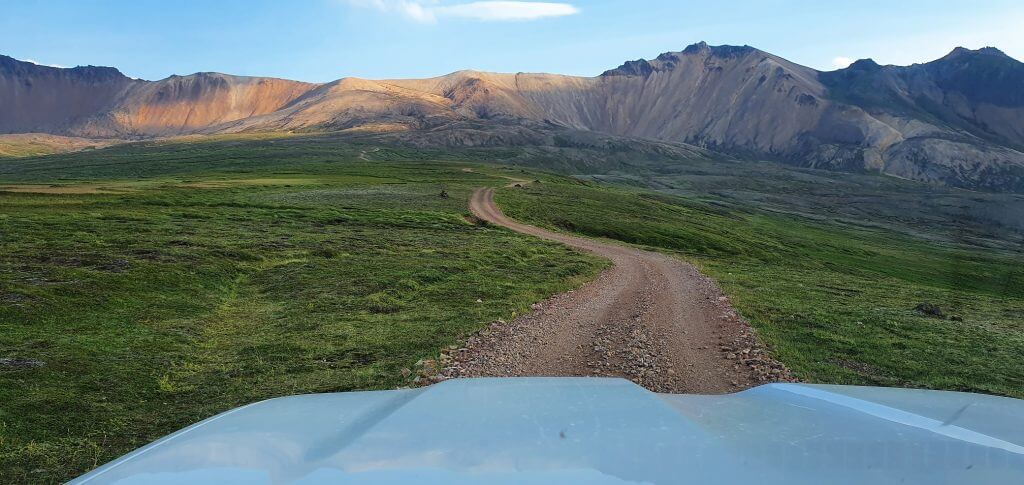
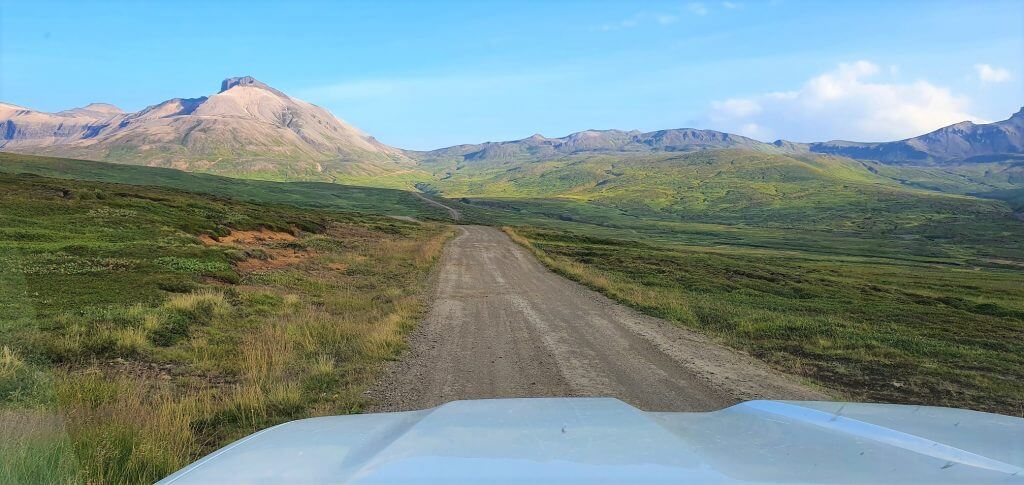
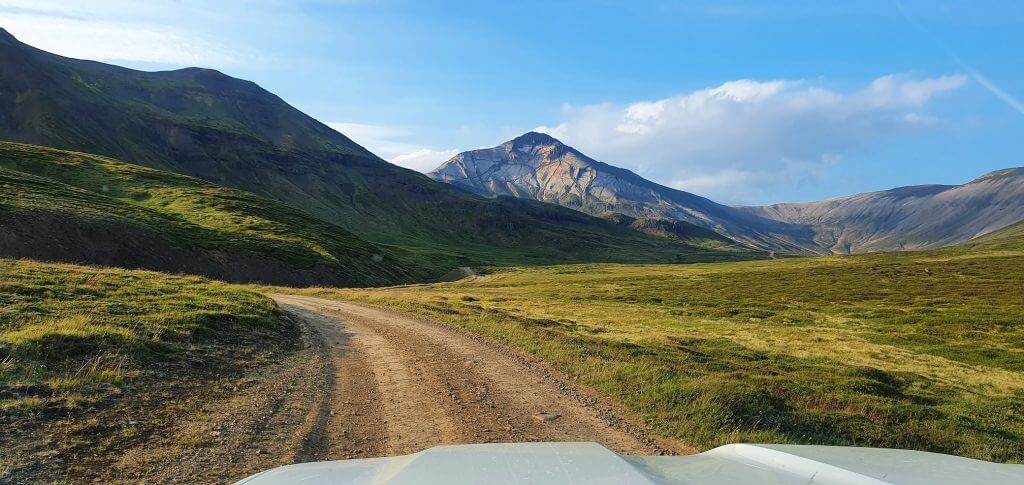
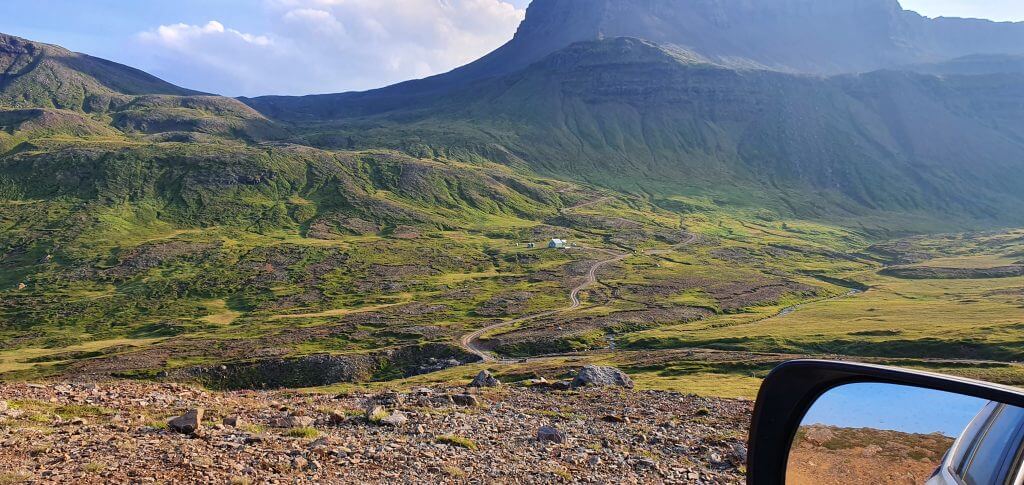
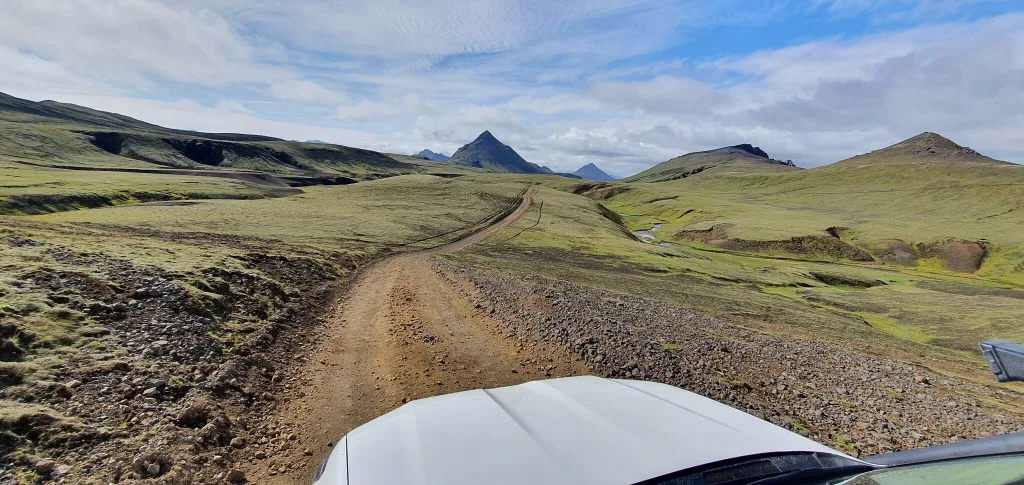
Out-of-this-world landscapes surrounding the F235 road towards Langisjór lake

The easy way – F235

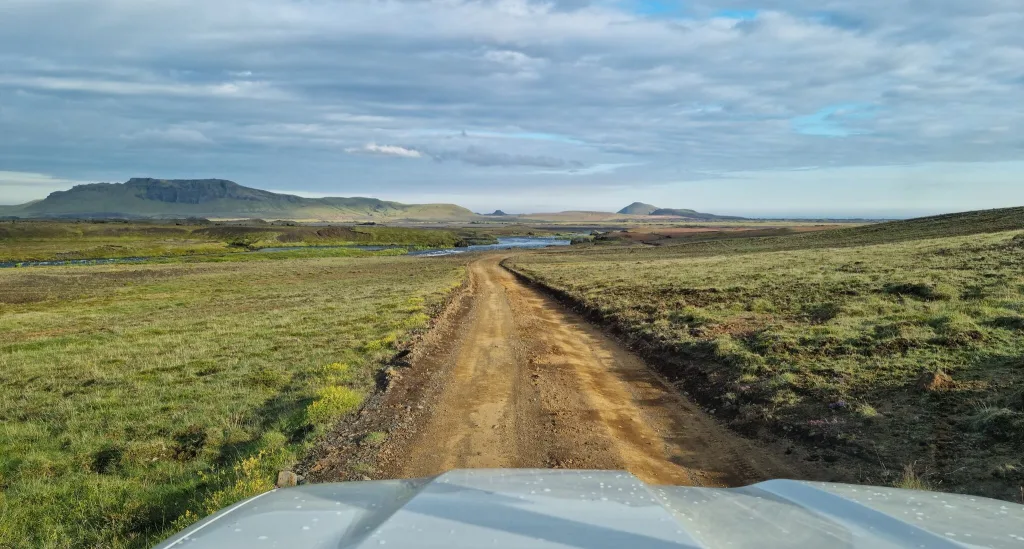
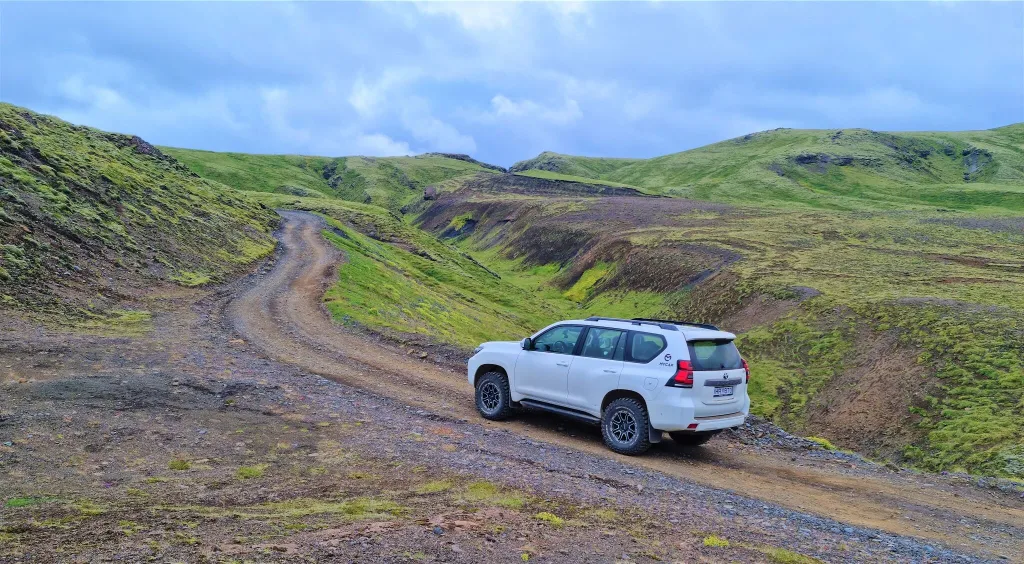
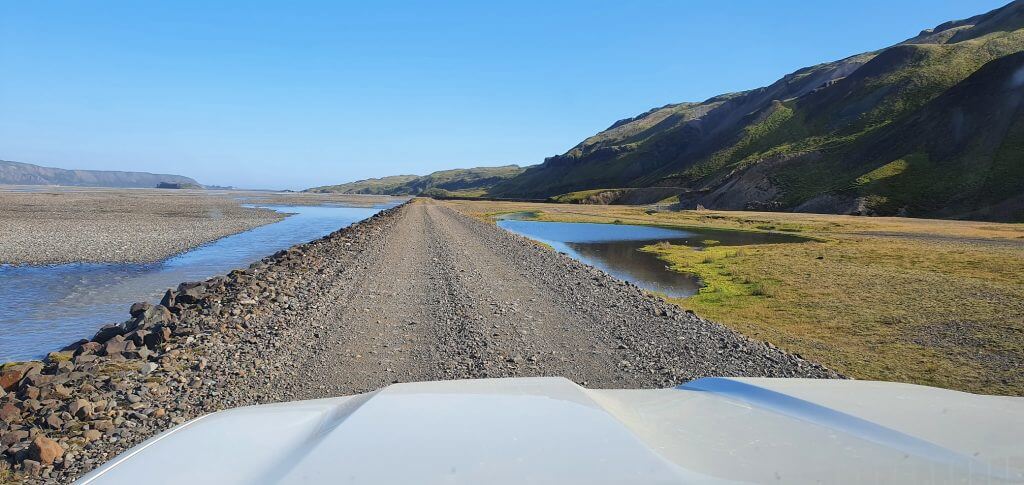
The least problematic access road to Langisjór is the F-road F235. It’s a beautiful road that never gets boring for us, and it’s also one of the easiest F-roads in Iceland.

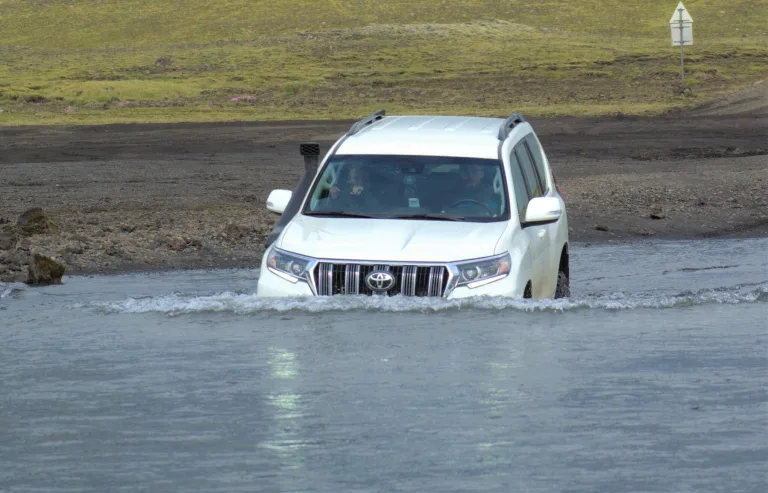
There are only small river crossings and streams or puddles on F235, so it doesn’t require an extensive river crossing experience. The road quality is very good, with no huge potholes or any other traps. Any 4WD car is fine for F235.

However, you first need to get to F235 somehow. The only connecting road to F235 is a bit more difficult F-road F208. Now, F208 is a long highland road connecting the south coast with central Iceland, leading east of Landmannalaugar. F235 is located exactly in the middle of F208.
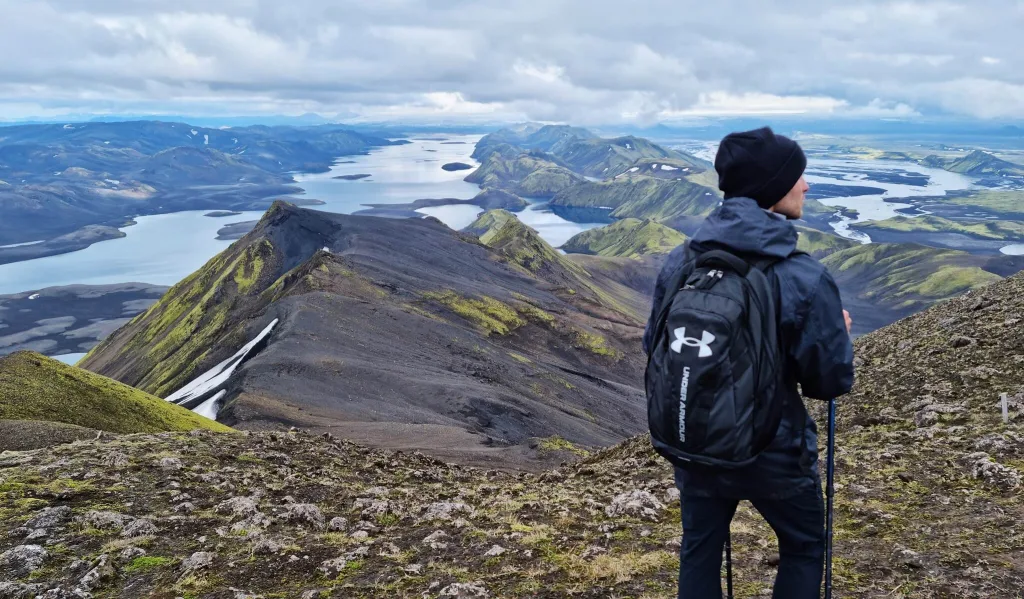
langisjor from sveinstindur hike

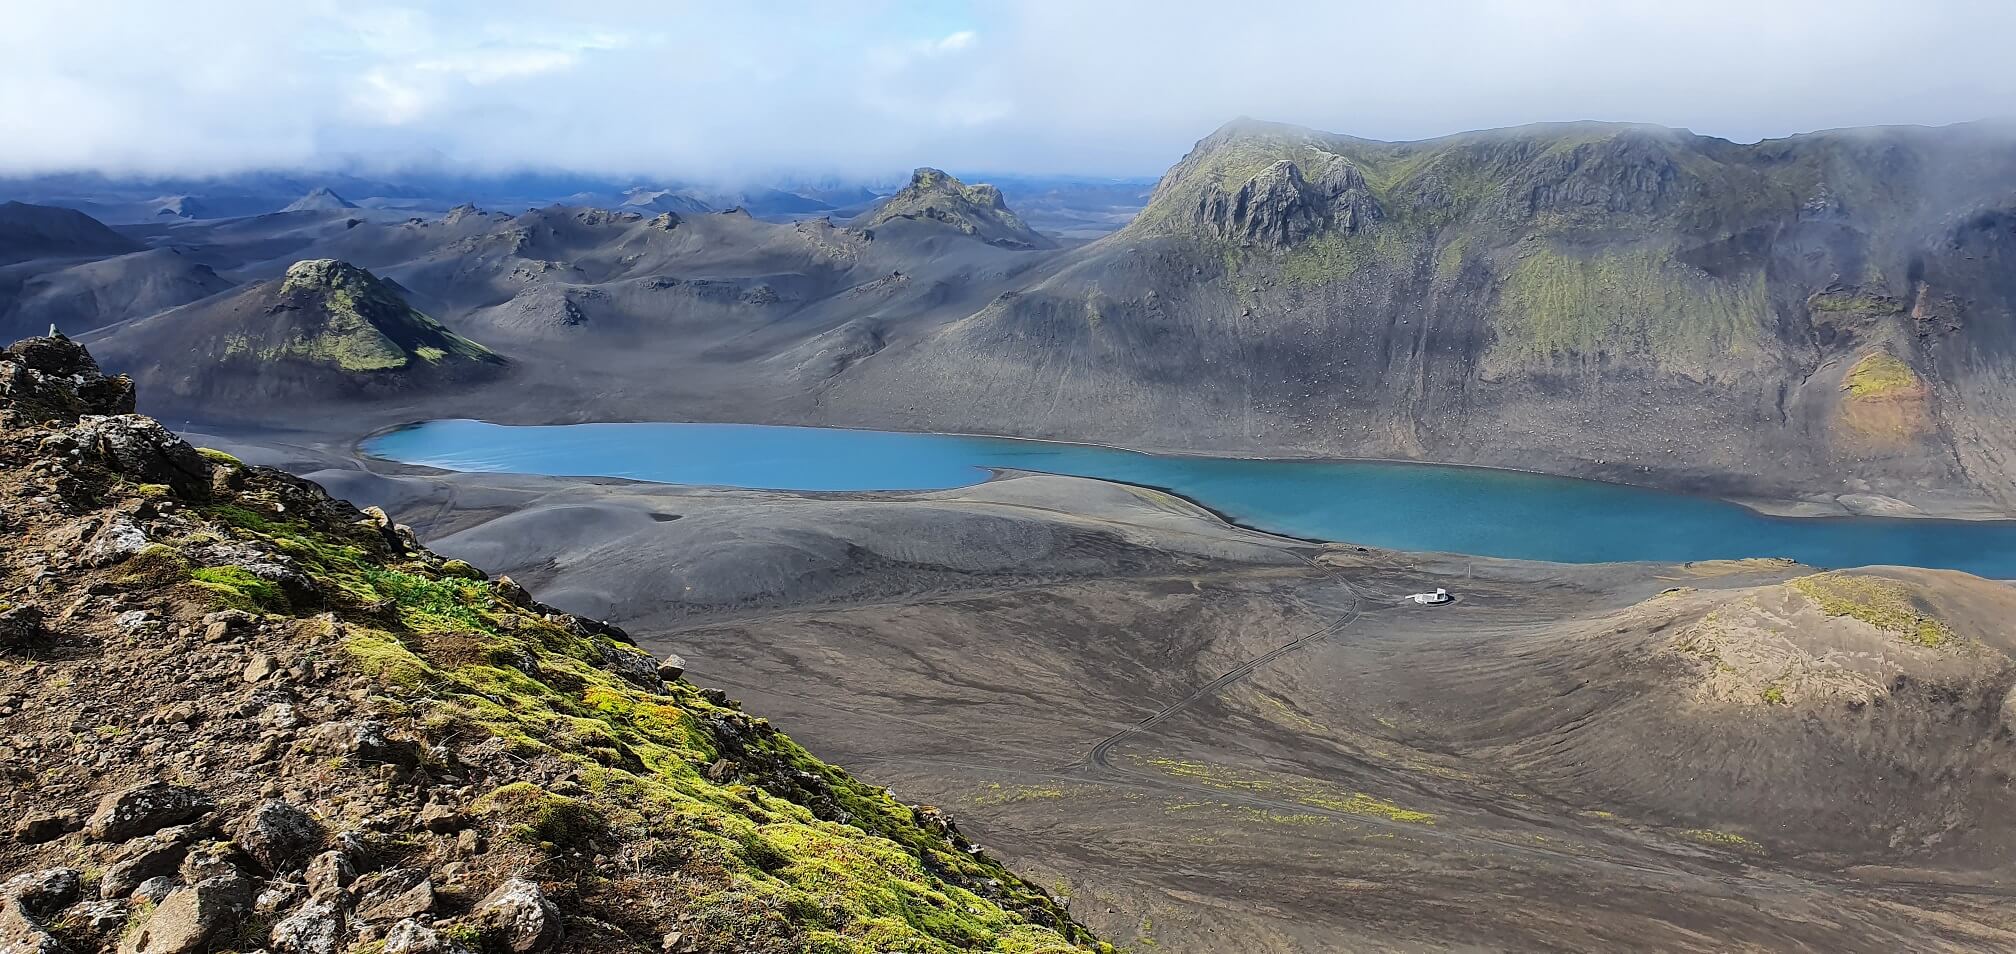
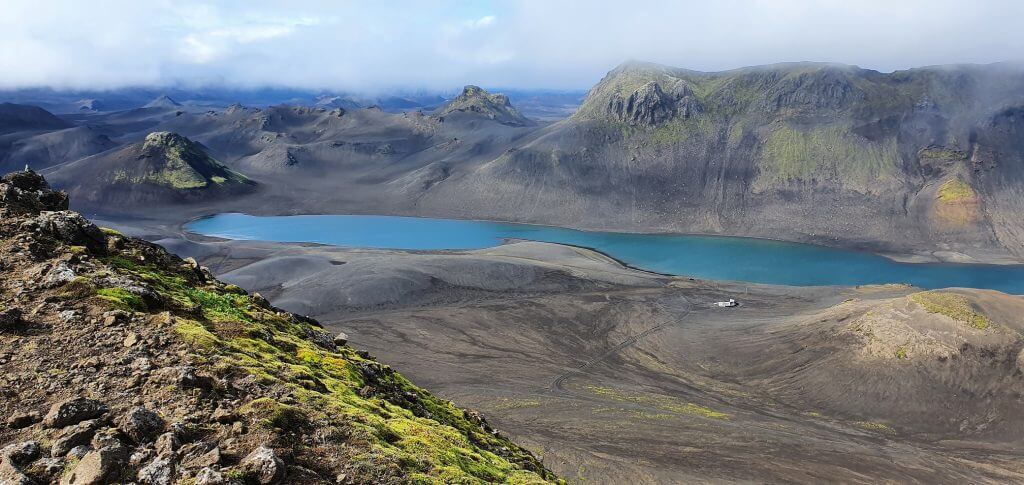
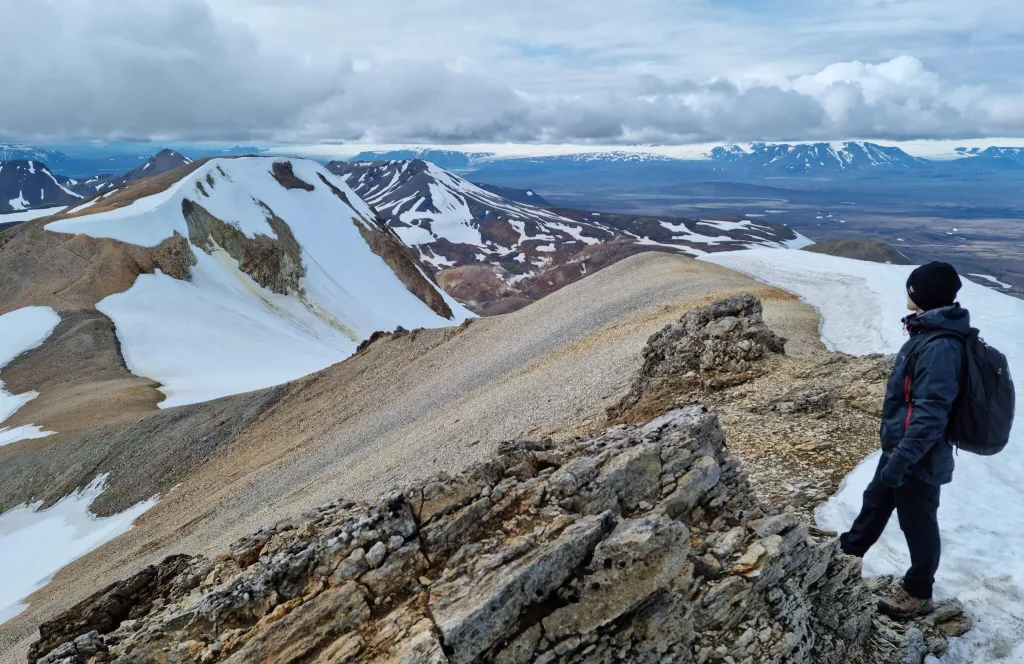
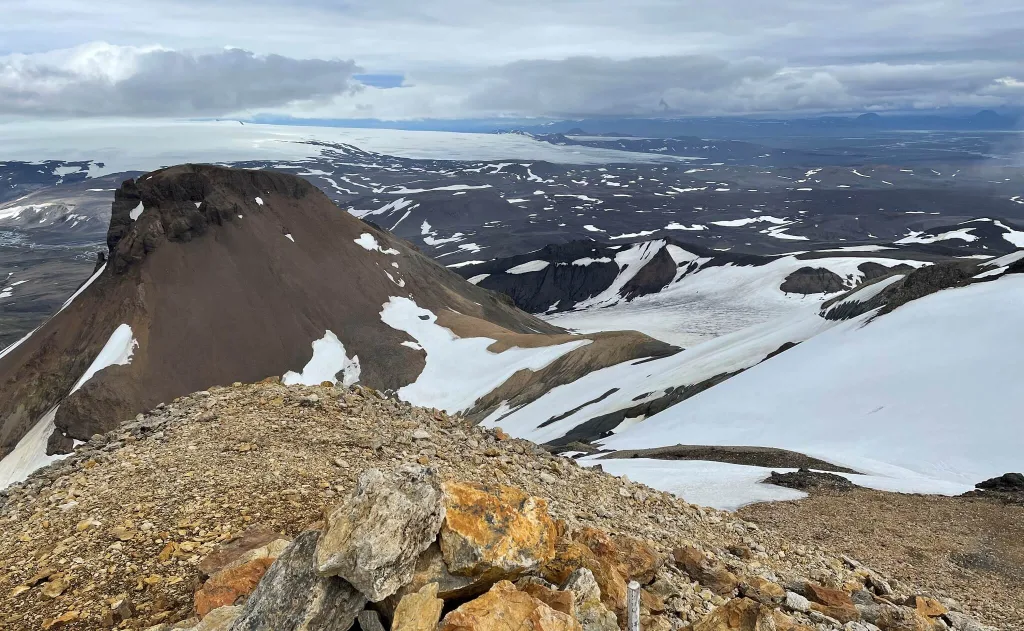
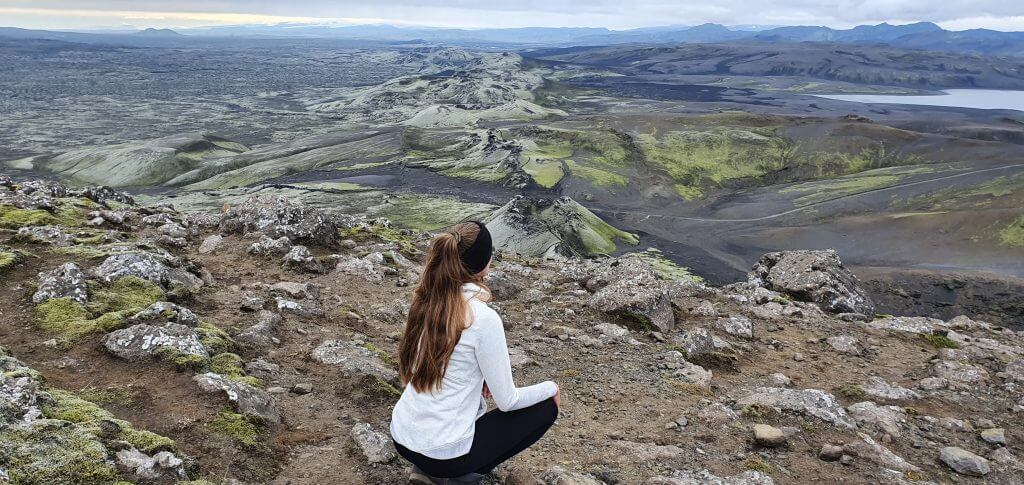
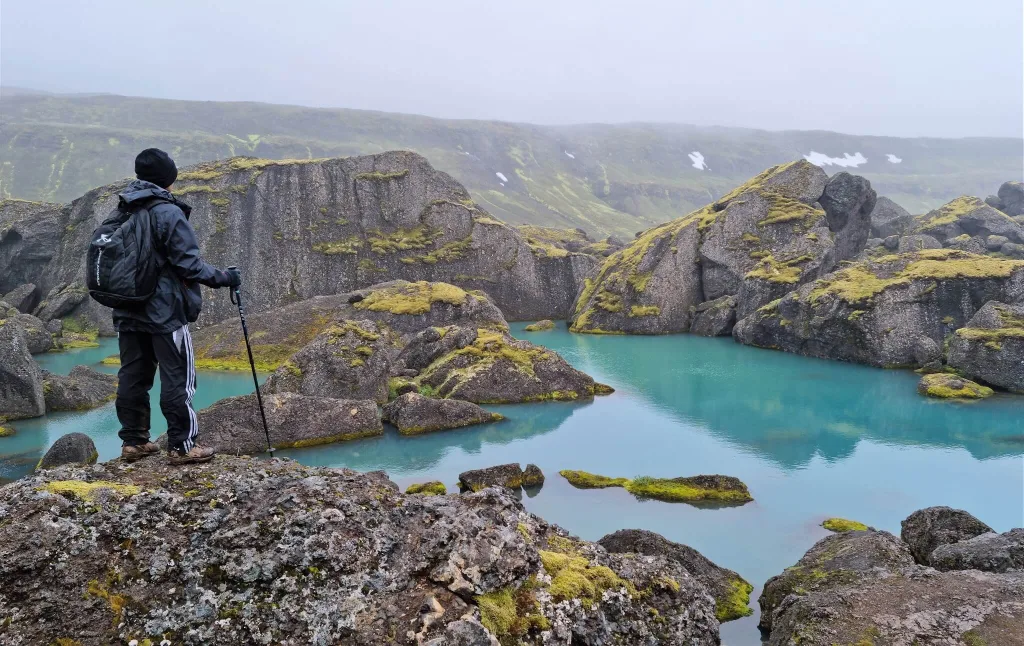
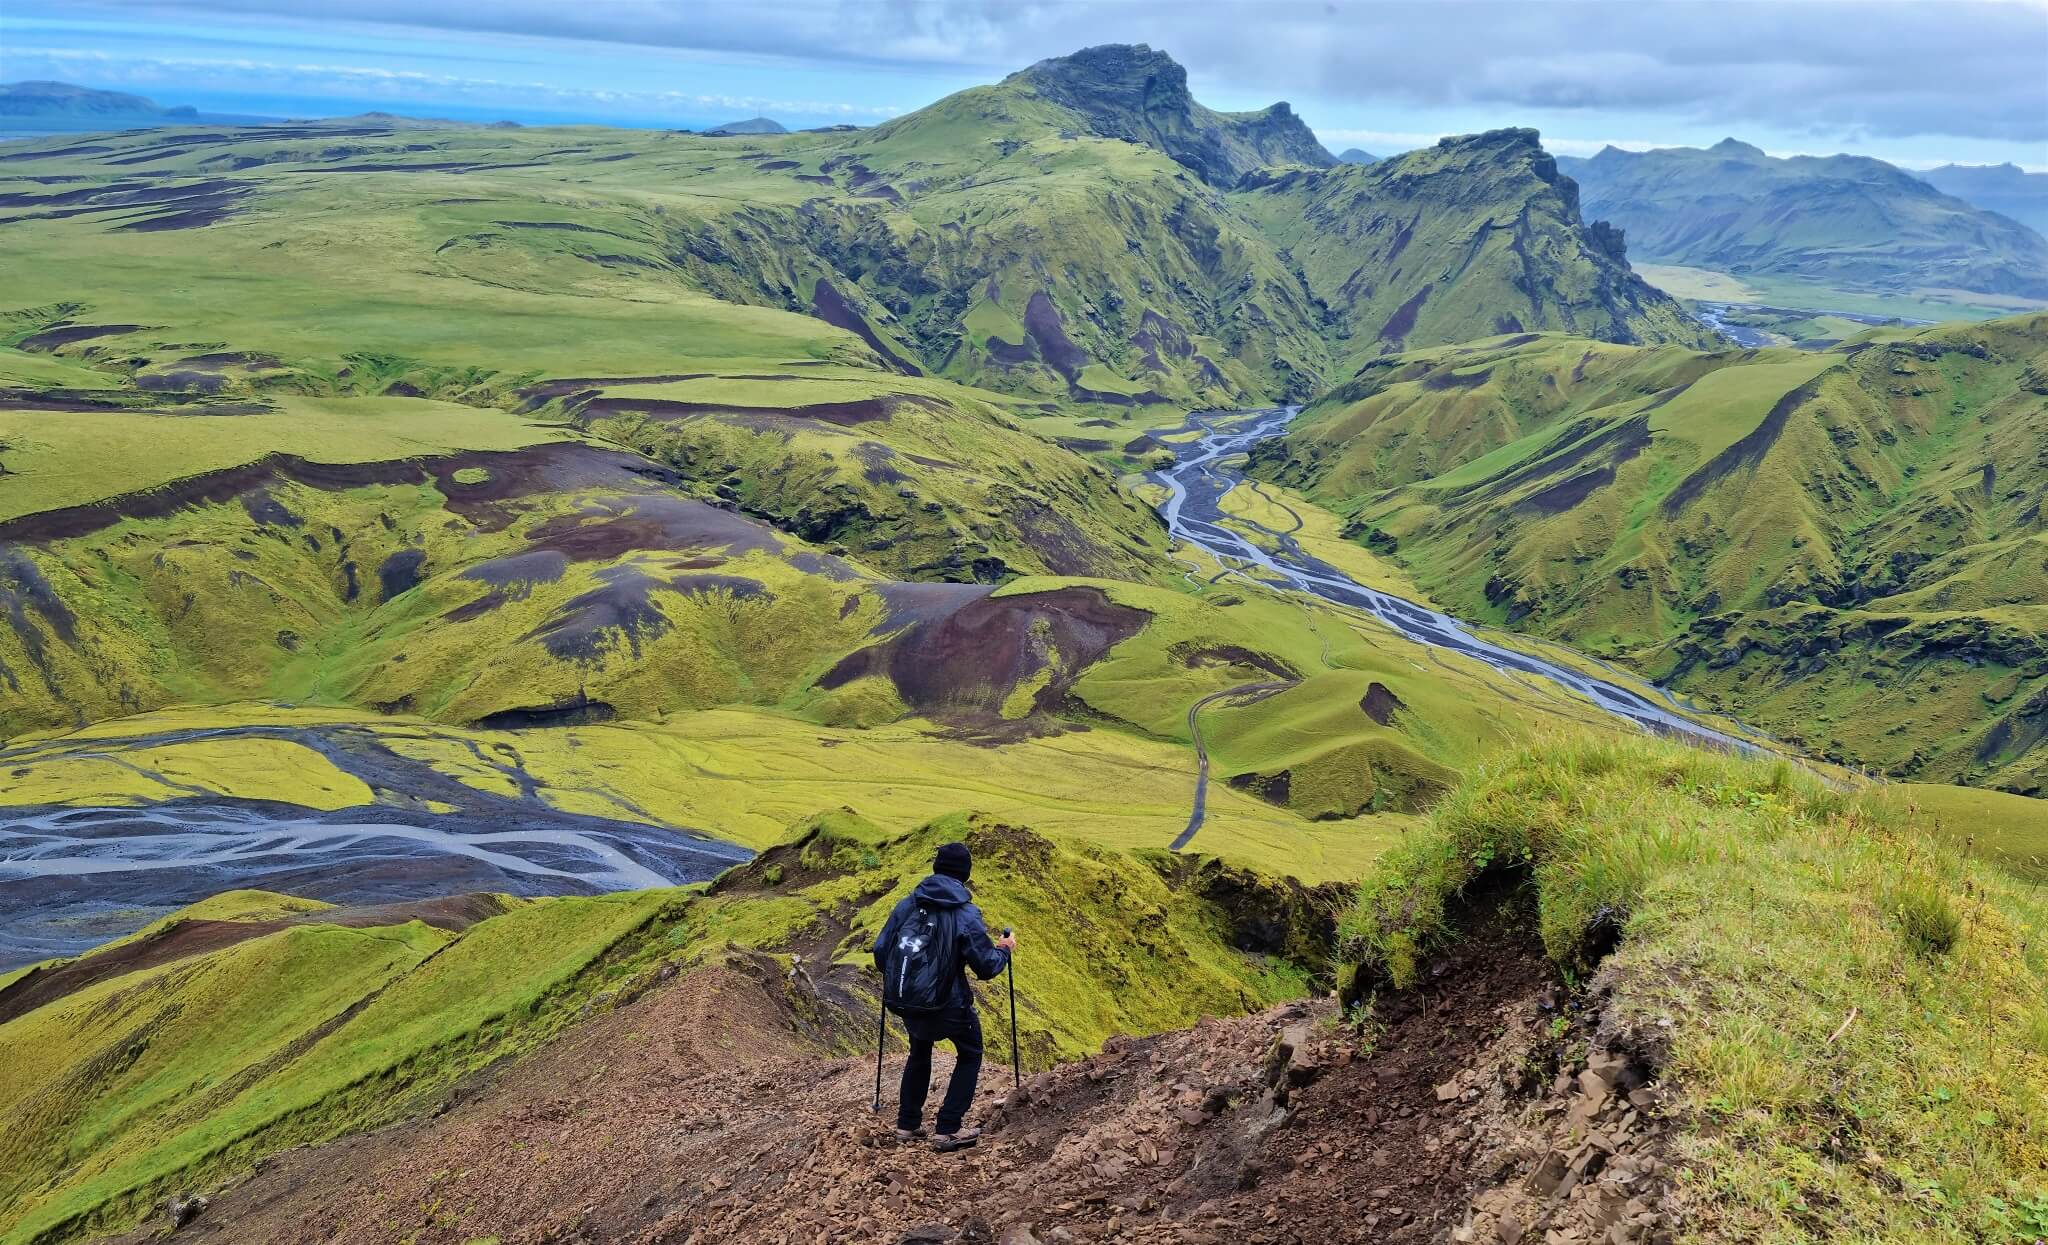
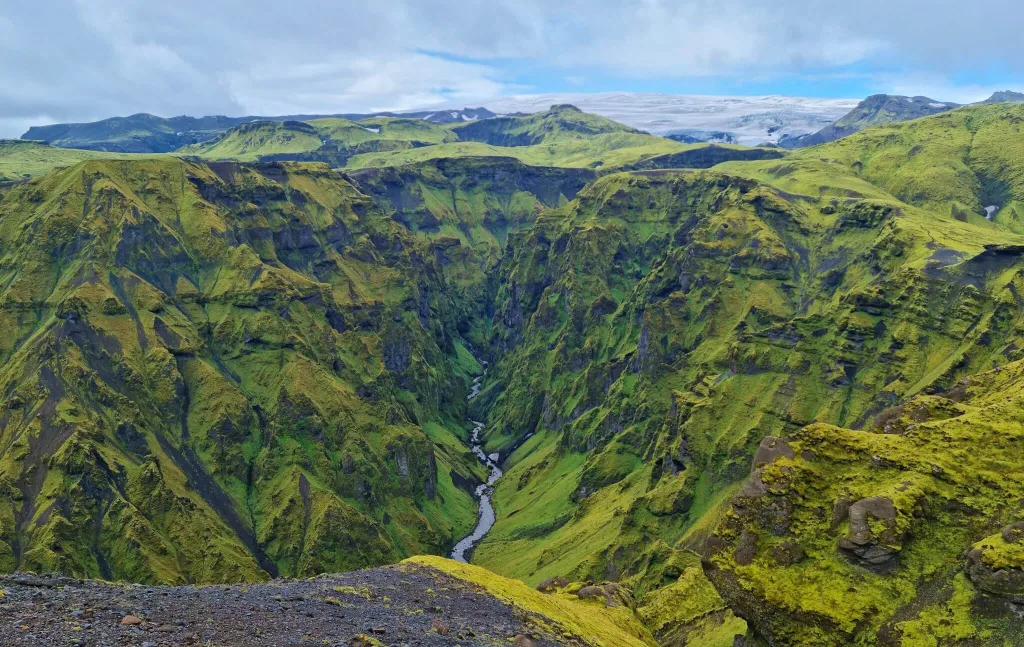
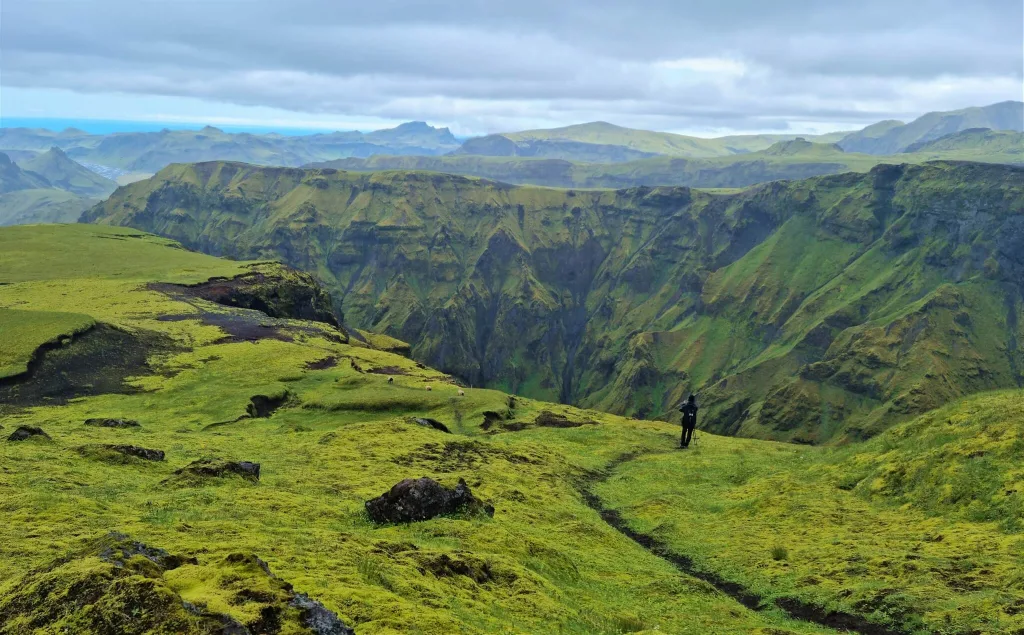
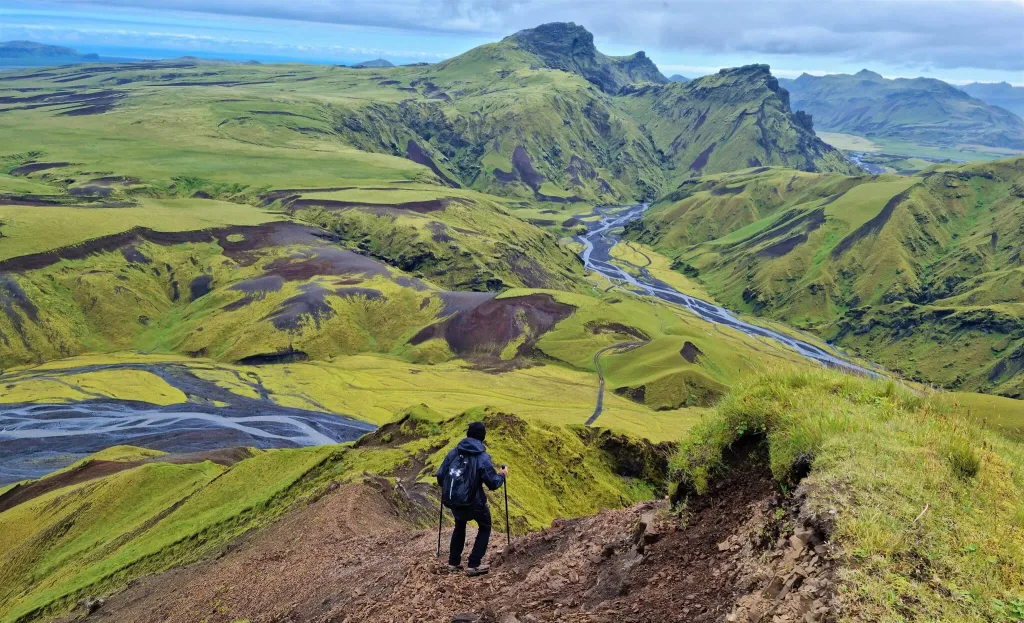
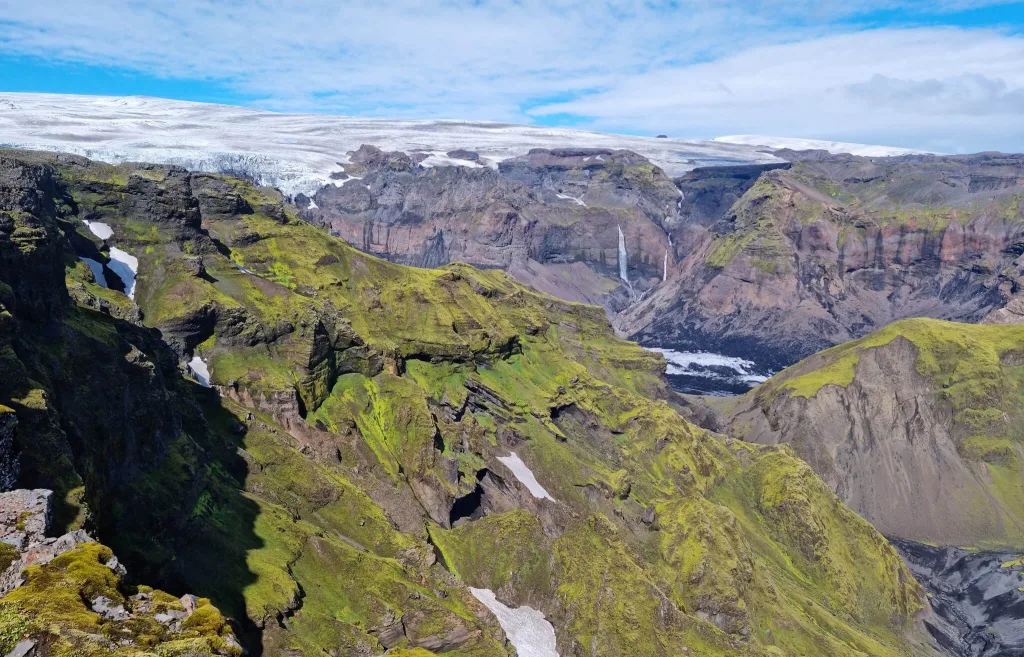
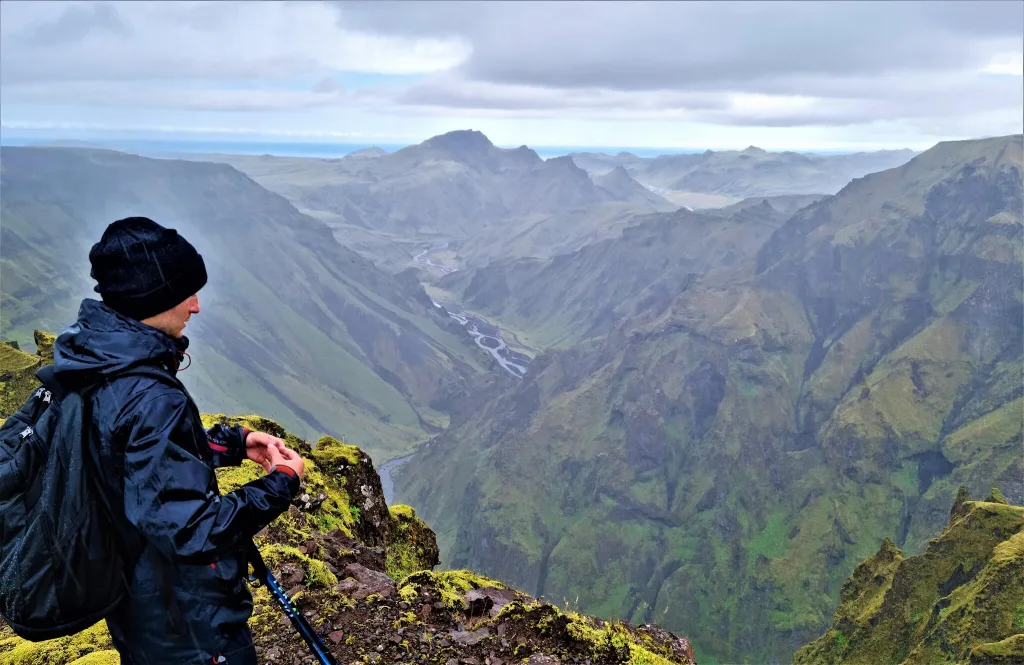
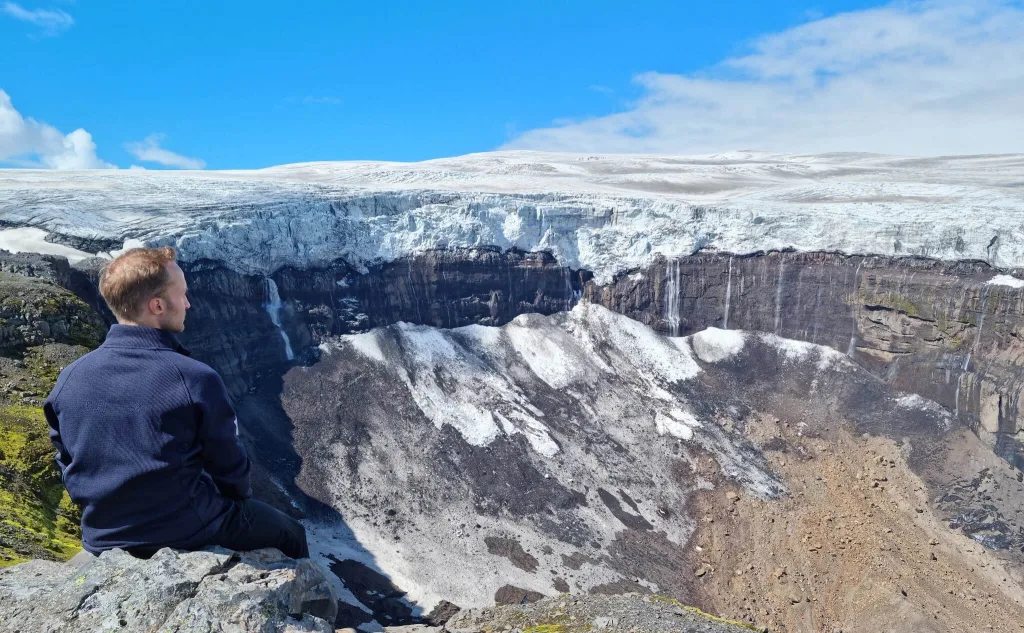
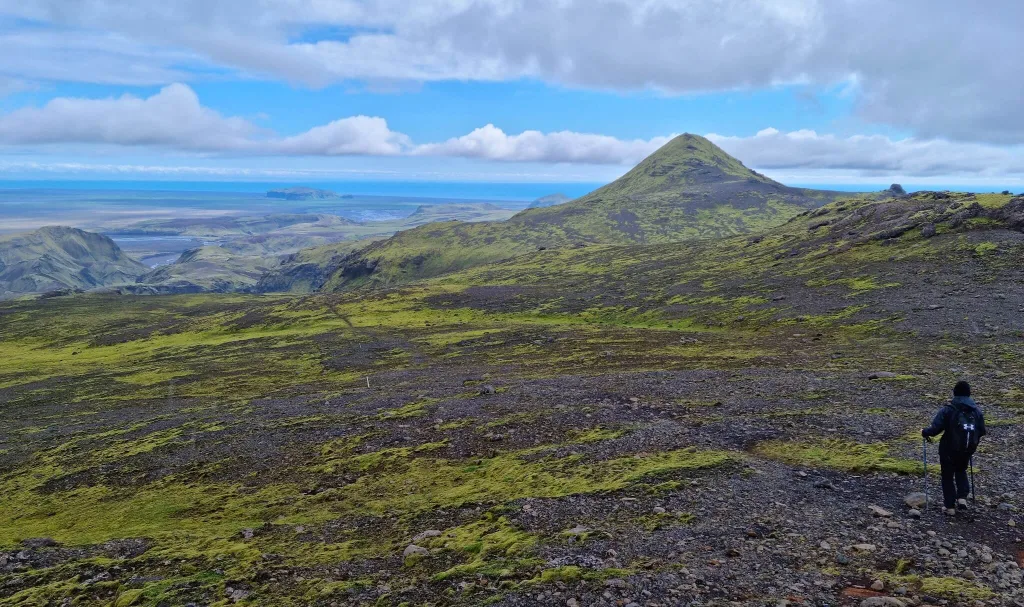
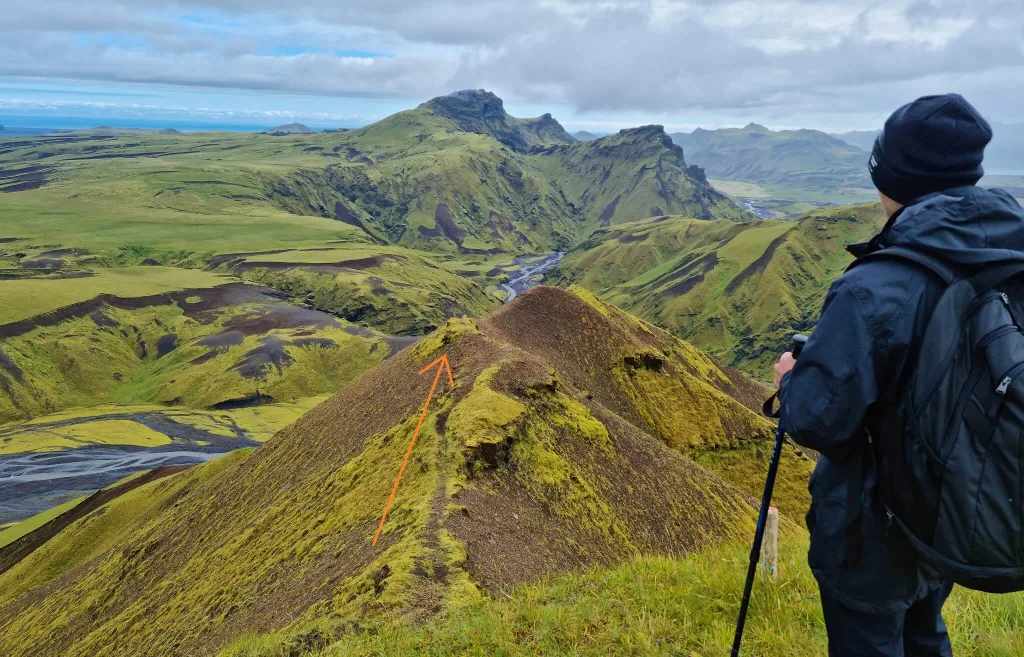
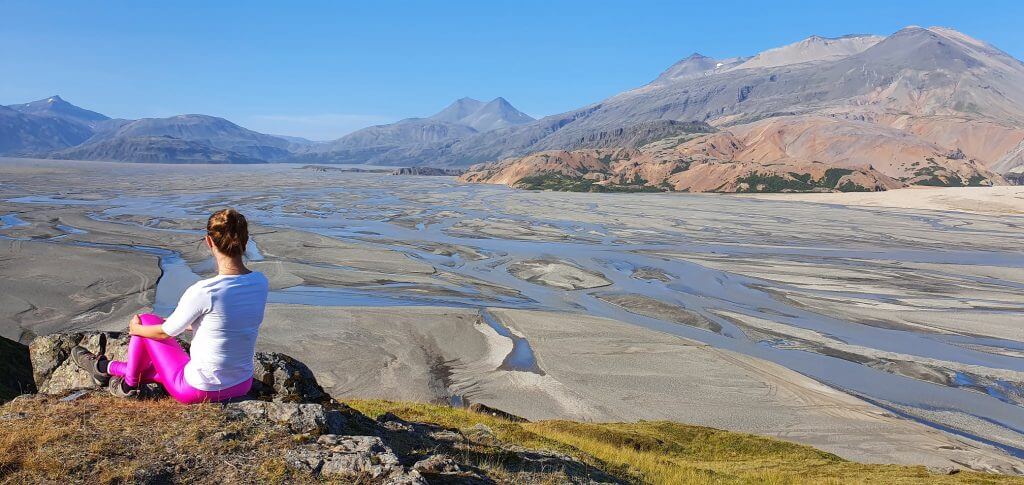
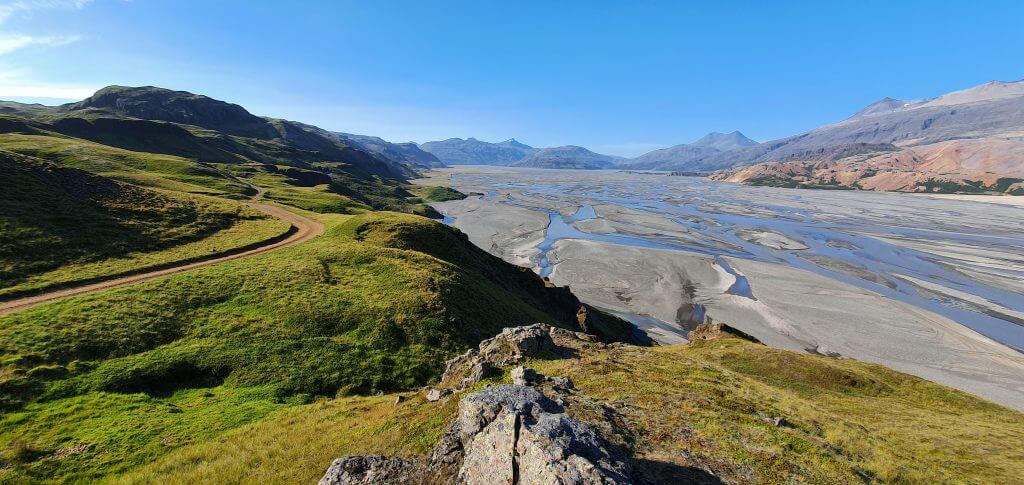
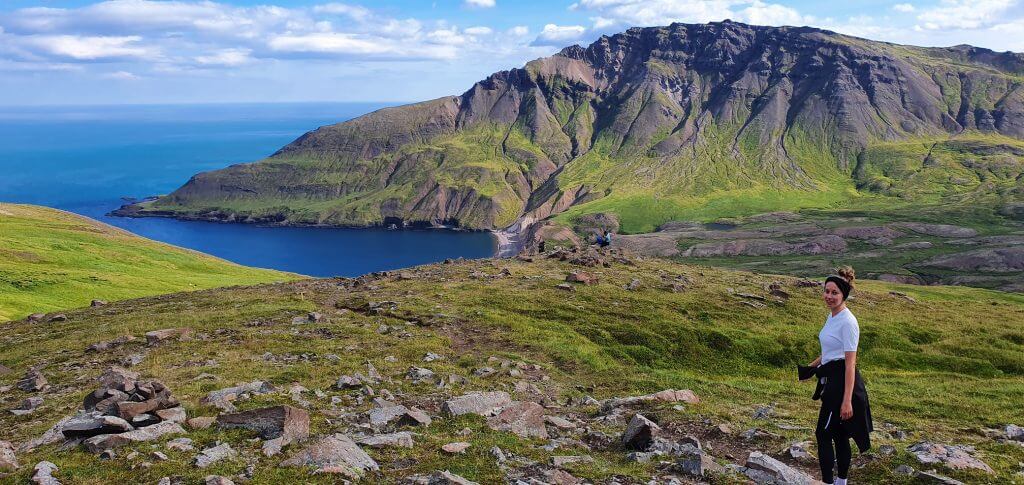
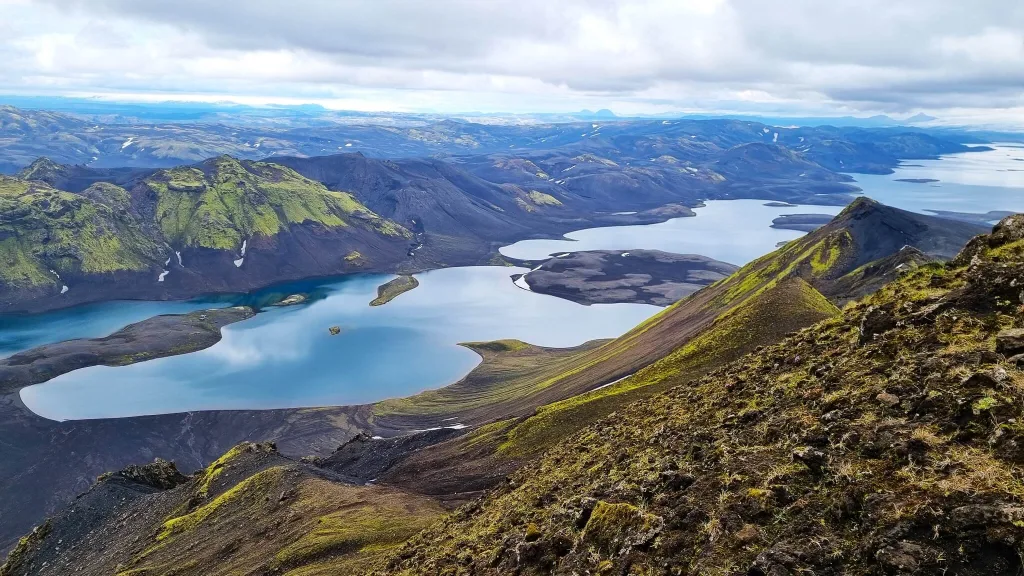
Views over Langisjór lake from the Sveinstindur hike

This means you have two options:

Both of these F208 route options require crossing small to medium-sized rivers and hence also some river crossing experience and adhering to river crossing rules.

It’s best you drive at least a medium-sized 4×4 car, like the Dacia Duster, and not the smallest 4WD cars, like the Toyota Yaris Cross or Kia Sportage. In good weather conditions, you may pass in any car, when driving well. However, when it rains a lot, you may have problems. Thus, our recommendation is at least a medium-sized 4WD car.
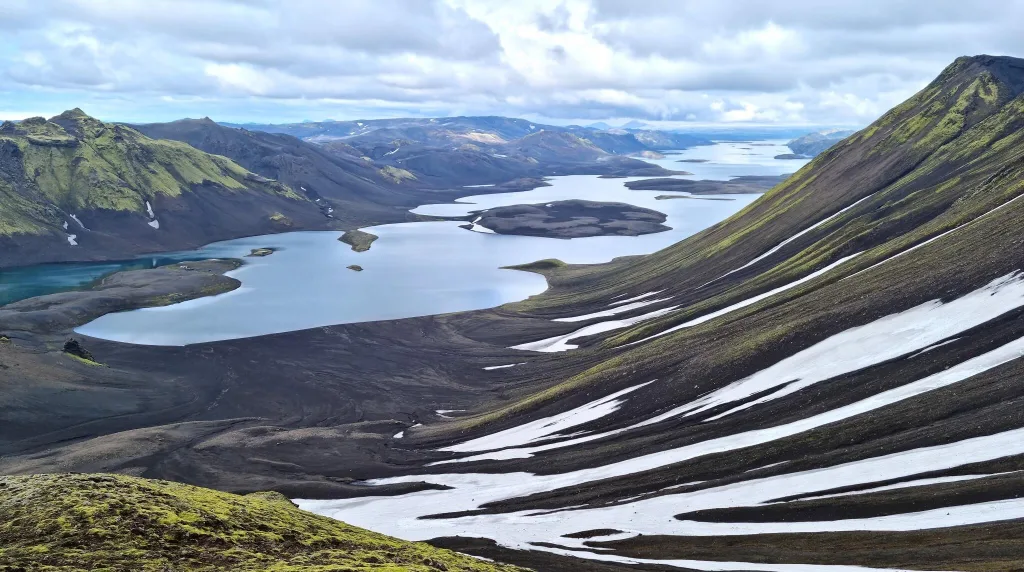
langisjor hikes iceland

Langisjór lake offers amazing hiking trails for any hiking enthusiast

The hard way – other roads

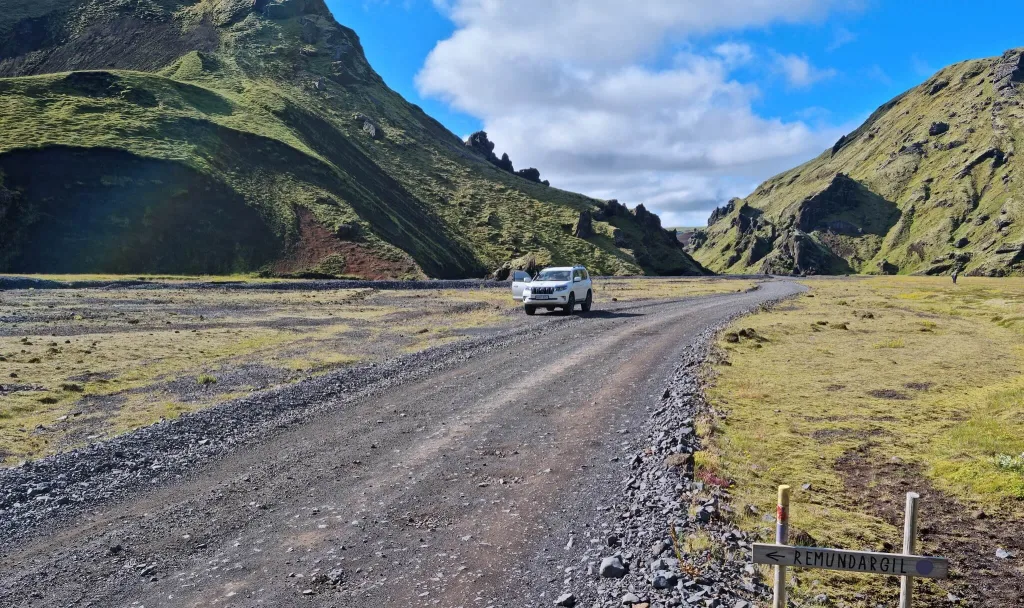
Besides the relatively smooth F235 road, there are also other ways to reach Langisjór. None of them is easy, though. They all require former 4×4 driving experience, crossing medium-sized rivers, and are more for 4×4 enthusiasts rather than someone who wants to get quickly to Langisjór.

All of these alternative routes are actually not even F-roads. They are just dirt tracks. This means they are harder to drive, and your car rental insurance may not apply. So either consult your rental company before driving them, or you have to take the risk if something happens, paying for it yourself. We‘ve driven all of these tracks, and as 4×4 enthusiasts, we love them!

Skælingar Blautulón track

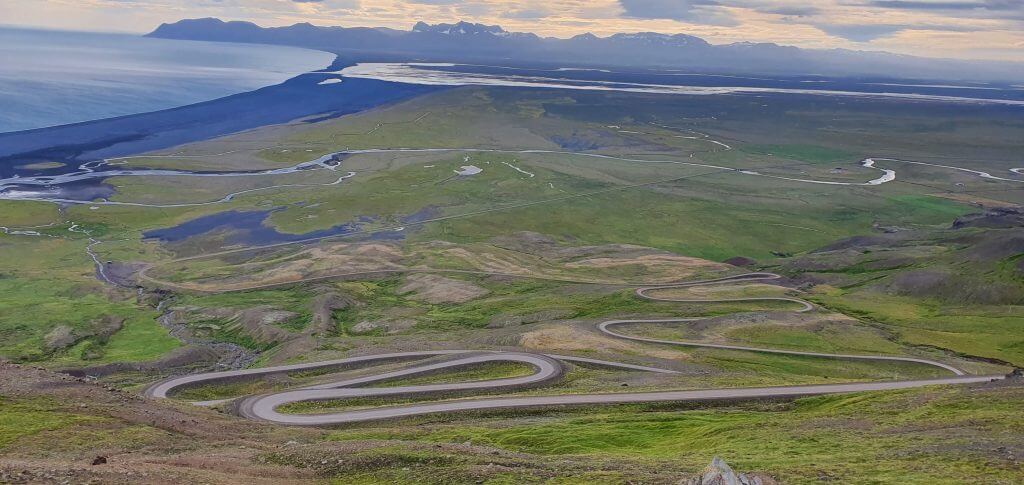
Skaelingar Blautulón track is the only track leading to Langisjór from the southeast. There’s one significant river crossing right in the beginning, close to Hólaskjól highland center. Afterward, Skælingar gets a bit rough, with some steeper inclines and declines. We even encountered snowfields on the track a few times in July!

The main highlight and, at the same time, an obstacle of Skælingar Blautulón track is the picturesque lake Blautulón. Spoiler alert – you have to cross the lake with your car! How? Read further below, and you will get to know it 🙂

You have to drive at least a large 4×4 car on this road, ideally a super jeep.

Faxasund track

Faxasund track is a challenging dirt road leading to Langisjór from the northwest. It’s a beautiful and versatile track, great for 4×4 lovers. You will have to overcome small to medium-sized river crossings, and there are several steeper hillside sections.

The most difficult part is close to the junction with F208. It consists of millions of sharp stones, and you need to take special care not to damage both your tires and undercarriage. When we drove the track in July, part of it close to Langisjór was also severely damaged.

You have to drive at least a large 4×4 car on Faxasund, ideally a super jeep.

Botnlangalón track

By far, the most difficult track that will get you to Langisjór is Botnlangalón, named after the lake that it leads to in the first place. It’s the northernmost and westernmost track. This is the track only for super jeeps. We drove it in a 33” modified Land Cruiser and barely made it!

Botnlangalón track crosses harsh, moon-like landscapes and is mostly unmaintained with tons of bigger holes, bumps, very steep ascents and declines, and, of course, river crossings as well. It took us a long time to finish the track, and I’m not sure I would drive it again.

However, there’s one fantastic highlight right at the end of this track. Which one? Read about our experience below, and you will get to know 🙂

When to visit Langisjór
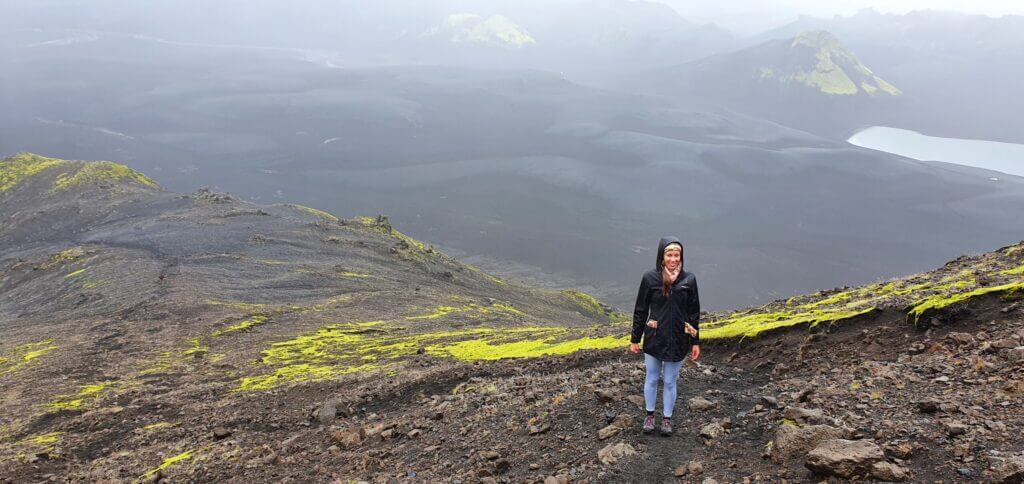
Sveinstindur hiking trail

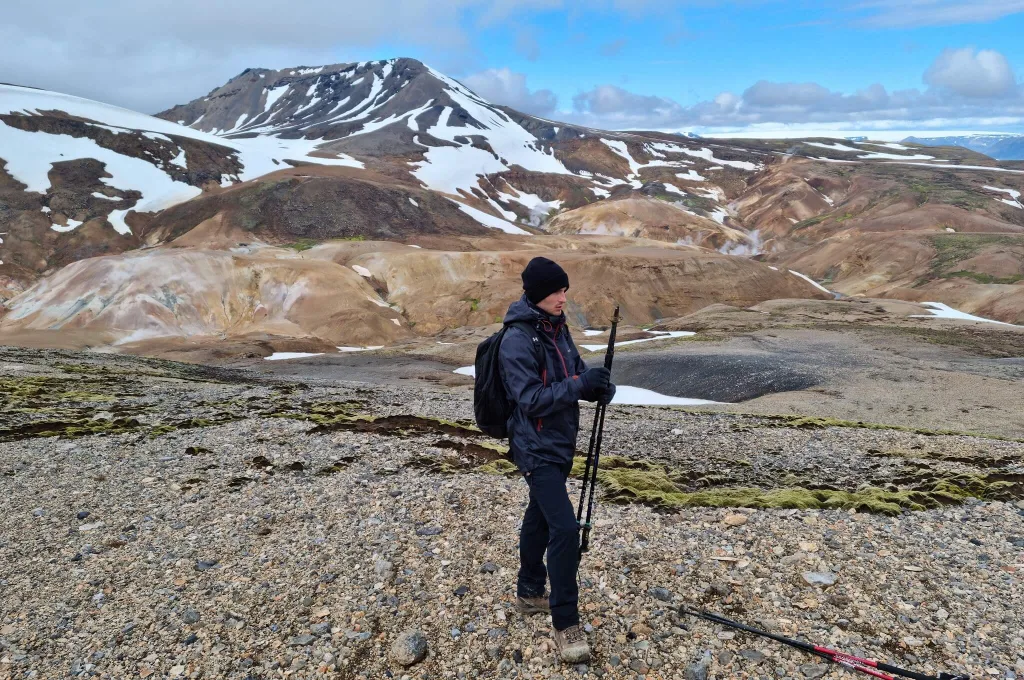
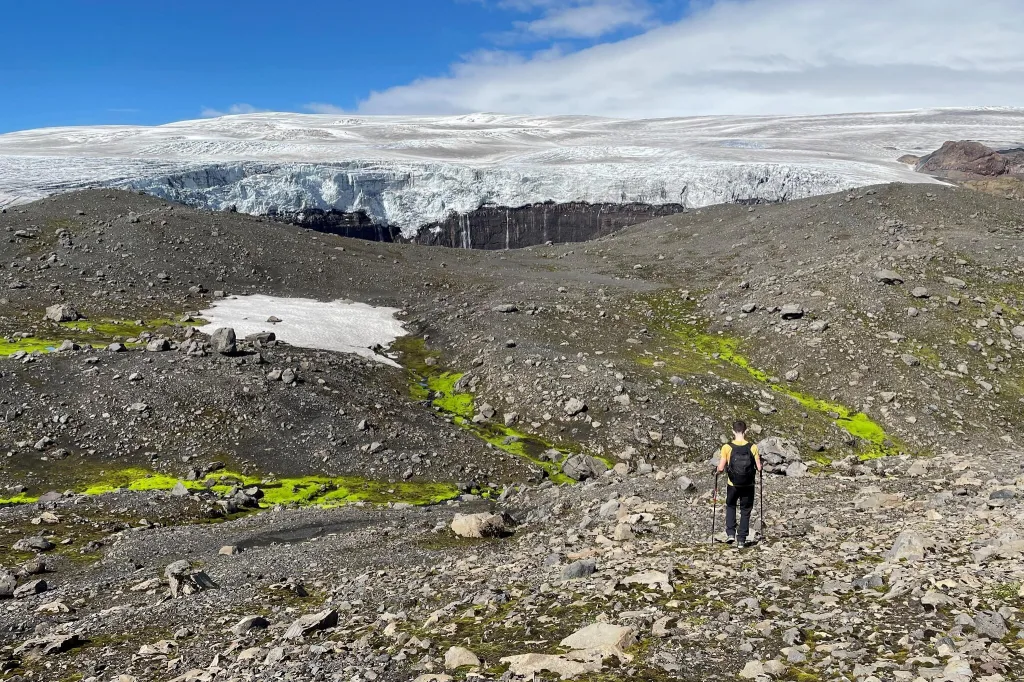
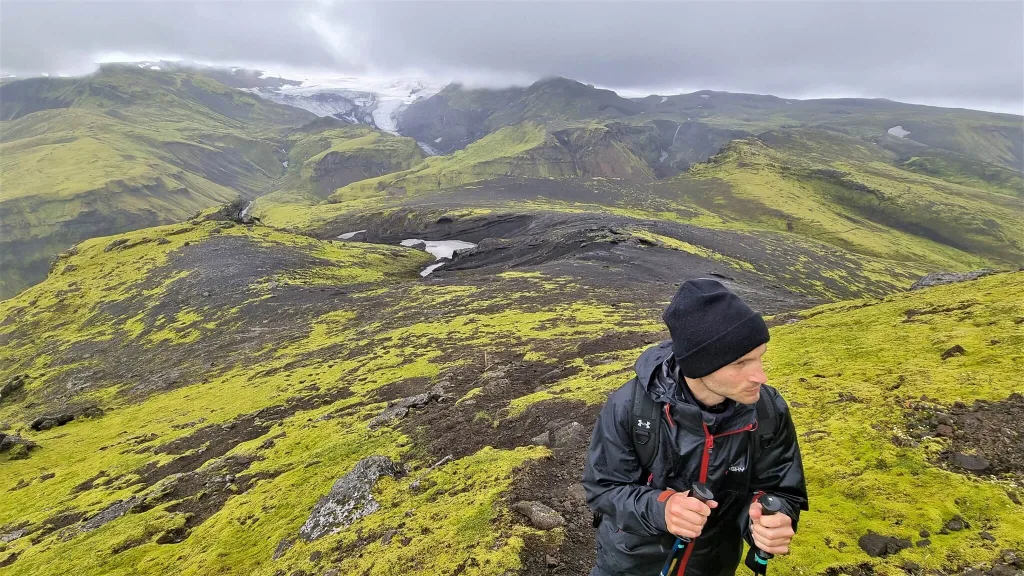
Sveinstindur hiking trail, somewhere around half towards the peak. Fog and rain are typical for this area.

You can visit Langisjór only in summer, when the roads F208 and F235 leading to the lake are open, i.e. marked green or dashed green on Icelandic Road Map. The roads typically open sometime between mid-June and mid-July, and they become impassable during the course of September.

To have the highest chances of open roads, it’s best to visit Langisjór between mid-July and early September. This period coincides with the peak of Icelandic summer and dryness of the highland roads.

Things to do at Langisjór

The area around the lake is no Disneyland. It’s a remote part of the highlands with no special attractions, however, with countless remarkable natural sceneries. Those who enjoy isolated places and untouched desolate landscapes will fall in love with Langisjór.

Hike
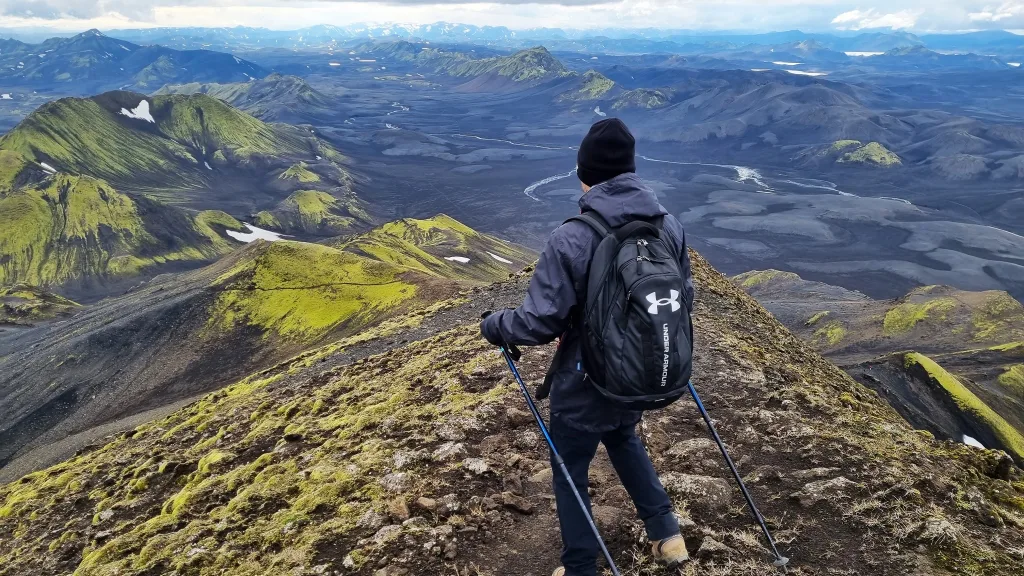
langisjor hiking iceland

Hiking is the best way to enjoy a visit to Langisjór to the fullest

There’s no wonder the main attraction in the area is hiking. Langisjór is also close to other popular hiking areas of the highlands, like Eldgjá or Laki craters. Most likely, the most beautiful hike here is a trek to the peak of Sveinstindur.

Drive rough roads

Off-road and 4×4 enthusiasts will love the area around Langisjór, which has many wonderful and difficult roads to try. Be careful, though, what you mean by a word “off-road”. It’s illegal and strictly punished to drive off any road in Iceland.

It has to be an official road or track with a name you plan to drive on. So, if we use the term “off-road” for driving on Icelandic tracks like Blautulón, because they are rough, it’s OK. But never drive off the road in Iceland, it damages the soil, often even forever, and it’s strictly prohibited!

In other words, off-road driving is forbidden in Iceland, but off-road lovers will enjoy countless Icelandic F-roads and dirt tracks due to their versatile terrain and surroundings!

Lake Langisjór

What else could possibly be the main highlight than the lake itself? Lake Langisjór is beautiful and fascinating. When we saw the lake for the first time, we were surprised by the absolute silence in the area. The word tranquil is weak to use. If we talk about Langisjór, it’s even calmer than that.

The lake itself is also quite well accessible. You could drive pretty close to the lake and leave your car at the adjacent designated car parks. Then, you can either walk around the lake, climb a nearby hill to get a view of the lake, or take one of the longer Langisjór hiking trails to admire it from more angles and viewpoints.
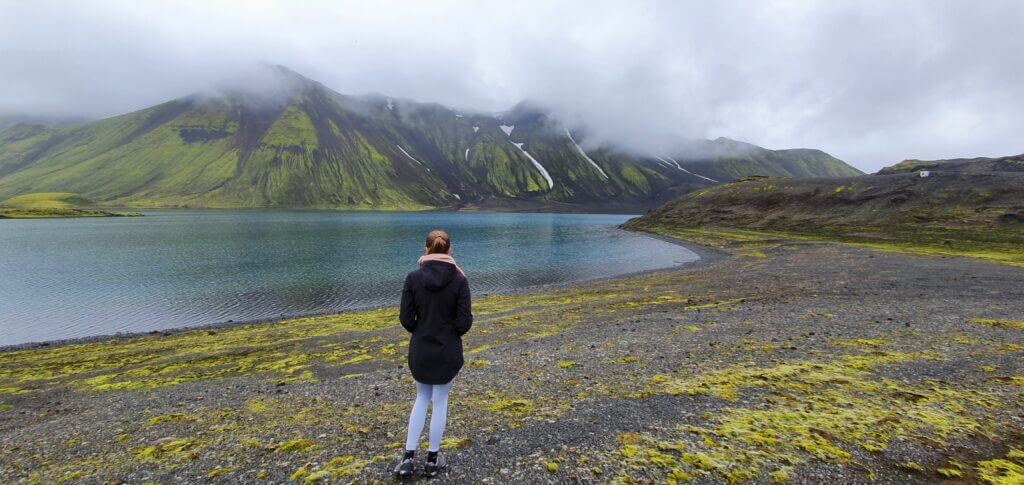
Langisjór lake

Lake just next to the Langisjór campsite mark on the map. Langisjór is a fishing paradise.

Fishing

On our first visit to Langisjór, we quickly realized this is a sought-after area also due to its incredible fishing opportunities. Crystal clear water of the lake is not only mesmerizing to look at, but it also seems to be loved by the lake’s inhabitants – some tasty fish.

Be sure to study the Icelandic fishing rules well and get all the necessary permits before fishing in Iceland.

Camping
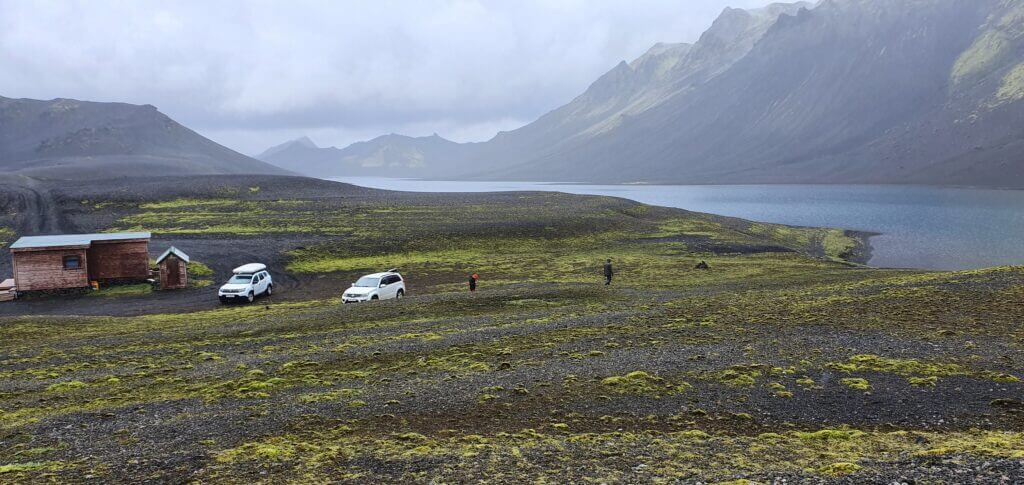
Langisjór campsite

This was supposed to be Langisjór campsite according to maps. It just turned out to be a remote place with nobody being there.

Langisjór campsite is not huge in size but fits nicely in the simple and harsh surroundings of the lake. It’s great mainly for those who plan on embarking on some of the multi-day hikes around the lake.

There’s a car park, a warden’s hut, typically occupied only in summer, and also two standard, modern flush toilets 🙂

Langisjór hiking trails

langisjor hiking trails map

Lake Langisjór hiking trails map (click to enlarge)

There are three main Langisjór hiking trails:

  • the Sveinstindur trail
  • the trail around Langisjór lake
  • the trail leading around Uxatindar mountains to Eldgjá.

Sveinstindur

Length: 4km
Time: 2 hours
Difficulty: moderate
Hiking trail map: Sveinstindur trail

Sveinstindur is the tallest peak right next to the Langisjór lake. It offers the most spectacular views of Langisjór as well as the entire moon-like area. It’s more than just worth a short but intense, roughly 1 hour long climb up the narrow and rocky path. This shortest trail to Sveinstindur is a well-marked out-and-back hike.

Sveinstindur is an Icelandic hidden gem almost nobody writes about, and we highly recommend hiking it if you are in good physical shape. The summit of Sveinstindur is one of the most magical places in Iceland. Make sure you visit it on a clear day, though otherwise you won’t see a thing.

Around Sveinstindur
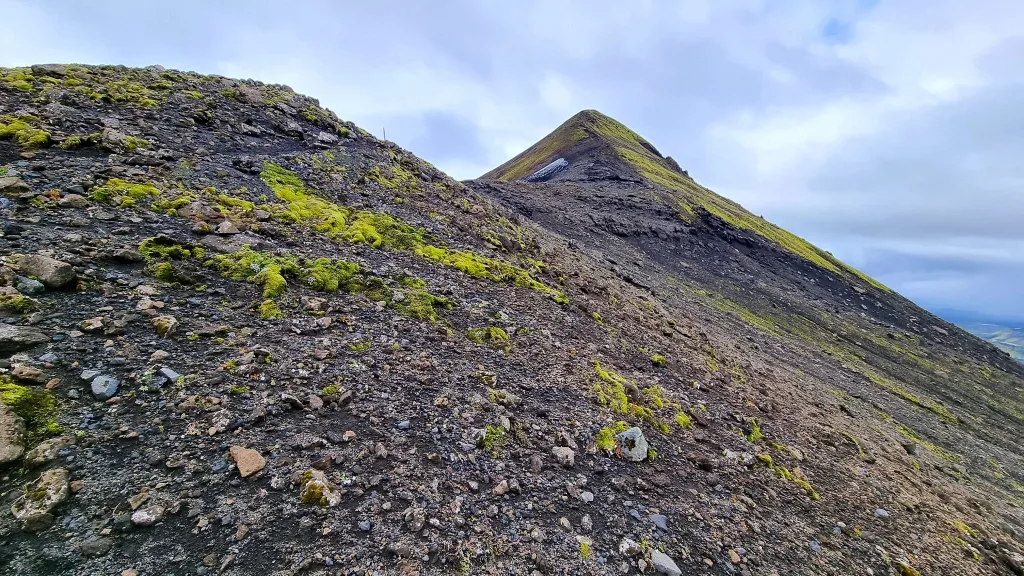
sveinstindur peak iceland

Sveinstindur peak in the distance

Length: 11km
Time:  4 hours
Difficulty: difficult
Hiking trail map: Around Sveinstindur trail

If you want to spend more time around Sveinstindur and Langisjór, you can take a Sveinstindur loop trail. This circular trail copies the southern edge of the lake and then turns south as an ascent to Sveinstindur.

This part of the trail is not well marked, and it’s best hiked later in the season when you can see at least some steps you can follow. It’s only for seasoned hikers who are not afraid to trek off the beaten path.

Around Langisjór lake
hiking around langisjor lake

Hiking around the entire Langisjór lake isn’t easy and should be prepared well in advance

Length: 50km
Time:  2 to 3 days
Difficulty: very difficult
Hiking trail map: Around Langisjor trail

If you are looking for a totally deserted multi-day hike in a scenic area, you can hike around the entire lake! The trail is not well marked, and you should have some experience with multi-day hikes in cold climate countries before taking it.

You may also encounter lake and river crossings, so it’s crucial you’ve already done some before. Ideally, you don’t want to be alone on this hike as well. We’ve also heard that online maps like Alltrails or Wikiloc are not precise in this area, so please be aware of that!

Uxatindar – Eldgjá
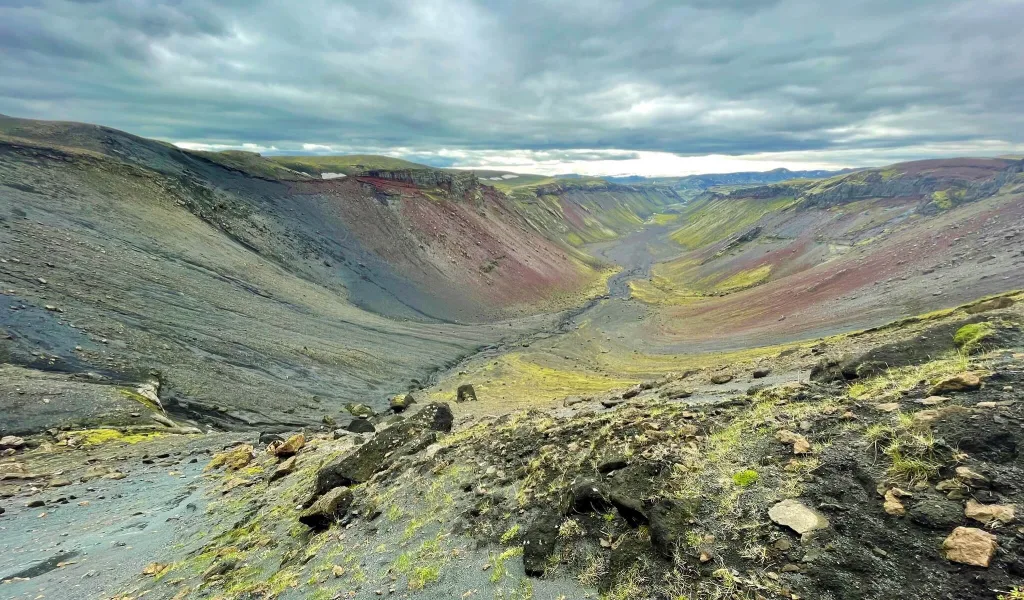
eldgja iceland

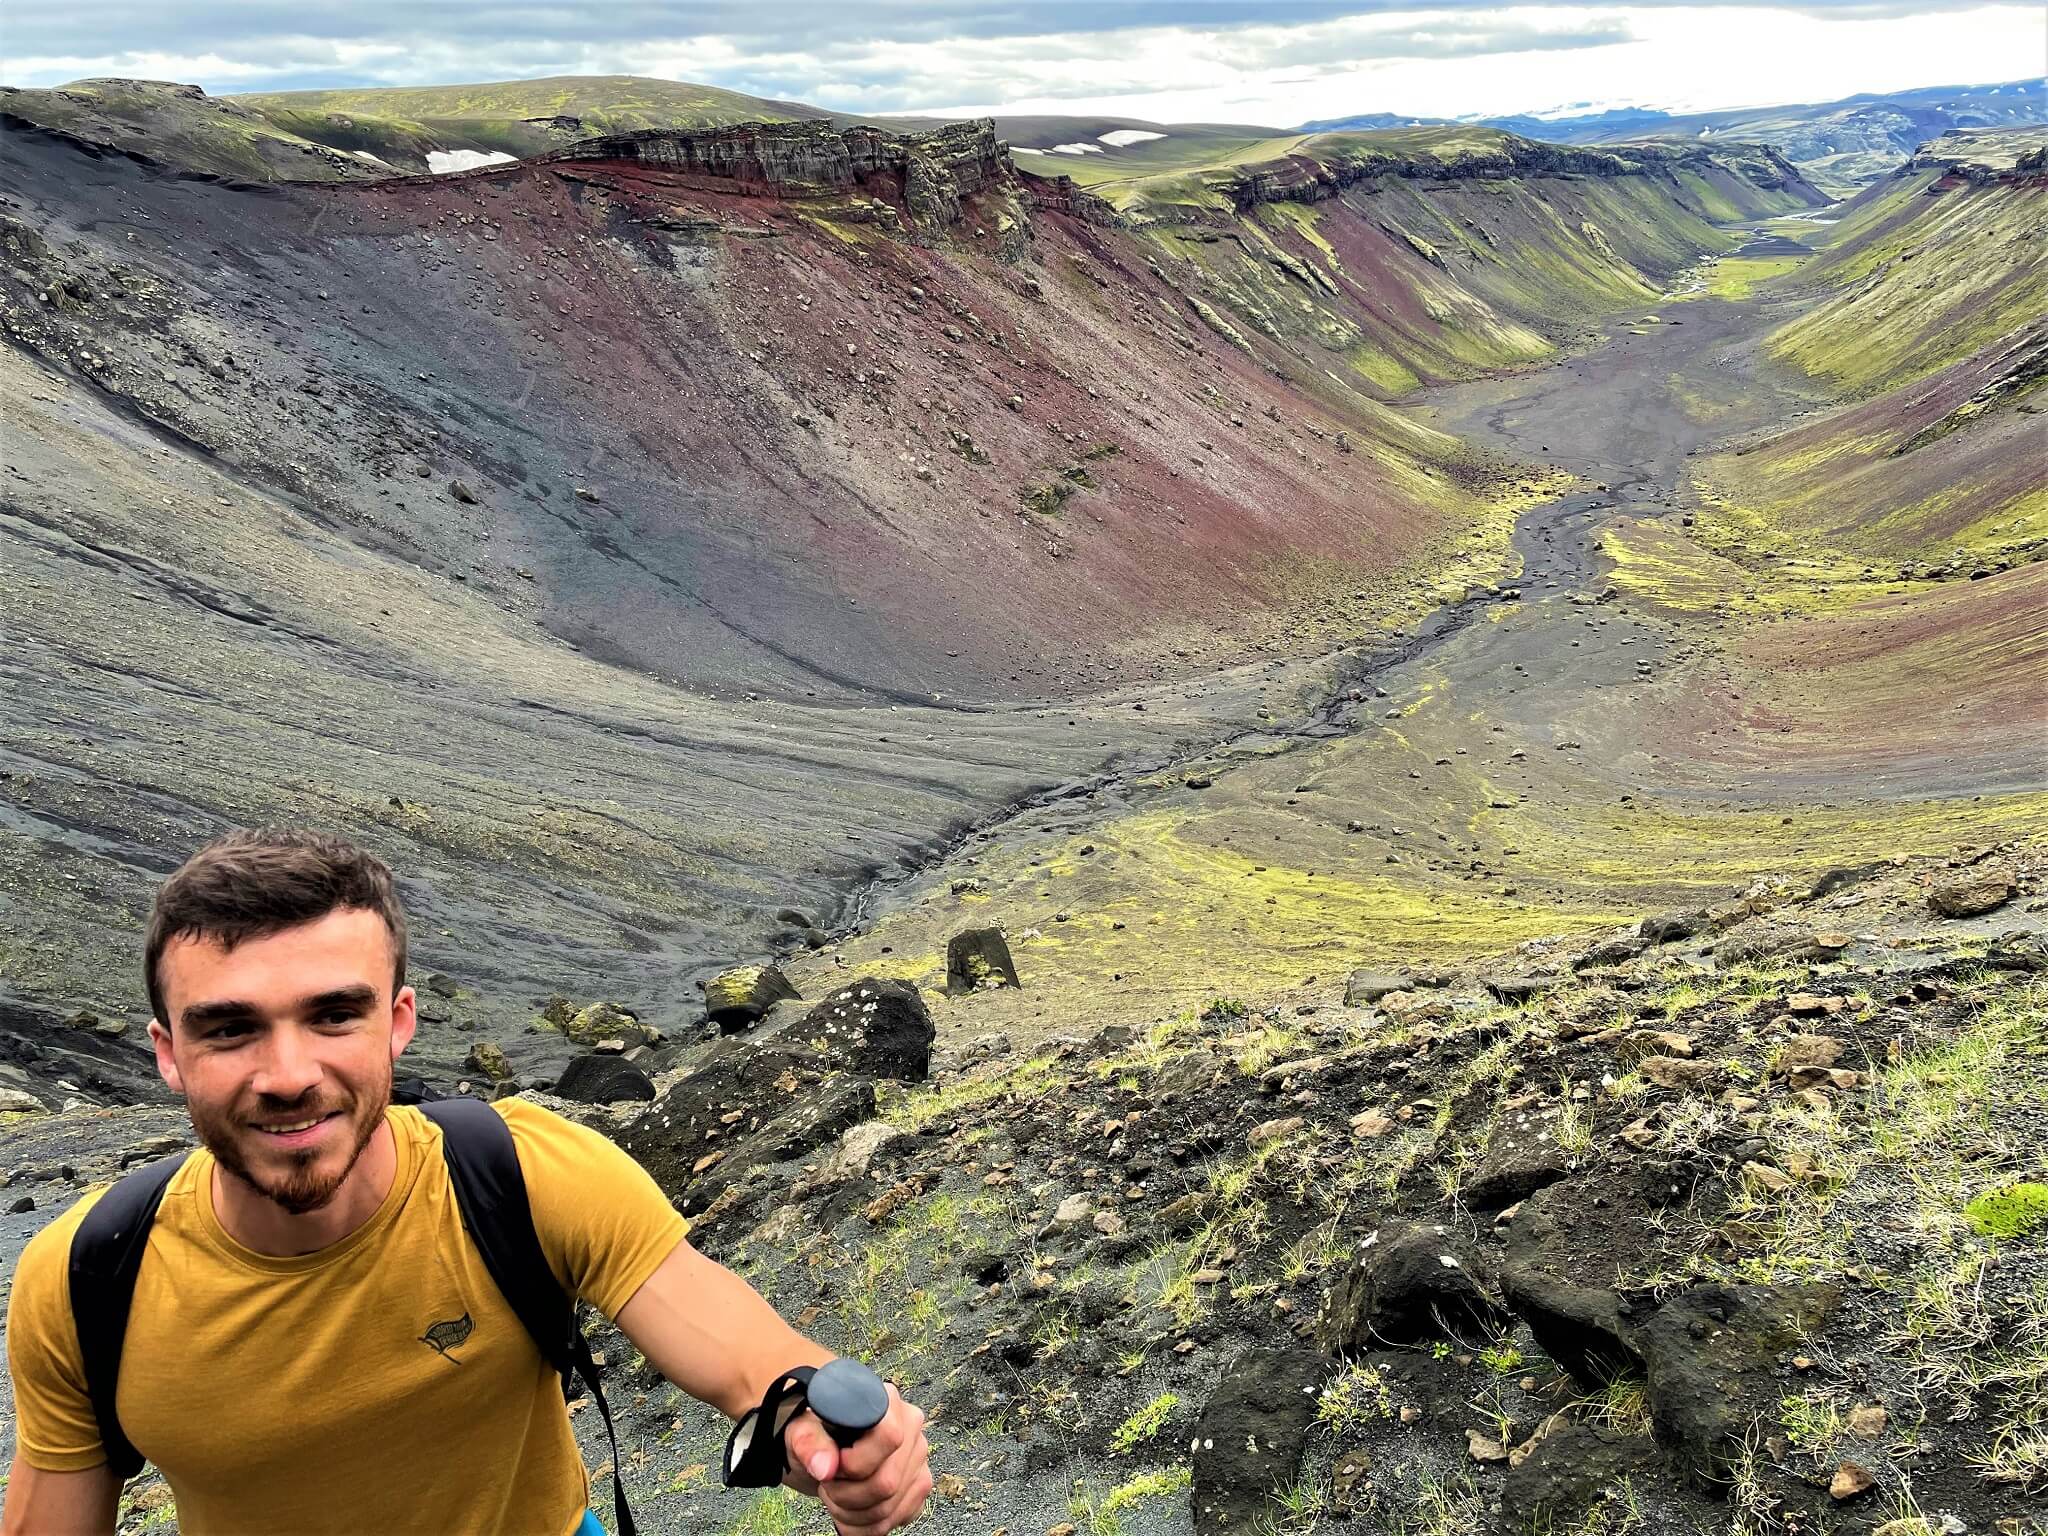
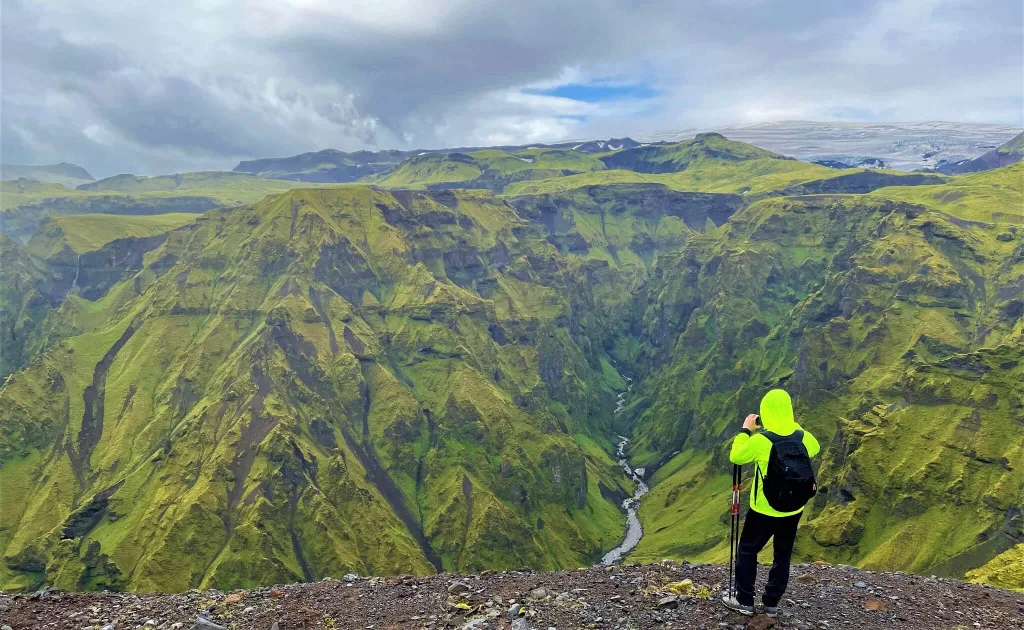
Bird’s eye view over the Eldgjá Canyon when hiking to Gjátindur

Length: 30-40km
Time:  2 to 3 days
Difficulty: very difficult
Hiking trail map: Uxatindar Eldgja trail

The last hiking option is to traverse all the way to Eldgjá. This is a multi-day hike that requires sleeping over in a mountain hut. The nearest huts are located at Sveinstindur, in Stóragil at Skælingar, or at Hólaskjól. You have to reserve the accommodation in advance at either Útivist or Hólaskjól.

The hike follows the Skaftá river along Skælingar and ends up in Eldgjá. It’s an excellent option for those who want to experience the wild surroundings of the Skælingar track, plus the scenic Uxatindar mountains on top of it, but don’t want to drive this rough road.

Our Tips
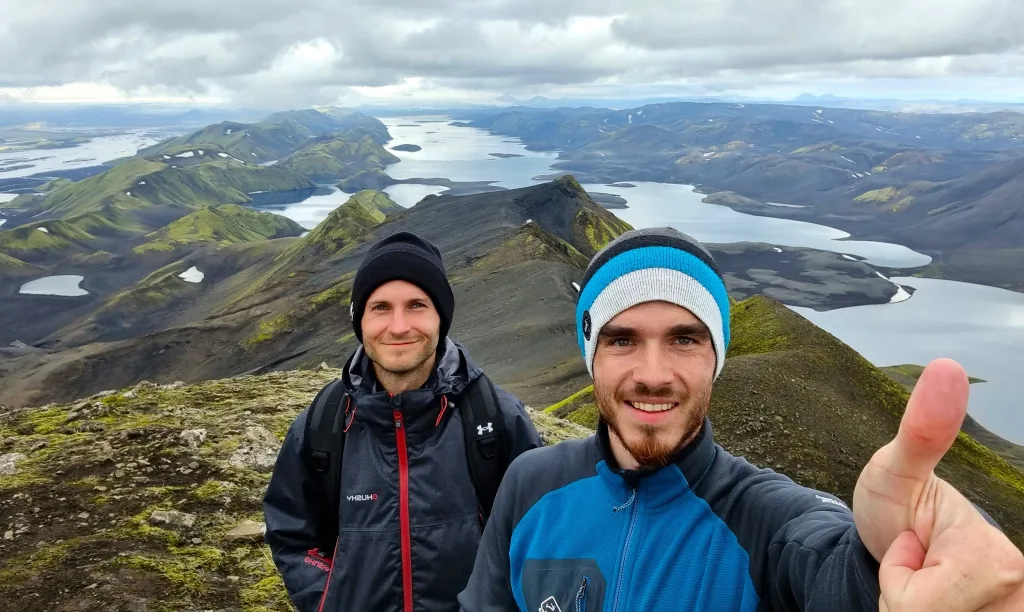
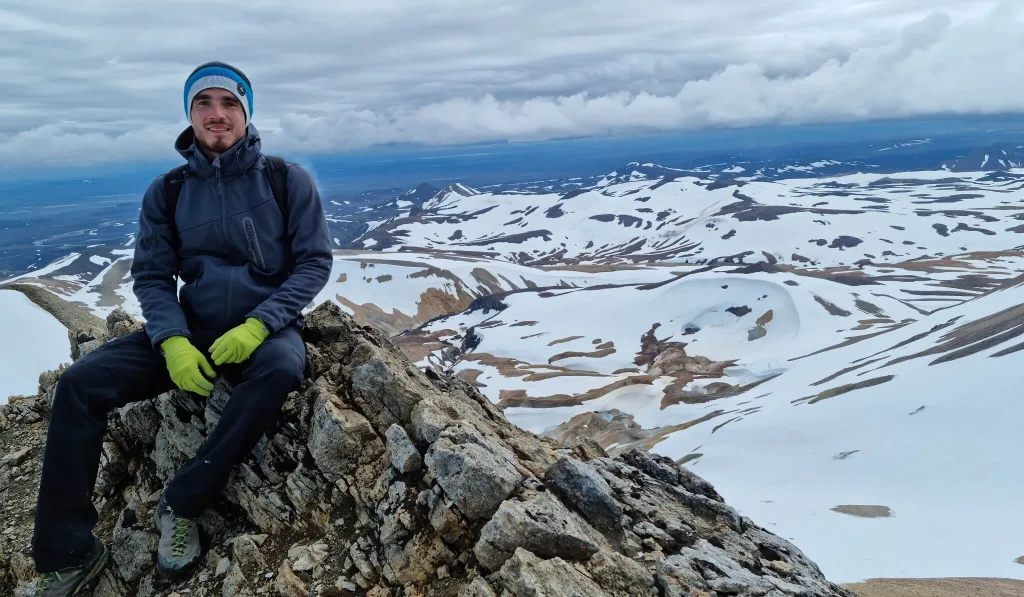
sveinstindur peak selfie

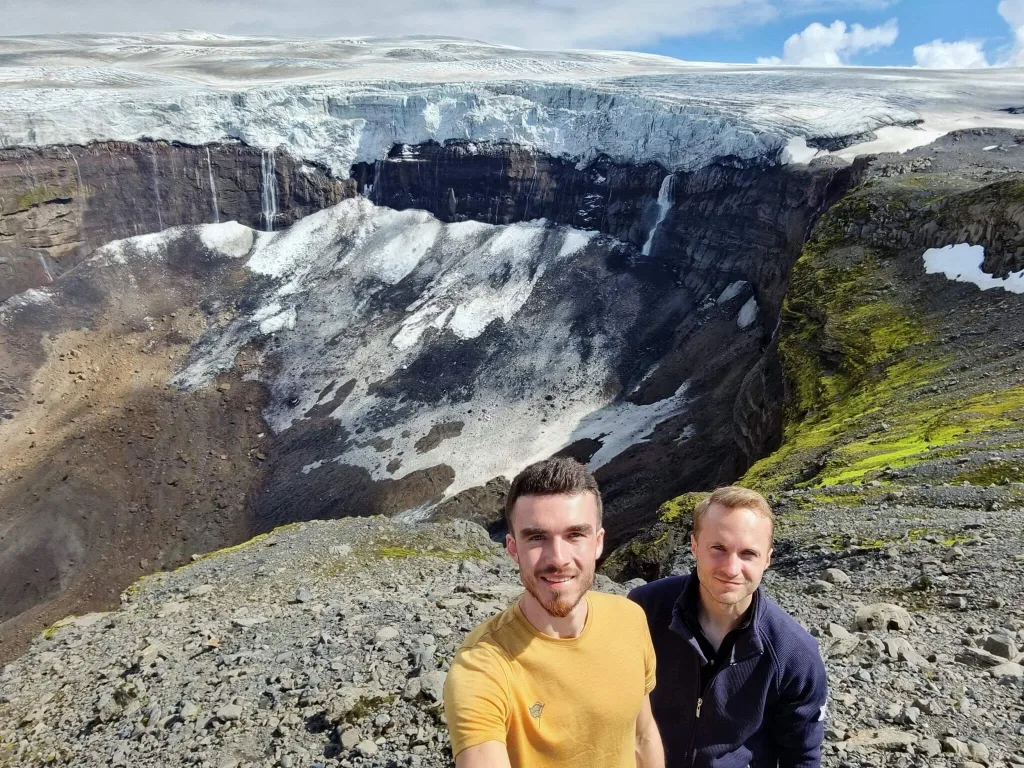
Sveinstindur peak selfie

  • Plan the trip to Langisjór outside of heavy fog. If it’s too foggy, you will not see a thing, and it will not make much sense to drive all the way here.
  • Take hiking poles if you plan to try any of the regular hikes, like Sveinstindur. They are pretty useful basically for any longer hike in Iceland.
  • If it’s your first time in the Icelandic Highlands, take the easiest route, F235, both on your way to and from Langisjór.
  • If you are in good shape and you catch a clear day, be sure to hike to the top of Sveinstindur! It’s a once-in-a-lifetime experience!
  • If you have enough time and like to pack a lot of things into one day, you can combine a trip to Langisjór with visiting Eldgjá. Go and see Ófærufoss, at least; it’s gorgeous!

Our Langisjór experience

We’ve been to Langisjór many times. Below we chose our three most memorable experiences you may find helpful.

First trip: F235 to Lake and 1st Sveinstindur Attempt

We visited Langisjór for the first time during the summer of 2020. Yes, exactly during huge Covid lockdowns. And it was magical. Enchanting. Otherworldly. Tourism in Iceland was down by 90%, and we were basically the only ones driving the roads on that day. And we were a bit scared, to be honest.
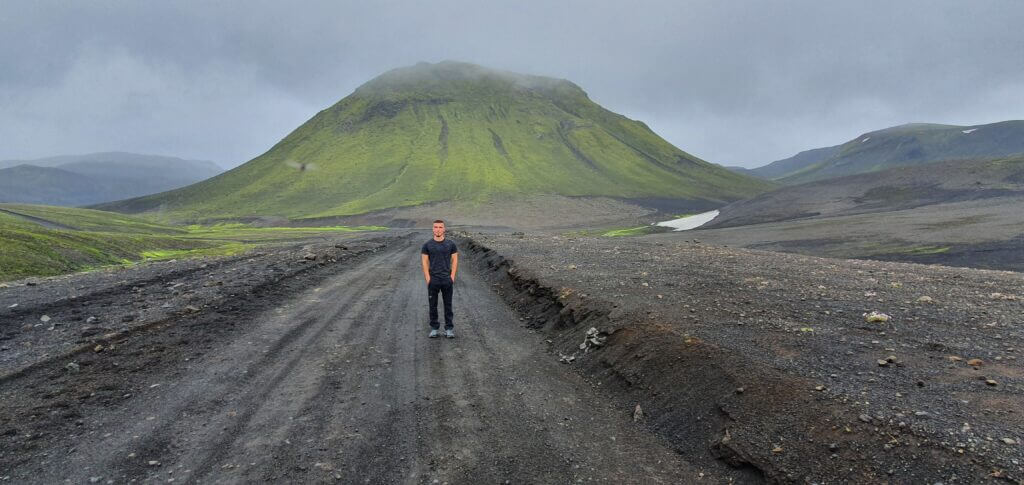
F235 towards Langisjór

Surreal landscapes on road F235 towards Langisjór lake

This was the first time we’d driven an F-road. And we weren’t sure what to do. We followed all the theoretical river crossing advice to the last point but were scared anyway. That being said, we gained a lot of helpful experience throughout the trip. You can read in detail about our first trip to Langisjór and the Icelandic Highlands.

Long story short, we took an F208 south from Vik and then an F235 to reach Langisjór. F235 is the easiest and pretty harmless way to get to Langisjór, as it contains only small to medium-sized river crossings and no other real obstacles. Still, we remained in awe throughout the entire day. The surrounding landscapes were simply amazing.
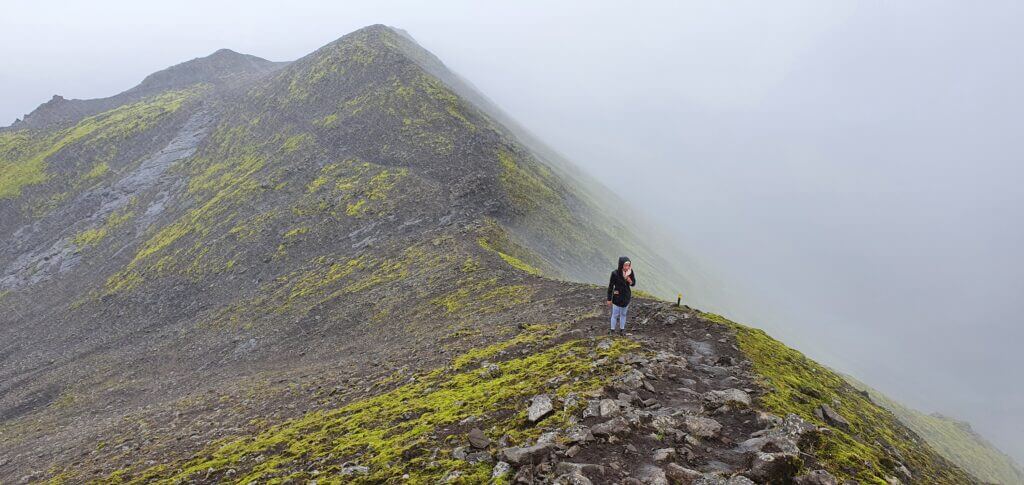
Sveinstindur near Langisjor

The upper part of the hike on Sveinstindur near Langisjor lake on a foggy day with slight rain

Proposing on Sveinstindur

Our (or better said, mine) ultimate aim was to hike the tallest peak of the Langisjor area called Sveinstindur, where I wanted to propose to my then fiancé, now wife, Katka. The hike started well. However, as is often the case in Iceland, the weather changed rapidly and turned into a pouring rain. This, combined with a rather steep ascent seemed a bit dangerous and very uncomfortable.
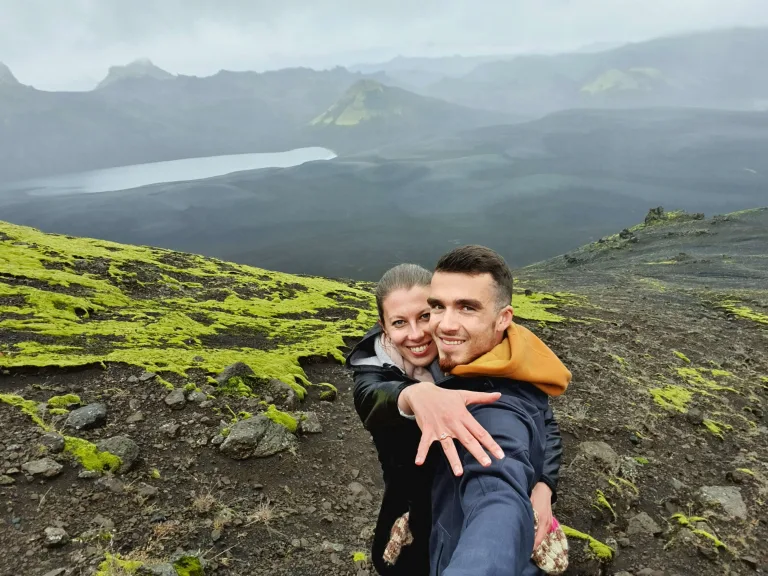
langisjor sveinstindur proposal

A few seconds after the (successful) marriage proposal on the way to Sveinstindur

At some point, Katka had enough and turned back. My plan to propose at the top went to pieces, so I had to improvise. Hence, I proposed right there on the ridge. And yes, you can guess, she definitely didn’t expect that 🙂 And a sour hike quickly evolved into one of the happiest memories of our lives. If you are interested in more details of our first-time Langisjór itinerary feel free to read our detailed article on it.

Second trip: Rough Roads and 2nd Sveinstindur Attempt

This time we wanted to try even more remote places and roads. Langisjór, Skælingar track, Blautulón track and Sveinstindur hike. That was our schedule for our last day in the highlands of southern Iceland.

I really wanted to drive the scarcely visited Skælingar dirt track to Langisjór 🙂 Thus, we went for Langisjór!

Beware, the Skaelingar and Blautulon tracks we drove are just dirt tracks. Not even F-roads. This means they are even harder to drive than F-roads. Always check with your rental company to see if it allows for such roads, choose your car wisely, and study the roads in advance. Mostly, only super jeeps are permitted to drive the dirt tracks.
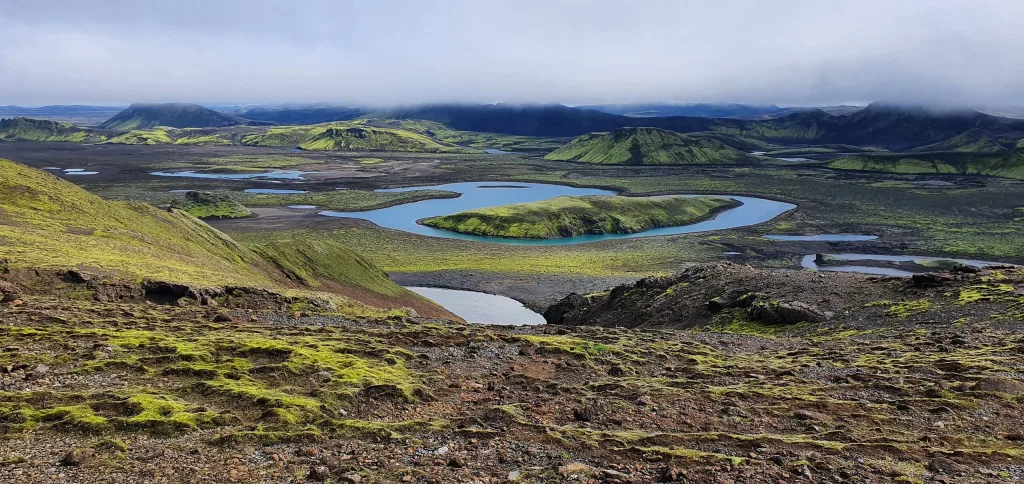
langisjor blue river valley

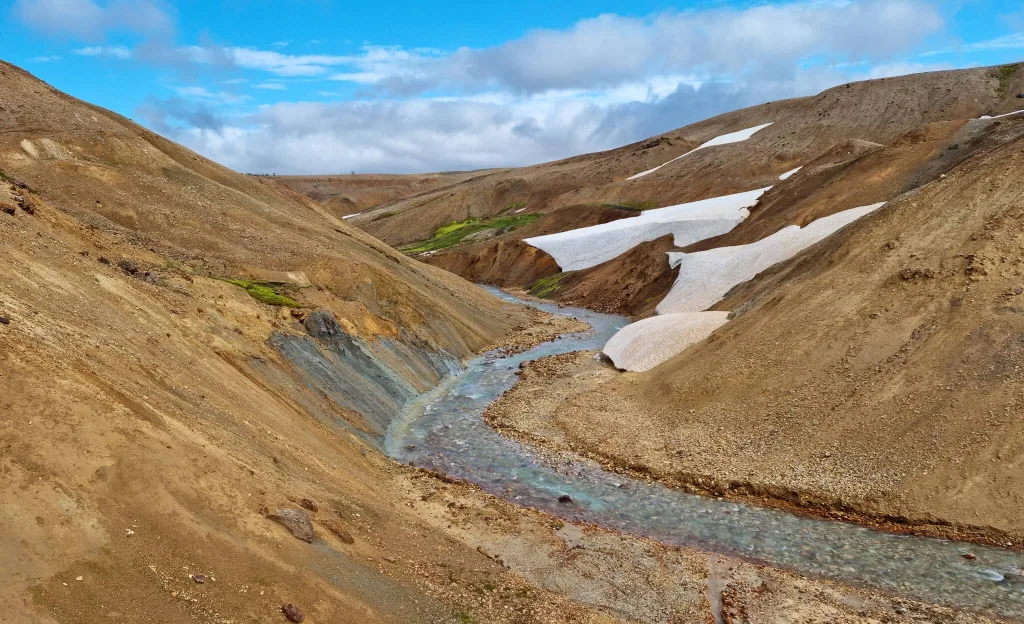
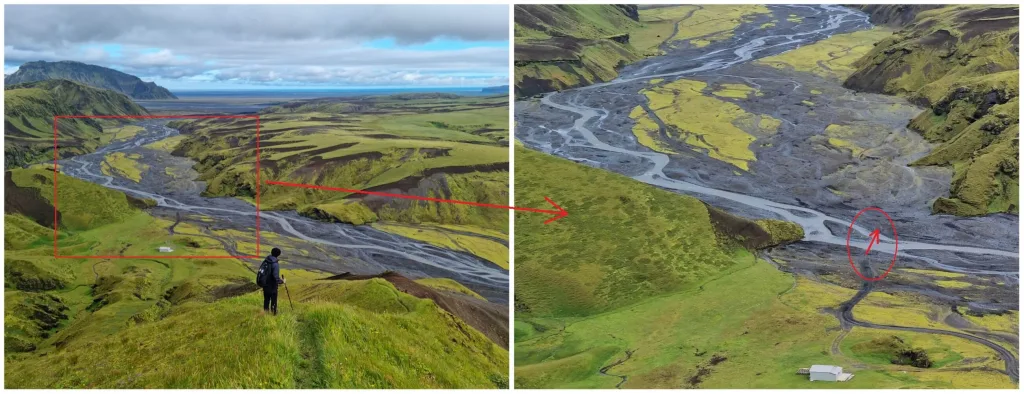
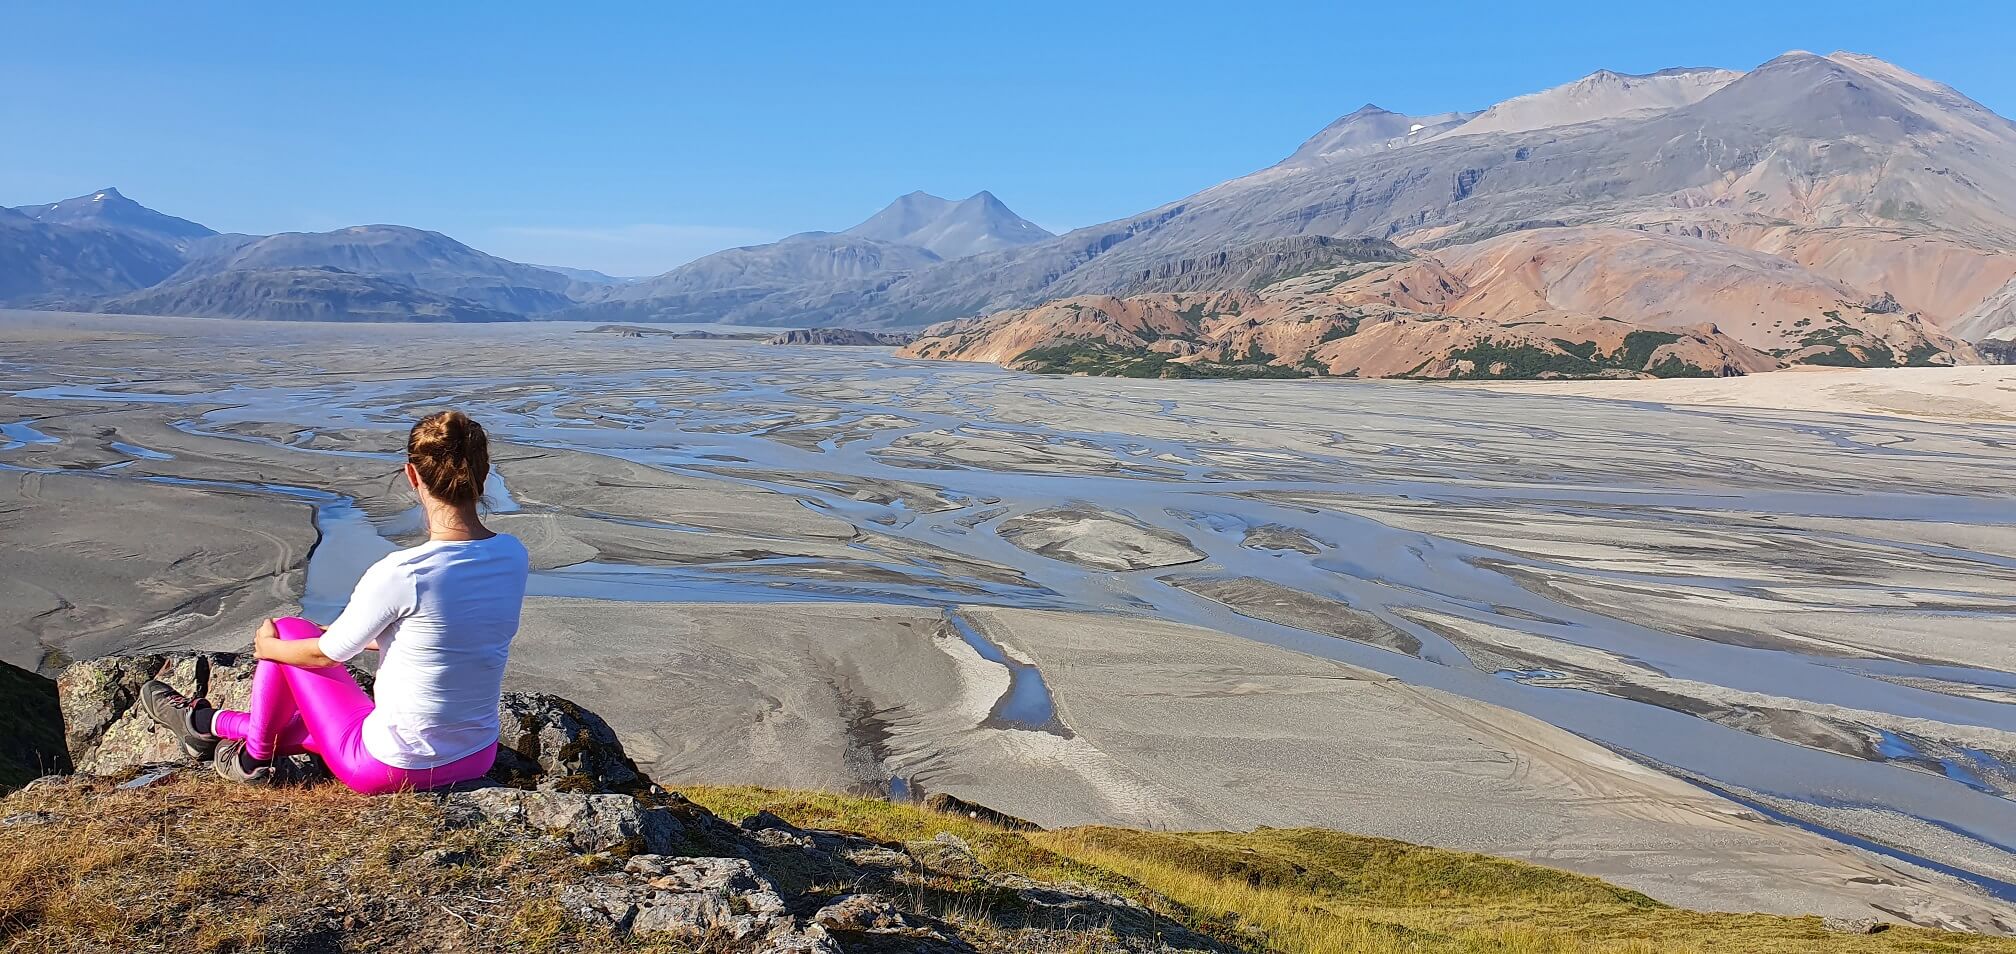
Langisjór Blue River Valley Viewpoint

The weather was merciful to us, and the day turned out to be pretty nice along our road despite the mixed forecast. We didn’t experience any rain, and the fog was present only at some spots (like Sveinstindur once again…). That night, we were based near Hekla, so it didn’t make sense to drive to Langisjór from the south (F208 south), so we drove from the north.

F225 and F208

I was sure I didn’t want to drive the boring, bumpy, and full of tourists Road 208 (F208 north). We turned to F225, Landmannaleið, which is an “F-road highway” —a very good quality F-road and a bit underrated road—at least compared to 208, which is much worse in both the views and the quality. Landmannaleid is also shorter than 208 north, so we soon reached the Landmannalaugar area.

The weather at Landmannalaugar was amazing. It actually seemed like the only place with clear blue skies and the sun shining everywhere. The views from our drive around the Landmannalaugar mountains were amazing. And, we faced a tough dilemma – whether to go for an unknown (and probably worse) weather at Langisjór or whether to hike again at Landmannalaugar. We’d been there already and done the hikes, though not in such great weather. Finally, I decided to risk it and go for Langisjór.
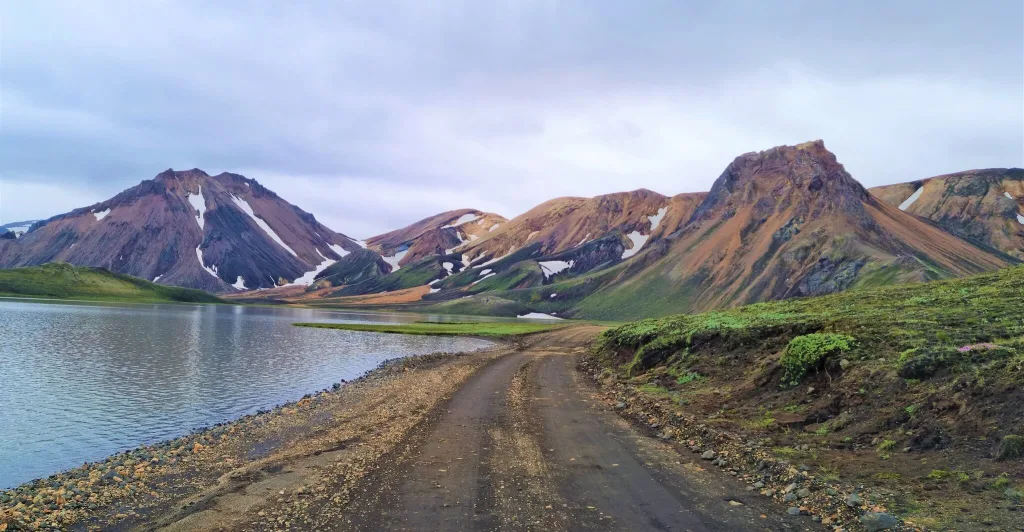
f208 landmannalaugar iceland

Amazingly beautiful roads around Landmannalaugar

Instead of the harmless F-road of F235, I wanted to try more adventurous tracks this time. The track I chose is called the Skaelingar track and it’s located north of Holaskjól highlands centre, just next to the river crossing (and the ranger’s hut). Skælingar track is a not much-known detour from F208 south that not many travelers pursue due to it not being well-known. Great highlands destination 🙂

The visibility got much worse 10 minutes south of Landmannalaugar already, much sooner than expected. We drove in a giant fog and couldn’t see more than a few meters ahead of us. However, we knew that all of the river crossings on F208 should be harmless – we’d done them a year before in Dacia Duster, and this year, the water level was even lower. This was exactly the case – no problems at all with the fords at F208 and really shallow rivers.

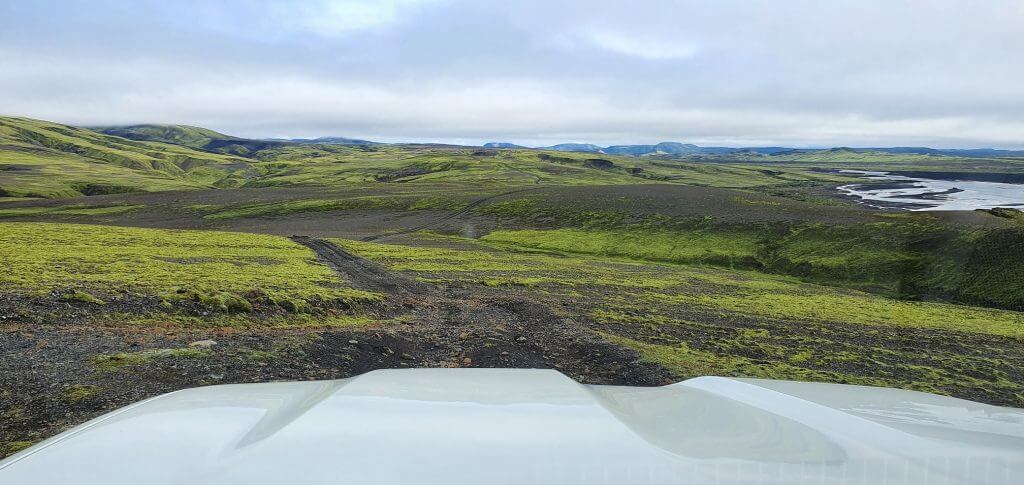
Skælingar dirt track
skælingar road to langisjor iceland

Skælingar track before Skælingar hut

After some foggy driving, we first arrived at the junction of F208 and F235. We continued driving the F208 and drove by another hidden detour – Faxasund track – which is actually a third track (along F235 and Skaelingar) leading to Langisjór. Faxasund is, however, said to be the most difficult out of these three paths, so this time, we chose the second one – the Skælingar track. Lastly, we crossed the first river at F208 south, next to the ranger’s hut and north of Holaskjól, and finally arrived at the hidden detour towards the Skælingar track.
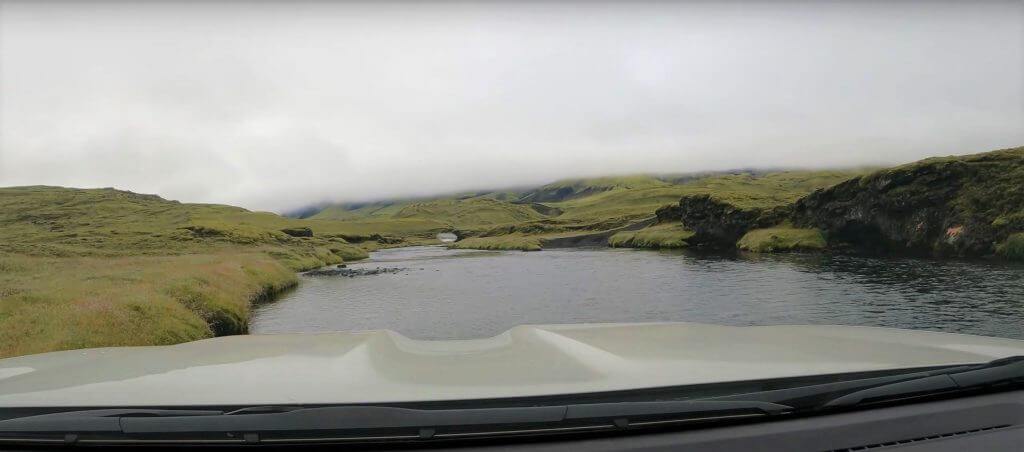
skælingar track river crossing

Skælingar track river crossing

There’s an exciting medium to big river crossing (more medium at the time of our visit) right at the beginning of the track. So, if you don’t feel like doing it, you may turn back right at the beginning. For this kind of river crossing, you should have past experience with river crossings and take the proper car, i.e., at least a Land Cruiser size or some kind of super jeep. Of course, it may be doable with Dacia Duster if you are lucky, but you may also fly with Dacia Duster if you are lucky – this doesn’t mean it’s recommended, nor responsible!
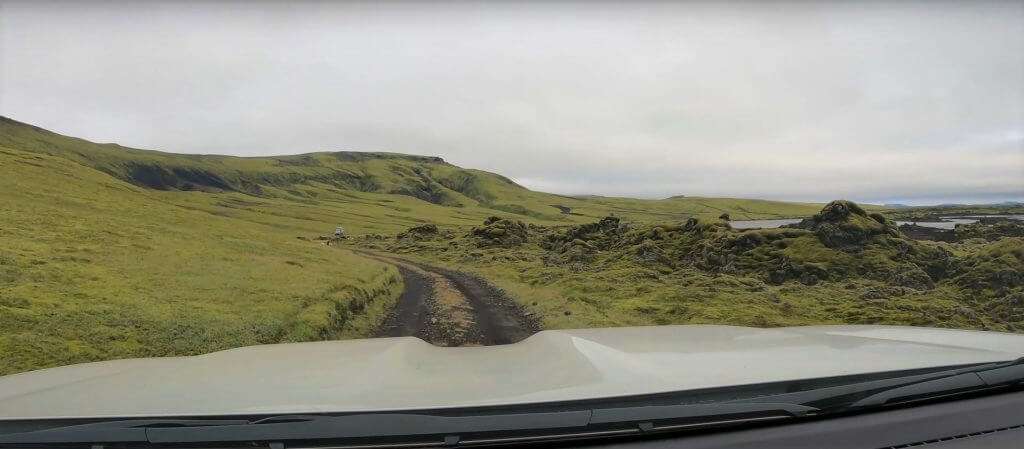
Skælingar track iceland

Skælingar track

The first river crossing on the Skaelingar track is also the only river crossing. To arrive at the other bank, you have to actually drive tens of meters IN the river bed (similarly to e.g. F210 river crossing or Strútur track river crossing). This is always a fascinating and memorable experience. With our 33” Land Cruiser with snorkel, we didn’t have any problems with completing the ford.

The Skælingar track then continued in the form of the narrow dirt tracks in green surroundings of grass and moss. We passed along the big Mercedes Unimog, which was struggling a bit driving these very narrow tracks, but the driver looked to be really enjoying the drive anyway 🙂 He was kind enough to let us overtake him at the earliest convenience.
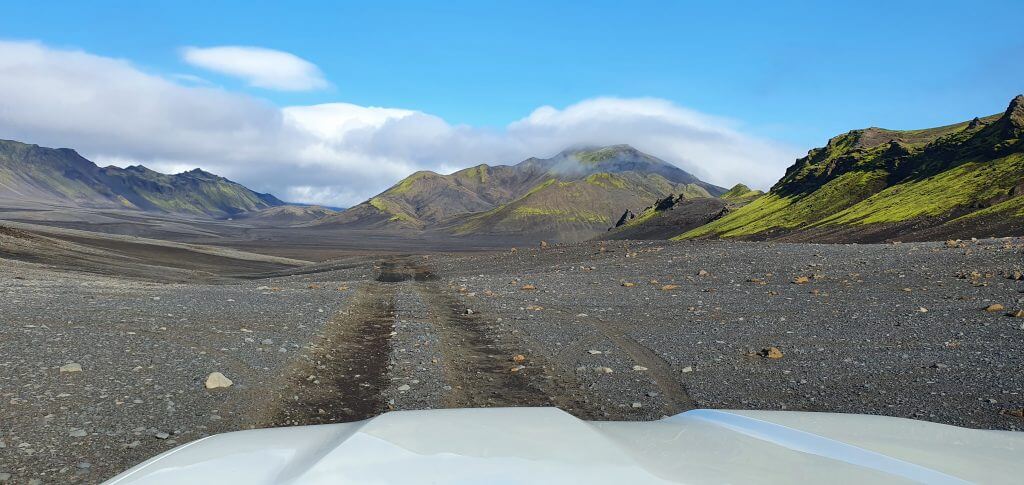
Skælingar blautulon track langisjor iceland

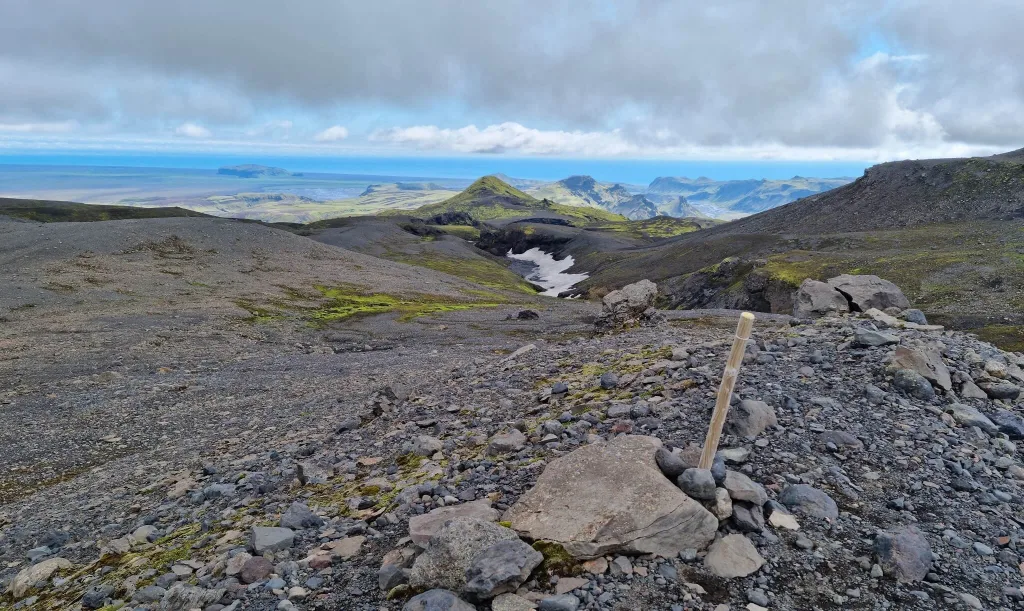
Between Skælingar track and Blautulón track to Langisjór

The landscapes were picturesque, almost along the entire road. After some 30 minutes of driving we arrived at the Skaelingar hut situated remotely in beautiful surroundings. It’s possible to take 2 different paths towards Langisjór from here. I already knew I wanted to take the longer, but much more exciting and picturesque route leading not next to the, but THROUGH Blautulón lake. Yes, through. More about that soon.

Blautulón lake track
blautulon track iceland

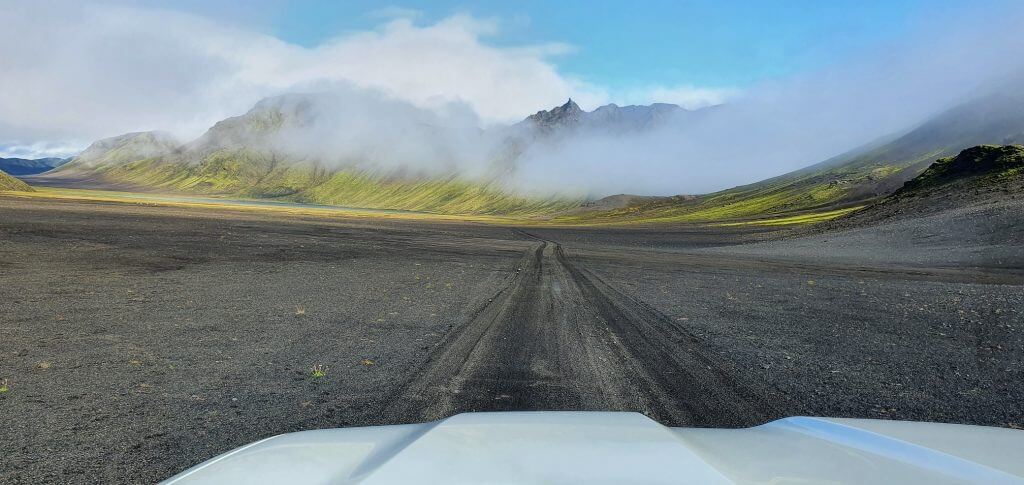
Blautulón track shortly before the Blautulón lake

The dirt track towards Blautulón lake led in between little hills and was a track consisting of both the gravel and the volcanic ash without any major obstacles nor river crossings. It was steeper at times but definitely manageable. The most exciting part of the Blautulón track was about to come. Once you arrive at the lake, the road suddenly disappears. Where it leads, I already knew because I had studied it and was really looking forward to it 🙂
blautulón lake drive iceland

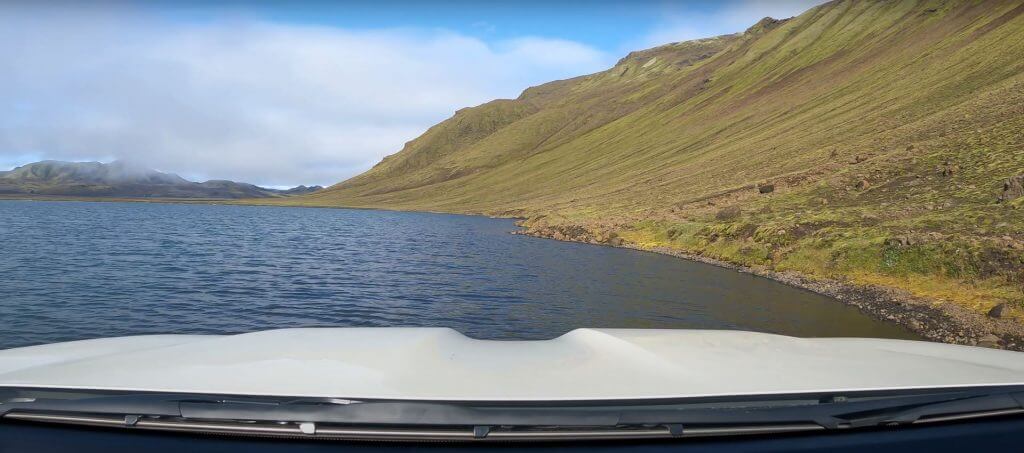
Unforgettable drive on the edge of the Blautulón lake.

We were lucky to have amazingly beautiful weather at Blautulón with partially blue skies, little fog, no wind at all, and an occasional sun. We were even able to have a picnic at Blautulón wearing just T-shirts! God bless this kind of Icelandic summer. And all of that in between stunningly beautiful mountains and the blue lake just in front of us. And us being entirely alone there. A once-in-a-lifetime moments for us.

As I already hinted, after we moved on from the front of the Blautulón lake, the road didn’t just continue in an ordinary way. The Blautulón track leads through the edge of the lake itself. You have to drive inside the lake, at the bank of the lake, for several hundreds of meters. For me, as a road enthusiast, this was an amazingly unique drive. After passing Blautulón, the track soon connects to the final part of F235.

Sveinstindur hike attempt No. 2
sveinstindur hike iceland

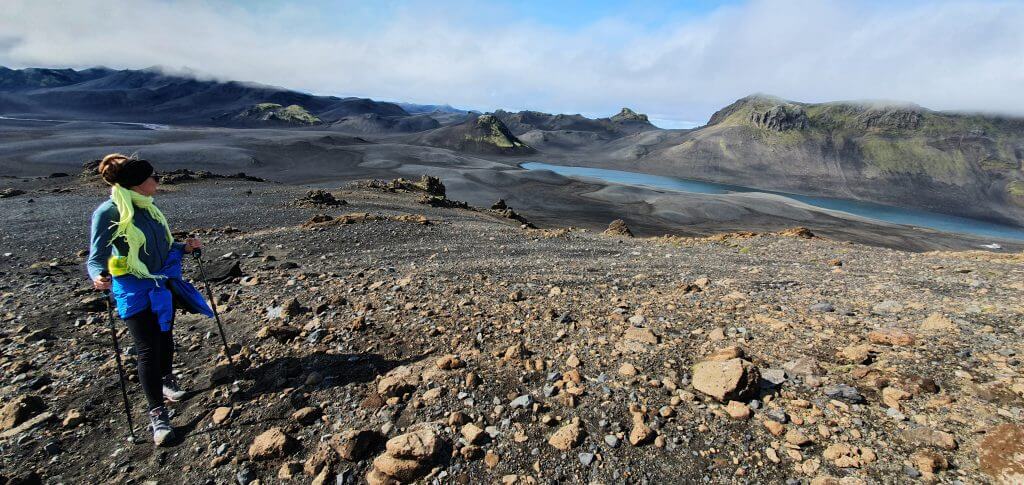
Hiking to Sveinstindur peak next to Langisjór lake

Sveinstindur is the highest accessible peak in the Langisjór area with amazing views around the surrounding landscapes in every direction. When the visibility is good. And this was the catch once again for us. A year ago, I had a plan to propose to my (at that time) girlfriend after climbing up the Sveinstindur. However, the weather had different plans 🙂 There was no visibility at all, and it started to rain a lot roughly around midway towards Sveinstindur. Hence, we decided to turn back. Hence, I proposed (just) on the hiking trail.
sveinstindur hike trail

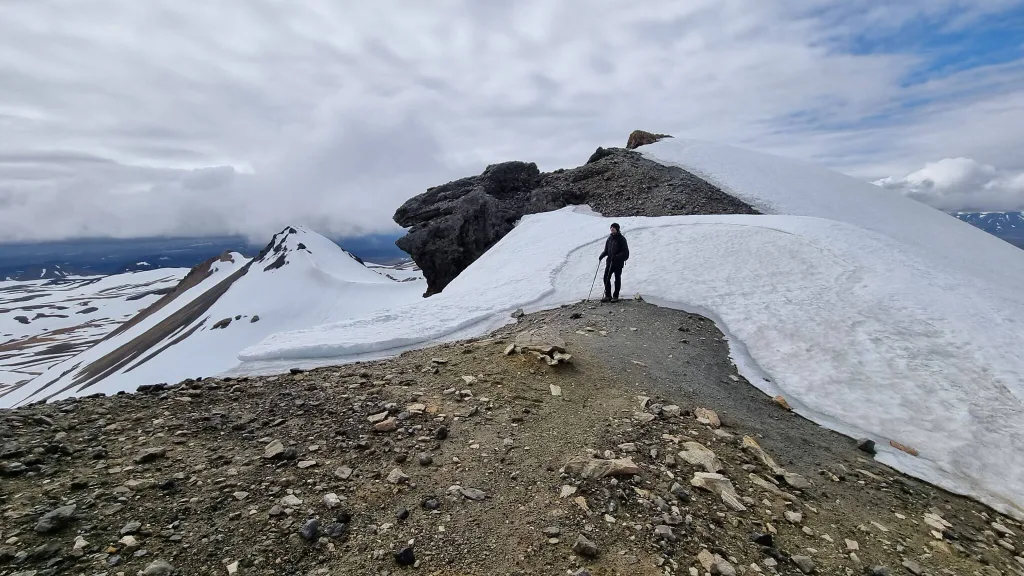
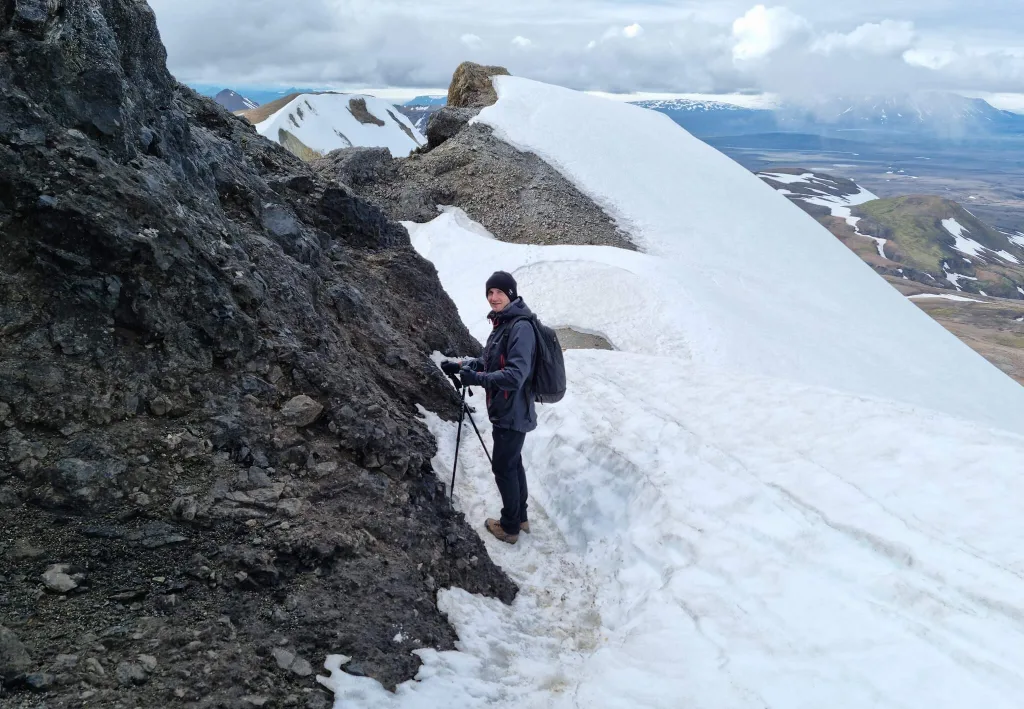
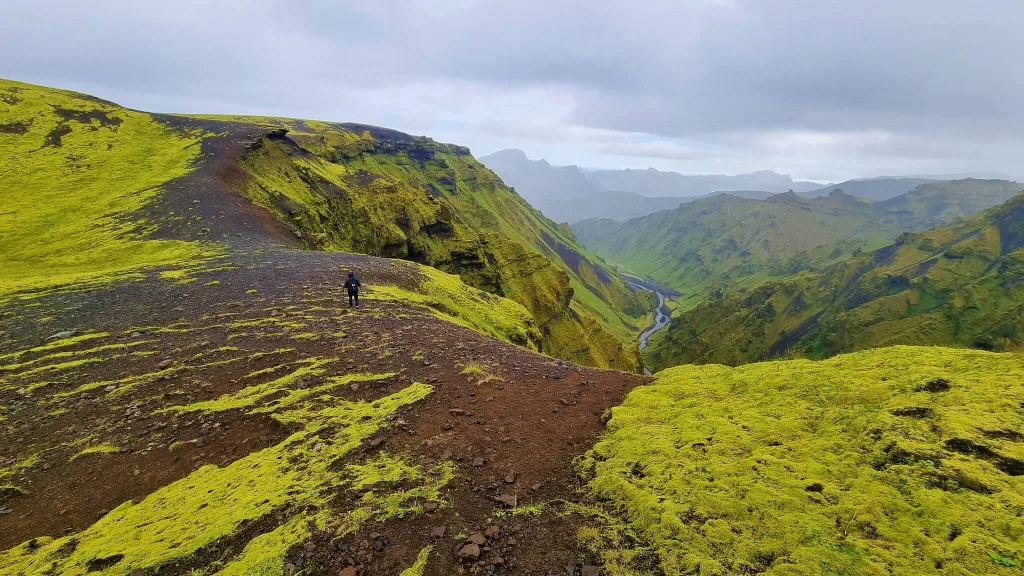
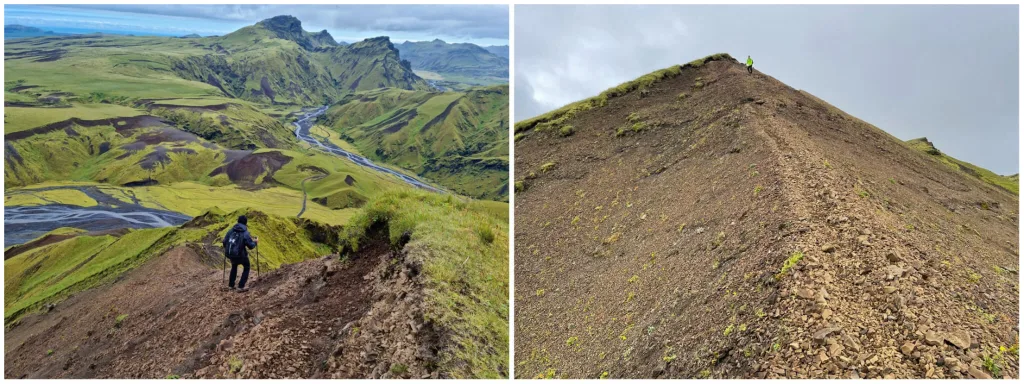
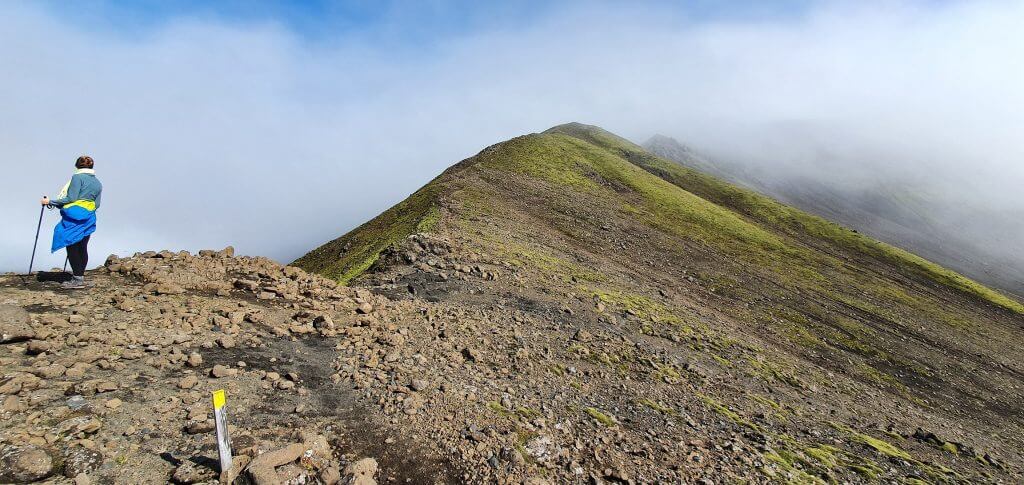
Sveinstindur hiking trail ridge

A year later, our weather was much better. Blue skies with occasional clouds and even a shining sun. However, the peak of Sveinstindur, as the only one, was covered in fog for the entire time we drove and hiked around. We gave it a try anyway and climbed a few meters further than last time, but we still arrived at the point where everything above this point was entirely covered in fog. And it wasn’t getting any better. The trail from this point above is also pretty exposed, with massive falls on both sides. Thus, for the second time, we gave up on our plans to reach the top.
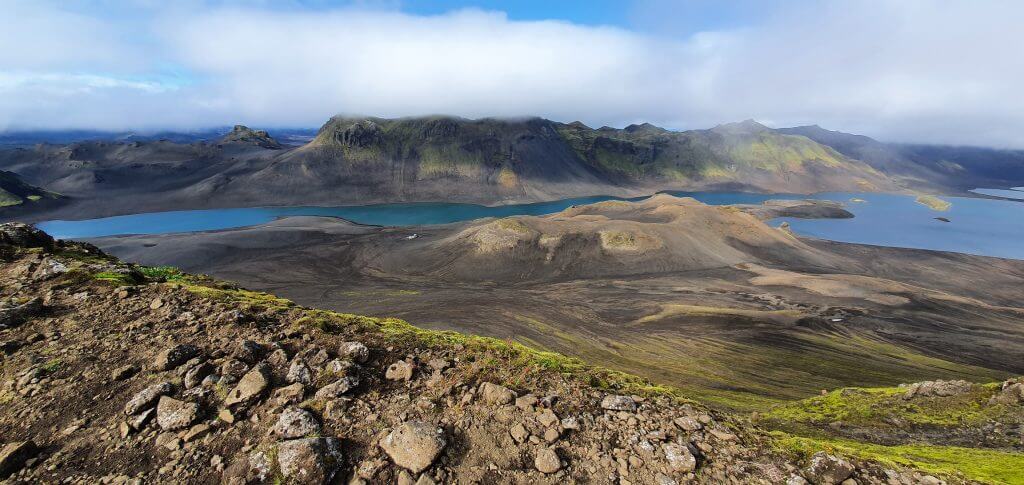
langisjor lake view from sveinstindur

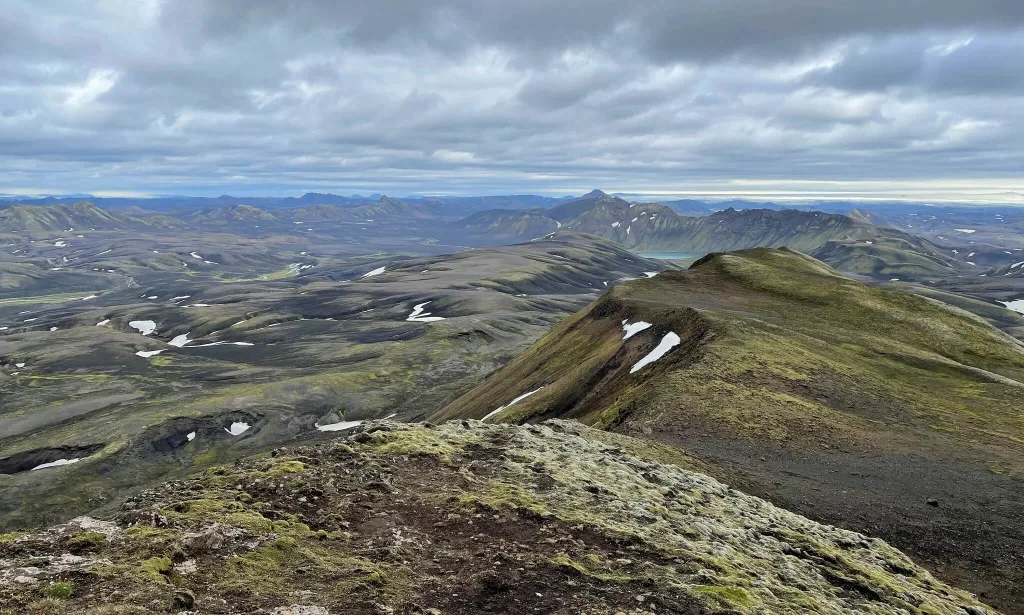
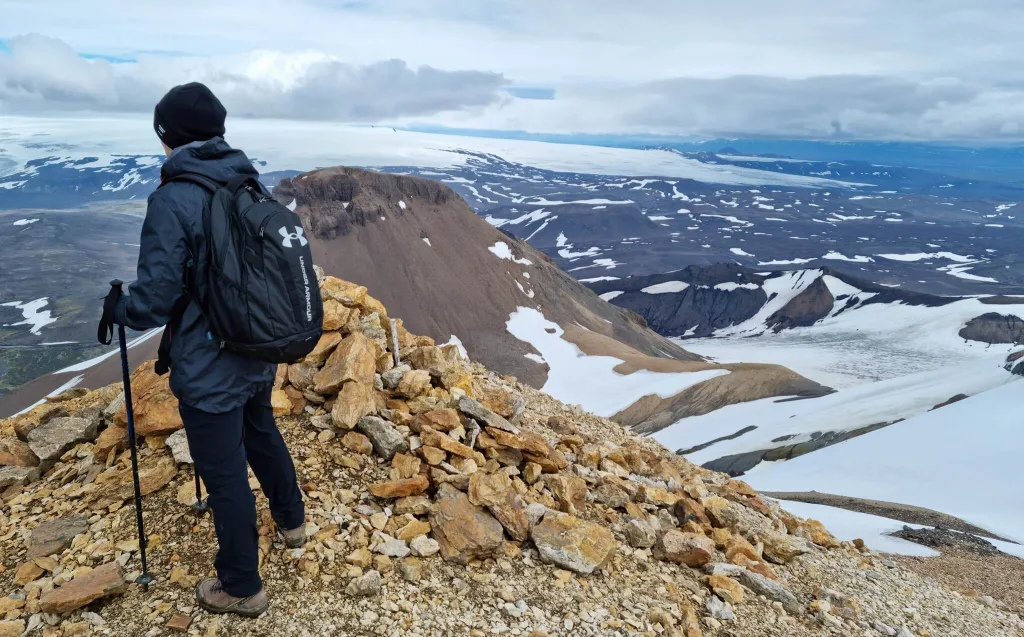
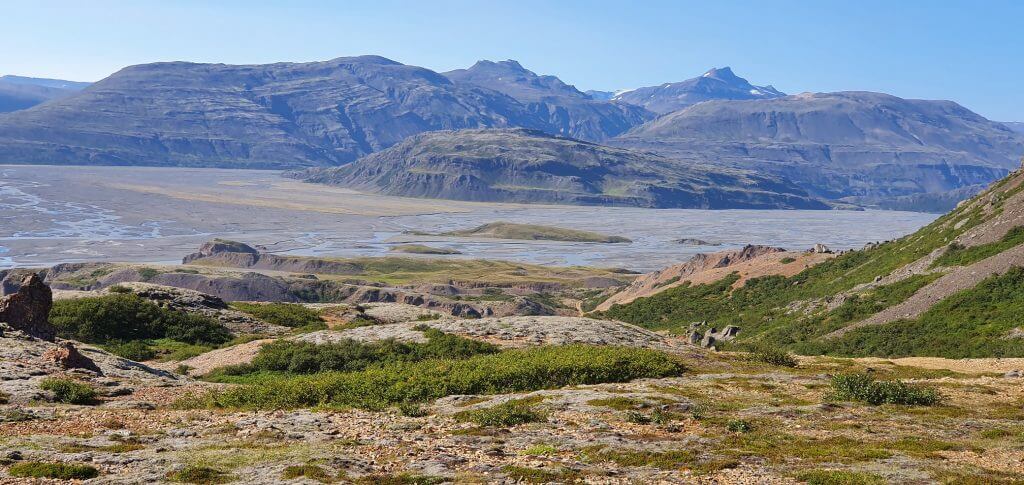
View over the Langisjór lake from Sveinstindur trail

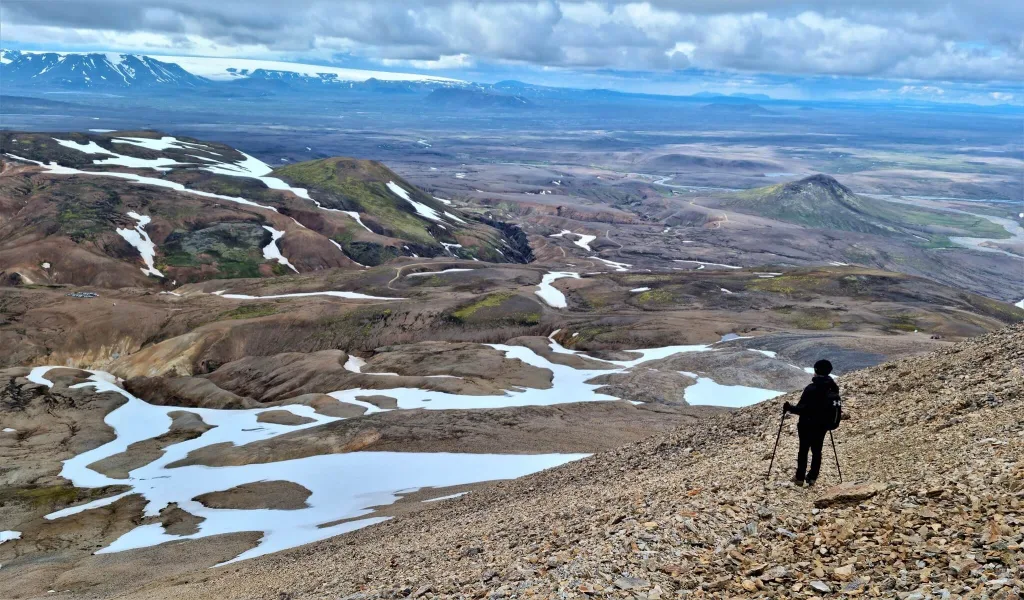
Nevertheless, the views around the area were still stunningly beautiful. Judge it yourself, here are the pictures 🙂 This time we were lucky enough to see almost the entire Langisjór lake.

Sitting in the car for almost the entire day, we were still hungry for a nice hike. However, the weather at Sveinstindur started to worsen. The fog was falling down, and the clouds were coming. We hiked back to our car when it started to rain. We decided to drive back towards Landmannalaugar to see if the situation was still as good there weather-wise as was the case in the morning. On our way there, it started to rain considerably, and an entire area was covered by fog. Luckily, we had already seen an amazing F235 a year before.

Third trip: The Roughest Tracks and Sveinstindur hike

This time, we wanted to take adrenaline one step further and decided to drive the most difficult road combinations to Langisjór. We drove via the Botnlangalón track and Faxasund track.

Botnlangalón track
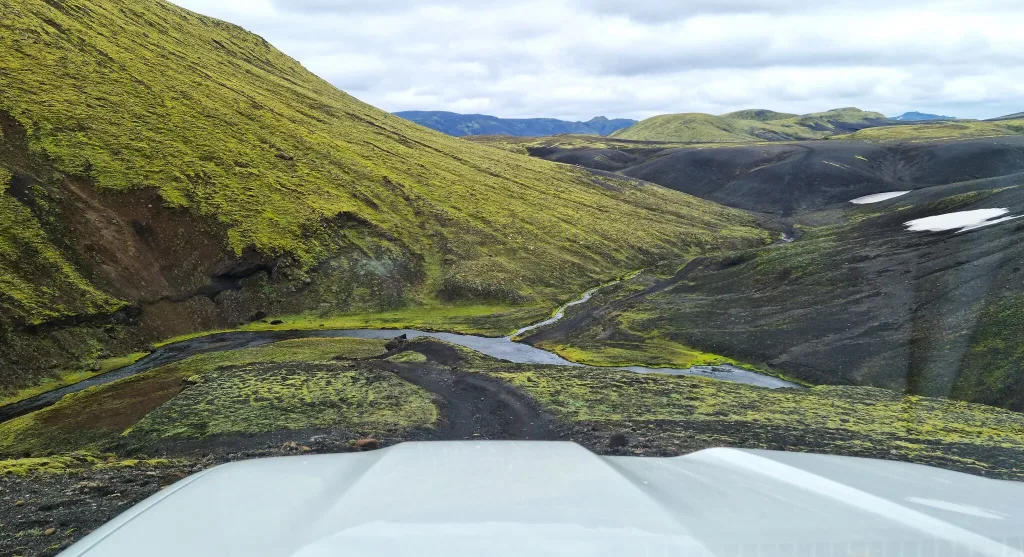
botnlangalon rough track iceland

Botnlangalón track – can you see the road? We often had to stop and search for it for quite some time.

Botnlangalón track is one of the most demanding tracks I’ve driven in Iceland, maybe even the most difficult one. Yes, there are some notoriously known dangerous river crossings, like Krossá on F249 to Thórsmörk or Skyndidalsá river on F980. These are undeniably both treacherous and impassable, even for large cars like Land Cruiser. However, none of these roads have such rugged terrain as the Botnlangalón track has.

Botnlangalón track is very scarcely maintained, and the road quality, pardon me, sucks. The track begins roughly 10km northwest of F235 and connects southern F208 with the lake Botnlangalón. Firstly, you will also encounter another lake along the way, which is called Grænalón.

Once you reach the Botnlangalón lake with the tiny (and usually closed) mountain hut, you have two options. You can either turn back and drive the same road again, or you can traverse east and connect to Faxasund track (another “pearl” road). From Faxasund, you can take it even more to the east and arrive at Langisjór, which we did in the first place.

What makes it so difficult
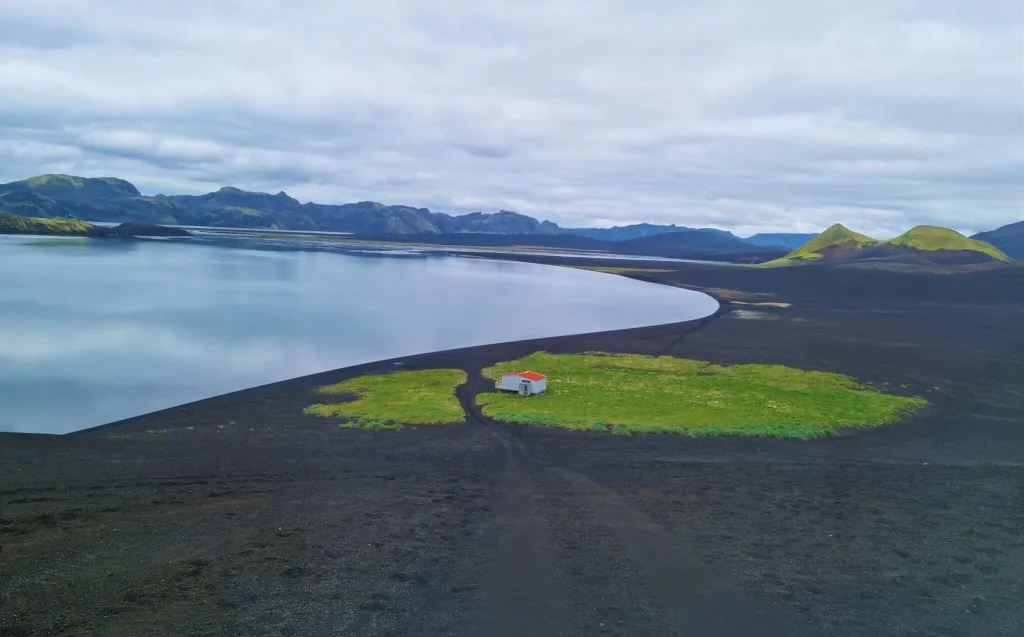
botnlangalon lake langisjor

Here it is – the Botnlangalón lake with a private hut

But let’s come back to the Botnlangalón track. Why do I consider it one of the most difficult tracks in Iceland? Well, first and foremost, there are countless huge potholes and uneven road parts, often a 1 foot deep or even deeper (20-40 centimeters). This means you need to have a ground clearance corresponding to this height to pass the road. Or, an infinite patience to drive around these spots at 3km/h (2mph) speed. I’m not exaggerating. This is the speed at which you will be driving most of the time so as not to damage your car.

We drove the Botnlangalón track with our 33” modified Land Cruiser, and I’m more than sure we’ve hit the limit of our car on this road. We made it only so-so and luckily managed not to scrap anything on the car, nor hit any obstacle.

That being said, the road was both magical and annoying. Magical, because the remote surroundings, valleys with river crossings, steep uphill followed by steep downhill every once in a while, all made it totally unique and unforgettable. Annoying because it felt like a never-ending road when driving on average at 5-10km/h (3-6mph). Pictures don’t do this track justice. It looks easy in the photos, but it is not!

River crossings

Here we were searching for where the road actually was supposed to be. Not an easy search:

Besides tough terrain, there are also several river crossings, most of them with medium-sized rivers. The main problem with Botnlangalón river crossings, though, is not the depth of the rivers, but the unclear path/road.

Often, we had a problem identifying where the road actually leads because there were no marks indicating that. We had to get out of the car and study where the road was about to continue almost every time we encountered some river crossing. This only added to both the adventure and also the time needed to finish the track.

It finally took us more than 1.5 hours to finish this 22km (13 miles) long piece of s… track. I would say, it was definitely worth the adventure. On the other hand, I wouldn’t drive this road again. Botnlangalón track is, as Icelanders used to say, one of these roads you drive only once in your life.

Driving in the river bank

Once we reached the Botnlangalón lake, we stopped for a lunch break, entirely alone with no one in the radius of tens of kilometers. This is both great but also a bit terrifying, in case any problem occurs. We borrowed a satellite device, just in case any emergency happens in places like this. After our lunch, we headed towards lake Langisjór. This meant we had to traverse east, firstly to reach the Faxasund track and secondly to reach Langisjór itself. And the first traverse is a very special one!

The part of the track from Botnlangalón Lake to Faxasund track actually leads through the canyon, which is full of water! The track leads in the river bank, and you will be driving at the bottom of the river canyon. Once again, nothing is impossible in Iceland when it comes to weirdly beautiful roads right? Driving through this river bank was again a once-in-a-lifetime experience for us we totally enjoyed.

Traverse track to Langisjór
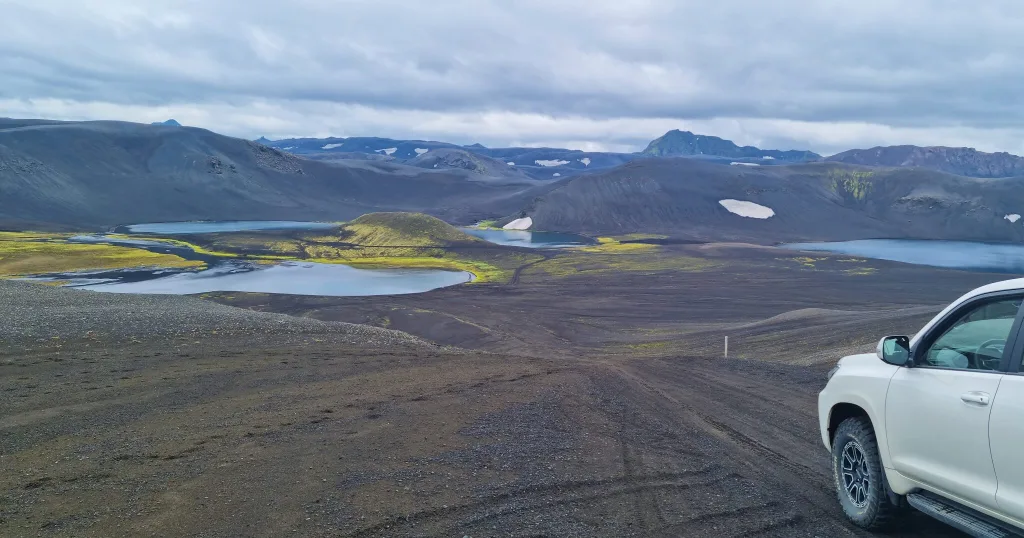
botnlangalon hardest f road iceland

Botnlangalón is one of the hardest F-roads in Iceland (it’s actually not even an F-road, just a dirt track)

After finishing the incredible river drive, the traverse track towards Langisjór continues via harsh, deserted, stony roads with frequent uphill and downhill drives. We remember 1 or 2 more river crossings, none of them being that deep, though, with at maximum medium-sized river crossings. This part of the drive was the easiest one, though also very remote and rough.

To drive the Botnlangalón track, you need to have a modified jeep, a.k.a. super jeep. Our 33” Land Cruiser from MyCar was a minimum, and we’ve almost hit the limits of our car. Other examples of vehicles being capable of this road are Land Rover Super Defender, and, maybe with a lot of caution also a good old 31’’ Land Rover Defender with snorkel. Other than these cars, go only for tires of size 35” and bigger.

Sveinstindur hike experience

On a third attempt, we finally managed to reach Sveinstindur without it being completely covered in fog. The weather wasn’t ideal, with a lot of clouds and also a mixed weather forecast, i.e. definitely not a forecast of a sunny day with clear skies.

Nevertheless, once we arrived at the bottom of the trailhead to Sveinstindur, we could see the summit clearly, indicating good chances of no fog at least for some while. Having said that, we immediately got out of the car and hurried up to hike Sveinstindur for the 3rd time.
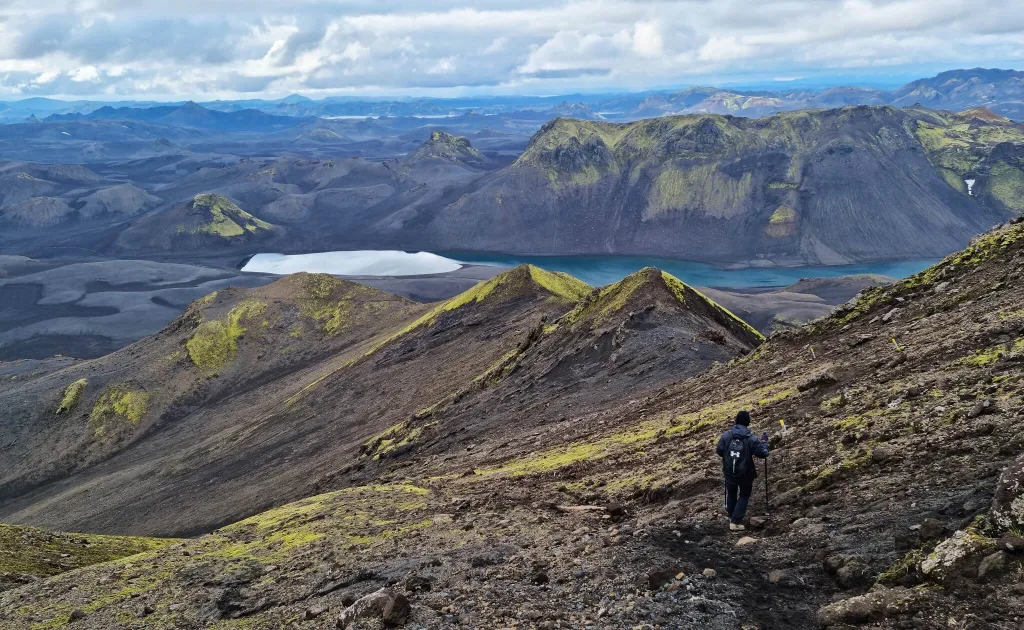
sveinstindur hiking trail iceland

Sveinstindur hiking trail on a clear day

We had no rain and no strong winds, so when it comes to Iceland, almost an ideal weather. The ascent all the way to Sveinstindur took us, with a pretty quick pace, only around 45 minutes. The trail to Sveinstindur is well marked and the ascent is steep and demanding, but not very long.

The first part of the hike is easier, while the second half becomes narrower and steeper. I can’t imagine hiking it in strong winds or during strong rain. I recommend the hike only to those fit enough. But, it’s not technical, no chains, no sharp ridges, just steep ascent. We highly recommend you use hiking poles.

Views got better and better with every additional meter climbed. Once we reached the top, we were finally able to admire one of the most beautiful views of Iceland, views from the peak of Sveinstindur. On a day with good visibility, you can enjoy the sight of the entire colossal lake of Langisjór together with all of the surrounding areas. If you zoom well enough, you can also spot many of the unbelievable tracks and roads like Faxasund, F235, or Blautulón track.
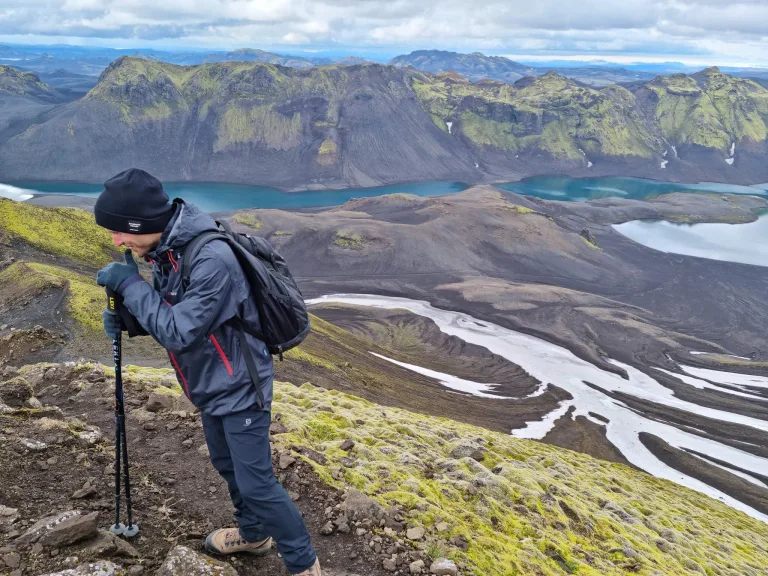
sveinstindur hike langisjor near the top

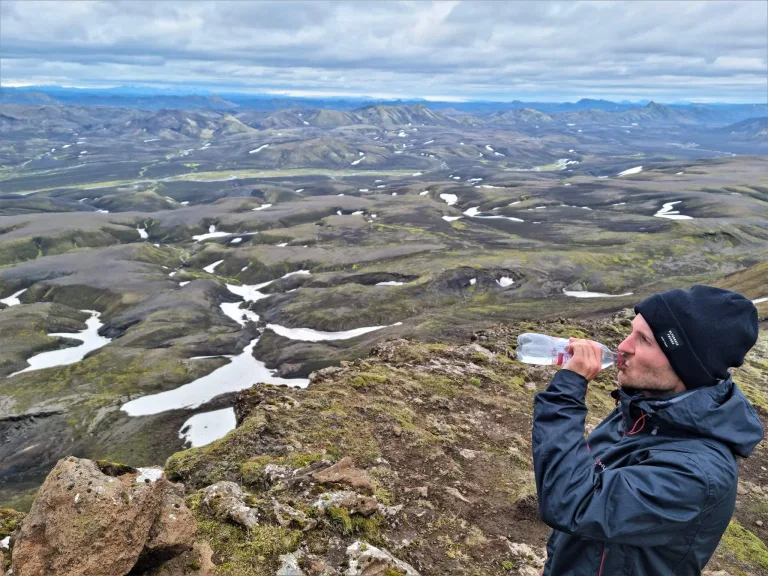
Near the top of the Sveinstindur hike, overlooking the Langisjór lake

The entire hike took us 2 hours as a roundtrip, including a 30-minute stop at the summit. Remember to dress well, even on a nice and seemingly warm day. It’s much colder up at the top, and you can easily get sick when a cold wind blows at you being sweat after the climb. It was only around 7°C / 45°F up at Sveinstindur, with the wind making the cold feeling even stronger.

The descent from Sveinstindur was in my opinion even nicer than ascent, because we had all these amazing views right in front of us, along the entire trail. I would definitely come back to Sveinstindur again on a sunny day. It’s more than just worth a long drive and a quite short hike.

Faxasund track

On our way back, we still hadn’t had enough of the difficult dirt tracks, so we took even the last one we hadn’t yet, the Faxasund track.

Faxasund track is a beautiful alternative to F235 to Langisjór. Just a lot rougher, tougher, and longer. It’s the third track in the series of more difficult roads leading to Langisjór. The first one is the Skælingar Blautulón track, the Botnlangalón track comes second, and the Faxasund track is the third. Faxasund connects southern F208, about 8km (5mi) northwest of F235, with lake Langisjór.
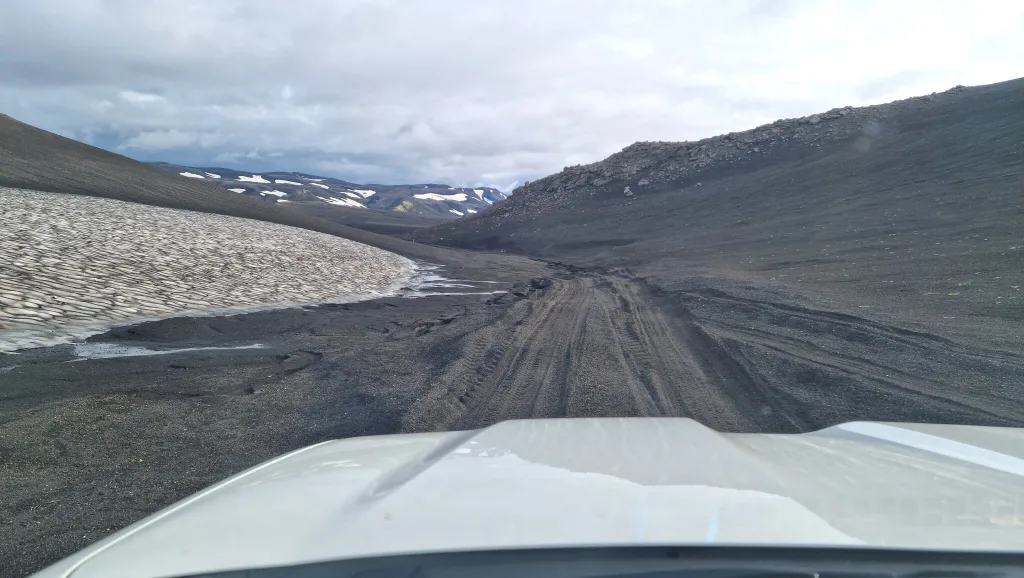
faxasund track langisjor iceland

Damaged Faxasund track with a lot of deep holes. Pictures don’t do it justice.

Faxasund is a very rough track with a lot of sharp stones and small to medium-sized river crossings. I’ve read on other websites that Faxasund has treacherous river crossings – this definitely isn’t true, and only illustrates the point that other websites often just simplify too much.

River crossings are not the main problem of this track. The biggest obstacle is the part of the track close to F208 with many sharp stones. There, you have to drive very carefully and take huge care of your tires.

Faxasund combines all kinds of different terrains and sceneries. Starting from the south, you will first encounter some steep ascents and descents on a very rough terrain consisting of billions of pieces of broken stones. This is the most challenging part of the Faxasund track – you need to have huge tires with lower air pressure and high ground clearance to pass without damaging your car. The views at this part of the track are one of the most beautiful ones – with many remote and lonely hills and valleys all around you.
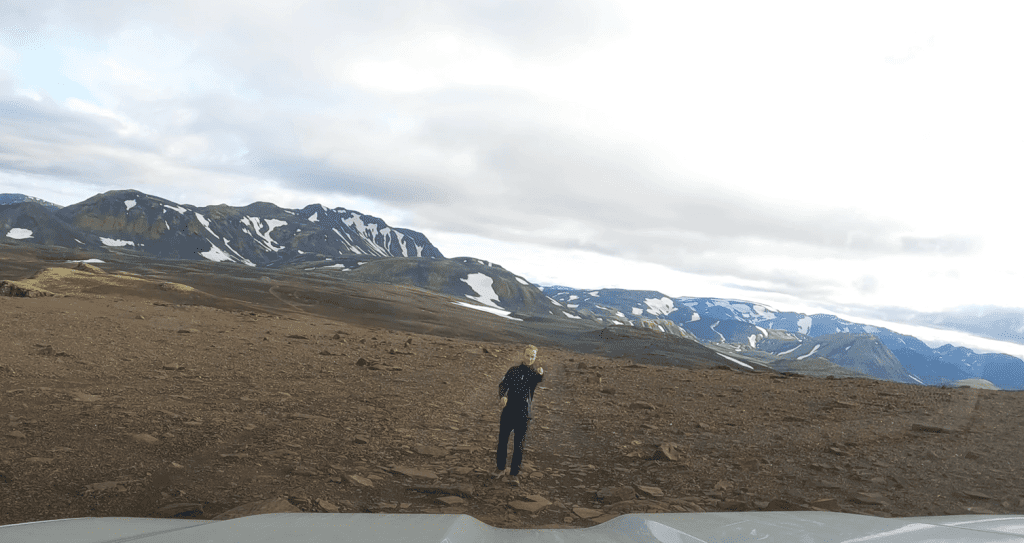
faxasund iceland sharp stones

Navigating through sharp stones of Faxasund track at 5mp/h

To drive Faxasund, we highly recommend driving at least a Hilux/Land Cruiser style jeep, ideally an even bigger/modified super jeep with tires 31” and bigger. Never with Dacia Duster, Subaru Forester, or any similar small to medium 4wd city SUVs.

What follows are some small to medium-sized river crossings, definitely doable with a large 4WD car. When it comes to scenery, even more hills and valleys appear everywhere, and you have to drive through many of them. In our case, in the second half of July, we even witnessed a lot of snow on nearby hills. The winter before our visit was a very hard one, though, leaving many snowfields everywhere in the highlands, even in August.

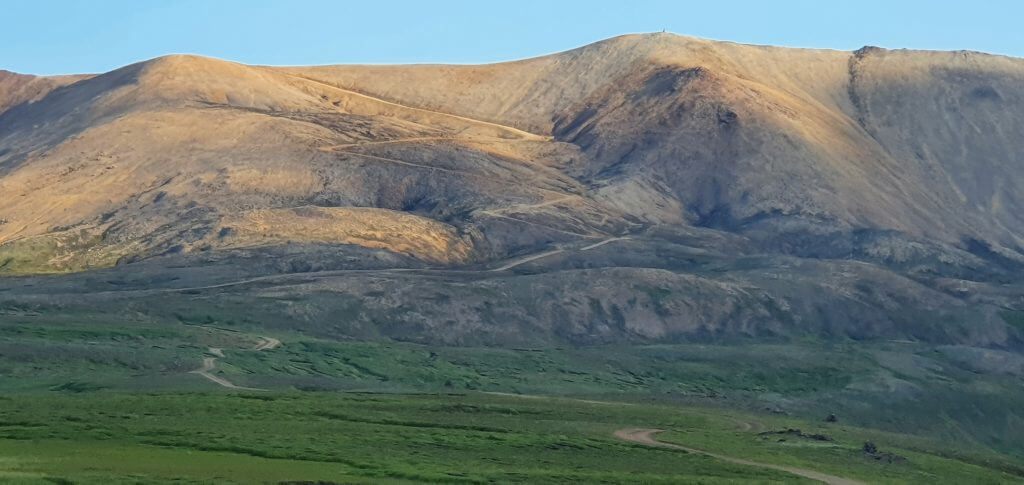
Thirdly, the terrain will change into driving in volcanic ash and on clay/mud tracks. Nearby mountains slowly start to resemble the Langisjór area – black ash hills with green tops. Driving on Mars? Almost. Definitely some out-of-this-world landscapes. Finally, you’re gonna drive on several hills composed of little stones, so this will be yet another different surface to drive on. Faxasund is a very versatile track.

YOU MAY ALSO LIKE:

Posted by Igor in Guide, Highlands, 3 comments
How to Visit Maelifell Volcano

How to Visit Maelifell Volcano

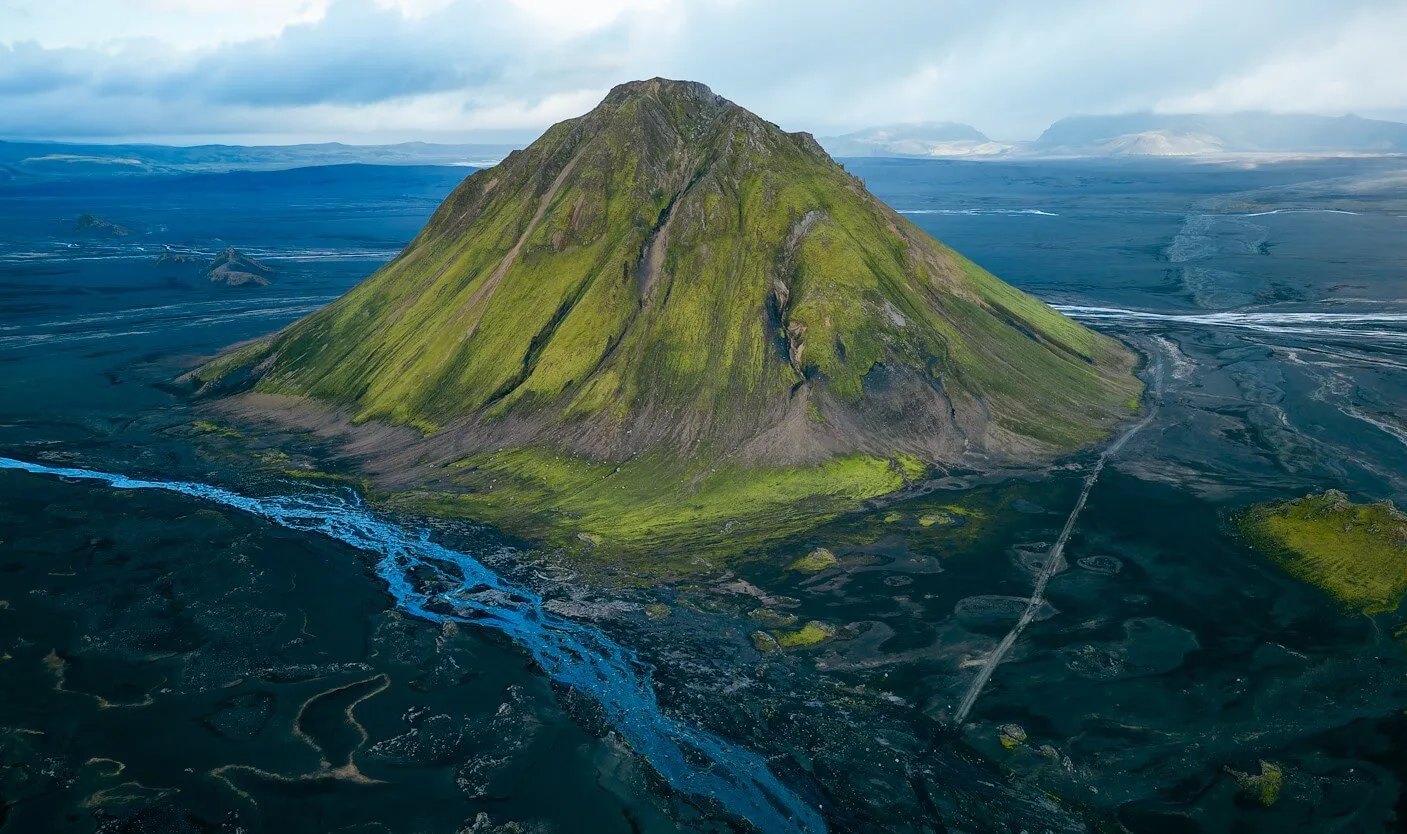
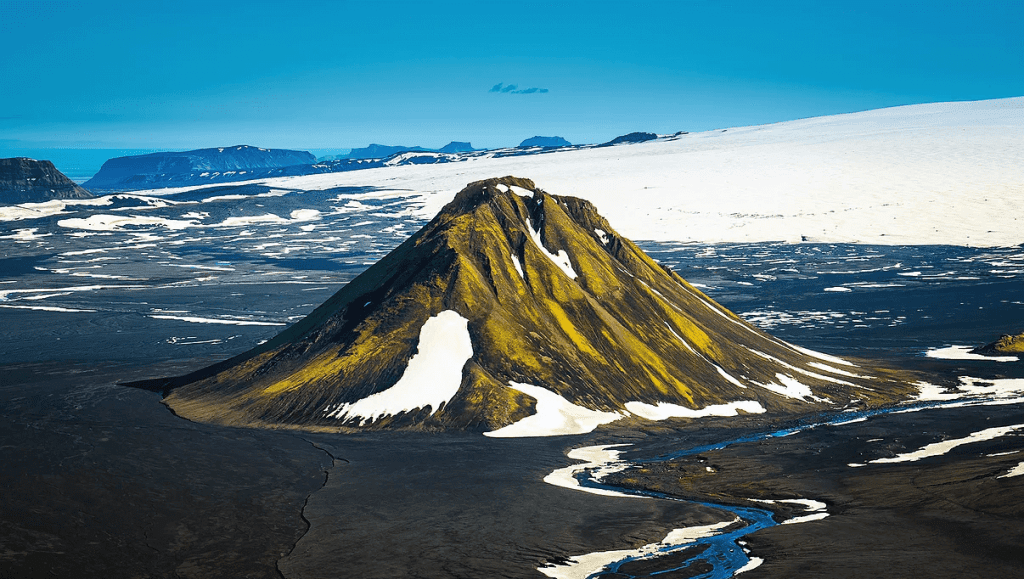
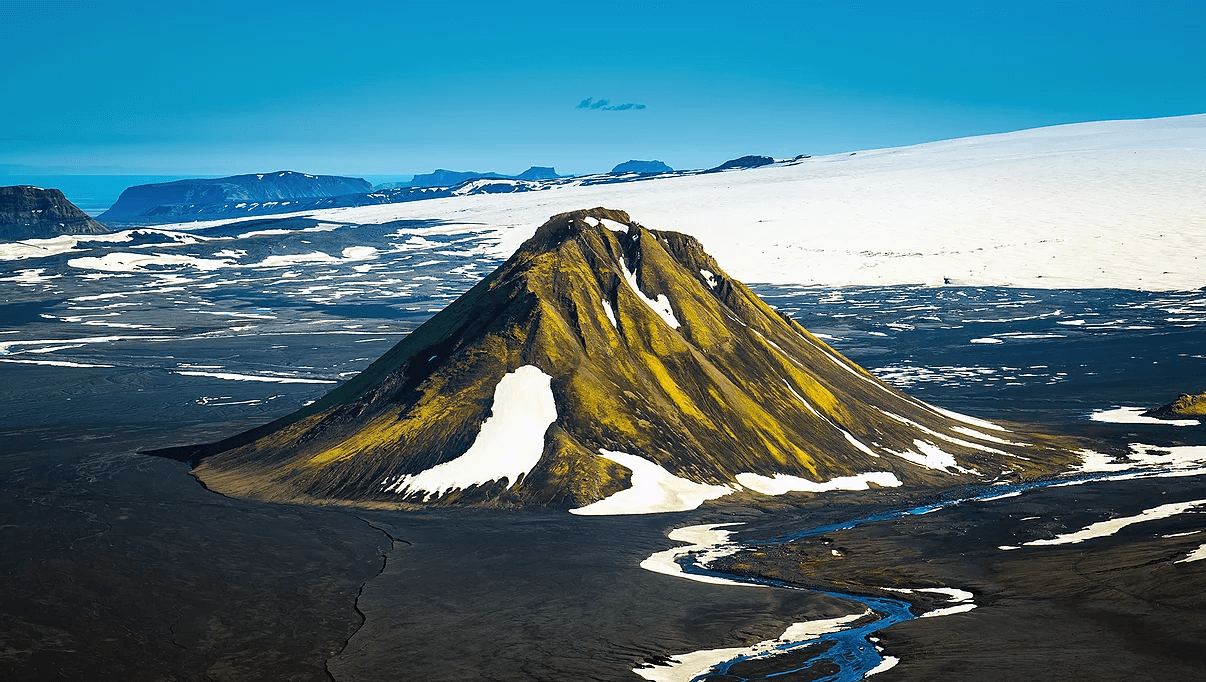
Maelifell is an epic green volcano hidden in the black Icelandic desert in the southern Highlands of Iceland.

Did you know that there is not just one Maelifell in Iceland? There are about 20 of them. Maelifell means “measuring mountain” in Icelandic, or an “orientational hill”. And Icelanders in the past were not very original in naming their mountains. So, yes, there are many Maelifells in Iceland.

Below we explain in deep detail how to reach Maelifell. Information in this article is based on our multiple visits to the volcano over several years. There’s no guarantee the conditions will be the same at the time of your visit, though! More on this below.

Maelifell Video Guide

Maelifell Map

How to get to Maelifell

You have three options:

  1. Drive to Maelifell yourself
  2. Take a public super jeep tour (10% discount code: EPICICELAND10)
  3. Or take our Epic Private Super Jeep tour

There are no buses or bigger group tours.

Driving to Maelifell

You have three options to reach Maelifell:

  • From the West – the most scenic route
  • From the South – the easiest route
  • From the East – route with the biggest river crossing
how to visit maelifell volcano

How to visit Maelifell volcano in Iceland

First of all – it is NOT EASY to get to Maelifell. It’s not a trip for beginners.

You need to drive a big 4wd car AND you have to cross the unpredictable rivers.

Maelifell is disguised deep in the southern Icelandic Highlands. To reach it, you need to take the difficult Highland roads, which are also called the F-roads.

For all of this, you HAVE TO prepare in advance.

Western route

You can reach Maelifell from the west by either

  • Road F210 only, or
  • Roads F261 and F210

Both of these roads are incredibly scenic and rough highland roads. You have to cross medium-sized rivers on both.

F210 only

F210 west near Keldur

F210 west near Keldur

My favorite option is to take the F-road F210 from the west only. It’s one of the most beautiful roads in Iceland. Views on a nice day are simply amazing.

You will have to cross several small to medium rivers on F210. Moreover, you will also drive in a river bank for about 100 meters (yards).

The most significant river crossing is located near the crossroads with F261, and the river is called Kladaklofskvisl:

There are no more river crossings after Kaldaklofskvisl, but the road gets rougher and rougher.

You will, for example, encounter huge volcanic boulders that require a high ground clearance and cautious driving.

What Car do you need for F210?

f-roads maelifell iceland

F-roads around Maelifell

To pass F210 safely, you must drive at least a Toyota Land Cruiser, Toyota Hilux, or Jeep Wrangler.

The best option is to drive a super jeep. Super Jeep is a modified vehicle with big tires and a snorkel. Some examples include Land Rover Defender, Land Rover Super Defender or a modified Land Cruiser.

You can rent all of these in Iceland. Check out our article on How to Rent a Super Jeep in Iceland.

F261 and F210

The second option from the west is to use the combination of the roads F261 and F210.

F261 is a bumpy road with one medium-sized river crossing at the end. The river is called Blafjallakvisl and requires just about the same cars to pass as F210.

F261 is also beautiful and worth the drive.

Southern route

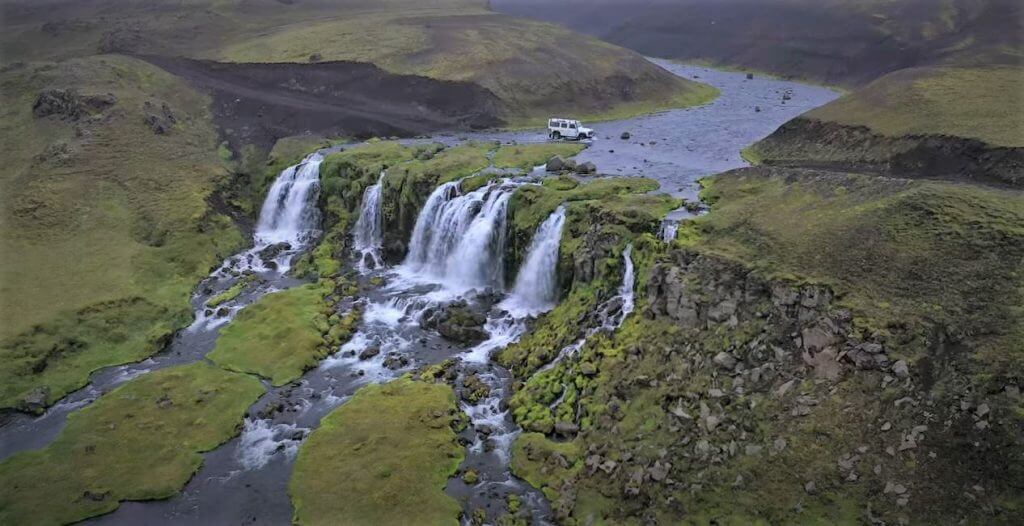
f232 blafjallafoss waterfall

F232 Bláfjallafoss waterfall

F232 from the south is the easiest road.

It is the least bumpy road and there is just one medium-sized river crossing. Or better said – a waterfall crossing.

There are huge stones at the bottom of the river and the crossing is very bumpy.

f232 road iceland

F232 south of Maelifell

This one particular spot – the waterfall crossing of Blafjállafoss – is great for drone lovers, and it’s very picturesque.

Other than that, there’s nothing super highly interesting along the road, just one more cute waterfall called Holmsarfoss.

To pass F232, we again recommend ideally a Land Cruiser or something bigger.

On a dry day, you may be able to pass with Dacia Duster, Suzuki Jimny, Nissan Qashqai, or something similar. BUT you need to drive well without mistakes. To be sure not to damage your car, it’s better to rent something bigger.

Eastern route

The final option is to take F210 from the east. Eastern F210 is not difficult, but there is one major obstacle on the road.

f210 iceland east

F210 East of Maelifell

A big river crossing of Holmsa river. This river crossing is located east of Maelifell, right next to the Raudibotn craters area.

To pass this ford safely, it’s best to drive a super jeep. On a dry day you may be able to pass with Land Cruiser or Hilux or something similar.

Please never cross Holmsa in a Duster, Jimny or anything similar!

When to visit Maelifell

In short, you can visit Maelifell only in summer AND only when the roads to Maelifell are open.

maelifell iceland our visit

Our first visit of Maelifell in August

The roads to Maelifell typically open in the beginning of July and usually become impassable around mid-September.

Always check this upfront on www.road.is or www.trafficinfo.is, that is the same website of Icelandic Road Administration.

You can drive to Maelifell only if the road is marked green or dashed green.

What to do around

Our favorite hidden gems near Maelifell are Raudibotn craters, Strútslaug hot spring, Markarfljotsgljufur canyon, and Hungurfit dirt track.

Raudibotn craters

Rauðibotn waterfalls

Raudibotn waterfalls

Raudibotn craters are an out-of-this-world secluded area full of waterfalls, rivers, and craters. Beware, though, to reach Raudibotn from Maelifell, you must cross the more giant Holmsa river.

Or you need to go all the way back to the ring road and access Raudibotn by F210 from the south.

You can read more about our Raudibotn experience here.

Strutslaug hot spring

strutslaug hot spring iceland

Strútslaug hot spring deep in the Fjallabak highlands of Iceland

Strútslaug is most likely the least visited hot spring in Iceland. This is a truly wild hot pot, unlike many other touristy ones in Iceland.

To reach Strútslaug, you have to cross one medium-sized river several times and then hike for about 1.5 hours.

You can read more about our Strútslaug experience here.

Markarfljotsgljufur canyon

markarfljotsgljufur east viewpoint

East viewpoint of Markarfljótsgljúfur Canyon

Markarfljótsgljúfur Canyon is one of our favorite canyons in Iceland. You are almost guaranteed to be alone when you reach it.

That being said, Markarfljótsgljúfur belongs to some of the most difficult-to-access canyons in Iceland.

You can get to Markarfljótsgljúfur either from the west or from the east. We describe in detail both of these options in the article about our Markarfljótsgljúfur experience.

Hungurfit dirt track

We will finish our list of the most secluded and fascinating spots in Iceland by Hungurfit track. This is one of our favorite deserted and totally remote dirt tracks in Iceland.

Driving the Hungurfit track involves steep ascents and descents, driving next to the deep ravines, as well as crossing numerous rivers and streams.

The most sought-for spots on Hungurfit, even for locals, is one of the tightest boulder-passes in Iceland – see video thumbnail above.

Tips and Safety

How do you prepare for a trip like this?

  1. Watch road videos and read blog posts to know what to expect
  2. Rent a proper car – Land Cruiser, Hilux, or a super jeep
  3. Practice on easier roads first
  4. Don’t go alone, ideally, go with more than just one car
  5. Go only when the weather is good, and the roads are open for tourists
  6. Check road and weather conditions on road.is or trafficinfo.is and en.vedur.is in advance
  7. Check with your car rental company if you are allowed to drive the roads to Maelifell
  8. Read our Highlands road trip guide

FAQ

maelifell iceland drive

Driving around Maelifell

Is there any accommodation near Maelifell?

There is no hotel or hostel anywhere nearby. Only mountain huts with sleeping bag accommodation.

The closest ones are Hvanngil hut, Strútur hut, Alftavatn hut, Alftavotn hut and Emstrur-Botnar hut.

Can I get to Maelifell in Dacia Duster or Suzuki Jimny?

Long story short – we do not recommend it.

It is theoretically possible on a nice and dry day. And only if you use the easiest southern route F232. But you are risking damaging your car.

Can I take small children to Maelifell?

Well, like generally? NO. Only if you already have experience with the highlands, otherwise not.

Maelifell highlands Iceland

Maelifell in the highlands of Iceland. Photo credit to: snorrithorphotography.com

How much time do I need?

It takes roughly 2 hours to reach Maelifell from the town of Vik and roughly 2.5hours from Hella.

If you want to see just Maelifell and nothing else, the roundtrip will take you around 6 hours.

Is it worth going in a fog?

Unfortunately not really. But this depends on how heavy the fog is and if it’s persistent or not. This is impossible to predict. So you just need to take your chances!

Why can I visit Maelifell only in summer?

Because there is snow or mud on the roads. You would get stuck or you could damage the fragile soil.

Can I hike Maelifell?

Yes you can, BUT it is a very hard hike on an unmarked trail. It’s very steep and only for highly experienced hikers.

Our Experience

maelifell highlands iceland

The gem on the highlands of Iceland

Our first trip to Maelifell started in Hella via F210 from the west.

Most of the F210 is without bigger river crossings, so in case of good weather, even if you don’t feel like doing bigger river crossings, you may try to drive it in a proper 4×4 (ideally Land Cruiser or bigger, see our guide on how to choose a proper car for Iceland) – up to Alftavatn mountain hut.

F210 west of Alftavatn

Up to Alftavatn hut, the road is just bumpy, with potholes and some steep sections, but really picturesque and one of my favorite Icelandic roads. You will get amazing views in each direction – seeing Landmannalaugar from the distance and a big part of Fjallabak Park.

Even until Alftavatn, you will still have to cross several smaller streams, and even drive in the riverbed for around 100 meters! This is really one of the “once in a lifetime” experiences, for anyone not used to it (yes, maybe not for Icelanders ;).

f210 iceland west

F210 west of Alftavatn

As I mentioned, the road leads through multiple mountainous areas, so if you are unsure about driving in such an environment, please don’t go. Once you pass Alftavatn, the first real obstacle gets into your path – crossing the Kaldaklofskvisl river.

F210 to Alftavatn

Hence, we drove F210 all the way to Alftavatn lake. The road was admiringly beautiful. The part I liked the most was the highest spot just before Alftavatn, where you could see all the surrounding land, including Landmannalaugar in the distance, almost from the “bird’s eye” point of view.

We took a short break at Alftavatn lake, which is a very nice, calm, and quiet spot to stop at and have a picnic or short stay during nice weather. We were lucky enough that exactly after our arrival at Alftavatn the sun started to fight its way between the clouds and we could even walk in the T-shirt outside.

F210 Fjallabaksleið Syðri

F210 Fjallabaksleið Syðri to Alftavatn

F210 after Alftavatn then continues in two directions – south towards F261 and east towards Maelifell and Holmsa river. Since our journey went smoothly up to this point, we definitely wanted to take a detour toward Maelifell and so we did. We turned left on the eastern part of F210. Here’s where the truly lunar landscapes have begun to emerge.

Kaldaklofskvisl river crossing

Kaldaklofskvisl crossing on F210 can get tricky at times because there are some large boulders in the river that you are unable to see beforehand. Secondly, the water level in the river may get too high to allow for safe crossing in vehicles not big enough.

It’s always necessary to strictly adhere to all the river crossing rules, watch someone cross before you, wade the river yourself if feeling unsure, and if still feeling unsure better turn back.

F210 kaldaklofskvisl river crossing

Kaldaklofskvísl river crossing F210

We had nice partially cloudy/partially sunny weather, luckily with no fog and no rain. We already knew from our friends and from the day before, that the water level in rivers is favorably low and rivers are shallower than usual. These are practically one of the best conditions possible.

F210 to Maelifell

F210 towards Maelifell is definitely one of the most unique Icelandic roads. Firstly, the weather almost always changes when driving on this road. F210 towards Maelifellsandur literally feels like a gateway towards another world, thanks to this. Secondly, the road itself is very specific – it starts with huge boulders and continues as a black sand road.

And it’s almost always covered with some kind of mist – either light or heavy. Huge boulders are the most difficult part of F210 towards Maelifell. The road doesn’t have a clearly visible track, and if you don’t take enough care, you may damage the underside of your car.

F210 Fjallabaksleid Sydri east to Maelifell

F210 Fjallabaksleid Sydri east to Maelifell

After basically driving on huge stone plates rather than an ordinary road, the route turns into tracks in the black sand. Oftentimes expect it to be wet and muddy because this is the area where it may rain occasionally. This part of the road doesn’t have any huge obstacles, or rivers, so it looks like a giant moon highway.

There are no more river crossings going from Kaldaklofskvisl to Maelifell. If you are the only car on the road (which is frequently the case, as with us) then your only guides are the tracks in the sand and yellow sticks marking the side of the road.

Maelifell

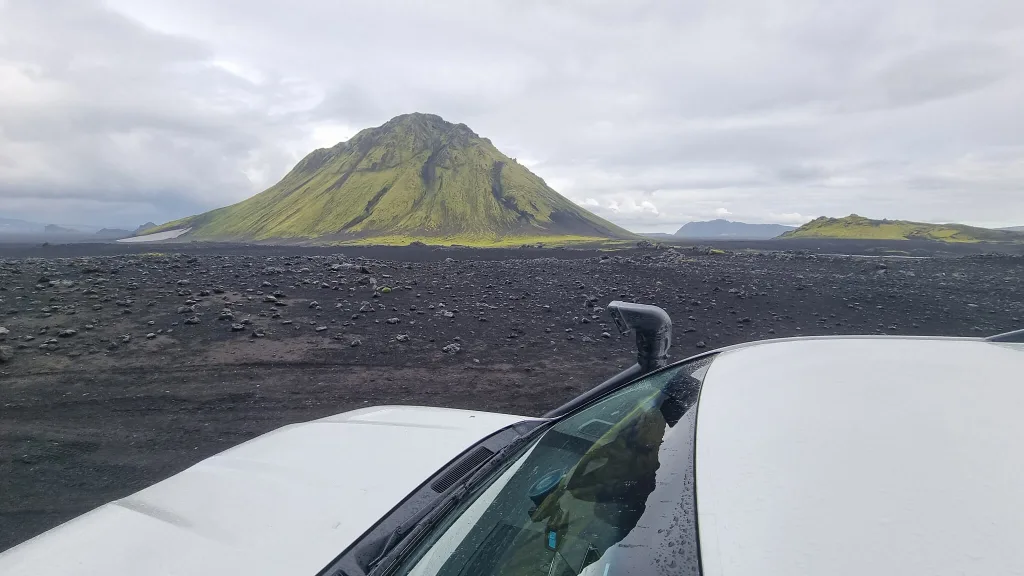
After a drive in the middle of “black sand nowhere”, you will be able to spot majestic Maelifellsandur in the distance. If you are lucky enough, and Mr. Maelifell is not covered in fog – which he likes to do – your view will be truly amazing. As I already mentioned, the weather usually changes to worse after turning towards Maelifell. This was exactly our case (multiple times). This time it, however, only changed to cloudy with occasional little rain – which is still considered good weather.

maelifell iceland

Maelifell in Fjallabak nature reserve

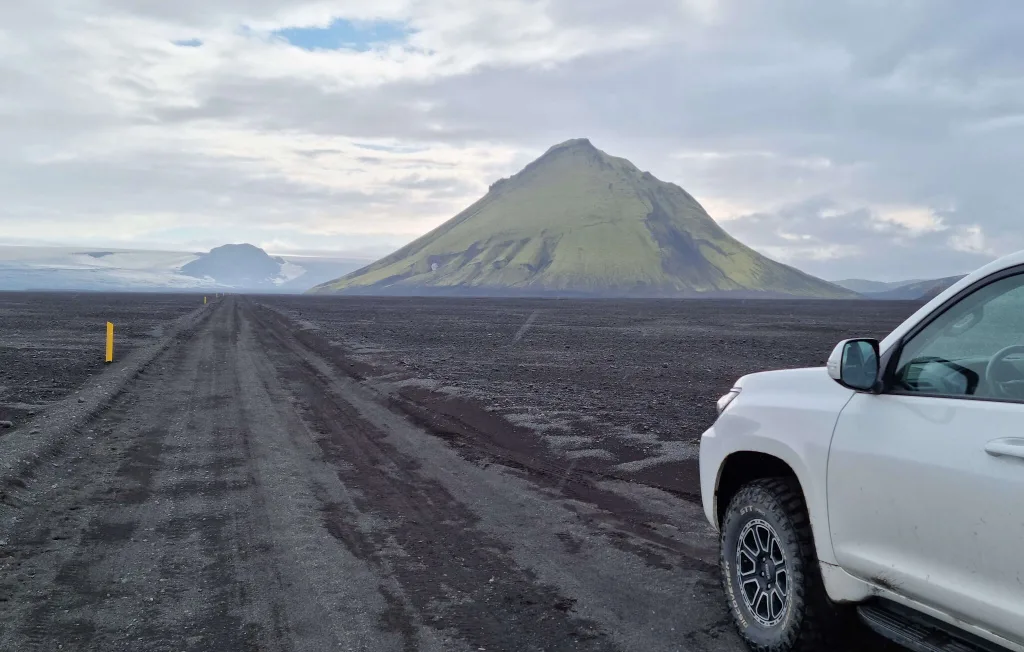
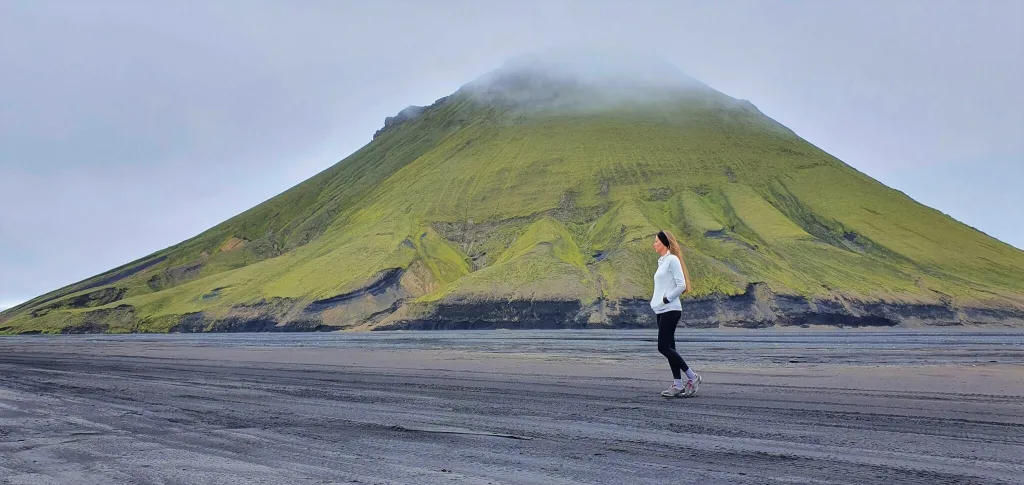
Finally, after an adventurous drive – there it stood – Maelifell volcano. It’s a view as if you were on a deserted planet. A huge green volcano in front of you, surrounded by black sand fields, with occasional little lakes created by past rain and absolute silence in the air.

It’s even possible to climb the Maelifell, but we don’t recommend doing that unless you are really experienced in performing steep, unmarked hikes unless there’s ideal weather and ideally only with a guide. We didn’t go for the hike as it may be really dangerous (and the view from above wouldn’t be great in partially foggy weather).

Holmsa river crossing

We still had enough time at that point of the day, because everything went pretty smoothly. Thus, we decided to take a look at the Holmsa river crossing with an aim of seeing Raudibotn – the beautiful hidden (from a typical tourist) area with a crater, river, and amazing landscapes all around.

holmsa river crossing iceland

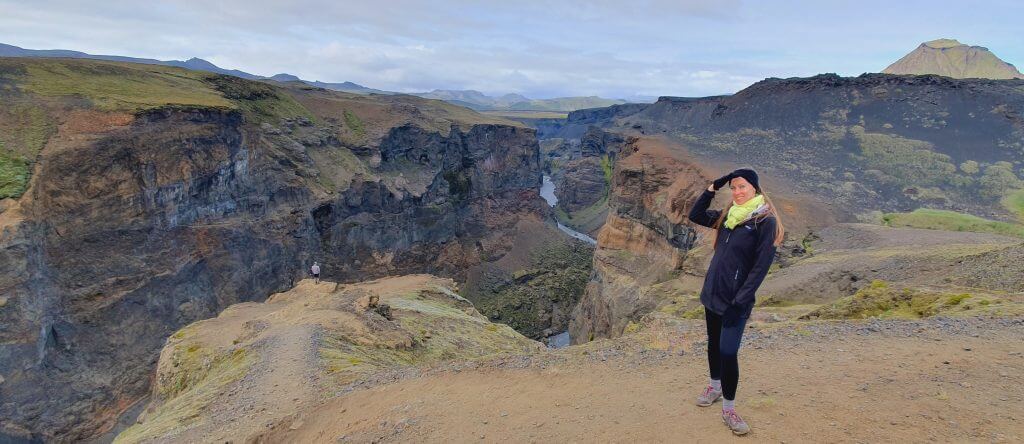
Me crossing bigger Hólmsá river by Land Cruiser on F210 near Maelifell

After reaching Maelifell, we continued east and we soon arrived at the Holmsá river crossing. According to a friend of mine, the crossing was supposed to be doable, without problems, at this time of the year (especially due to low water levels). Beware, this is the river crossing which may get pretty nasty. Always check both beforehand and on-site.

The crossing looked exactly like my friend Haraldur described it – this time harmless. I examined the river anyway and it looked calm and shallow. Because of this, we decided to go for a ford even without wading the river on foot. And the crossing went smoothly. There’s a small hill with the road, usually easy to spot on your left after the Holmsa crossing.

Raudibotn, Markarfljostgljufur and Hungurfit

After crossing Holmsa we went hiking all the way to Raudibotn craters. Highly recommended and totally worth a tiring day!

hungurfit track river crossings

Many small to medium river crossings are an amazing part of the Hungurfit track

After Raudibotn, we didn’t have enough and explored also Markarfljotsgljufur canyon and drove Hungurfit track. You can read in detail about our Fjallabak highlands day involving all these activities.

epic iceland facebook group ask questions or get inspired in our community

Posted by Igor in Guide, Highlands, 2 comments
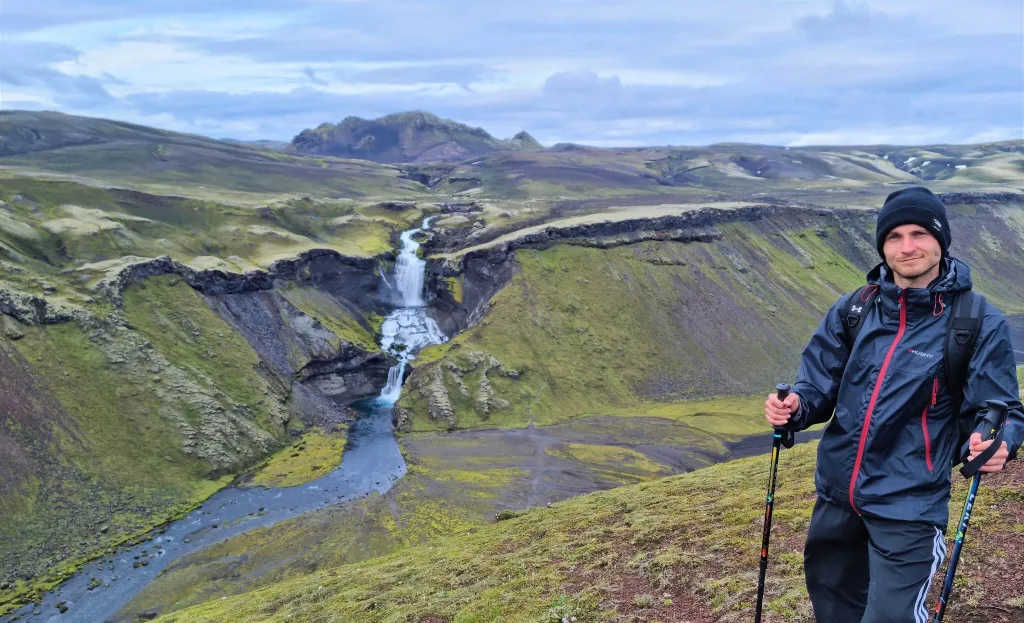
How to visit Eldgjá

How to visit Eldgjá

Eldgjá is a gigantic canyon created by the largest volcanic eruption on earth in the last millennium. From a historical point of view, Eldgjá is definitely a fascinating place to visit.

Except for the Eldgjá canyon, there’s also a very picturesque waterfall called Ófærufoss right in the heart of Eldgjá.

But does Eldgjá belong to one of the most beautiful places in the Icelandic Highlands, as many people describe it? Well, we are not so sure about that, and we will explain why below.

Map of Eldgjá

eldgja map iceland

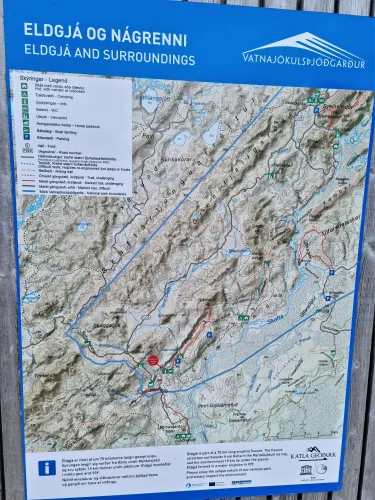
Map of the Eldgjá area (click to enlarge)

Eldgjá hiking trails

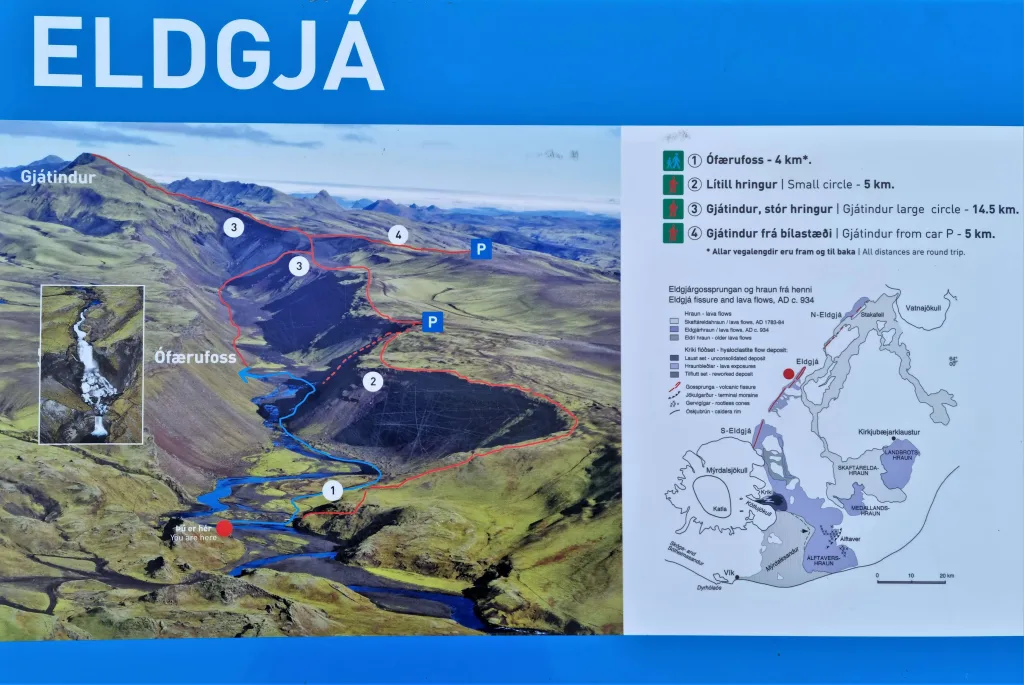
There are three main hiking trails in Eldgjá:

eldgja hiking trails iceland

Hiking trails in Eldgjá

The two most popular hiking spots in Eldgjá are Ófærufoss waterfall and the peak of Gjátindur. The majority of visitors go only to the famous Ofaerufoss because it’s the most efficient option.

We wrote a list of 25 Off-The-Beaten Track Places in Iceland that nobody else writes about.

Besides the main trails, there are also several traverse routes leading to the Highlands.

Ófærufoss waterfall

ofaerufoss waterfall eldgja iceland

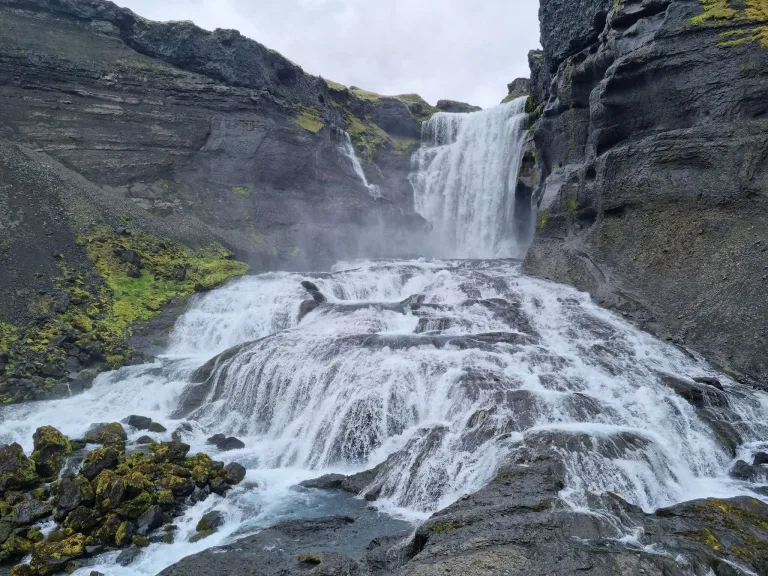
Beautiful Ófærufoss waterfall in Eldgjá

Hiking time: 1.5 hours round-trip
Difficulty: very easy
Trail Map: Ófærufoss hiking trail

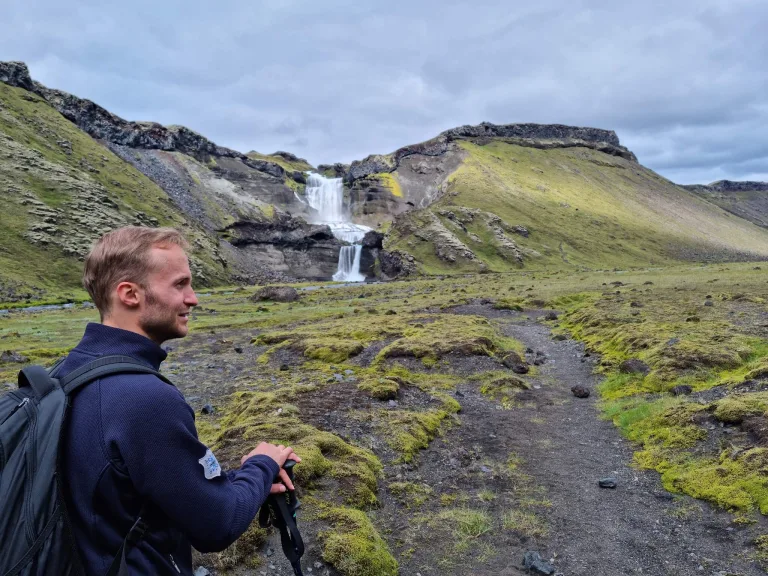
Ofaerufoss is the legendary picturesque waterfall and the main attraction of Eldgjá. The waterfall is a must-see spot in the area we highly recommend visiting. It’s spectacular in any weather.

It’s an easy, well-marked walk that anyone can do. It took us less than 30 minutes to reach the Ófærufoss waterfall from the Eldgjá car park.

The shortest trail to Ófærufoss leads along the right/eastern bottom of the canyon and turns left/west right before the waterfall.

Small circle

ofaerufoss waterfall eldgja

Ófærufoss viewpoint from the “Small Circle” hiking trail in Eldgjá

Hiking time: 2 hours round-trip
Difficulty: easy to moderate
Trail Map: Small Circle hiking trail

If you want to enjoy Ófærufoss from more angles and the bird’s eye perspective, you can take a longer Small Circle hike.

This trek is a loop path extension of the easy bottom-of-the-canyon walk. After passing Ófærufoss, you will need to climb shortly to the eastern edge of the canyon. From there, you turn back south.

Once you finish the climb, you will also get nice views over the Eldgjá Canyon. You can take this loop trail in any direction. It’s a nice compromise between a short Ófærufoss walk and a long Gjátindur trek.

Gjátindur circle

eldgja iceland

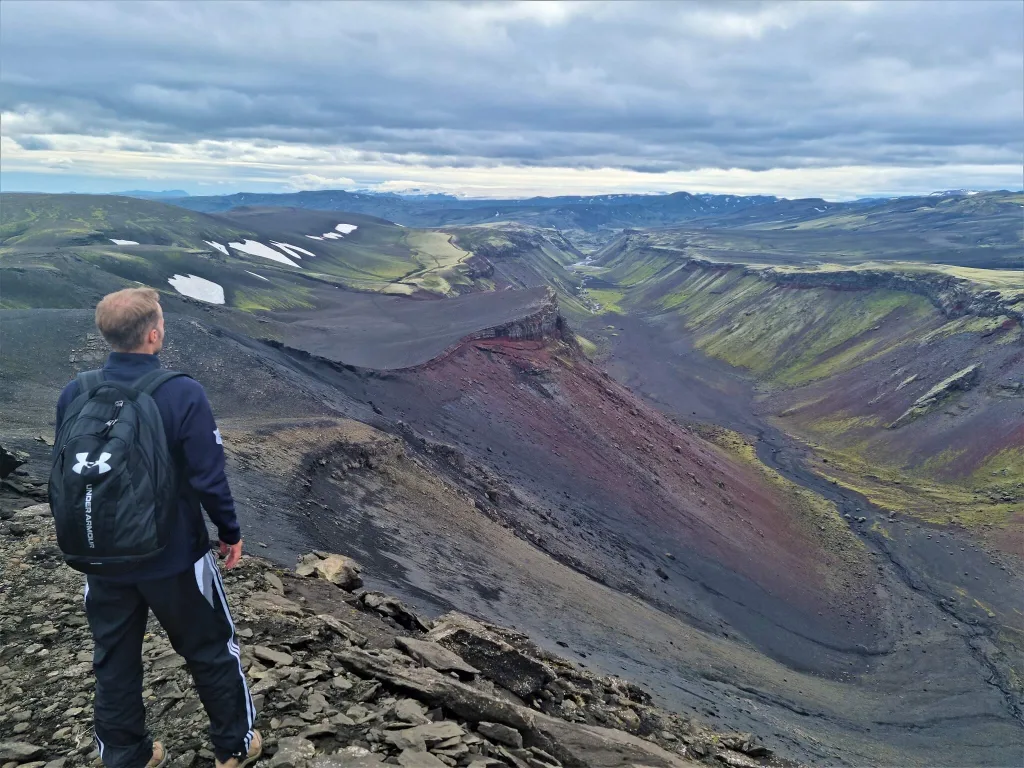
Bird’s eye view over the Eldgjá Canyon when hiking to Gjátindur

Hiking time: 5 to 6 hours round-trip
Difficulty: moderate with one steeper climb
Trail Map: Gjátindur hiking trail

Gjátindur is the tallest peak in the Eldgjá area. By climbing Gjátindur on a nice day, you will be guaranteed to have the best views over the entire Eldgjá. But are these views worth the climb? Well…

It took us almost 6 hours to complete the loop trail to Gjátindur and back, including a stop at Ófærufoss and then a struggle to find the correct path. The hike to Gjátindur is moderately difficult, with one pretty steep ash climb. Otherwise, the trek isn’t anyhow dangerous. It’s just long (around 16 kilometers, or 10 miles).

Several different trails lead to Gjátindur. One of the trails leads inside the bottom of the canyon, while the other trail leads along the upper edge of the canyon, see the Eldgjá hiking map above.

Langisjór traverse trail

langisjór lake iceland

View over the Langisjór lake from Sveinstindur trail

Hiking time: 1 to 2 days
Difficulty: moderate to difficult
Trail Map: Eldgjá Skaelingar hiking trail

Eldgjá Canyon is actually a part of the vast hiking area that stretches all the way in between the road F208 (Fjallabaksleið Nyrðri) in the southwest and Lake Langisjór in the northeast.

Numerous marked and unmarked remote trails connect Eldgjá to Langisjór and Uxatindar mountains in between. See the huge Eldgjá map.

How to Visit the Icelandic Highlands and prepare for the Highlands road trip?

How to get to Eldgjá

To get to Eldgjá, you must take the F-roads F208 and F223, respectively. There are no buses or guided tours, so your only option is to drive or take a private tour.

Road F208

If you take the road F208 from the south, you have to cross one medium-sized river. You need to drive at least a medium-sized 4wd car to pass safely.

When you arrive by F208 from the north, you will encounter several small to medium-sized rivers to ford. This route is one of the most beautiful Icelandic highland roads.

We again recommend driving, at minimum, a medium-sized 4×4 car like Dacia Duster. That being said, if the conditions are ideal and the weather is dry enough, you may also pass with smaller 4wd cars like Toyota RAV4 or whatever is being called a 4×4 these days.

Road F223

F223 to Eldgjá is an easy F-road without any river crossings or other obstacles.

It’s a very short drive from the southern part of F208 (Fjallabaksleið Nyrðri). The only reason Eldgjárvegur is marked as an F-road is probably that it’s impossible to get there without using other F-roads.

Once you reach Eldgjá, there’s a huge car park with a ranger’s hut and modern toilets.

Is Eldgjá worth a visit?

Eldgjá is worth a visit if you have more time to explore the southern Icelandic Highlands. If you are short on time, we recommend other fantastic spots in the Highlands.

Interestingly enough, if you ask locals in Iceland to name a few most beautiful places in Iceland, many replies will include “Ásbyrgi” and/or “Eldgjá”. We have visited both, and both were actually slightly underwhelming in our opinion (and other foreign visitors’ opinions).

How to choose the Best Car for Iceland based on your trip plans?

Don’t get me wrong, both Eldgjá and Ásbyrgi are beautiful places to visit. But Iceland has so many unique gems to offer that Eldgjá or Ásbyrgi simply don’t measure up to many of them.

What is the Best Hike in Eldgjá?

gjatindur eldgja iceland

At the peak of Gjátindur in Eldgjá

If you have just a few hours dedicated to visiting Eldgjá, we suggest primarily seeing Ófærufoss. Ófærufoss waterfall was probably the highlight of our full-day visit to Eldgjá. Moreover, a hike to Ófærufoss is just an effortless walk, not even a hike.

If you have more time, you can do a longer hike to Gjátindur, the highest summit of Eldgjá. We suggest doing this hike only if you are really into hiking and have enough time. Once you climb the edge of the Eldgjá Canyon, there’s a nice viewpoint over the entire Eldgjá area from a bird’s eye viewpoint.

List of 130 most beautiful Icelandic Waterfalls with detailed info.

However, to reach Gjátindur, you need to continue even further, and the view from the peak isn’t that special in our opinion. Definitely not if you compare it, for example, to nearby Sveinstindur, Bláhnúkur, or Thakgil.

Once again, don’t get me wrong, the Gjátindur hike is pretty. If you have time and energy, then go for it. It’s just not among our favorite ones in Iceland, not even close to it.

Our Eldgjá Experience

We visited Eldgjá at the end of July and did all the main treks. We hiked to Ófærufoss and then to Gjátindur for the best views over Eldgjá.

Ófærufoss hike

As expected, we met many fellow tourists along the way to Ófærufoss. Apart from tourists, we also met many infamous Icelandic midges 🙂 Eldgjá is actually the only place where we’ve ever used head-nets in Iceland.

Ófærufoss hiking trail eldgjá iceland

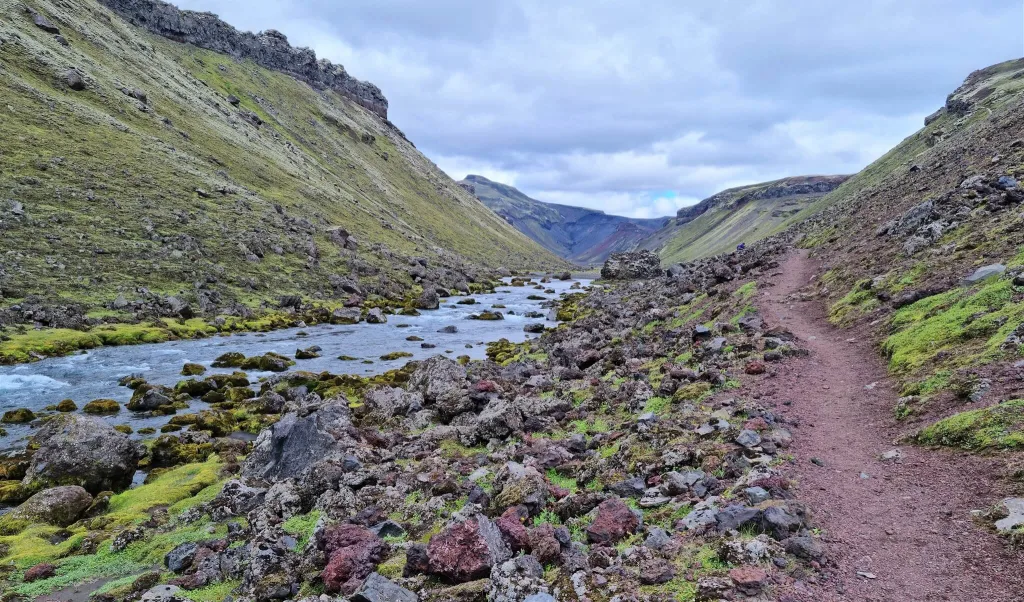
Easy hiking trail to Ófærufoss

Midges don’t bite, and they are not dangerous. They are just very pesky and persistent about getting into your nose and eyes, being attracted to wet spots. So either you will be waving your hand in front of you, or you’re gonna use head-nets.

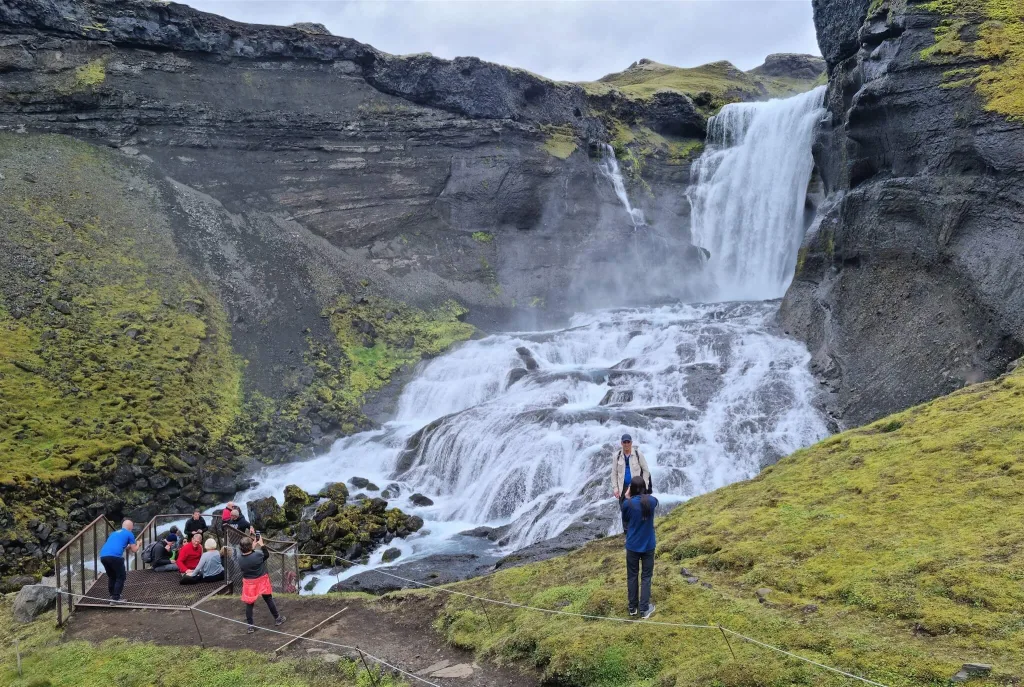
Ófærufoss is totally worth a short walk. If I were to come here next time, Ófærufoss would be the only place I would visit again in Eldgjá. The waterfall is magnificent, and it will definitely make it to our list of favorite Icelandic waterfalls.

There’s even a huge viewpoint platform with seating. Rangers built ropes around the waterfall to protect the moss and tourists from falling into the waterfall. Despite the ropes, several arrogant visitors didn’t respect them and stepped on the moss to take better pictures anyway. This is how NOT to be a responsible tourist.

crowds at ofaerufoss iceland

Crowds at Ófærufoss and tourists breaking the rules by standing behind the rope.

Gjátindur hike

After seeing Ófærufoss, we still had enough time and energy to hike more, and the weather was ugly everywhere else anyway. Thus, climbing Gjátindur made great sense.

We were equipped with hiking poles, head nets, and an old map, which showed we were supposed to be able to reach Gjátindur from the western trail. The map was terribly wrong. The only real trail leading to Gjátindur is the eastern trail, but more on that below.

Be sure to always check the safety warnings, road conditions, and weather forecast before embarking on any hike in Iceland!

The Bottom of the Canyon

Our hike to Gjátindur started by walking to Ófærufoss from the eastern bottom of the canyon which, right before the waterfall, turned to the west to reach the waterfall itself. After stopping at the waterfall, we continued further along the western bottom of the canyon in the north direction towards Gjátindur.

eldgja canyon hiking

Hiking the bottom of the Eldgjá Canyon

This part of the hike is a fairly easy walk on flat ground. I remember very sparse red marks, but we mostly just followed the well-trodden steps along the bottom of the canyon.

Ascent to the Edge of the Canyon

According to our map, we were supposed to turn left a few hundred meters before the canyon ended and begin ascending steeply. There were no marks, only steps of someone else walking before us.

List of All Hot Springs in Iceland with detailed info.

Thus, we followed the steps, which soon turned into a very slippery and steep ascent via the ash slope. Steps soon disappeared, and we reached the point where it was impossible to continue safely. We tried to find the correct western trail but without success.

After climbing down the ash slope, we instead turned right to the marked trail (yellow sticks if I remember correctly). This eastern trail to Gjátindur led via a pretty steep slope entirely consisting of ash. Thus, with every step we slipped back a bit, because ash rolled back together with us. This was the spot where hiking poles came in extremely handy.

Crossroads and the Ridge

eldgja canyon iceland

Great view over Eldgjá on a halfway towards Gjátindur

After finishing the climb to the eastern ridge of the Eldgjá canyon, we soon reached the crossroad of several different trails. Some lead further toward the Langisjór area, while one leads to Gjátindur (yellow sticks). Another trail leads back to Eldgjá car park, but not via the bottom of the canyon, but rather via the upper eastern edge of it.

Once you finish this climb and get to the edge of the canyon in the Gjátindur direction, this is where the most beautiful views over Eldgjá will pop up in front of you. You can see the entire Eldgjá Canyon from the bird’s eye viewpoint and this sight is really magnificent.

We then continued towards the peak of Gjátindur via a marked trail, which was basically a pretty dull and rocky ascent. It took us roughly an hour to reach Gjátindur from the above-mentioned crossroad of routes.

The summit of Gjátindur

gjatindur iceland eldgja

Views from the summit of Gjátindur

Gjátindur is the tallest possible viewpoint over the entire Eldgjá, so yes, you will be guaranteed 360° views if you hike on a day with good visibility. Despite the moody weather, we were lucky to have this good visibility.

Nevertheless, we were not overwhelmed by the views from Gjátindur. They were a bit monotonous and not that spectacular compared to many other amazing views we’d seen already at that time. Nice hike, nice views, but nothing out-of-this-world.

The weather felt a bit cold at the time of our visit, with some 5°C and light winds. Not ideal picnic weather, though. We started to feel cold even in all our layers after standing on Gjátindur for 5 minutes. Thus, we made a short protein bar break and started our descent back.

The Way Back

gjatindur hiking trail eldgja

Hiking trail to and from Gjátindur

We decided to take a loop trail because we didn’t want to hike the same route twice. It was a good decision. Not only we avoided the unpleasant and steep ash slope descent, but we also saw Ófærufoss from a beautiful eastern ridge viewpoint.

The loop trail back from Gjátindur is a marked trail that leads along the upper edge of the eastern part of the Eldgjá Canyon. After more than halfway through the trail, you will reach an Ófærufoss viewpoint from the bird’s eye perspective, which is undoubtedly worth seeing. This is already a part of the “Small Circle” hike in Eldgjá. The trail then continues and descends back towards the car park.

YOU MAY ALSO LIKE:
epic iceland facebook group ask questions or get inspired in our community

Posted by Igor in Highlands, Hikes, 0 comments
Snækollur – Hiking the highest peak of Kerlingarfjöll

Snækollur – Hiking the highest peak of Kerlingarfjöll

Snækollur is the highest peak of an amazingly beautiful Kerlingarfjöll. And guess what happens if you hike to the tallest point of the heavenly place? You will be getting once-in-a-lifetime views!

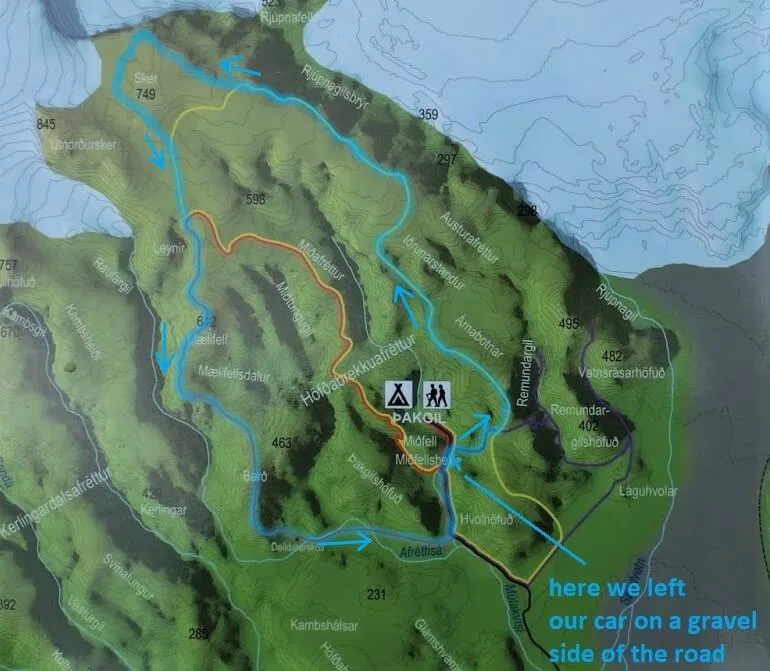
And that’s exactly what you will get once you climb to Snækollur on a nice day. Views above Kerlingarfjöll you will never forget.

Most Kerlingarfjöll visitors go just for the Hveradalir hot spring area and/or just visit the Kerlingarfjöll campsite area. Both of these are quite easy to hike, and this way, typically, everybody ends up visiting the same spots. Instead, we wanted to do something different this time. A hike to the highest peak of Kerlingarfjöll, Snækollur, seemed an ideal candidate.

Hike in a Nutshell

Hiking time: 4 to 7 hours round-trip (depends on the trail and conditions)
Length: 9.3km / 5.8mi
Difficulty: moderate to difficult
Season: July to September
Obstacles: slippery terrain, snowfields, sometimes bad visibility and sparse marking
Trail map: Snaekollur main hiking trail

Snækollur main hiking trail via Fannborg. Powered by Wikiloc

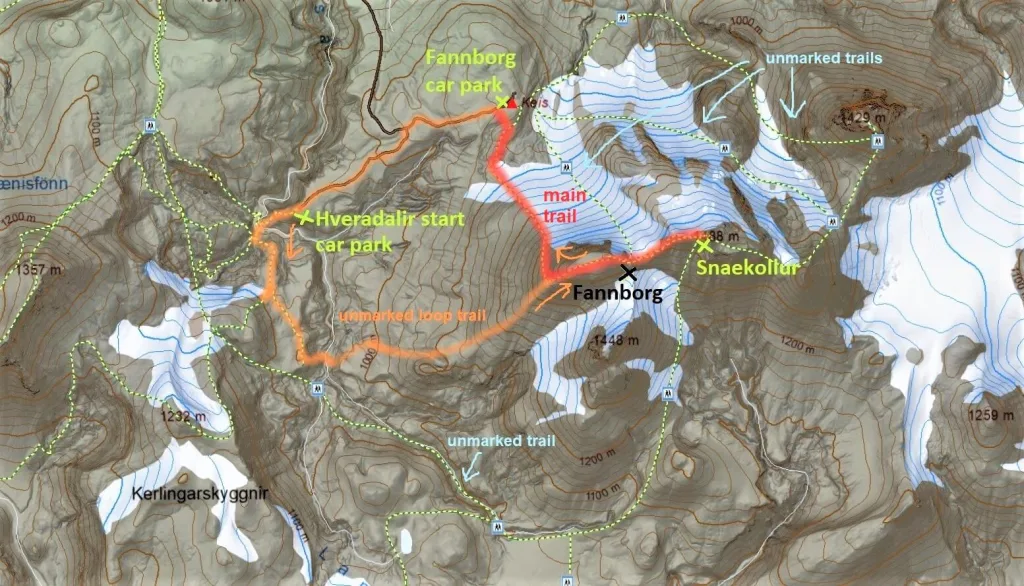
Kerlingarfjöll Hiking Map

Snækollur hiking trail map

The main hiking trail to Snækollur along other Kerlingarfjöll hiking trails

How to get to the Snækollur trailhead

It’s easy to reach Kerlingarfjöll by car via Kjölur (road 35, or former F35) and F347. You need a proper 4×4 car, though. We’ve already explained how to get to Kerlingarfjöll in our Guide to Kerlingarfjöll.

Heading to Highlands? Read how to prepare for Highlands in Iceland.

Snækollur trailhead is just a few hundred meters from the main Hveradalir geothermal area. You can easily park there, similar to parking in Hveradalir.

When to hike Snækollur

We highly recommend hiking only from mid-July until mid-September, when the trails are clear of snow. Sometimes, when spring is hot enough, it may also be possible to do the hike a few weeks earlier. And vice versa, when summer is longer than usual, also a few weeks later.

These are the Top 25 Places in Icelandic Highlands.

Regarding weather, we again highly recommend visiting only on days without rain or strong winds. Ideally, you aim for a day with good visibility. Otherwise, it doesn’t make sense to hike to Snækollur and see nothing from above.

How to hike Snækollur

Hike to Snækollur is challenging. It’s no easy walk. You need to be in good physical shape to climb all the way up. On the other hand, the Snækollur hike is not especially dangerous or exposed if you come at the right time, in the right shape, and follow the right trails.

Now what about equipment? I highly recommend you bring hiking poles and a satellite location device, for example, PLB, if any emergency occurs. Otherwise, just autumn hiking clothes are needed.

snækollur hike kerlingarfjöll views

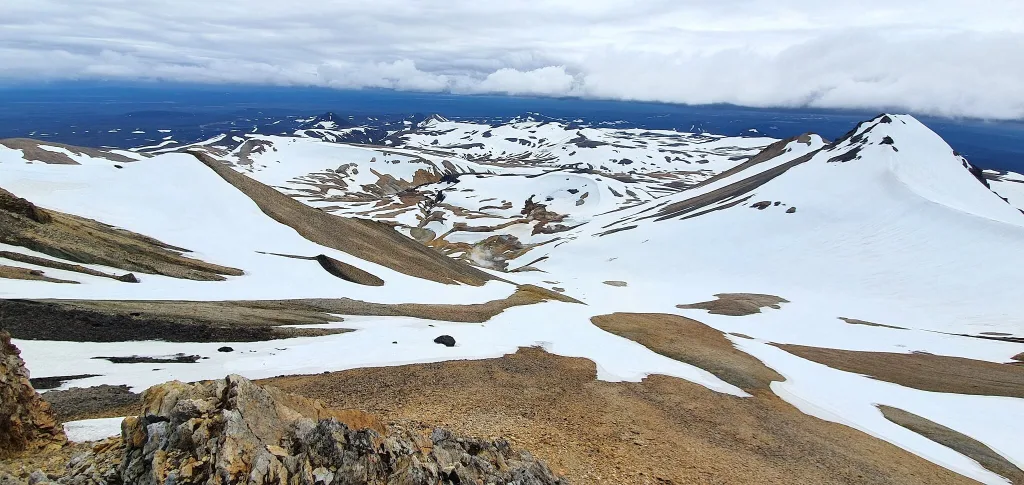
Views from the peak of Snækollur

Expect very chilly weather. The temperature reached around 5°C (41°F) at noon in July, when we reached the peak of Snækollur. Kerlingarfjöll is one of the coldest areas in Iceland due to its proximity to two glaciers and a pretty high altitude.

Oh, and one last thing – if you want to do the hike as a loop, starting at an unmarked trail in Hveradalir (as we did), you will need to cross a river. In that case, bring some water shoes and a little towel.

Hiking trails to Snækollur

There is one main hiking trail to Snækollur. It begins next to the Hveradalir geothermal area car park and leads first to the peak of Fannborg and then to Snækollur. It can only be done as an out-and-back trail. The main route is the easiest one for orientation.

snaekollur hike map kerlingarfjoll

Various hiking trails to Snaekollur, most of them unmarked

Then there are also several unmarked hiking trails leading to and from Snækollur. It was almost impossible to get any info about ANY of these trails, even the marked one, before our trip. This was also one of the main reasons why I decided to write this article.

All the alternative routes to make a “loop trail” are unmarked or barely marked. We’ve chosen one of these loop trails. And it was pretty hard to follow. I recommend instead taking the marked trail to Snaekollur and back the same way.

Before every trip check weather forecast, road conditions, and safety warnings.

Fannborg car park to Snaekollur – the main trail

When you drive to Hveradalir, coming from the Kerlingarfjöll campsite direction, there’s an often-overlooked detour left, a few hundred meters before reaching Hveradalir. This detour will take you to the Fannborg car park.

This is the beginning spot for the only marked trail to Snaekollur. We took this route on our way down, returning from the peak. This is the recommended trail. We describe it in detail in the section about the descent.

The barely marked loop trail we took (not recommended – take the main trail instead). Powered by Wikiloc

Hveradalir car park to Snaekollur – mostly unmarked

This is the trail we took on our way up. It starts at a Hveradalir hot springs area (marked) and follows as an unmarked detour towards the river crossing. You then steeply and steadily climb upwards to Fannborg, where you will join the marked main Fannborg trail. For more details, see our Snækollur experience below.

Other trails – mostly unmarked

There are multiple other, mostly unmarked trails leading to and around Snaekollur – see our Snækollur trails map. Most of them were covered by deep snow at the time of our visit in July. I strongly advise against taking these trails without a local guide. There’s a risk of an avalanche and dangerous falls.

Our Snækollur hiking experience

snaekollur hike kerlingarfjoll

Views from the Snækollur hike in Kerlingarfjöll

Since our first visit to Kerlingarfjöll, I wanted to see Kerlingarfjöll also in nice weather, which seemed almost impossible. I’ve been watching the forecast for quite some time, and Kerlingarfjöll had the worst weather possible for most of the time. The same happened last July when I was planning our 2nd visit.

Trail and Conditions

We began our hike to Snaekollur at 11:00 after a long morning drive from Selfoss to Kerlingarfjöll in the middle of July. The weather was very nice when it came to Kerlingarfjöll – cloudy, no rain, little wind, and occasional sun fighting through the clouds.

It was not ideal, though. From time to time, some huge fog clouds appeared, especially the higher we were on the trail. Nevertheless, this was definitely very good weather for the hike.

Snækollur hike views

Snækollur hike views

We chose a loop trail that starts in Hveradalir hot spring area, follows a marked path in Hveradalir towards Hverabotn, and then it turns into an unmarked trail as a direct ascent to Fannborg. Once reaching Fannborg, it then continues via a classical partially marked trail to Snækollur.

We finished at Snækollur, turned back, took the main marked trail down via snowfields to reach the north-eastern Fannborg car park, and then walked back to Hveradalir. This was our Snækollur hiking trail in a nutshell. Now how did it look in detail?

Ascent from Hveradalir

We left the car in a classical Hveradalir car park, where visitors of all the Hveradalir hot spring area park. Firstly, we descended to the famous hot spring area. Several short hiking trails lead all around Hveradalir, so we struggled a bit to connect to the correct path toward Snaekollur.

Following the Wikiloc trail on our cell phones definitely helped a lot. In Hveradalir, we turned left, climbed stairs onto a nearby hill, and continued hiking the otherworldly landscapes of Kerlingarfjöll for a few hundred meters.

hveradalir ascent to snaekollur

Beginning of the unmarked trail from Hveradalir to Snækollur

The marked trail then starts turning right. However, this is the direction toward another hot spring area called Hverabotn, not the right direction for our hike. Firstly, we got confused and hiked a little bit in this direction, but then we realized we had to take a different – unmarked – trail, so we did.

We followed some barely visible footsteps, which anyway disappeared for most of the time, and mostly used Wikiloc GPS trail for orientation.

Please never ever step on moss or fragile orange soil. It may never recover. If unsure, you better take a marked trail.

River crossing

We reached the point where there was no other way than to cross the nearby river. We searched for a suitable spot for a while and had to descend down to the river via slippery hills, following the almost invisible footsteps and our GPS.

At times even GPS didn’t help because its precision is relatively poor without a satellite connection. Nonetheless, we were surrounded by the fantastic beauty of Kerlingarfjöll and full of energy and motivation to reach Snaekollur.

We finally found an (at least for us) suitable crossing point. We removed our shoes, put on our wading shoes, and quickly crossed the ice-cold river stream.

Soon after the river crossing, another obstacle appeared right in front of us. A large, melting snowpack was blocking the (at least what we thought to be) trail, so we had to find a safe and careful way around it.

A word of caution – never step on any moss in Iceland, and don’t step on the ground in a way that the soil below your feet falls down. This can cause erosion to the fragile soil. If this is the case, find a different path or turn back.

The Worst Part

After about 20 minutes of searching for the best spot to climb the nearby hill, we finally found our way. We finished the very steep and slippery ascent with the substantial help of our hiking poles. This was one of the worst spots of the entire hike – hard orientation and risk of falling down. That’s why we instead recommend taking the main marked trail.

Snækollur hiking trail ascent

Snækollur hiking trail ascent

The footsteps completely disappeared at this point, and we only had to use our GPS trail. GPS was inaccurate and often led directly via deeper snowfields, which didn’t feel safe to cross through.

During this part, we basically had to traverse a lot between snowfields and take special care to step only on stones and gravel and head towards Fannborg. This is precisely the point where you need good visibility. I cannot imagine heading towards Fannborg if we didn’t see it before us.

Fannborg ascent

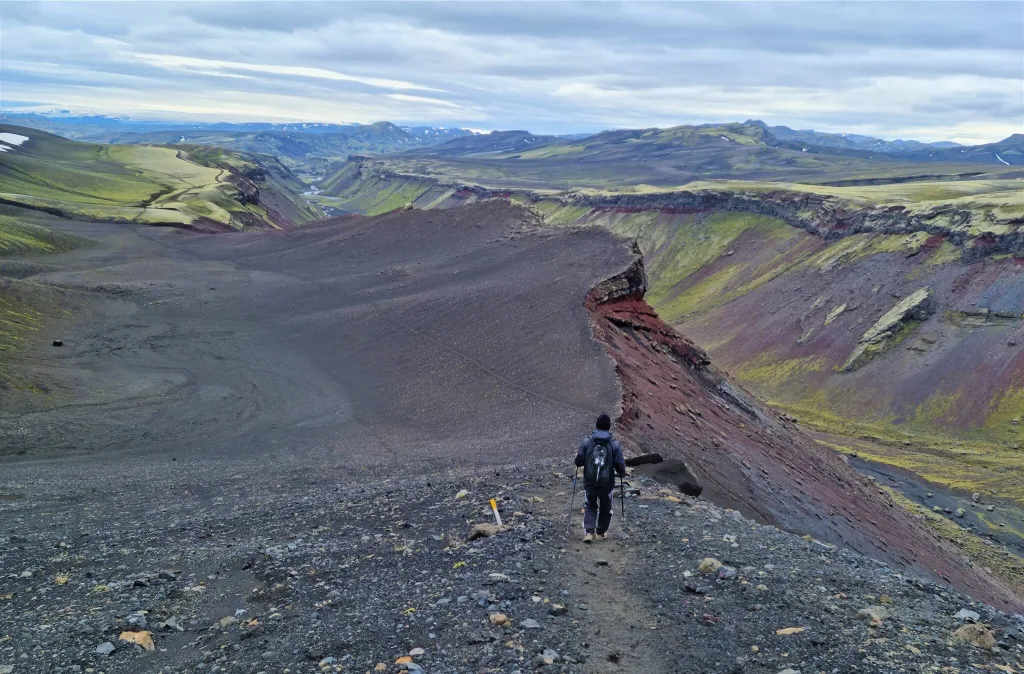
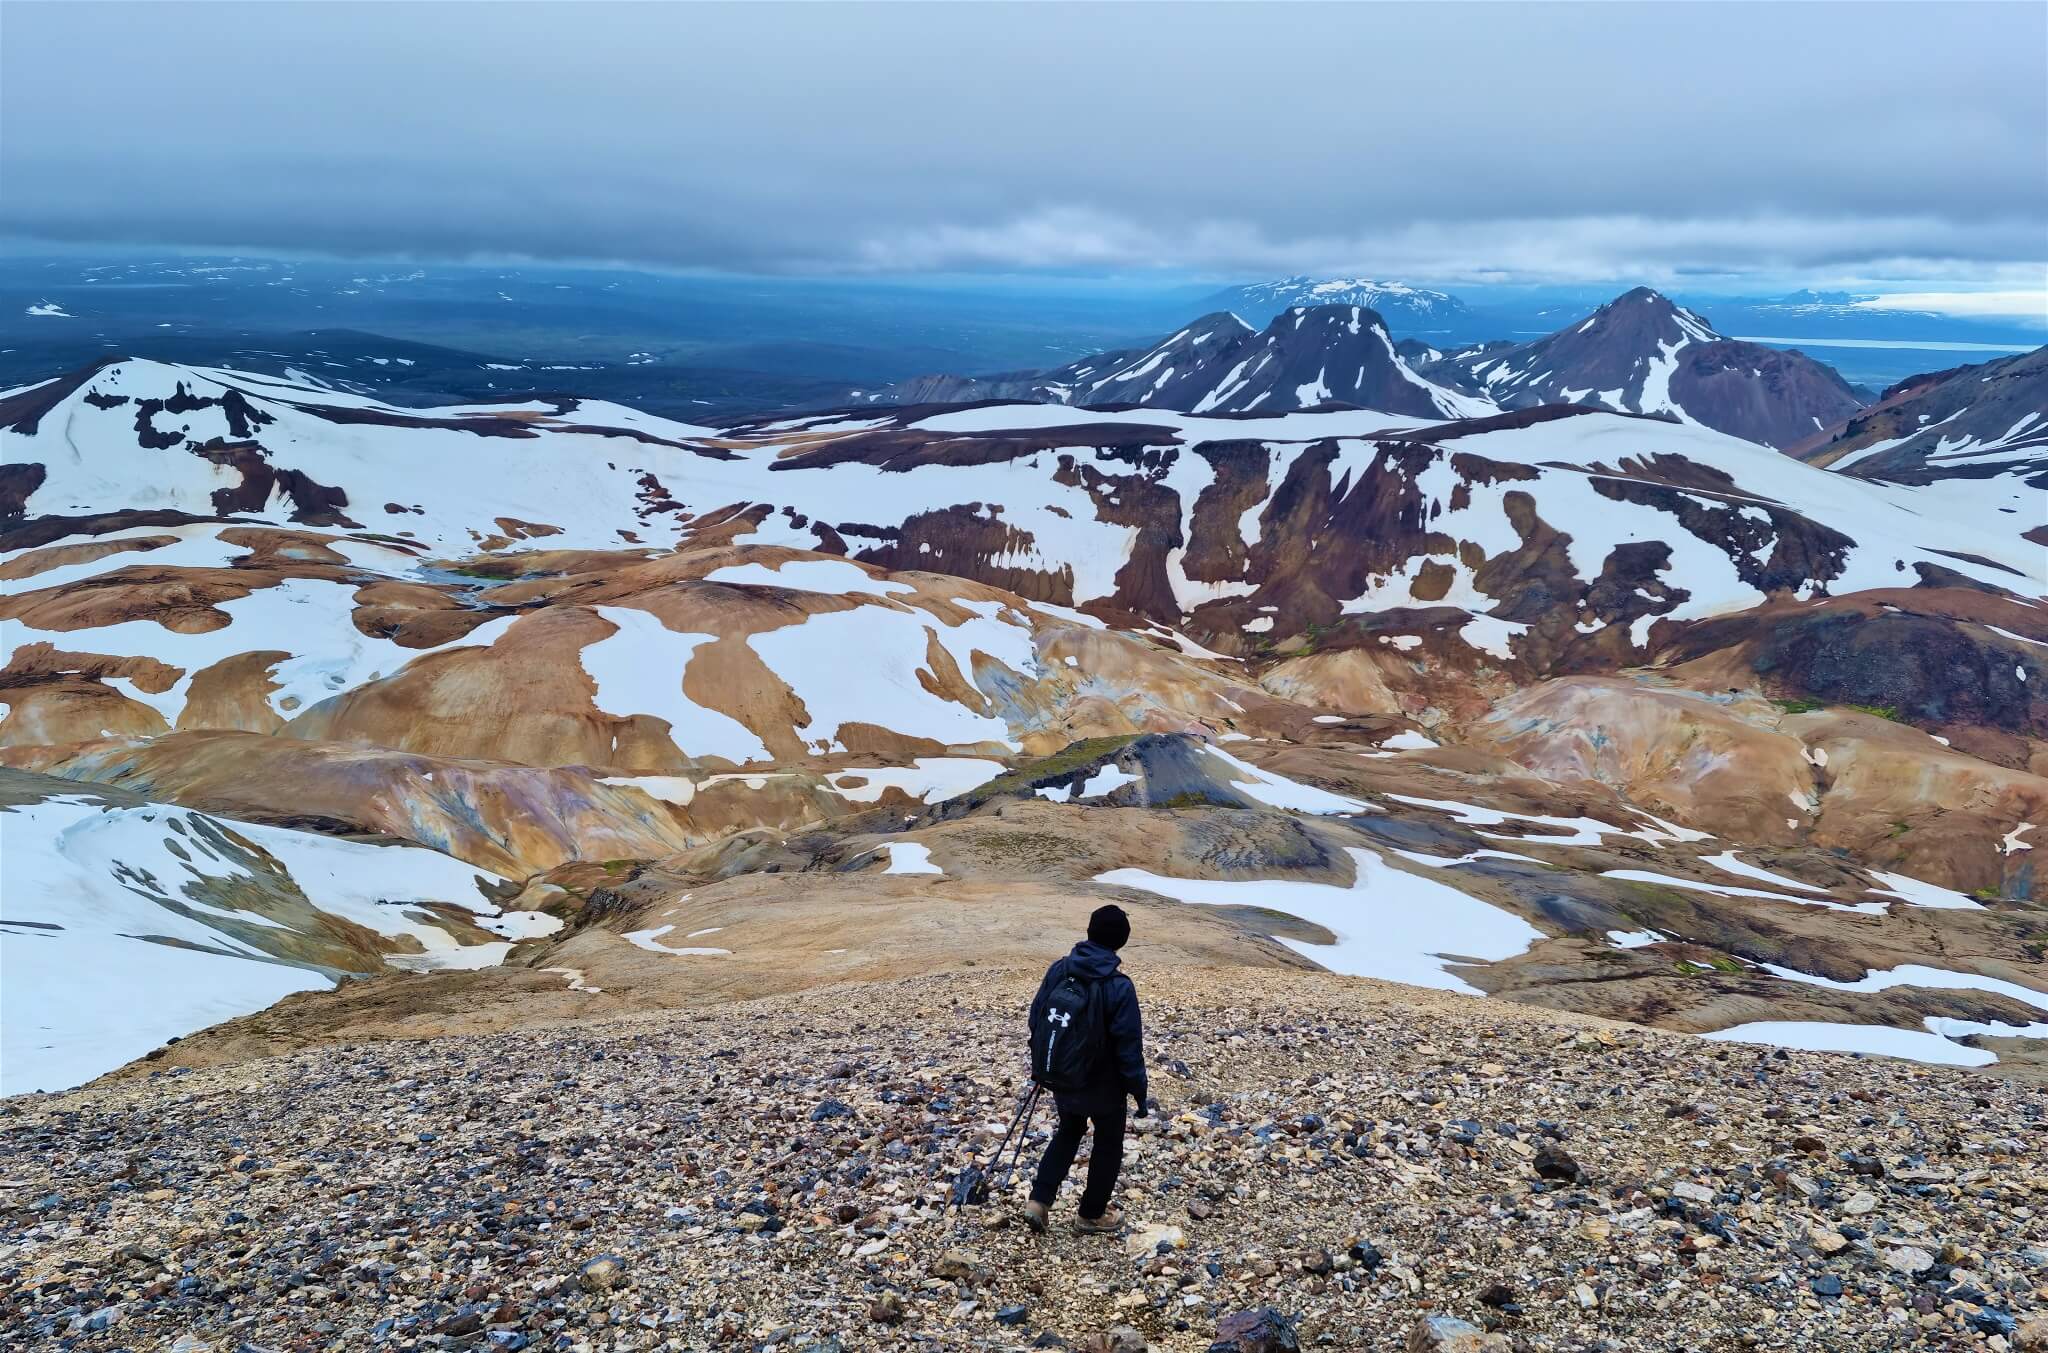
What followed was the steep and steady ascent towards Fannborg, with the ground covered by trillions of pieces of broken stones. With each step, we were getting more and more rewarded with better and better views of the entire Kerlingarfjöll area. You will not get these views anywhere else, only from this hike.

snaekollur trek kerlingarfjoll

Between Fannborg and Snækollur

After about less than an hour, we successfully connected to the (supposedly) yellow-marked hiking trail leading from the left (from the Fannborg car park) and continuing up to Fannborg and Snaekollur. The only thing was – the marks were not there 🙂 However, the footsteps on the ground were more evident, so we could follow them more easily. Finally, some guidance.

We reached the peak of Fannborg after 2.5 hours of hiking from Hveradalir. On a nice day with good visibility, views from Fannborg are already more than impressive.

If, for whatever reason, you are unable or just don’t want to continue all the way to Snaekollur, you don’t need to regret it too hard because you will already see close to the best available views from Fannborg.

fannborg kerlingarfjoll views

Views from Fannborg, the peak right before Snaekollur

Nevertheless, we initially thought we’d already reached Snækollur when we got to Fannborg. Only after checking the GPS, I wondered why it still shows less than one more kilometer to go.

Unfortunately, after we climbed to Fannborg, the fog settled down more intensely, interrupting our breathtaking views. At that moment, we contemplated ending the hike at Fannborg and turning back because continuing with almost zero visibility didn’t make sense. Moreover, Snækollur seemed still quite far away and not that easy to reach with a lot of snow on the trail.

Snækollur ridge

My cousin co-hiker, however, persuaded me to finish our hiking plan, no matter the weather. And luckily, I agreed. In the same way, the fog had started to settle down, it slowly faded away in a few minutes, and our spectacular views got even better.

snaekollur ridge snow

Snaekollur hike – ridge with snow

360° views into Kerlingarfjöll, Hveradalir, and around all nearby hills and hot springs partially covered with snow and partially with out-of-this-world orange and blue colors were simply overwhelming.

That being said, we still had to hike for quite some time through the ridge leading from Fannborg to Snaekollur. There was still a lot of snow on this part of the trail, so we had to be careful, and hiking poles came really handy here. We also had crampons in our backpacks but didn’t need them because the snow was soft, and the problem wasn’t the grip on the snow but the fear of falling deep into the snow. And, obviously, you don’t know what’s below the snow.

Firstly, we had to descend a bit from Fannborg, only to ascend again a few hundred meters later. The trail was not evident from a distance and sometimes not even clear a few meters ahead.

We reached the point where we had no other option than just to go through the snowfield and slightly climb over the big rock. During this part, we passed some pretty exposed spots of the trail, with steep falls on both sides. Luckily, the snow was firm enough to hold us, which we’d tried to test before stepping on it.

snaekollur peak kerlingarfjoll

At the peak of Snækollur

Finally, the last and the steepest climb took us to our final destination – the peak of Snækollur. It was hard but totally worth it! We felt like having climbed the Icelandic version of Mt. Everest.

Snækollur, the highest peak of the entire Kerlingarfjöll, obviously offers the best views out there over the Kerlingarfjöll area. We were lucky with good visibility and pleasant weather. Although cloudy, the clouds were high enough not to block our views and small enough not to produce rain. On a nice day, views from Snækollur could easily qualify as a natural wonder.

Descent – partially marked trail

If it wasn’t so cold out there, we would have stayed and admired the views for at least an hour. However, the reality was a bit harsher, with around 5°C (41°F) and occasional wind, up at Snaekollur. This meant that, by just sitting or standing, we started to feel pretty cold, and thus, we were pretty motivated to move again.

descent from fannborg

Descent from Fannborg

We had to return via the same steep and exposed parts, partially covered with snow, to reach Fannborg again (see section Snækollur ridge). Then we continued further down, now via the yellow-marked trail leading to the north-east. We got back to the little crossroads of our unmarked trail, which we used for the climb up and of a (supposedly) marked path with footsteps leading eastwards (to the right).

The trail led diagonally downwards on the slope of Fannborg, with billions of broken stones forming the ground. Still no marks, just footsteps. Eventually, we reached the point where there were only snowfields to continue through. One gigantic, which didn’t look very safe, and one smaller, with what looked like some old footsteps. We opted for the smaller snowfield with (hopefully) footsteps.

My cousin checked the snowfield, and it seemed to be pretty firm. Hence, we began our snowfield descent. Luckily, everything went alright. After crossing the biggest snowfield of our trip, we finally saw a stick in the ground. Is this supposed to be the mark or just the random stick? Yes, it turned out to be a mark, because it was followed by another yellow bar soon.

snaekollur trail snowfields

Snækollur hiking trail snowfields

Finally – a first real trail mark after 4 hours of hiking. This made the descent much more straightforward, and no other obstacles were on the trail. Soon we arrived at the Fannborg car park and headed back to the Hveradalir car park, which is about 10 minutes of walking on F347 away.

To sum up, the north-eastern (supposedly) marked trail to Fannborg is definitely easier in many aspects:

  1. The bottom part of this trail is marked, making orientation easier.
  2. Even after marks end, there should be trodden footsteps to follow in summer.
  3. This trail is much shorter. The unmarked trail via Hveradalir was more adventurous, but I instead recommend you take the partially marked trail from the separate Fannborg car park.
kerlingarfjoll highest peak view

Bird’s eye views of still snowy Kerlingarfjöll even in July, after the hard winter

YOU MAY ALSO LIKE:

epic iceland facebook group ask questions or get inspired in our community

Posted by Igor in Highlands, Hikes, 0 comments
Hveravellir Hot Springs: 2025 Guide + Hiking Trails

Hveravellir Hot Springs: 2025 Guide + Hiking Trails

Hveravellir Hot Springs is a nice natural geothermal site in the middle of the highlands, pretty close to the famous Kerlingarfjöll.

Hveravellir is mostly special because there are several natural hot springs, and these things called fumaroles that bubble up from the ground. You can even take a dip in one of these natural hot pools.

There are also numerous trails for hiking, a little cafe, and a campsite. Hveravellir is surrounded by the remote area of the Kjolur Highland road, with great views of two big glaciers, Langjökull and Hofsjökull. It’s definitely worth a visit if you’re into very remote lands and a bit of adventure.

How to get to Hveravellir

Unlike many other places in the Icelandic Highlands, Hveravellir is rather easy to reach. You can get to Hveravellir by driving or by a guided tour.

By Car

Road 35, or in Icelandic Kjölur or Kjalvegur, followed by Road 735, will get you to Hveravellir hot springs. These are both gravel roads where you officially don’t even need a 4wd car.

That being said, I do recommend driving a car with higher ground clearance, like Dacia Duster, which is typically also a 4wd car. The roads are bumpy and rough, with no river crossings.

When driving the highland roads in Iceland, always check the road conditions in advance, along with the official Icelandic weather forecast and current safety warnings!

f35 kjalvegur

F35, aka Kjalvegur, near Hveravellir

By Bus

There used to be a bus service from Reykjavik, but it has been recently canceled.

10% discount code for Kerlingarfjoll + Hveravellir guided tour: EPICICELAND

By Tour

You can take a Hveravellir guided tour from Akureyri. The trip combines a visit to Kerlingarfjöll and Hveravellir to make the most of your day.

When to visit Hveravellir

The easiest and most popular time to visit Hveravellir is during Icelandic summer, i.e. between June and October.

Hveravellir hot springs

Hveravellir hot springs area, source: http://www.icelandofmine.com

Summer

Roads to Hveravellir typically become snow-free and mud-free sometimes between the end of May and the end of June. This is when the Icelandic Road Administration marks the road as “Easily Passable” instead of impassable.

Summer is the best time to visit Hveravellir because you can get there easily, hike freely in the area and there’s no danger of storms.

Roads to Hveravellir then become impassable again anytime between mid-September and the end of October once the new snow settles in.

Winter

It’s possible to visit Hveravellir also in winter and experience there fabulous Northern Lights, but only by a private jeep tour.

Top Things to Do in Hveravellir

Hveravellir is rather undeveloped without too many things to do. Yet hikers and hot springs enthusiasts will definitely have a fun time in here.

Hveravellir Hot Spring

hveravellir main bathing hot pool

Hveravellir main bathing hot pool

The number one thing to do in Hveravellir is undoubtedly the main Hveravellir hot spring. Bathing in a picturesque hot spring in the middle of nowhere is an unforgettable experience in any weather.

Hiking to Other Hot Springs

hveravellir hiking trails

Hiking around hot springs in Hveravellir

There are also many other hot pots and fumaroles where you can’t bathe, but you may still hike around them.

After seeing many other amazing places in Iceland, we found them a bit underwhelming, though. You can read more about our Hveravellir experience below.

Our tip: if you are short on time, take just a dip in the main hot spring. This was the highlight of our Hveravellir visit

Hveravellir Mountain Cafe

Right next to the parking lot, there’s a cute little cafe inside the Hveravellir Lodge. The lodge serves as a highland accommodation. You can also pitch your tent at the Hveravellir campsite right next to the lodge.

Hiking around Hveravellir

hveravellir hot springs iceland

The easiest hiking trail around Hveravellir hot springs takes about 20 minutes.

There are numerous hiking options in Hveravellir. The easiest but also the least spectacular option is just to wander around the main hot spring area.

The alternatives include longer hikes, where you will see some better views of the area, though not the best in Iceland in our opinion.

Hveravellir Hiking Trails

Hveravellir’s hiking trails offer harsh landscapes and historical points of interest entirely away from crowds or any civilization. The three main routes are the Green Trail, the Red Trail, and the Orange Trail.

Green Trail

hveravellir green hiking trail

Green hiking trail in Hveravellir. Source: www.hveravellir.is

Route: Eyvindarrétt Circle 
Length: 3km (1.8mi) 
Walking time: 30-50min
Elevation: almost none

The Green Trail takes you through a route lined with lava fields, moss heath, and heathland. If you’re lucky, you might even encounter an Arctic fox.

As you traverse this trail, one of the main points of interest is Eyvindarhellir, also known as Eyvindur’s cave. This was where Eyvindur and his wife took refuge with their sheep.

Alongside, you’ll also come across Eyvindarrétt, an impressive volcanic rock structure once used for sheep herding.

Red Trail

strytur hveravellir red hiking trail

Strýtur at the red hiking trail, source: www.hveravellir.is

Route: from Hveravellir to Strýtur and back 
Length: 12km (7.5mi) 
Walking time: 3-5 hours
Elevation: 240m (800ft)

Although a bit longer, the Red Hiking Trail in Hveravellir isn’t demanding, and anyone in fair shape can manage it. The trail offers a blend of grey, black, and brown colors, remnants of lava and volcanic ashes.

As you traverse this path, you’ll see steam escaping from beneath the lava and cross a few tiny streams. A nice stop is Strýtur crater, located amidst the lava field. It erupted roughly 7,000 years ago and is generally flat and vegetated, making it relatively easy to cross. You can even walk around Strýtur and even inside the crater.

On clear days, seeing glaciers, including the impressive Hrútfell, is a beautiful bonus.

Orange Trail

hveravellir orange hiking trail

Hveravellir orange hiking trail, source: www.hveravellir.is

Route: from Hveravellir to Þjófadalir and back 
Length: 21km (13mi) 
Walking time: 5-6 hours
Elevation: 150m (500ft)

The Orange Trail is straightforward and mostly flat, offering a diverse landscape to enjoy.

The literal translation of Þjófadalir would be the Valleys of the Thieves because several places in the area were used as hideouts for outlaws.

You will see lava fields, flowers, berries, and great views on this trek. The most spectacular ones are views over the mountain “Mt. Redhead” (Rauðkollur), the Langjökull glacier, and also of Kerlingarfjöll and Hofsjökull glacier.

Our experience with Hveravellir

Distance from car park: 2 minutes (hot spring)
Time spent at: 1 hour 
Worth visiting even with bad weather: yes
Physical condition needed: little 
Interesting index: 3 – nice  (1-amazing, 2-great, 3-nice)

I had been so excited to visit Hveravellir, imagining a crystal blue bubbling hot spring in my mind. I had read about the multiple hot springs in the area and seen some absolutely mesmerizing photos, so I was really looking forward to experiencing it all for ourselves.

hveravellir hot spring iceland

This is a typical picture of Hveravellir hot spring you will find on the internet. Real? Not really. Just post-processed.

Arrival

However, when we finally arrived, I was a bit underwhelmed. Don’t get me wrong, the Hveravellir area was nice enough, but it just didn’t quite measure up to some of the other stunning landscapes we had seen in Iceland.

When we got to Hveravellir from road (F)35, it was a quick and easy drive to a parking area by a charming little restaurant.

Exclusive Discount codes for Car Rentals and Guided tours in Iceland for our readers.

Our Hot Spring Experience

There was a public hot spring right next to the parking lot that was really nice, although it was pretty crowded since it was so convenient. Despite our visit in the midst of the ongoing Covid-19 crisis!

The hot spring itself was quite spacious, and the water was a lovely temperature, around 38°C from what I could tell.

hveravellir main hot spring

Hveravellir main hot spring, source: www.hveravellir.is

However, the air temperature was surprisingly chilly, even in August, hovering around 7-8°C. So, it’s definitely important to come prepared for those kinds of conditions, especially since you’re up in the highlands of Iceland.

Our Search for Other Hot Springs

We decided to take a chance and visit also the other hot springs in search of those mesmerizing photos I mentioned in the beginning. We had heard that there were multiple hot springs, so we set out to explore and hopefully find some that were less crowded.

We followed one of the hiking trails, which was an easy, flat path through fields with a great view, but no steam or hot springs in sight. We kept walking, hoping to stumble upon them, but after 20 minutes, we still had not found anything. Although we didn’t mind the walk, the scenery was unremarkable and lacked any exciting sights.

hveravellir trail

Hveravellir hiking trail. Pretty dull landscapes compared to other ones in Iceland

We did meet some sheep along the way, but they didn’t seem to know where the hot springs were either. Eventually, we reached a small hill, and I scanned the area, but still no hot springs in sight. We decided to take a different path on our way back, hoping for better luck.

Despite returning by the second trail, we still couldn’t find any hot springs. I was really looking forward to experiencing the stunning hot springs I had seen online, so I was determined to find them. As a last resort, we asked for help at a nearby restaurant.

hveravellir trail sheep

Sheep around Hveravellir trail

The staff member informed us that the only hot spring suitable for bathing was the one by the car park. The others were further away and not meant for bathing. With this information, our enthusiasm waned, and we decided to bathe in the only hot spring we had found.

Our take on Hveravellir

To be clear, Hveravellir, like almost every place in Iceland, is a beautiful place. Our disappointment stemmed from the difference between our huge expectations and what we actually experienced that day. Nice, but not overwhelming, like many other top Icelandic places.

YOU MAY ALSO LIKE:
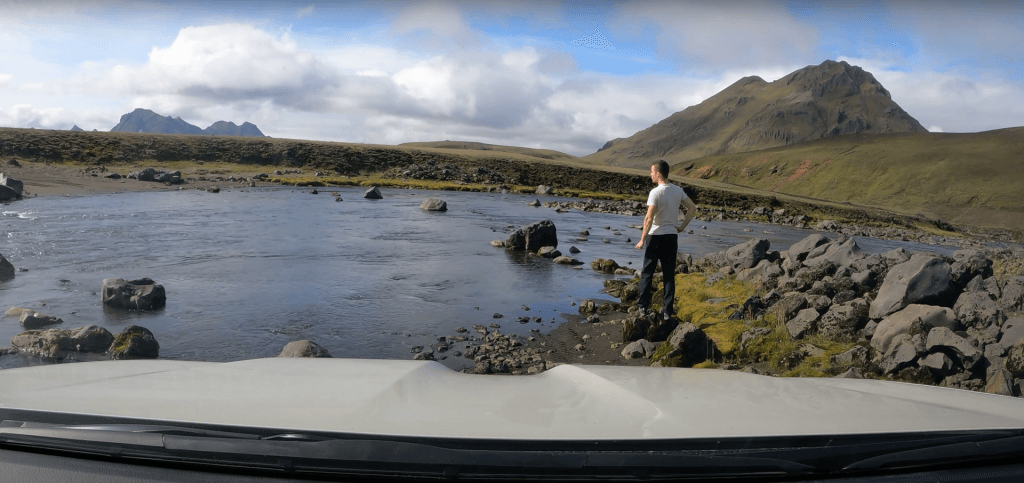
epic iceland facebook group ask questions or get inspired in our community

Posted by Igor in Highlands, 2 comments
Top 25 Places in the Highlands of Iceland

Top 25 Places in the Highlands of Iceland

When searching for the top places in the highlands of Iceland, you will often find the same 5 or 6 spots being listed all over again. We will take a different approach.

We have spent months over several years exploring Icelandic highlands and have personally been to all the spots we write about in this article. We’ve compiled this list of the 25 most amazing places in the highlands based on our own experience with lots of personal tips.

Highlands have a special place in our hearts. New hidden corners pop out each time we come back, which is why we love them so much. It’s scarce these days to find spots like these in a civilized and safe country, which Iceland undoubtedly is!

Map

1. Thórsmörk

thorsmork valahnjukur top view

Thórsmörk offers amazing hikes and is one of the best places in the Highlands of Iceland

Why go

If we had to pick the three most beautiful places in the Icelandic Highland, Thórsmörk would surely be among them. The Valley of Thor, or in Icelandic “Por”, is a one-of-its-kind hiking area full of incredible rivers and lush green canyons.

Thórsmörk is a hiker’s paradise and a dream destination for any highlands enthusiast seeking shelter from the crowds of typical touristy destinations.

How to get there

Getting to Thórsmörk is tricky and complicated. We wrote a detailed guide about Thórsmörk to help you plan your trip. You can go by bus (10% discount code: EPICICELAND), join a guided tour or drive there yourself.

10% discount code for the best local Thórsmörk super jeep tour from Hvolsvöllur: EPICICELAND10

In short, the highland road F249 leads to Thórsmörk. It contains several river crossings, which get bigger and bigger the further you drive into the valley. The most significant river crossing is the infamous Krossá River, and it should never be attempted without a guide.

It’s possible to reach Básar hut in Thórsmörk and also all the most beautiful spots by driving yourself if you follow the three rules below:

We can also take you to Þórsmörk on our fully tailored Epic Private tour. Just e-mail us at [email protected]!

Tip from a local

The three most photogenic spots in Thórsmörk we enjoyed the most are:

2. Askja

askja oskjuvatn viti

Askja

Why go

Askja is one of the most magical places in Iceland. It’s an old crater filled with crystal-clear and warm water where you can even bathe!

10% discount code for the best Askja super jeep tour from Akureyri: EPICICELAND

Askja is our favorite because the drive there and the visit to the Askja volcano genuinely feel like hiking on another planet. We wrote a detailed guide on visiting Askja to help you prepare for the trip.

How to get there

The drive to Askja is long but worth every hour. All routes involve crossing medium-sized rivers. The two most accessible options to reach Askja are:

  • Eastern route (slower, more versatile, and adventurous), via F-roads F905, F910, and F894.
  • Northern route (quicker, along beautiful Herdubreid volcano), via F-roads F88, F910, and F894.

Alternatively, you can take a super jeep tour to Askja from Akureyri.

This is a volcanic area. Have a quick chat with a ranger in Dreki before every trip to check the current seismic conditions. You can also give him a call in advance.

Tip from a local

You can hike down to the bottom of Askja Caldera on a nice day. The hike is short, steep, and slippery. Bring hiking poles to avoid any injuries. When swimming in Askja, follow the signs to avoid areas with dangerous geothermal activity.

3. Kerlingarfjöll

kerlingarfjoll hveradalir stairs

Kerlingarfjöll can rightly be marked as one of the top places in the Icelandic Highlands

Why go

Kerlingarfjöll is a must-see place in the highlands of Iceland because of its unique orange-colored soil. You will hardly find similarly picturesque hiking trails anywhere else. And that is not all Kerlingarfjöll has to offer!

The most famous part of Kerlingarfjöll is a geothermal area full of little hot springs called Hveradalir. You can take several different hikes from Hveradalir. All of them are amazingly beautiful, with pieces of snow contrasting the orange mountains even in summer.

There is also one hidden hot spring where you may soak yourself in with a view over a remote canyon. You can reach the hotpot via a 1-hour hike from the Kerlingarfjöll mountain resort.

How to get there

Kerlingarfjöll is one of the easiest-to-reach places in the highlands. Just take Road 35 and then an F-road F347. These roads have no river crossings, and they are typically accessible from June to October. Any 4wd car would be sufficient to drive these roads.

10% discount code for the great Kerlingarfjöll guided bus tour from Reykjavik: EPICICELAND24

The accessibility of Kerlingarfjöll will soon improve even further. The new luxurious Highland Base will open there in the summer of 2023, and the connecting roads will likely improve even more.

10% discount code for the best Kerlingarfjöll super jeep tour from Akureyri: EPICICELAND

Alternatively, you can also take a super jeep tour to Kerlingarfjöll from Akureyri or a guided tour to Kerlingarfjöll from Reykjavik.

Tip from a local

Kerlingarfjöll is often very foggy and rainy. If you want to enjoy it to the fullest, wait for a day with clear skies, you will not regret it! We visited the orange mountains several times and never had clear skies, so it will be challenging.

4. Langisjór

langisjór lake iceland

View over the Langisjór lake from the Sveinstindur trail

Why go

Lake Langisjór is one of the most beautiful lakes in Iceland. It is well hidden from any crowds deep in the Icelandic Highlands. Standing alone in total silence and observing the crystal-clear waters of Langisjór is almost a soul-healing experience.

There are also many amazing hikes and roads leading to and around Lake Langisjór, making it one of the best places in the highlands of Iceland. The most beautiful hike in the area is definitely a hike to the mountain Sveinstindur.

How to get there

The easiest way to reach Langisjór is to take an F-road F235. This is one of the easiest F-roads in Iceland, with only small river crossings. Moreover, the surrounding moon-like landscapes make it totally worth a drive!

All you need to know about How to Choose the Best Car for Iceland.

You need a medium-sized 4×4 car to reach Langisjór because the connecting road F208 is slightly harder to drive with medium river crossings.

There are also three alternative roads leading to Langisjór, or better said, dirt tracks. These are mainly for off-road enthusiasts, and all require a big 4×4 car or a super jeep. Their names are Skaelingar-Blautulón track, Faxasund track, and Botnlangalón track.

Don’t want to go on your own? We can take you on our Epic Langisjór Private tour! E-mail us your wishes at [email protected]!

Tip from a local

If you want the best view over the entire Langisjór area, hike Mt. Sveinstindur. The panoramic views from the summit of Sveinstindur on a nice day are unbelievable.

5. Maelifell

road maelifell volcano iceland

Maelifell volcano

Why go

Maelifell is Iceland’s most famous and picturesque volcano, and deservedly so! The otherworldly green volcano sits right in the middle of the black ash desert, making Maelifell one of the top places in the Icelandic Highlands.

Visiting Maelifell was one of the most surreal moments of all our trips around Iceland. The atmosphere surrounding the volcano is almost indescribable, and you have to experience it yourself!

How to get there

The journey to Maelifell is even more adventurous than hiking the volcano itself. We described it in our step-by-step guide to reaching Maelifell.

Discounts for our readers on Icelandic car rentals and Guided tours.

In short, you have several options. None of them is easy, and all require at least a sizeable 4wd car like Land Cruiser and involve crossing medium-sized rivers. The most popular routes include:

  • Southern route (the easiest), via road F232 as an out-and-back trip
  • Western route (the most beautiful), via roads F210 and/or F261
  • Eastern route via roads 210 and F210

We can also take you to Mælifell on our fully customized Private Maelifell tour.

Tip from a local

If you are an experienced hiker, you may try to hike all the way to the top of Maelifell. Beware, though; it’s a steep and slippery hike. Wait also for nice weather; the trek doesn’t make sense in a fog.

6. Landmannalaugar

landmannalaugar Grænihryggur hike iceland

Unbelievably colorful Landmannalaugar can’t miss among the top places in Icelandic Highland

Why go

The rainbow mountains of Landmannalaugar proudly belong to an exclusive club of the most impressive spots in the highland of Iceland.

If you want to see one of the most colorful places on earth, then take a hike in Landmannalaugar! Not only are the rainbow mountains astonishingly picturesque, they are also pretty safe to visit. There’s a campsite, Landmannalaugar hot spring, and you will also meet many fellow hikers.

There are several magnificent hikes of various difficulties and lengths in Landmannalaugar. If you are fit enough, we highly recommend hiking an Orange Mountain – Blue Mountain loop trail. When taking this trail, you will enjoy some of the best views in Landmannalaugar.

How to get there

You can take a bus (10% discount code: EPICICELAND), hop on a super jeep tour or drive there yourself. Roads to Landmannalaugar are open for tourist driving only in summer, typically from June until September. Super jeep tours can access Landmannalaugar almost all year round, though.

10% discount code for the best local Landmannalaugar super jeep tour from Hvolsvöllur: EPICICELAND10

There are three main routes leading to Landmannalaugar:

  • Northern route (the easiest), via roads 26, 208, and F224, small 4wd car required
  • Western route (the quickest), via roads 26, F225, and F224, medium 4wd car required
  • Southern route (the most beautiful), via roads F208 and F224, medium 4wd car required

10% discount code for the great Landmannalaugar guided bus tour from Reykjavik: EPICICELAND24

If you want to be alone and fully flexible, we can take you on an Epic Private Landmannalaugar tour!

Tip from a local

One day is enough to explore the most beautiful hikes in Landmannalaugar, like Bláhnúkur or Brennisteinsalda. However, if you want to go more off-the-beaten-path, go for two days. With two days, you will also have a higher chance of catching the nice weather with clear skies.

7. Thakgil

yellow hiking trail austurafrettur Þakgil iceland

Views from Thakgil hikes are one of its kind

Why go

Thakgil is a paradise for all hiking enthusiasts. You will find gigantic canyons, melting glaciers, hundreds of waterfalls, and lush green canyons almost instantaneously.

Together with Thórsmörk and Landmannalaugar, Thakgil is one of Iceland’s three must-see hiking areas. It is its unique canyon ecosystem you won’t find anywhere else in Iceland or even in the world!

Thakgil hikes are of various difficulties and lengths. Be sure to check the map of the Thakgil trails, as well as what you can expect. Avoid heavy rain or strong winds; they can make hiking uncomfortable and dangerous.

How to get there

Getting to Thakgil is very straightforward. There’s just one route leading there – Road 214 to Thakgil. The road is open only in summer, usually from June until September, and is very bumpy.

All you need to know about visiting Highlands in Iceland.

Technically, you can drive to Thakgil in any car. Given the bumpiness of the road, it’s advantageous to take a vehicle with higher ground clearance, though, for example, Dacia Duster, to avoid any car damage.

Tip from a local

If you can spend a whole day in Thakgil, we highly recommend hiking to the melting Huldujökull glacier. It’s a once-in-a-lifetime experience to see the glacier with your bare eyes! We suggest taking a yellow and red trail loop if you are a good hiker. It offers the most beautiful views over Thakgil.

8. Laki craters

laki crater hike

Mount Laki views at Laki craters are a must-see in the Highlands of Iceland

Why go

Fancy a volcano? What about more than ten volcanos? When visiting Laki, you will see even more!

Laki craters are an area full of many hundreds of years old volcanos and craters, which changed the history of Europe. These days they are luckily already covered with flourishing moss. You can become a part of this surreal scene if you visit this extraordinary place in the highlands.

Don’t forget to also stop by the spectacular Fagrifoss waterfall along the way and the fairy-tale-like Tjarnargigur Lake! We wrote a guide on all you need to know about Laki craters.

How to get there

You can get to Laki Craters by a proper 4wd car or take a guided super jeep tour. Two F-roads lead to Laki – F206 and F207. A medium-sized 4×4 car is a minimum, and a large 4×4 car is definitely advantageous.

How to rent a super jeep in Iceland?

Roads to Laki craters are slow, bumpy, and full of twists and turns. They are also remote, with sparse network coverage, and involve two river crossings.

You can also take a super jeep tour to Laki.

Tip from a local

The best viewpoint of Laki craters is from Mt. Laki. Don’t miss this spot on a clear day! The hike to Mt. Laki is short and a bit steep but very worth every step! Jaw-dropping 360° views will be your reward soon after you finish the climb.

9. Laugavallalaug

laugavallalaug highlands hot spring

Laugavallalaug hot waterfall spring in the eastern Icelandic Highlands

Why go

Laugavallalaug is one of the wildest hot springs in Iceland. It is actually a hot waterfall! This makes Laugavallalaug an unforgettable experience in the middle of the very remote corner of the Icelandic Highlands.

After a long drive to Lagavallalaug, you will be rewarded with the peaceful surroundings of a small rustling river and sheep gazing at you while you bathe in this otherwordly hotpot.

How to get there

You can get to Laugavallalaug by:

  • Roads 910 and F910 from the south or by
  • Roads 923 or 907 and then F910 from the north

For all F-roads leading to Laugavallalaug, you need to drive at least a small 4wd car.

The Ultimate List of all hot springs in Iceland.

Roads to Laugavallalaug are open and accessible to the public only in summer. Please find detailed info on getting to Laugavallalaug in our Icelandic hot springs guide.

Tip from a local

If you want to be alone at Laugavallalaug, try coming before 10 AM or after 7 PM. When walking from the outdoor changing room, you better take slippers or sandals; you will need to descend down a little hill.

10. Aldeyjarfoss

aldeyjarfoss waterfall iceland

Aldeyjarfoss waterfall

Why go

Aldeyjarfoss is, without a doubt, one of the best waterfalls in the highlands. Its basalt columns are shaped exactly like the cliffs at the famous black sand beach Reynisfjara.

This makes Aldeyjarfoss unique and picturesque, yet not that hard to reach! The major part of the journey to Aldeyjarfoss is a drive, and then it takes just a short hike everyone can make to reach the stunning scenery of the waterfall.

How to get there

The shortest way to reach Aldeyjarfoss is to start in the north near Fossholl and drive south via roads 842 and a short section of F26. Any 4wd car is sufficient for this drive.

The detailed List of 130+ Icelandic Waterfalls.

The second option is to take a long and dark road F26 from the south across entire Iceland. You need to drive a large 4×4 car and already have some experience with river crossings in Iceland to pass F26 safely.

10% discount code for the private Aldeyjarfoss super jeep tour from Akureyri: EPICICELAND

There’s also an option to take a private super jeep tour to Aldeyjarfoss. Our readers can enjoy a 10% discount on this tour as well as all tours by Star Travel with a discount code: EPICICELAND.

Tip from a local

The best times for photography at Aldeyjarfoss are during sunrise and sunset. The more cozy time out of these two is the sunset because you don’t have to get up crazily early.

11. Fjallabak nature reserve

F210 near alftavatn

Just driving the F-roads around Fjallabak Reserve is a once-in-a-lifetime experience

Why go

Fjallabak nature reserve is the name of the immense area in the southern highlands of Iceland. Besides many hidden spots, it also encompasses the famous Landmannalaugar.

Everybody knows about the rainbow mountains of Landmannalaugar, but did you know that tens of fabulously adventurous roads stretch across an entire Fjallabak park?

The most well-known ones are the F-roads F210, F261, or F233, but this is nowhere near the end of the list! Multiple wild and harsh dirt tracks like Hungurfit, Strútur, or Krakatindur also exist.

And why drive these difficult roads? Because you will feel like you are on the moon! There are countless hidden hills, canyons, waterfalls, and even hot springs everywhere around these roads.

How to get there

There are several roads leading to the Fjallabak nature reserve. Some examples include roads F208, F225, F210, or F261.

10% discount code for the Fjallabak super jeep tour from Hvolsvöllur: EPICICELAND10

These roads are no joke! They involve steep and narrow terrain and crossing medium-sized and big-sized rivers. We highly recommend driving at least a large 4×4 jeep around Fjallabak, ideally a super jeep. Alternatively, you can also take a Fjallabak super jeep tour.

If you want to be alone on tour, we can take you on an Epic Private Fjallabak tour; just email us at [email protected] 🙂

Tip from a local

If you want to explore Fjallabak fully, you will need several days. The area is vast, and all drives take a lot of time due to rough terrain.

12. Raudibotn

Rauðibotn waterfalls

Raudibotn waterfalls

Why go

Raudibotn is a tiny natural wonderland hidden in the middle of nowhere, deep in the highlands. The area features cute waterfalls, volcano craters, twisted river beds, and, most importantly – zero visitors!

How to get there

To reach Raudibotn, you can take an easy hike through a lush green valley that starts a few kilometers east of the famous Maelifell volcano. It takes about 3 hours as a roundtrip to complete.

The catch lies in getting to the trailhead. It’s a difficult drive. You can get to Raudibotn from the west or the east.

Roads F261 and F210 leading to Raudibotn from the west are two of the most beautiful Icelandic F-roads; however, they are tough. You have to cross several medium to big rivers. For that, you need a large 4×4 car or a super jeep.

Read about our visit to Raudibotn in detail.

You can reach Raudibotn also from the east, by road F210. This is the easiest way with only small to medium rivers involved and a medium-sized 4wd car required. But you can’t continue any further because both F210 west of Raudibotn and F233 east of Raudibotn contain river crossings that are dangerous for any smaller cars.

Tip from a local

Rent at least a Land Cruiser or a super jeep when visiting the highlands. It will give you the freedom to see much more and an increased safety in case of difficulties.

Afraid to go alone? No tours go to Rauðibotn, but we do! On our Epic private tours, just email us your wishes!

13. Eldgjá

eldgja gjatindur hike iceland

Happy me hiking to Gjátindur over Eldgjá canyon

Why go

Eldgjá Canyon is something like Silfra. Eldgjá is a more than 1000 years old fissure and chain of craters. Many Icelanders think this is one of the most beautiful places in the highlands.

You can take several hikes in Eldgjá. The shortest, easiest, and most popular one is a walk to Ófærufoss, one of the prettiest Icelandic waterfalls.

Read our guide on How to avoid crowds in Iceland.

You can also go for a longer hike to the peak of Gjátindur or continue even further towards Lake Langisjór. All these hikes offer scenic views making Eldgjá worth visiting.

How to get there

You can get to Eldgjá by F-roads F208 and F224 either from the north or from the south. Regardless of the way you choose, you need to cross medium-sized rivers on F208, and for that, you need at least a medium-sized 4wd car. Road F224 is very easy, then.

Tip from a local

After seeing all the other incredible places in the highlands, Eldgjá seemed a bit boring to us. However, a view of the Eldgjá fissure from above is an exception, and we recommend hiking for it. You can reach one of the best viewpoints halfway into the Gjátindur hike shortly after climbing up from the Eldgjá valley.

14. Raudufossar

raudufossar iceland

Rauðufossar, Raudfossar, or Raudafoss – all the different names for the same picturesque waterfall.

Why go

Raudufossar is an unbelievably colored orange waterfall not known to many visitors. It proudly belongs to the top places in the highlands of Iceland.

The hike to Raudufossar is simple and doesn’t require any special experience. You can take a shorter version of the trek, just to the bottom of the waterfall, in about 20 minutes one way.

Read in detail about our trip to Raudufossar.

There’s also an option to hike above the waterfall and continue deeper in the highlands towards the source of Raudufossar. It’s called Raudufossafjoll, and it features another orange waterfall! This part of the hike takes an additional 1 hour one way.

How to get there

Raudufossar trailhead and parking lot are located in the eastern part of the F-road F225. Landmannaleið, or F225, is one of the easiest F-roads in Iceland. In good weather, you can definitely drive it in any 4wd car in summer. Just don’t continue west from the parking lot via the Krakatindur track. It’s very precarious.

Tip from a local

Don’t get discouraged by bad weather! Raudufossar is one of those places you can also visit in the pouring rain, as we did. Moreover, if it rains, you will most likely be entirely alone.

15. Mulagljúfur Canyon

mulagljufur canyon hike iceland

Us hiking a Mulagljúfur canyon in September

Why go

Mulagljúfur Canyon is one of the most spectacular yet well-accessible Icelandic canyons. It takes about 3 hours to explore it on a beautiful hike fully. The hike leads along the western edge of the Mulagljúfur Canyon and offers breathtaking canyon views.

It’s an out-and-back hike suitable also for fit families and belongs to the most beautiful half-day hikes in the highlands. Please visit the canyon only in nice weather and ideally only in summer; otherwise, the trails might be dangerous.

All you need to know about car rental insurance in Iceland.

There are also two giant waterfalls in Mulagljúfur called Hangandifoss and Múlafoss. Hangandifoss can be easily seen from about the trail’s midpoint, and Múlafoss is hidden deeply in the canyon and can only be observed from a distance.

How to get there

Múlagljúfur Canyon trailhead is easy to reach and located just west of the Fjallsárlón glacier lagoon. A hard-to-be-seen gravel road leads to Múlagljúfur car park as a short detour from the ring road. It’s very bumpy, but you can slowly drive it in any car in summer.

Tip from a local

Múlagljúfur is one of the dream places for anyone flying a drone. Please check the current Icelandic drone flying regulations before flying one there.

16. Strútslaug

strutslaug hot spring iceland

Strútslaug hot spring deep in the Fjallabak highlands of Iceland

Why go

Strútslaug is most likely the least-known hot spring in Iceland. If you are looking for a totally remote hotpot bathing experience in the middle of nowhere, look no further!

There’s just one little caveat – Strútslaug is pretty hard to reach. Getting to Strútslaug involves a difficult drive followed by a 1.5-hour long hike.

Once you reach it, though, you will be rewarded with an authentic Icelandic natural experience. Don’t expect any changing rooms or hot spring stairs – you are out in the wild here!

How to get there

Regardless of the way you choose, you will need to cross several medium-to-big-sized rivers to reach the Strútslaug trailhead. To do that, you need to drive at minimum a large 4×4 car, ideally a super jeep.

Ultimate guide on How to cross rivers in Iceland.

The closest access point to Strútslaug is the end of the Strútur dirt track next to the Strútur hut. The Strútur dirt track starts just west of the popular Maelifell volcano. We wrote a detailed guide about visiting Strútslaug.

Tip from a local

Strútslaug can easily be visited also when it rains. The hiking trail is easy, and it’s a very enjoyable experience to soak up in the hot spring with rain pouring on your head!

17. Hornstrandir

how to visit hornstrandir iceland

Hornbjarg Horn cliffs in Hornstrandir, photo by Reinhold Seiz

Why go

If you are looking for a true wilderness, love long and rough hikes, and prefer being totally alone, then your no.1 destination in Iceland will be Hornstrandir.

Hornstrandir is one of the last places on earth with still untouched nature and yet within reach from populated areas of Iceland.

You’ve probably already seen the picture of the most famous spot in Hornstrandir – the pointy Hornbjarg cliffs right next to the ocean’s edge. Well, that is just one amazing spot. There are so many hidden corners in Hornstrandir; it’s even impossible to list them all!

How to get there

Hornstrandir is the most remote region in Iceland, with no roads. The only way to get to Hornstrandir is by ferry. And then your only mode of transportation will be your own feet.

Our guide on How to find nice weather in Iceland.

Ferry is running daily, only in summer, from the beginning of June until the end of August, from Ísafjörður to the following settlements in Hornstrandir: Adalvík, Hesteyri, Veidileysufjordur, Hornvík, Grunnavík, Fljótavík.

Be sure to book the ferry in advance and better reschedule later. The slots are limited and may be fully booked. Secondly, if you don’t make a reservation, the ferry may simply not stop at your spot!

Tip from a local

Prepare well for any trip to Hornstrandir longer than a day, and don’t go alone. Practice especially carrying a big heavy backpack (20kg / 45lb) in strong winds and rains on steep hiking trails. This will sooner or later happen in Hornstrandir, even in summer.

18. Fimmvörðuháls

fimmvorduhals hike highest point

One of the highest points of the Fimmvorduhals hike with stunning views

Why go

Fimmvörðuháls hike is considered by many to be the most beautiful 1-day hike in Iceland. And we can’t disagree, it’s surely one of the best places in the highlands.

Fimmvörðuháls is a long hike, and it’s not for beginners, but it will reward you with some of the best views Iceland has to offer.

It’s very versatile, with the first part full of countless lush green waterfalls called The Waterfall Way. What follows next is the otherworldly volcanic area of red-colored craters Magni and Móði. The last part, where you descend to Thórsmörk, then features the most stunning views of the Fimmvörðuháls hike.

How to get there

You can start the Fimmvörðuháls hike either at the southern end in Skógar or at the northern end in Thórsmörk.

Read our detailed Fimmvörðuháls hike guide.

The southern trailhead is very easy to reach, located right next to the famous Skógafoss waterfall.

On the other hand, the northern trailhead is located at the end of the treacherous F-road F249 in Thórsmörk. You need a large 4×4 car or a super jeep, good weather, and river-crossing skills to reach it. Or take a highland bus (10% discount code: EPICICELAND) to/from there, operated by 2 companies.

Tip from a local

Bring hiking poles. They are priceless on steep and slippery terrain. And plan a hike for a nice day. Trust me, you don’t want to hike Fimmvörðuháls on a rainy and windy day!

19. Stórurð

Stórurð hike east iceland

Stórurð hike in the highlands of east Iceland near Borgarfjörður eystri

Why go

Stórurð is a magical crystal blue-colored lake with huge stones sitting up in the mountains of Borgarfjörður Eystri. You will feel like being in a fantasy movie when visiting Stórurð.

Stórurð is an easy hike even for families and is a must-see in East Iceland. Several different trails lead to Stórurð, with the easiest one being the Njarðvík hiking trail.

We also wrote a list of the 15 Best summer guided tours in Iceland.

How to get there

Stórurð trailheads can easily be reached by any car; all the roads around are paved. You can park your car at each trailhead, whether it’s an easier Njarðvík trail or a more difficult Vatnsskarð trail.

Tip from a local

The hiking paths are typically snow-free from around early July until late September. You can hike Stórurð even if it rains lightly, but you better avoid fog. You can’t see the lake well when it’s too foggy.

20. Markarfljótsgljúfur

markarfljotsgljufur east viewpoint

East viewpoint of the otherworldly Markarfljótsgljúfur Canyon deep in the Icelandic Highland

Why go

Markarfljótsgljúfur Canyon is one of the most impressive canyons in Iceland that almost nobody knows about, entirely away from all the crowds.

Markarfljótsgljúfur is breathtakingly huge, and you can hike along its edge for as long as you wish. A mighty river carves its way through the bottom of the gorge.

How to get there

You can reach Markarfljótsgljúfur either from the west or the east and only in summer. All roads leading to the canyon are difficult highland roads and require at least a large 4×4 car.

The western viewpoint is easier to get to. You need to take a short but very rough detour east from the road F261.

We wrote a detailed guide on visiting Markarfljótsgljúfur canyon.

The eastern viewpoint offers the best views but is harder to drive to. Emstrur dirt track is steep and rough, and you should ideally drive it in a super jeep only.

Tip from a local

Don’t try to visit Markarfljótsgljúfur in a Dacia Duster; rent a proper and reliable 4×4 car. You may be the lucky one who made it here in the Duster, but you will most likely be a star of the rescue operation.

21. Kerlingarfjöll hot spring

kerlingarfjöll hot spring iceland

Bathing alone at Kerlingarfjöll hot spring

Why go

Kerlingarfjöll hot spring is one of the most stunning hot springs in Iceland. What makes it unique is its remote location tucked inside a scenic canyon. You can get here only by hiking, and you will often be alone.

The hike to the Kerlingarfjöll hot spring is a piece of cake and takes about 1 hour one way. Even the trek itself is worth your time because its surroundings are very picturesque. The pleasant hotpot dip at the end is just a free bonus.

How to get there

The hiking trail to the Kerlingarfjöll hot spring starts at the Kerlingarfjöll Mountain Resort, which has recently been renamed the Highland Base. The hike is well-marked.

We also wrote a detailed guide to Kerlingarfjöll.

In summer, you can get to the Kerlingarfjöll Highland Base by any 4wd car via roads 35 and F347.

Tip from a local

There’s no changing room next to the hot springs. Get ready for that, or simply don’t be shy. Don’t forget to bring a bag for a wet swimming suit on your way back.

22. Bláfjallafoss

f232 blafjallafoss waterfall

Bláfjallafoss waterfall on a highland F-road F232

Why go

Did you know that Bláfjallafoss is the only waterfall in Iceland you can actually drive through? This makes visiting Bláfjallafoss a once-in-a-lifetime experience.

Photographers love to take drone pictures of jeeps driving through the upper bank of the waterfall. It’s an amazingly beautiful and surreal scene that never gets old.

Be sure to read our one-of-its-kind list of all Icelandic F-roads.

How to get there

Bláfjallafoss is situated in the middle of the F-road F232. You need at least a medium-sized 4wd car to reach it and, most importantly, to cross the river/waterfall itself. The river crossing is very bumpy, and we advise you to only take a car with sufficient ground clearance here.

Tip from a local

You can hike down to the bottom of the waterfall to get the best views of the waterfall itself. This spot, however, is not the best for photographing cars passing through the waterfall. The best place for photography is from one of the banks or by drone.

23. Gjáin

gjain trail waterfall

Everything is smaller in Gjáin. Especially waterfalls. Tiny Highlands.

Why go

Gjáin is a cute little highland wonderland. It resembles a miniature of Iceland. There are many mini waterfalls, tiny valleys, and petite rock formations.

Gjáin is worth visiting on your way to Haifoss or towards Landmannalaugar, as it’s located nearby. You can easily explore Gjáin in less than half a day or even an hour if quick enough.

How to get there

You can drive to Gjáin in summer by gravel road 327. It’s a bumpy road where a car with higher ground clearance is advantageous. Still, you can come here in any car when going slowly and cautiously.

You can read more about our visit to Gjáin.

Tip from a local

Gjáin is a great family hiking spot because all its hiking trails are straightforward and short. It’s also a cool place to see when it rains for the same reasons.

24. Kverkfjöll

kverkfjoll hveradalur highland iceland

One of the least visited corners of the Highland of Iceland – Hveradalur in Kverkfjöll

Why go

Kverkfjöll is a very scarcely visited magnificent mountain range and glacier area south of Askja in eastern Iceland.

Kverkfjöll is also geothermally very rich and active, with several little hot springs spread all over the area.

You can explore Kverkfjöll exclusively by hiking. There are several hidden ice caves and hot springs. On a nice day, you will be able to see the panoramic views only very few visitors see in Iceland.

How to get there

The only way to reach Kverkfjöll is by driving several highland F-roads. You need to start on F910 and then take either a combination of the road F903 and F902 or drive just F902 directly to the Kverkfjöll lodge.

When is the best time to visit Iceland? Pros and Cons of every season.

The roads are open to foreign visitors only in summer.

Tip from a local

Kverkfjöll is full of glacier tongues with crevasses, so we highly recommend you take a guided tour of the area. In any case, always consult a ranger in a Kverkfjöll mountain hut before embarking on any hikes! Ideally, even a few days in advance.

25. Lónsöræfi

Lónsöræfi highlands iceland

Lónsöræfi Highlands by talented photographer Snorri Þór Tryggvason

Why go

Lónsöræfi is a colorful, hard-to-reach hiking area similar to Landmannalaugar, just totally out of sight of any foreign tourists.

There are many hiking trails in Lónsöræfi of various lengths and difficulties. Lónsöræfi is also popular among locals for multi-day hikes in the wilderness with stunning views.

The main caveat of visiting Lónsöræfi lies in a very challenging access road. This is the main reason why almost nobody tends to visit the area.

How to get there

The only way to reach the main Lónsöræfi hiking trail is to drive the mountain road F980. And the problem is that F980 is one of the hardest F-roads in Iceland, probably even the hardest.

We partially visited Lónsöræfi ourselves, but only a part of F980 up to Skyndidalsá river.

The main obstacle is a massive, unbridged Skyndidalsá river, which you must cross. The only way to do that is by driving a huge super jeep and, at the same time, having the exact knowledge of the optimal fording spot. Always leave this to locals!

Tip from a local

To arrange a river crossing transfer to Lónsöræfi, contact Stafafell Guesthouse or a tour company called South East Iceland.

epic iceland facebook group ask questions or get inspired in our community

Posted by Igor in Highlands, Top Places, 8 comments
Þakgil – Full Guide + Best Hiking Trails

Þakgil – Full Guide + Best Hiking Trails

Þakgil is an amazingly beautiful hiking area, yet there was no detailed guide to Thakgil, nor any detailed description of the best hiking trails in Þakgil. We want to fill this gap and will be writing in deep detail about all the hiking trails, the Thakgil campsite, how to get to Þakgil, what to see, and when to go.

Hikes in Thakgil definitely belong to the best hikes in Iceland. Some people incorrectly spell the Icelandic name Þakgil as “Pakgil”, but it’s not “P”, it’s “TH” as Thór. And Thakgil is a hiking paradise full of canyons, ravines, waterfalls and even melting glaciers! Þakgil is located pretty close to Vik, a very popular city in southern Iceland, very well accessible to all tourists. There are three main hiking trails and several possible detours.

Most of the other blogs out there describe only one of the Þakgil hikes in detail – the purple one – the Remundargil ravine hike. Probably, because it’s the easiest and the quickest one. However, definitely not the most rewarding one 🙂

That being said, we will do the opposite. We will describe in detail our day hike which included hiking a yellow trail and a red trail in Thakgil. These hikes are called the Austurafréttur hike and the Mælifell hike. We also added an amazing hidden bonus – a hike to Huldujökull glacier.

When to visit Þakgil

Same as for all parts of the Highland of Iceland, you can visit Thakgil only in summer when the hiking trails are open. When do hiking trails in Þakgil open? The trails open once there is no snow on the trails. This usually happens any time between the beginning of June and the first half of July.

When do the Thakgil hiking trails close? The trails close after the first heavier snowfall. The first heavier snowfall typically reaches Þakgil at any time between the first half of September and the end of October.

canyon red Mælifell trail Þakgil iceland

Magnificent canyon next to the red Maelifell trail, Þakgil

So, when should you visit Thakgil? To be sure to have clear and dry trails, visit Þakgil between the first half of July and the second half of September. This period also coincides with the mildest and warmest weather, which you will definitely need. For 100% accurate info on the current state of the trails, please contact the campsite or safetravel.is.

Can I visit Þakgil in winter? Outside of the main season? Only in theory. First of all, the road leading to Thakgil is full of snow at that time. Secondly, the trails are full of snow too. This means both the road as well as the trails are very dangerous to navigate and you should never do that without a professional guide. Even with their help, Þakgil is typically inaccessible between October and May.

Tips on the most beautiful places in Icelandic Highlands.

How to get to Þakgil

The only way to get to Thakgil is to use the gravel Road 214, Kerlingardalvegur. Since the road is 16 kilometers (10 miles) long, you have to rent a car or hitchhike. There’s no bus service to Þakgil. You may probably be able to arrange some expensive private transport, but in that case, better rent a car.

road to thakgil iceland

Beginning of the road to Þakgil. This was the easiest part.

Road to Þakgil

Kerlingardalvegur, or Road 214, leading to Thakgil is a pretty bumpy gravel road. Road to Thakgil is officially a normal 3-digit road, however, it could quickly be classified as an F-road. I could easily name several F-roads that are easier (and more comfortable) to drive on than Road 214. The thing is, the road to Þakgil doesn’t contain any river crossings, so they decided to classify it as a normal road.

The road is open to normal vehicles only in summer. In winter there’s usually “no winter service”. What does it mean? Feel free to read our article about Icelandic Roads to find out more. Long story short, expect a very bumpy and slow drive with many potholes and in summer also many fellow tourists.

road 214 Kerlingardalvegur thakgil iceland

Road 214 Kerlingardalvegur to Þakgil on a beautiful sunny day.

Do you need a 4×4 to get to Thakgil? The road to Thakgil is definitely passable also in a 2wd car, but you will feel much safer in a 4×4 car. I’m glad we had our Land Cruiser. This way we didn’t need to worry about any damages to the car’s undercarriage / chassis. Or you can rent with Lotus, the only car rental company in Iceland which insures undercarriage / chassis). If you are interested in details of how car rental insurance works in Iceland, we wrote a detailed guide on that.

All that being said, if you are lucky enough with the weather, the road to Þakgil is amazingly beautiful on a sunny day. A scenic drive through a valley full of river streams, black ash, and green moss hills everywhere around you with a lush green Thakgil valley slowly coming closer to you in the background. Totally worth the bumpy drive.

Parking in Thakgil

The only actual sort of “official” car park in Þakgil is located at the campsite. This is probably the best spot to leave your car and it’s free unless you stay overnight. That would be camping already and you need to pay for that. Not all the hikes in Thakgil begin at the Thakgil campsite, though – see the map of Thakgil hiking trails below.

parking Þakgil iceland

We left our car on the gravel, next to the road, close to the purple hiking trail.

If you want to park your car as close to the beginning of your chosen hiking trail as possible, you may also park the car next to a road, close to the start of the hiking trail (as we did). However, please keep strictly in mind, that you can NOT park on the moss or grass. You have to find a gravel spot or a spot where there’s nothing you may potentially destroy and evidently other cars have already parked there before. Additionally, never leave your car parked on the road itself! Park NEXT to the road. If you are unsure about where to park, better leave your car at the campsite, it’s pretty close to all the trails anyway.

A detailed guide on How to choose the best Car for Iceland.

Thakgil campsite

Þakgil campsite is probably one of the most beautiful campsites in Iceland. Thakgil camping is located directly in the heart of Þakgil. In summer you will be surrounded by magnificent lush green hills and ravines. There’s also a much more expensive possibility to book your private hut. Take a look at the website of the campsite for an up to date info. The website may be a bit outdated from time to time (seems like locals are not much of web admins, understandably) but the phone number is working, so I suggest you call them if you need anything. They do speak (simple) English 🙂

Þakgil campsite iceland

Þakgil campsite

If you want to book a hut or accommodation nearby, we highly suggest you do so enough in advance. Huts in Thakgil are in very high demand in summer. With simple camping, you don’t need to book in advance. It’s a first come, first serve system and I don’t remember the campsite being full at any time. There’s also a possibility to ask for the current trail conditions at the campsite. Sometimes you may also get an accurate answer. Don’t rely on that, though – see our hiking story below :).

Hiking trails in Þakgil

  • Ravine walk from the campsite, 1km, 15-20 minutes
  • Remundargil ravine (purple trail), 13km, 3-5 hours
  • Austurafréttur range (yellow trail), 17km, 6-8 hours
  • Maelifell (red trail), 14km, 4-5 hours
  • Huldujökull glacier detour (white trail), 3km, 1-3 hours
  • Austurafréttur + Maelifell + Huldujökull loop (yellow + red +white trail), 20km, 6-9 hours

Map of the hiking trails in Þakgil

There are 3 main hiking trails in Þakgil – the red trail, the yellow trail, and the purple trail. Then there are several “side” trails. See the hiking map of Thakgil below. This map is accurate and you can rely on it. The original map, however, didn’t mark any dangerous parts, or river crossings. That’s why we added our notes to the map and we suggest you read our entire article if you plan on going hiking in Thakgil.

Map Þakgil hiking trails

Map of Þakgil hiking trails with our notes (click to enlarge)

If I had to rank the main trails by difficulty, the order would be as follows:

  • Common red/yellow trail (the easiest)
  • Yellow and purple trails (medium)
  • Red trail (more difficult)
thakgil all hiking trails map

Local map of all the hiking trails, roads and tracks in Thakgil (click to enlarge)

The alternative map above depicts all these trails (including the detour) and distinguishes between hiking trails only (yellow/green dashed line) and buggy/jeep tracks (brown) which also serve as hiking trails.

Myths and Facts about hiking in Thakgil

The lack of factual information about hiking trails in Thakgil gives rise to many weird myths about Thakgil. Below we answer all questions we’ve heard about Þakgil.

What is the best hiking trail in Thakgil?

The most beautiful trails are the eastern part of the Yellow trail and the western part of the Red trail, in our opinion. They are also the most difficult trail segments. Views from these parts of the trails are simply stunning, see our trip report below. Probably the most beautiful unmarked detour from these trails is a detour to Huldujökull glacier.

Þakgil canyon iceland

The red Mælifell trail is very green, full of spectacular canyons and ravines.

Is one day in Thakgil enough?

If you catch the nice weather, one day is definitely enough to see the best of Þakgil. If you want to hike all the trails, it would take you 2 days if you are a quick hiker, and 3 days if you are a slow hiker. Just bear in mind, the trails and the surrounding landscapes are somewhat similar, so it doesn’t entirely make sense to hike every single inch of all of them.

The yellow and the red trail may be done in 1 day as a huge loop. This is exactly what we’ve done and couldn’t be happier! Totally worth every mile! The yellow and the red trail are pretty diverse and quite different from each other – it felt like hiking at two different places. The entire loop took us 9 hours to finish, including many photo pauses, a longer lunch break, and losing almost an hour by finding the proper route when crossing the river. See our trip report below.

Many useful discounts on Icelandic car rentals and Guided tours.

How difficult are the hiking trails in Thakgil?

The hiking trails in Þakgil are of medium difficulty. They are definitely not easy hikes for families with little children or for the elderly. They are also not any mountaineering expeditions. No special equipment is required in summer. We recommend taking hiking poles and if you plan to hike the red trail, then also water shoes for the river crossing.

maelifell red hiking trail thakgil iceland

Steep descent from the red hiking trail in Þakgil

Can you get to Thakgil with a 2wd car?

Yes, you can, but you will have to drive slowly and there’s a chance you may damage your car because the road to Thakgil is very bumpy. We recommend taking any 4wd car and driving carefully.

Is the yellow trail the most beautiful one?

We think that the eastern part of the yellow trail and the western part of the red trail are the most beautiful trails. If we had to choose just one, it would be a hard decision. The yellow trail is definitely an easier one, though, with no river crossings.

The least exciting trail is the common red/yellow trail because it leads via old jeep tracks. This part of the trail is, on the other hand, also the easiest part to hike. If you aim for a worry-free hike, or you are simply hiking in unfavorable weather, then go for this trail.

yellow trail Þakgil iceland

Amazing views from the yellow hiking trail in Þakgil

Should you do the Þakgil hikes only in the nice weather?

Yes, definitely. Aim for clear skies and no strong winds. The hikes are doable in light rain and slightly windy weather, but if it gets worse, they may be pretty dangerous. There are some steep ridges and slippery parts, so please, choose your day wisely and better turn back when feeling unsafe.

Especially the western part of the red trail and the eastern part of the yellow trail are pretty dangerous if it strongly rains/snows/wind blows, regardless of your hiking experience. The common red/yellow trail should be fine because it leads through the old road/track. However, consider also the views – if it’s foggy, you will see nothing despite doing a pretty demanding hike.

Is the yellow trail dangerous?

I’ve read that the yellow trail is pretty demanding, steep, and dangerous at some points and you should better do it starting from the east (counter-clockwise).

Well, I don’t think this is true. From our experience, the route is doable in both directions in good weather and if you are used to longer hikes. If you are not used to hiking, then yes, this trail is demanding and possibly dangerous.

rainy red trail thakgil iceland

Rainy picture from the middle of the red hiking trail in Þakgil. Still amazing views.

All trails are dangerous during bad weather, like strong rain, strong wind, snow, or bad visibility due to fog. In the nice weather, the yellow trail is not more dangerous than the other trails of Thakgil in any way. In fact, the most dangerous trail is the red trail in our opinion, due to the sharp ridge part and river crossings.

Do you have to cross the river during the hikes?

Only when hiking the red Maelifell trail. There are 3 river crossings located close to the campsite. The river is pretty fast flowing and it’s no joke to ford it, see our experience below. Take water shoes, adhere to river fording principles, and always hike at minimum in a group of 2.

Is the purple trail and the common red/yellow trail worth hiking?

Of course, they are worth hiking 🙂 The entire Þakgil area is totally beautiful and all the hikes are nice. We are just cherry-picking here the best out of the already beautiful options.

Hiking the Yellow and Red trail loop – our experience

view top maelifell thakgil iceland

Our rainy and a bit foggy view from top of Mælifell red trail in Thakgil

Yellow hiking trail in Thakgil, also known as Austurafréttur, is one of the two hikes we consider the most amazing in Thakgil and also the most difficult. The second one is the red trail to Maelifell. Here is a link to our Wikiloc hiking trail in Þakgil.

The yellow trail is probably slightly easier than the red one, though. You may form your own opinion after reading our report. As you can see on the map, there are several options for how to hike the yellow trail. We chose the counter-clockwise direction, i.e. an ascent from the east and a hike towards the Austurafréttur range. It took us 3 hours one way to hike the eastern part of the yellow trail and to reach the Huldujökull glacier.

Map yellow red trail loop Thakgil

Map of the yellow-red loop hiking trail in Þakgil we took

There are several different starting points for the yellow trail available. We aimed to choose the “most efficient” starting point to minimize walking on the road and maximize hiking the trail itself. That being said, we parked our car at the intersection of the road to Þakgil and the purple hiking trail, see above.

We had first crossed the little stream next to the road, then ascended up via the purple trail, and then continued to the north via the yellow trail.

The ascent towards the Remundargil ravine

We started our hike by first crossing the river. It was possible to cross the river by jumping and we didn’t have to take our shoes off. Hiking poles definitely helped. The river is pretty narrow, though, and it was also possible to find some “jumping stones” to cross the river through. Afterward, the hike began with a pretty steep, but safe, climb on the purple trail. The climb led to the intersection with the yellow trail, up on the ridge.

remundargil ravine Þakgil iceland

First ascent via the purple Remundargil ravine trail crossing our yellow trail. Our car is in the distance.

Technically, we haven’t done the “entire“ yellow trail, because we made a shortcut via the purple trail, and the yellow trail continues further toward the southeast. Nevertheless, we made this decision on purpose, because we wanted to save some time for a hike towards Huldujökull. Moreover, the southernmost part of the yellow trail (which we skipped) is said to be the least interesting one.

A pretty steep, but short ascent via the purple trail led us up towards an intersection with a yellow trail, where we continued left on the yellow trail. After finishing the ascent, you will be rewarded with amazingly beautiful 360 degrees views. Only 15 minutes into the hike and you may already admire the stunning beauty of Þakgil from this viewpoint. Our car already looked so tiny in the distance after the climb.

Austurafréttur trail

I’ve read on some blogs that the yellow trail is unmarked. This is not true at all. The yellow trail is well-marked. After an intersection of a purple and a yellow trail, the yellow trail then continues to the north as a gravel path. This part of the trail is slightly boring but doesn’t last very long. No worries, many nice views are yet to come.

yellow hiking trail austurafrettur Þakgil iceland

View after the first ascent towards Austurafréttur range – the yellow hiking trail

You will soon reach a point where you have to perform one additional steep ascent. This ascent leads via the old moss field and can be very tricky if it’s wet because it can become pretty slippery. We had perfect weather with blue skies, therefore also no problems with the ascent at all, just burning some calories. After this last ascent, the trail mostly continues as a gravel path along the eastern edge of the pretty wide Austurafréttur ridge.

Another picturesque viewpoint will soon pop up on your right – a view over a gigantic Kötlujökull glacier. This viewpoint may serve as one of the great picnic spots as well. The yellow trail then continues further north along the edge of the ridge and several little waterfalls and canyons can be observed in the distance, right next to the Kötlujökull glacier.

Kotlujökull glacier Þakgil iceland

Views over the Kotlujökull glacier from the yellow Austurafréttur range trail

You will then reach the point where the yellow trail (and marks) start turning left and lead to the dirt tracks probably used by jeeps or ATVs/quad bikes. This is where the marked yellow trail connects to the dirt road and continues back west to the intersection with the red trail. On top of the yellow trail to the left, however, you have the option to continue further north towards Huldujökull glacier. This is exactly what we’ve done and what I highly recommend on a nice day!

Hike to Huldujökull glacier

After hiking the eastern part of the yellow trail, you will reach an intersection of yellow marks (continuing to the left) and white marks (continuing straight ahead in the northern direction). We followed the white marks and made a detour away from the yellow trail towards the melting Huldujökull glacier (which our friend Dace kindly pointed out to us, thank you!). An ideal time to hike this trail is summer – because this is when the glacier melting may actually be observed and witnessed in real time!

Huldujökull glacier hike Þakgil iceland

Amazing views at the melting Huldujökull glacier in Þakgil

White Trail

You won’t find a white hiking trail to Huldujökull on a classical hiking map, only on a local Icelandic map. It leads via a pretty dull stony/gravel path on the eastern edge of this Thakgil ridge. However, the trail itself is not your main aim here. Instead, you aim for reaching the Huldujökull Glacier, which will slowly start to reveal itself in front of you (on a nice day with good visibility). Hiking the white/unmarked trail to the glacier and back took us roughly 2.5 hours including a lunch break and many pauses for photos.

thakgil huldujokull glacier white trail

Scarce white marks on the white “bonus” trail leading to amazing Huldujökull melting glacier in Þakgil

If I remember correctly, at some point even white marks disappeared. Nevertheless, the orientation is not that hard, because you more or less hike pretty close to the eastern edge of the wide ridge all the time. After the marks had disappeared, we simply followed the edge until the edge basically ended. This included a few little ascents and descents on stony terrain. Although being unmarked, a walk like this is perfectly fine, unless you don’t damage anything “alive” (like moss, please don’t step on any!).

Huldujökull Glacier Views

There are many different viewpoints of Huldujökull, just have in mind where it’s located and you can definitely get there. I don’t recommend going in foggy or (strongly) rainy weather though. Not only you will not see a thing but you may also get lost.

thakgil iceland melting glacier trail

Final, unmarked part of the trail leading to the melting Huldujökull glacier

After reaching the northern edge of this Thakgil ridge a monumental view over almost the entire Huldujökull Glacier opened directly in front of us. And not only that! We had a chance to witness a bit sad but amazingly beautiful phenomenon of a melting glacier! Right in front of us. We were even lucky enough to observe and hear a massive fall of part of the glacier into the ravine below, due to thawing. I’ve caught one of these falls on camera (see the video below, to be added later). Power of nature as a live broadcast.

We made a little picnic with views over a thawing glacier and soaked up the sunrays on this heavenly beautiful day. We then admired the glacier from many viewpoints, hiking a bit to the west. Subsequently, we hiked back via an unmarked trail to reach the yellow, marked one. We’ve first seen the yellow marks and then reached the intersection of a red and a yellow trail.

Huldujökull glacier Þakgil iceland

The end of the partially unmarked white hiking trail in Þakgil

Hiking the Red trail to Mælifell

The red trail in Thakgil is full of lush green valleys and peaks, amazing canyons, and green river valley views. We totally recommend it, just please go only if you are a more experienced hiker. There are 2-3 pretty exposed and steep parts towards the southern part of the trail. It took us 4-5 hours one way to complete the western part of the red trail, including a 1-hour search for the correct river crossing route.

thakgil red hiking trail maelifell

Beginning of the red hiking trail, near the top, near the intersection with the yellow trail. Mælifell on the right.

Originally, we had planned on doing only the yellow trail, i.e. we had wanted to descend back via the common yellow/red trail (western part of the yellow trail / eastern part of the red trail). However, once we reached the intersection of a yellow and a red trail, we realized that this “common yellow and red trail” is simply a rough track for jeeps/ATVs. And, we rather prefer driving the tracks than hiking on them. That being said, we rather wanted to descend back via a pure hiking trail – which is exactly what a western part of the red trail is.

At that point I texted our friend Dace, asking whether the common red/yellow trail is worth the hike. She responded that this was the only option, because a map at the campsite showed some “X” marks on the red trail, indicating that the red trail may have some obstacles or impassable spots. Therefore, I decided to call the campsite directly and ask about the red trail. After a few minutes of trying hard to explain that we want to ask about the conditions of the red trail, I didn’t get any answer. The other side didn’t understand what we were asking about.

red trail thakgil iceland

Hiking near the top of the red Mælifell trail in Þakgil

Finally, we made a decision to try the red trail and in case we reach any impassable point, we still had enough time to turn back and hike down via the easier trail/track. Unfortunately, as is often the case in Iceland, the weather turned from clear blue skies to quite annoying rain. Still not strong enough to change our plans, though.

95% visitors visit only 5% of places. How to avoid tourists in Iceland?

Ascent to Mælifell

The northernmost part of the red trail (where we began our hike) leads to a mountain called Mælifell. Beware, this is not the same Maelifell as this one. Probably the most famous “Maelifell” is instead located next to the road F210, Fjallabaksleið Syðri. Did you know that there are actually more than 10 Mælifells in Iceland? Just to make it easier for a foreign visitor 🙂 Nevertheless. This Maelifell was nice too and more so were the views from the top of it!

This part of the red trail to Mælifell in Þakgil is quite easy and even in normal rain, it wasn’t complicated to hike it. Contrary to the gravel/glacier scenery of the yellow trail, the surroundings of the red trail are much much greener. The final ascent to Mælifell is a bit steeper but fairly short.

peak view red trail thakgil iceland

Foggy and rainy view from the peak of Mælifell on the red trail in Þakgil

After reaching the peak, you will be rewarded with some of the best views over the entire Thakgil! I definitely recommend this detour (even if you then turn back to the yellow route) on a nice day! Unfortunately, this was the point when it rained the most during our trip and also Mrs. Fog came to visit us, so the view was a bit blurred but amazing anyway.

Green canyons and ravines

What follows next during the middle part of the red trail is a pretty easy walk on the western edge of a Thakgil ridge. Stunning views over huge canyons on your right will be your company all along this part of the red trail. There are several scenic photo spots worth stopping at. One of these spots is a view over a gigantic green canyon, multiple times more spectacular compared to, for example, a very touristy Fjaðrárgljúfur canyon. And guess what, you will have it all for yourself! The chances that you will meet someone here are close to zero. We met exactly ZERO people on this trail! Besides that, a lot of friendly trail-following sheep will be your guides.

canyon red trail Þakgil Iceland

Me in front of the huge canyon on the red trail in Thakgil (better then Fjadrargljufur!)

Slippery ridges and descent to a hut

The trickiest part of the red trail is located in the southwestern part of the trail, roughly more than halfway into the hike (halfway of the western part of the red trail). It’s near a spot marked on maps as “Barð”. This tricky part is a pretty exposed ridge followed by a steep and slippery descent. By an exposed ridge I mean a narrow hiking trail with steep falls both to your left and to your right. Definitely not for anyone with a fear of heights. This is where the hiking poles were priceless to maintain our balance. I don’t want to even imagine doing this in a strong wind, or strong rain. Stay away from this part in unfavorable weather!

After a short walk via the exposed ridge, a steep, slippery, and again exposed ridge descent continues for about 50 meters. This was the worst part of the hike for me because personally I just hate terrain where I don’t have any firm ground to walk on available. I have to admit I had to step inch by inch because I felt like slipping and falling with each step. Thus, these 50 meters took me about 15 minutes to finish. My cousin finished this quite quickly, though, so maybe it’s just my problem with these steep and slippery trails ^^.

steep red hiking trail Þakgil iceland

The most exposed part of the red hiking trail in Þakgil. It’s much scarier in reality.

Nevertheless, despite this part of the red trail being dangerous, it is amazingly beautiful too! View over the entire valley and all of the river arms was spectacular and we totally enjoyed it. The descent soon turned into a much safer one, and ended all the way down in the river valley, right next to an empty mountain hut. There’s also a track for jeeps leading to the hut, including several interesting (and not that small) river crossings. The track was easy to be observed from above when descending.

River crossings

There’s a big and fast-flowing river right next to the hut. This is also where the well-trodden path ends. We were able to spot the next red trail mark far in the distance on the other side of the river. Well, this meant, we had to cross the river. But the question was – where? Right next to the hut, the crossing simply looked too wide and the river too fast-flowing to be safe. Moreover, we left our water shoes in the car, so we aimed for crossing without getting our feet wet. And this finally turned out to be an unachievable task.

maelifell red trail Þakgil steepest part

The steepest and most slippery ridge a) from above, b) from below. Much worse in reality than in the picture.

Long story short, we first hiked along the eastern bank of the river only to realize there was no way to continue. Firstly, we climbed a little hill on the left (where we saw human steps) and continued, but the river looked nothing like anything you wanted to cross. A fast stream and very wide even at this spot. We tried for about an hour to find a spot where to cross but unsuccessfully. Turning back was not an option at this point, we were already about half an hour of walking away from our car.

At this point, I finally remembered reading about the red trail before our trip. I forgot that one of the route descriptions mentioned “you may have to cross a river; several times”. Well, the hell they were right. My cousin resigned a bit at that time, rather wanting to hike his own way via huge hills to our right. This wasn’t an option for me because it was both dangerous and illegal, creating your new own route in an unknown place. Luckily, we met a local glacier guide hiking this trail for the first time too, struggling to find a spot to continue and ford the rivers as well.

Þakgil iceland red trail river crossings

The best spot where to cross the first river arm on the red Maelifell trail. Don’t have pics of the other 2 fords :-/ (click to enlarge)

After a little brainstorming, the glacier guide approved my idea, that we should cross the river where cars cross. My reasoning was that Icelanders probably know why they cross the river there with their cars. The spot where cars cross should (generally) be shallow enough also for people to cross. Some of us took our shoes off, some crossed in their shoes. We held each other’s arms and crossed slightly upstream – exactly according to river wading guidelines. A river reached our knees at the worst point and was flowing pretty fast, but we made it without major problems to the other bank.

We followed the car tracks afterward, which, however, soon disappeared. And the river appeared again. Another river crossing. At that point, I remembered again what the description said: “you may have to cross a river; several times”. I see now. Several times. To make it shorter – we crossed again, the same technique, only this time the current was much stronger. At one point I felt like the current might drag me down, but this is where holding each other’s arms totally helped and we crossed successfully.

There was one last crossing (the smallest one) before we reached road 214 to Thakgil. After 9 hours of hiking, we happily got into our cars again, thanking god for all – a beautiful day, views, making it safely back, and successfully finishing all these adventures! What a day!

huldujokull glacier thakgil iceland

Enjoying out-of-this-world views over Huldujökull Glacier in Þakgil

Tips for hiking in Thakgil

  1. Pick a day with good weather. I know it’s not that easy, but at least try. We wrote a handy guide on How to find nice weather in Iceland. Nice weather, at minimum, means no strong wind and no strong rain. Some trails are pretty dangerous to hike in bad weather. Secondly, I more than just recommend going in clear weather, i.e. no fog or very little fog. You may have good weather but with poor visibility, all the spectacular views may be gone. But fog is still a better alternative compared to rain and wind, which, when being strong, are dangerous.
  2. Wear proper clothes and gear. Good hiking shoes, layers, and one waterproof (not water-repellent) layer for both trousers and jacket are a must. I highly advise taking hiking poles as well, they are amazing support on all kinds of slippery terrain. Take a GPS with trail coordinates at least in your phone as well. If you are a novice hiker, you better rent a Location Device or a satellite phone.
  3. Don’t go alone and bring water shoes and a little towel, if you plan to hike a red trail. There will be river crossings. Cross them where cars cross and slightly upstream, holding arms of each other as support.
  4. Try both the yellow and the red trails, they are amazing! Of course, only if you already have an experience with all-day hikes. You can hike the yellow and the red trail both in one day or as separate day hikes.
  5. Don’t be shy to change your plans and/or turn back if the weather worsens or if you get lost. You don’t want to get injured or die in here.

YOU MAY ALSO LIKE:
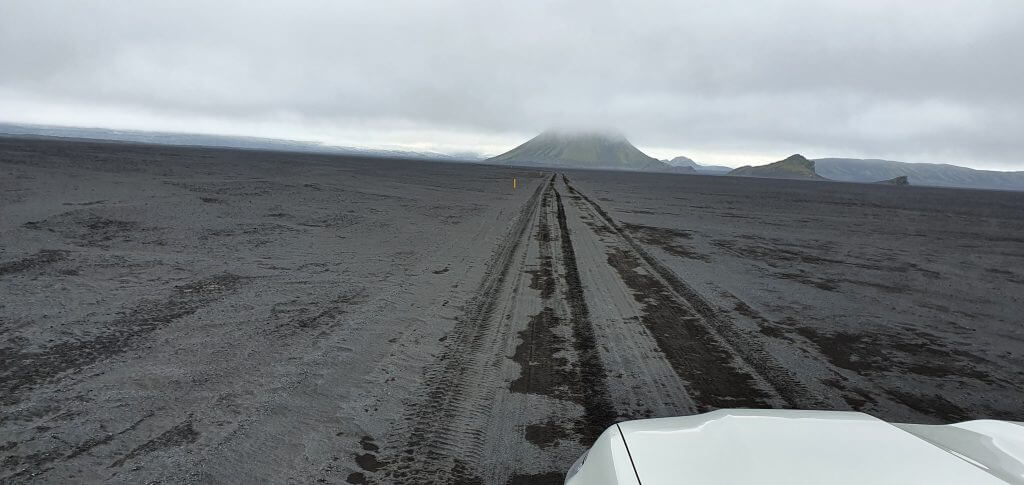
epic iceland facebook group ask questions or get inspired in our community

Posted by Igor in Guide, Highlands, 33 comments
Day 9 – Northern Highlands

Day 9 – Northern Highlands

F839, Leirdalsheiðarvegur and F899, Flateyjardalsvegur combined with Husavik whale watching and Asbyrgi canyon. For this day of our highlands trip we once again planned a more relaxing day without hikes and with more driving. Firstly, I wanted to drive the two F-roads leading to the sea – F839 and F899. Then we had whale watching in Husavik scheduled for the afternoon. Afterwards we simply wanted to head towards our accommodation in Grímsstaðir and if we had time and energy, make a stop or two along the road.

F839 – Leirdalsheiðarvegur

F839 is one of the two F-roads leading to the shore from where you may reach Flatey island. It’s a beautiful F-road leading along the green valley, in between mountains on both sides. The road has many curves and you have to drive it slowly, not because of it being dangerous but because of narrow curves everywhere. It took us longer to complete than Google had suggested, because of this.

f839 Leirdalsheiðarvegur iceland

F839 – Leirdalsheiðarvegur

I don’t remember any bigger river crossings on the road. There were some streams, puddles and smaller rivers but nothing major. That being said, any 4wd car should be able to complete the road in summer. The main challenge of the road is the curved, slightly mountainous drive with some ascents and descents. Otherwise the road is fine to drive.

f839 Leirdalsheidarvegur north iceland

F839 Leirdalsheidarvegur

F839 or F899? If I had to choose again, I would go only for F899. The roads are pretty similar and I liked F899 – Flateyjardalsvegur more. The views around F899 were slightly more beautiful in my opinion and the road was more exciting – both because of the terrain and the medium river crossings. There’s also a nice beach at the end of Flateyjardalsvegur.

F899 – Flateyjardalsvegur

f899 iceland

Flateyjardalsvegur

The roads F899 and F839 are pretty similar in terrain and surroundings. F899 is the second of the two F-roads leading to the shore from where you may reach Flatey island. It’s also a beautiful F-road leading along the green valley, in between mountains on both sides. F899, Flateyjardalsvegur, too has many curves and you have to drive it slowly, not because of it being dangerous but because of narrow curves everywhere. F899 also took us longer to complete than Google had suggested, because of its curvature.

f899 Flateyjardalsvegur north iceland

F899 – Flateyjardalsvegur

F899 contains several river crossings. At the time of our visit, in the end of August, the biggest river crossing at F899 could be classified as a medium-sized river crossing. There are multiple streams and small river crossing at the road. The biggest river crossing is located almost at the end of the road, close to the beach. So, you may still drive the road up to this point and if feeling unsafe, simply turn back.

In good conditions in summer, you can drive F899 with any 4wd vehicleup to the last river crossing. The last river crossing really depends on whether it rained during past days/weeks, i.e. what is the actual water level in the river at the time of the crossing. In good conditions and dry weather, it’s doable by any 4wd car, in medium conditions Dacia Duster would be a minimum and in worse conditions it’s better to opt at least for a Land Cruiser (as we did).

f899 near flatey

F899 near Flatey island

After the last river crossing of F899 you will spot the sea and the beach in front of you. This part of F899 actually leads literally “through the beach”, because you will be driving in a deeper sand. This is also the spot where bigger 4×4 may come handy. You wouldn’t want to get stuck in the sand with some small Subaru or Suzuki in here, trust me. We didn’t have much time to enjoy the beach and the coast, but I definitely do recommend you do it. Especially on a beautiful day. It’s a very picturesque place.

Whale watching

Although I’m personally not a big fan of organized tours, we decided to go for a whale watching in Husavik. Why? Because you probably won’t find a better place in Europe to see whales. And that’s a once in a lifetime experience.

husavik whale watching gentle giants

Whale watching overalls

Whale watching tours we recommend

When it comes to whale watching by wooden boats, we definitely do recommend North Sailing whale watching. North sailing is one of the oldest Icelandic whale watching companies with almost 30 years history. They run their tours from Husavik, Hauganes as well as from Hjalteyri – so you may choose which spot works better for you. North Sailing is also very covid-friendly, because they rapidly reduced their boat capacities due to Covid. North Sailing is also one of the cheapest companies out there.

north sailing whale watching

Whale watching by North Sailing

Because of the reasons above we decided to partner with North Sailing and can offer our readers a free 10% discount code for North Sailing: EPICICELAND
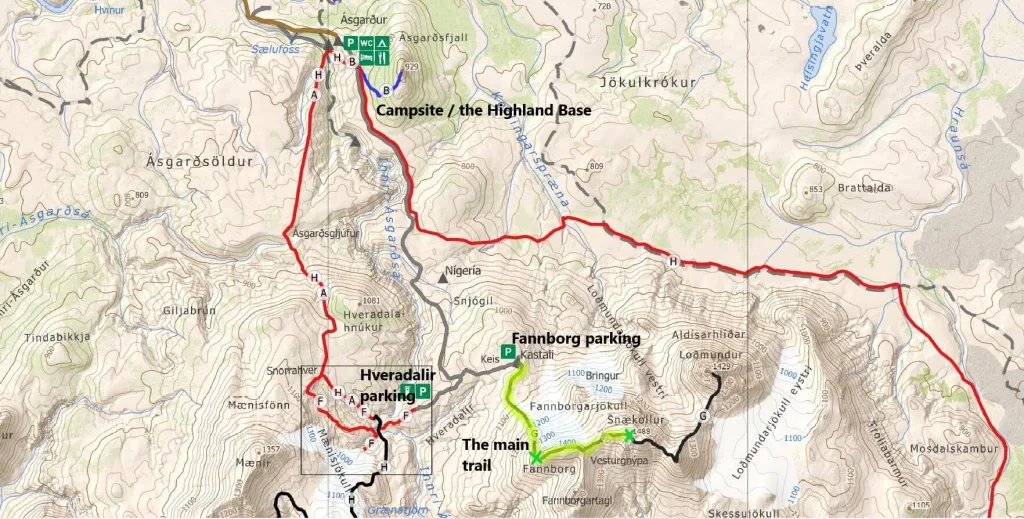
If you prefer whale watching by speed boat, our favorite company for this is Gentle Giants. They have long history and experienced crew. You won’t make a mistake by going with them.

Our whale watching experience

We wanted to try whale watching by speed boat, because we were short on time and wanted to maximize our chances to see the whales. When it comes to speed boats there’s a simple number one company – Gentle Giants. They are both the most famous speed boat whale watching company in Iceland and also the most professional.

husavik whale watching rib boat

Husavik whale watching by RIB boat

We arrived at the base of Gentle Giants in Husavik and everything started on time exactly according to schedule. English speaking guides, warm overalls, whale watching stories and vycerpavajuce information are a certainty. Our guide was a marine biology student from Italy, so she knew every bit of information when it comes to whales.

Meeting the whale

She also explained to us this summer was especially hot, which meant lower number of whale spottings. There were 10 passengers on the board of our speed boat. The captain sailed the boat for roughly 20 minutes when the first humpback whale appeared. As we were told later, we were lucky to meet this whale, because during past 3 days there were no sightings at all.

humpback whale husavik

Humpback whale taking a dip

Once you meet a whale, it has a special ritual which can be predicted. Firstly, it comes above the sea level to get some air for a few minutes – this is when you spot a whale. Secondly it dives back into the sea, leaving a “diving circle” mark behind itself. Thirdly, after roughly 3-5 minutes a whale comes above the sea again. This cycle usually repeats for a few times, meaning that once you find a whale you should stick to it and enjoy a show several tens of minutes long.

While we were lucky to see the beautiful humpback whale, we weren’t that lucky with anything else. Other than humpback whale, we’ve seen one seal sunbathing near the rock and that was it. The boat sailed around for another hour but didn’t find any other whales nor dolphins or anything else. Probably due to warm waters as mentioned before.

Ásbyrgi canyon

asbyrgi canyon iceland trail

Alone in August at Ásbyrgi canyon

Our next and the last stop for the day was Ásbyrgi canyon. Every Icelander we met recommended us Ásbyrgi as one of the most beautiful places in Iceland. On the other hand, if I read reviews online, Ásbyrgi sounded like nothing special. That’s also why we hadn’t visited it before, only now. From what I’d read, Ásbyrgi also seemed to be a pretty touristy place and I had expected it to be really crowded.

We arrived at Ásbyrgi pretty late, at half past 7 PM. For a short while, we thought we made a mistake and chose a wrong path, because there were no cars, nor buses, nor tourists both along the road and at the car parks. In late August. We left our car at a huge, well maintained, paved car park and went for the short exploration of Ásbyrgi on foot.

asbyrgi canyon iceland trail

On a trail to Ásbyrgi canyon

There are many hiking trails in Ásbyrgi, and if you are into it, you may easily spend here an entire day, or even several days. To have an idea, here is the map of Ásbyrgi hiking trails:
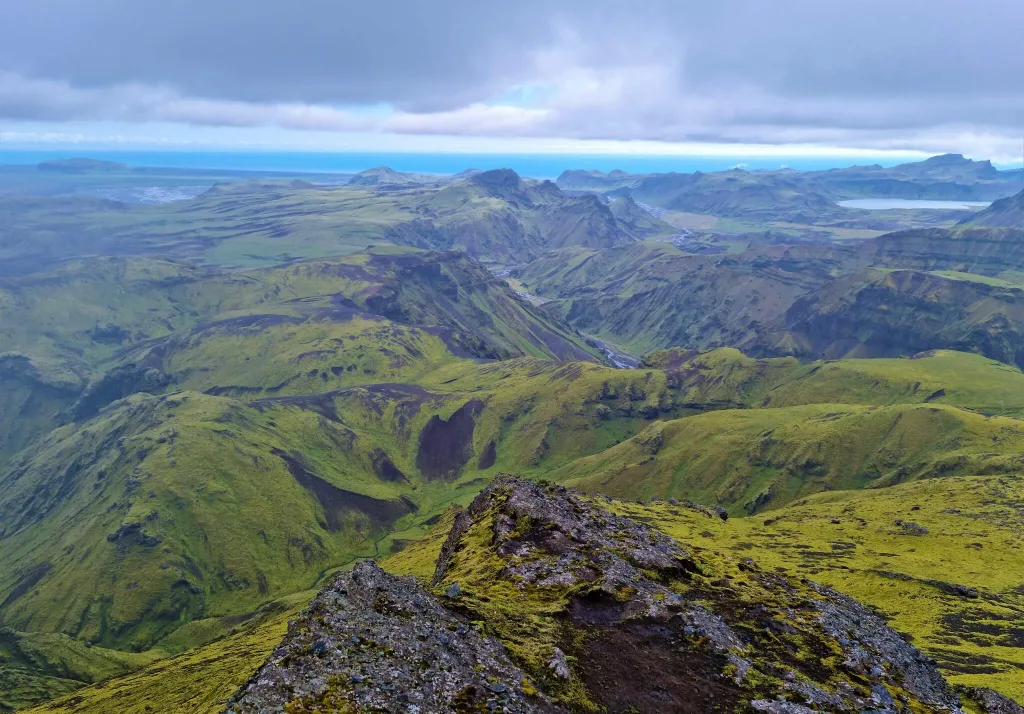
asbyrgi hiking trails map

Ásbyrgi hiking trails map

We took the shortest (and probably most efficient) visitor’s trail (A1 on the map above). The Ásbyrgi visitor’s trail will take you to the main viewpoint for the canyon, from below, in about 10-15 minutes. You will reach the nice spot near little lakes located at the bottom of the canyon. From there you may observe the “U-shaped” canyon embracing you from several sides. There are also several short detours from the visitor’s trail which end up at viewpoints of the same canyon, but from different angles.

Icelandic midges

Ásbyrgi is also the place where we really had a chance to get seriously attacked by midges. I didn’t understand everyone asking about the midges in Iceland. We travelled around Iceland several times and met almost no midges. But the Mývatn area is different. In a good weather, i.e. when it gets hotter in summer, you may meet unpleasant midges, especially in the Mývatn area. They are not dangerous, just unpleasant. Imagine 1000 midges fighting to get as close to your face as possible. That being said, if you plan to spend longer time around Myvatn, headnets may be a useful tool for you. You may buy them e.g. at gas stations.

lake myvatn

Lake Mývatn is a place with the highest concentration of Icelandic midges

Ásbyrgi canyon – is it worth visiting?

Yes, Asbyrgi canyon is beautiful. Is it one of the most beautiful places in Iceland? Definitely no in our opinion. Having seen hundreds of out-of-this-world amazing places in Iceland, Ásbyrgi wasn’t that great in our opinion. It’s a nice stop if you have a way around, but you also won’t make a mistake skipping it. Hiking trails and surroundings of Borgarfjörður Eystri, Landmannalaugar or Skógar were much more stunning in our opinion.

Hljóðaklettar

Hljodaklettar iceland

Hljóðaklettar

Another interesting place we wanted to go look at is called Hljodaklettar. Hljóðaklettar is supposed to be a nice area for short hiked we beautifully colored hills and rocks. You will for example find a “red hill” there and several other interesting spots. Although Hljóðaklettar looked interesting from the photos, we decided to skip it due to lack of time. Hljodaklettar also didn’t seem to be that super interesting compared to many other amazing places in Iceland (similarly as Asbyrgi).

Videos


epic iceland facebook group ask questions or get inspired in our community

Posted by Igor in Highlands, 0 comments
Day 12 – Hvannagil and Lónsöræfi

Day 12 – Hvannagil and Lónsöræfi

On this day we wanted to explore south-eastern highlands. Once again, we planned to stay away from typical touristy places and rather explore lesser known hikes and F-roads. Our accommodation base was a picturesque fjord town of Faskrudsfjordur. We’ve never been in the hot spring near Djúpivogur, called Djupavogskorin, so we definitely had to try it out. On a way there, though, I didn’t want to take an easy route and rather planned a drive via an old mountain F-road, former F936.

As a next stop we wanted to try a hike in Hvannagil valley, a place not many visitors know about. Then we planned to drive a part of the road F980 to Lonsoraefi, until the big river crossing and then turn back. As the only (massively) touristy spot we went to see Vestrahorn and Stokksnes with their black beach. Weather was unbelievably beautiful, so it simply screamed for taking some pictures there 🙂 If we had enough time, I also wanted to drive F985 towards glacier an back. A long day ahead!

Fáskrúðsfjörður

faskrudsfjordur iceland

What you can see on a sunny day in Fáskrúðsfjörður

We woke up on an amazingly beautiful sunny morning with the view over the fjord. Mountains were mirroring themselves in the sea. What can be better? Faskrudsfjordur was a real positive surprise of our trip. The whole summer has enjoyed spectacular weather in the north and in the east, while pretty bad one in the touristy south. Our time in Fáskrúðsfjörður only confirmed this. We admired the views and the scenery for quite some time and then moved forward towards our next stop.

F936 – Þórdalsheiðarvegur

Road 936, Þórdalsheiðarvegur, is the road you won’t find much about on the internet. Some maps mark it as F936, there’s even a sign “F936” right before the road. However, official Icelandic road map says it’s now road 936. So be it. An ideal target for exploration on our own then 🙂

road 936 Þórdalsheiðarvegur iceland

Road 936 (F936), Þórdalsheiðarvegur

Thórdalsheidarvegur is an old mountain road which leads along the power lines in the mountains of Eastfjords, west of Faskrudsfjordur and connects the ring road with the road 95. Compared to road F338, that also leads along the power lines, the F936 is much more eventful, interesting and worth a drive. That being said, there’s probably no reason one would want to drive 936 other than just having an adventurous drive. There are several better quality road alternatives nearby.

What makes 936 unique is a zig-zagged mountain drive through green valley. It sort of resembles F821 in the north in some ways, though 936 is much less driven. There are no river crossings on 936 (hence it’s no F-road anymore). The road is steep and narrow at times, though. I definitely recommend driving a 4wd car on the road, ideally a medium-sized one or bigger. I enjoyed the drive and recommend it to any 4×4 enthusiast.

Djúpavogskörin hot spring

Djúpavogskörin hot spring

Djúpavogskörin hot spring, Djúpivogur

In short – the only hot spring I couldn’t bathe in. But not because it was dirty or anything, but because it was too hot in summer! In winter it was, however, just right 🙂 So we’ve already given you a spoiler ahead and now let’s talk a bit more about Djúpavogskörin hot spring.

Djupavogskorin is located right next to both the ring road and Djúpivogur. Thus, Djúpavogskörin is pretty well accessible and might get crowded in full season. On the other hand, Djúpavogskörin is not totally easy to find. We tried to follow Google Maps, that at least helped us locate the turn from the ring road. The turn will lead you onto a field track that simply ends at some point soon. That’s probably supposed to be a little “parking spot”. Please take care to not damage anything green with your car.

Djúpavogskörin hot spring iceland

Djúpavogskörin hot spring

The next step was to found the actual Djúpavogskörin hotpot itself. The path leading to the hot spring is not marked. That being said, you don’t have many options, only to follow the only slightly trodden trail you can observe with your eyes. The path will soon bring you to a small steel pool called Djupavogskorin.

There’s no changing room, but there’s a wooden platform right next to the hotpot, where you can leave your towels and change your clothes at. Djúpavogskörin is the hottest hot spring we’ve bathed in. Or at least tried to bathe in. We weren’t able to fully soak in, because the water was simply too hot in the end of August. Djupavogskorin hot spring is free of charge and it’s a nice short stop along the ring road. We were lucky to be alone there, though I do not expect this to happen in the future again in summer.

Hvannagil golden valley

hvannagil golden valley

Hvannagil golden valley hike – views from the top

If I had to name one of the “hidden gem hikes in Iceland”, hike to Hvannagil valley would be one of them. Almost nobody knows about this hike, yet it is beautiful. Hvannagil valley is located next to the settlement called Staffafell. Hvannagil is also pretty close to Lonsoraefi nature reserve, just on the opposite side of the river.

hvannagil hike map

Hvannagil hike map

You may get to the start of the Hvannagil hike trail by any car in summer. The road leading to Hvannagil valley is semi-paved and narrow but without any river crossings. There’s no designated car park, but you can safely park your car at the huge pebbles area located here. This is a good starting point for the hikes in the area. There are two main hikes of Hvannagil valley – shorter clockwise Hvannagil round trip and longer clockwise Hvannagil-Raftagil round trip.

Hvannagil valley hiking trail

hvannagil golden valley hike iceland

Beginning of the Hvannagil golden valley hike

We picked the shorter hike to Hvannagil valley. Hvannagil hike took us 2 hours to complete as a round trip. Hike is not marked at all and most of the time you just have to follow the (sometimes well, sometimes not) trodden trail. The maps like Alltrails or Mapcarta helped a lot. Hvannagil hike starts by walking on pebbles in the direction of the Hvannagil canyon. You will basically be walking through the dry river bed. Hike then continues steeply up the hill on your right via a bit slippery and a bit steep ascent. You should be able to spot this either as a trodden path or on your maps.

hvannagil hike iceland

Hvannagil golden valley hike

Both the views of the canyon and the views you will get when you reach the top of the ascent are amazing. And, most likely, you will not meet many fellow visitors in here. So the feeling of remoteness only intensifies the entire experience. Be sure to pick a nice day, i.e. not too foggy or too rainy, otherwise you won’t see much during the hike and the ascent may become a bit dangerous.

hvannagil golden valley hike

Hvannagil golden valley hike – the ascent

If you continue for 5 minutes from the highest point of the hike in a clockwise direction you will have two options for your descent. Either do a longer hike, which continues as a more gradual descent to the left, or descend quickly via a steeper gravel trail on your right. Firstly, we couldn’t even find this second alternative. Luckily, we met one other couple and together we figured out, also thanks to our maps, how to descend back towards our car.

The descent

This steeper descent leads via gravel trail pointed directly towards a lake in Hvannagil valley. You should clearly see this lake, so this will be your lead. Try finding a path leading to the right (not left) edge of the lake. It’s useful to have hiking poles at hand for this section, it can get slippery and a bit steep. Otherwise it’s pretty doable in good weather and in normal health conditions and fitness.

hvannagil valley hiking trail

Hvannagil valley hike – the descent

After this descent, you can walk around the lake, or just have a picnic there, or both. At this point, you are already back down at the lowest altitude point of the trail. The only thing left, is to find the way back towards your car. This again took us a few moments, because the trail is not marked. That being said, you don’t have many options, so you will surely find your way. We made a mistake and turned too much to the right, where we got surrounded by a private property soon.

Instead, after passing the lake, we should have gone more to the left (straight ahead from the lake) and not turn right that soon. That way, we soon reached the huge pebbles area where our car was parked in roughly 10 minutes.

Hvannagil track

hvannagil track iceland

Hvannagil dirt track

After reaching Hvannagil valley car park, it’s possible to continue further following the dirt road, or better said a dirt track, along the river, deeper into highlands. We drove the track for a few more kilometers with our Land Cruiser and you definitely need a 4wd car for this first part of the track. Maybe even a super jeep for latter parts (which we haven’t driven yet).

hvannagil hike views

Hvannagil golden valley track – views from the top

The first part of the track, right next to pebble “car park” of Hvannagil valley, is a narrow and a bit steep ascent on leading on the nearby orange hill. There are steep falls on your sides. Luckily, the ascent is not that long. Once you reach the top, amazing 360° views will open up all around you. It’s definitely worth doing this climb to see these views in good weather.

The track continues further along the river, more into the highlands, but we didn’t follow it anymore, due to the lack of time. There are some huts and settlements in the area, so the track should definitely be accessible in summer, I’m just not sure about the quality of the road, or whether there are any river crossings or not.

F980 – the road to Lónsöræfi

f980 Kollumulavegur iceland

Views halfway into F980 Kollumulavegur

A long day has continued. Our next planned destination was a treacherous F-road called Kollumúlavegur, in other words F980, leading to a huge Lonsoraefi hiking area. F980 itself is not treacherous, however, there is one spot on F980 which makes this road one of the hardest-to-pass F-roads in Iceland. This spot is the huge river crossing right in the middle of Kollumúlavegur.

f980 Kollumulavegur lonsoraefi iceland

F980 Kollúmulavegur to lonsoraefi

But let’s start from the beginning. We had an amazingly beautiful weather when driving F980 and the surrounding views were simply magnificent. The road starts as a drive through lush, green valley. There’s a small river crossing somewhere around the first quarter of F980. The highlight of the drive came after driving for around 20 minutes, after the first (small) river crossing. We passed a pretty narrow part of the road with a steep fall on our right and then the most beautiful view of the day popped out.

f980 lonsoraefi jokulsa views

Views at Jökulsá river from F980

On a beautiful day, you can observe endless arms of the river Jökulsá on your right. Some of them are drier, some of them heavier with more water. In the background, mountains of the Hvannagil area stand proudly. This makes for a really unique and picturesque scenery. We’ve even met two local photographs who were taking advantage of this amazingly beautiful day and making their photoshoot of river Jökulsá as well. We’ve taken some pictures of this unforgettable scenery, enjoyed the views and continued towards the biggest threat of the road F980.

Skyndidalsá river crossing

f980 Kollumúlavegur iceland

F980 – Kollumúlavegur to Lónsöræfi

This threat is the river crossing of the river Skyndidalsá. And this river crossing is huge. In terms of width and depth Skyndidalsá may be bigger than infamous Krossá in Thórsmörk. On our way to the river crossing we’ve met one local on an older, but bigger car than our Land Cruiser. I asked the driver whether he attempted to cross Skyndidalsá and he just replied “no, I didn’t have the guts, it’s just too big”. Nevertheless, we arrived at the river crossing anyway and made our own assessment.

f980 lonsoraefi skyndidalsa river crossing

D980 Kollumúlavegur Skyndidalsá river crossing

Our assessment was in line with that of the local guy. The crossing simply looked too big and dangerous to do, despite the road F980 being marked as “green”, i.e. open and passable on www.road.is. Even this mark is not everything, it’s better to turn back than to get your car drowned. We’ve seen several videos of cars getting entirely drown in Skyndidalsá on this river crossing of F980 (see below) and didn’t want to end up in a same way. That being said, we’ve admired the power of the river for a few moments, turned back and drove all the way back to ring road.

In a beautiful weather, F980 is definitely worth a drive at least up to the river Skyndidalsá , especially due to amazing views over river Jökulsá and Hvannagil in the background.

Vestrahorn

vestrahorn stokksnes iceland

Vestrahorn, a.k.a. Stokksnes on an amazingly beautiful day

For our next stop we headed to the famous and popular Vestrahorn mountain. For the first time. Yes, we always rather avoided this touristy place, in the same way as we up to today still avoid trips like golden circle, because they are just too crowded for us. Anyway, let’s come back to Vestrahorn. Is Vestrahorn worth all its hype and is then Vestrahorn and Stokksnes worth visiting? Well, if you get a nice weather then we have to admit, it really is.

We were lucky to have almost completely clear skies. And that’s exactly one of the settings when we definitely recommend you should visit Vestrahorn. When, on the other hand, we do not recommend the visit, is a too foggy weather. If Vestrahorn is covered in mist, the entire scene loses most of its charm. This luckily wasn’t our case this time.

vestrahorn black beach iceland

Vestrahorn black beach

We firstly bought 2 tickets for the area at the Viking café (yes, this is private property and you have to pay for the visit). We parked our car roughly on a halfway between Viking café and the Lighthouse. Then we simply walked and enjoyed a picturesque black sand beach. Although sunny, it was still pretty windy, but hey, that’s Iceland, right?

Next, we headed towards the artificial “Viking village” next to a Viking café. We decided to take a walk through the beach to reach the village from the east. And this was not a good idea. The beach soon started to be wet and there was no clear path leading to the Viking village. We spent more than half an hour just figuring out how to find a path to the Viking village without getting our feet wet.

vestrahorn stokksnes beach iceland

Vestrahorn beach pic

We finally figured that out by zig-zagging in-between all of the puddles. But it took us ages. And the path was much longer than we originally expected. That being said, I recommend you don’t walk to the Viking village through beach but rather drive there and leave your car at the car park.

F985 – Jökulvegur

f985 jokulvegur iceland glacier

Amazingly beautiful sunset at the peak of F985, Jökulvegur, next to the Skalafellsjökull glacier

As the last adventure of the day, I planned an F-road drive and this time I was determined to finish the road until the end. My target was the road F985 – Jökulvegur, F-road leading to Skálafellsjökull glacier, branch of the biggest Icelandic glacier – Vatnajökull. I already knew that F985 doesn’t contain any river crossing so I expected just a mountain drive, which was exactly the case. But, as usually in Iceland, F985 is no ordinary mountain drive at all.

f985 jokulvegur iceland

F985 Jökulvegur

F985 has probably the biggest number of zig-zag bends out of all roads I’ve driven in Iceland. F985 will lead you to a pretty high altitude through steep gravel road. F985 seems to be short on the map, but in reality, it felt to be quite a long drive. And the drive is not for those afraid of heights 🙂 Several parts of the road will test your guts.

I drove F985 in our modified Land Cruiser and had no problems at all. It may be dangerous to drive all these steep ascents and rough gravel with Dacia Duster or anything smaller. Yes, it may be possible, but irresponsible. I better recommend taking a Land Cruiser or anything bigger, no shame for a super jeep.

f985 jokulvegur glacier

F985 – Jökulvegur, views at Skalafellsjökull glacier

F985 mostly serves as an access road to the glacier. Tour companies take their jeeps with snowmobiles and transport tourists together with snowmobiles directly to the glacier via this road. Once you reach the final bits of F985 in the highest altitude, you will understand what I’m talking about. Hint: you will be really close to the glacier! The downside: F985 gets rougher and harder to drive. At one point, F985 was just too rough and steep even for our Land Cruiser. At that point, already being really close to Skalafellsjökull glacier, I decided to stop, take pictures and turn back.

f985 vatnajokull glacier

F985 Vatnajokull glacier

F985 is a pretty adventurous, exciting and also a bit dangerous drive. The main “attraction” of the road is the glacier in the end. Is F985 worth driving for someone who is in Iceland for the first time? Probably not, and it might also be dangerous without prior experience in driving roads like this. For me, F985 was definitely worth a drive for another out-of-this-planet driving experience in Iceland.

Northern lights in Rauðaberg

We finally headed to our accommodation, which was located on a remote farm of Raudaberg. This is a great spot for hunting down the northern lights, if they are present. We stayed at Rauðaberg on a first day of September and we were lucky enough to already see the northern lights, although weak! We had totally clear skies and some aurora activity, so we simply headed out towards midnight and in a few minutes, we were able to take this picture:

northern lights Rauðaberg

Northern lights in Rauðaberg, 1st September

Beware, though, that in reality aurora at the time of our visit was not as green as the picture shows. It was more like white or faint-green. The entire magic was then performed by the camera of my phone. Nevertheless, it was a beautiful experience anyway.


epic iceland facebook group ask questions or get inspired in our community

Posted by Igor in Highlands, 4 comments
Day 11 – Borgarfjörður Eystri

Day 11 – Borgarfjörður Eystri

For this day I planned some beautiful short hikes in Eastfjords and hikes in Borgarfjörður Eystri. And, as always, I also planned to drive some amazing mountain roads in the Eastfjords highland of Iceland. I’ve done thorough research for beautiful and remote places in Eastfjords and ended up with the following list.

The plan was to start by driving north from our accommodation in Hrafnabjorg and do the short hike to picturesque sea cliffs called Ker. Then I wanted to do some mountain driving with nice views from above, so I planned to drive road 917, enjoy the view from above and come back. Our next destination was Borgarfjordur Eystri and I planned a beautiful short hike to Brunavik beach there. Our hike to Brúnavík beach turned out to be one of the most amazing short hikes we’ve done in Iceland. Definitely recommended!

Enjoy car rental discounts and tour discounts in Iceland for our readers.

If we had enough time, energy and daylight I also wanted to drive the legendary F946 F-road all the way to Loðmundarfjorður. But not in a straightforward way, rather driving via detour to Breidavik beach first, via Breiðavík track. The aim was then to end the day in Seydisfjordur. A long day full of adventures ahead!

Hike to Ker

ker cliffs iceland

Ker

There’s one pretty overlooked short hike that almost nobody seems to be mentioning which I somehow managed to dig out from local Icelandic sources. It is called Ker. The area of Ker is a coastal area and the entire hike leads along the beautiful coast. It ends in front of picturesque cliffs that carry the name Ker.

hiking trail ker eastfjords

Hiking trail to Ker cliffs

In late August, the weather at the time of our visit was amazing in the north and in the east. Weeks and weeks of sunshine and hot weather of 20°C (68°F) and more almost every day. We took advantage of this and planned some amazing hikes in Eastfjords, one of them being hike to Ker, which was really enjoyable in sunny weather.

Ker hike map eastfjords

Map of the hiking trail to Ker

Hike to Ker is a short and easy hike even families or elderly will definitely be able to do. It takes around 30-40 minutes one way and along the entire trail you will have a nice coastal view of the sea and nearby cliffs. The trail is not well marked, but there’s a semi-trodden path that can be distinguished with some effort. The entire hike starts here and leads along the coast, closer to Ker cliffs. There are multiple nice viewpoints along the trail.

ker cliffs eastfjords iceland

Ker cliffs

You’re gonna pass black beaches, cliffs with black beaches and all that near the sea. And you’ll meet almost no visitors. The hike is not being done by typical tourists. We’ve met just one couple during the entire hike. I can definitely recommend a hike to Ker as a nice short hike in Iceland.

Road 917 Hlíðarvegur

road 917 Hlíðarvegur iceland

Road 917, Hlíðarvegur

The next on the plan was a drive towards zig-zagged mountain road 917, Hlídarvegur. Driving up the road 917 is a pretty decent climb which can be done by any car in summer, because Hlídarvegur has quite good quality and is almost fully paved. The more you go outside of the full summer season (July and August), the lower the chances you can drive the road in any car. If you plan to drive the road in a more off-season period I definitely do recommend a 4×4 car.

road 917 hlidarvegur

On top of the road 917, Hlidarvegur

Views from Hlídarvegur are very nice, especially in a good weather with good visibility. You are able to see all nearby beaches from above as well as Borgarfjörður Eystri further in the distance. For me, road 917 was worth a short detour, not for my wife though, who doesn’t enjoy driving Icelandic mountain roads as much as me :))

Borgarfjörður Eystri

Our main activities of this day in Iceland were the hikes in Borgarfjordur Eystri and driving the F-roads in Borgarfjörður Eystri. That being said, our next stop was exactly this amazing mountainous area. Borgarfjordur is a group of several mountains in Eastfjords and is truly a hikers’ paradise. There are more than 40 different hiking trails and if you wanted to explore only half of them, you could easily spend here a month or more. Here is the map of Borgarfjörður Eystri hikes.

borgarfjordur eystri dyrfjoll mountains

Dyrfjöll mountains in Borgarfjörður Eystri

We obviously didn’t have a spare month to spend in Borgarfjordur, so the hardest task was to choose. What short and beautiful hike should we take in Borgarfjörður Eystri to have a good glimpse of the entire area? After some research I finally settled with a hike to Brúnavík beach. And now I can conclude it was a good decision.

borgarfjordur eystri iceland

View over Borgarfjörður Eystri

Luckily, just driving to Borgarfjörður Eystri made it for amazing views. You will be driving coastal zig-zagged roads which are fully paved with views over sea and over massive mountains of Dyrfjöll. There are places at the side of the road where you can stop and take a picture of this beautiful area, so take advantage of it 🙂

The actual village of Borgarfjordur is pretty small with limited meal and accommodation options. But, this is what makes this area so unique – remoteness and endless surrounding nature.

Hike to Brúnavík beach

brunavik hike trail iceland

In the middle of the trail to Brúnavík beach in Eastfjords

There are two alternatives of hiking to Brúnavík beach – a longer one and a shorter one. A longer one starts closer to Bakkagerði (see our map below) and you can either make a loop trip or a roundtrip via same trail. It is 15km long and will and the roundtrip will take you roughly 5 hours.

brunavik beach hike map

Brunavik beach hike map

The shortest hike to Brunavik beach starts at a little carpark near Borgarfjarðarhöfn (see the trail marked with yellow in our map). This is where we started our hike to Brúnavík. The roundtrip hike to the Brunavik beach and back from this spot is roughly 8km long and it took us 3.5-4hours to finish the roundtrip using the same trail there and back. Hiking trail is marked with yellow sticks so it’s easy to follow the path.

dyrfjoll mountains eastfjords view from brunavik hike

View over Dyrfjöll mountains from the hiking trail to Brúnavík

The hike connects the western and eastern part of the coast via small mountain pass. Brunavik hike starts with a rather uneventful ascent, but turning back and looking at the coast you will soon be getting really nice views over Borgarfjörður Eystri and mountains of Dyrfjöll. After roughly an hour of ascent, you will reach the highest point of the trail where you cannot sea either part of the coast (yet). After continuing forth for a few minutes, the best views will slowly start to reveal in front of you.

brunavik beach hiking trail

Hiking trail to Brúnavík beach

In a good weather you will soon realize what is this entire hike to Brúnavík beach about. The view over Brunavik beach is one of its kind and truly amazing. Brúnavík beach was one of the most beautiful places we’ve seen during our trip. Even my wife, that is not much into hiking, was amazed by this hike. The second part of the hike is a descent towards the beach. At times it gets a bit steep but the hiking trail is in good conditions so anybody in at least a medium shape should be able to do it. Just don’t expect a 10-minute flat walk.

hike to brunavik beach

Hike to Brúnavík beach

Brúnavík beach was lovely at the time of our visit. And completely deserted. We enjoyed our time at the beach so much, the more so in warm and sunny weather. It’s an amazing picnic spot and both a place to just sit, relax and enjoy the beauty of Icelandic fjords. We were able to take some of our most beautiful photos here just with our phones.

brunavik beach borgarfjordur eystri iceland

Amazing Brúnavík beach hidden in Borgarfjörður Eystri

Rather than doing a longer loop-trip to Bakkagerði, we took the same way back. Thus, we firstly had to ascend the steeper part near the beach and then to descend back to the car park. When we finished the hike, it was around 16:30, so we still had a few hours of daylight and I definitely wanted to spend them by driving some amazing F-roads.

Breiðavík track

If you want to drive the road F946, Loðmundarfjarðarvegur, all the way to Loðmundarfjorður and Klyppstaðarkirkja, you can either drive road 946 first and then directly proceed to F946 or you can do a mountain drive detour to another beach called Breidavik. Since I don’t like the easier roads, of course I wanted to rather drive the Breiðavík beach track.

breidavik track eastfjords iceland

Breiðavík track in Borgarfjörður Eystri leading to Breiðavík beach

The Breiðavík track starts by driving a few kilometers of road 946 first and then turning left to the Breiðavík track. Keep in mind this is just a track, i.e. the road quality is even worse than F-roads. You definitely need at least a big 4×4 to drive the road and ideally a super jeep. Also, please check with you car rental company if you are allowed to drive the track. If you rent a super jeep, it’s usually allowed (that’s what super jeeps are for, right?).

The Breiðavík beach track starts as a pretty scary steep and narrow ascent with abyss to one or both sides right next to you. Although we had a great car for such roads, my wife was still freaking out. And yes, I have to admit, this road is nothing for 4×4 beginners and neither for those who are afraid of heights.

Breiðavík track in Borgarfjörður Eystri

Breiðavík track in Borgarfjörður Eystri leading to Breiðavík beach

After a few minutes of drive, you will reach the point where you can see another steep, narrow and really zig-zagged part of the track in front of you. This was the spot where my wife refused to continue, so we turned back and didn’t finish the track. But I definitely plan to finish it sometimes soon all the way to Breiðavík. After doing that, I will also complete this article about the Breidavik track and report on the quality of the second half of the track.

F946 – Loðmundarfjarðarvegur

We drove back from the Breiðavík track to the beginning of road 946. You have to first drive 946 to reach F946. The “simple” 946 makes for roughly a half of the entire path to Loðmundarfjorður. 946 is a semi-paved road, technically possible to be driven by a 2wd vehicle only, but we recommend to take a 4×4 for it, especially if you plan to reach the end of the road, not just the beginning.

f946 iceland

F946 in Borgarfjörður Eystri

The second half of the road 946 turns into a mountain drive and you will begin a zig-zagged and steep ascent into the Borgarfjörður Eystri mountains. You will eventually reach the point where 946 turns into F946. This is where the road conditions worsen. Road gets even bumpier, steeper and narrower. There are no river crossings on F946, though.

f946 Lodmundarfjardarvegur eastfjords

F946 – Loðmundarfjarðarvegur

We recommend driving F946 in at least a medium-sized 4×4 car, ideally a large 4×4, especially if you don’t have much experience with steep mountain drives. The main danger of the road lies in steep and narrow ascents and descents and all that on a gravel track with potholes. We’ve seen also small 4wd cars driving F946 (like Jimny) but they were struggling and we consider using such cars irresponsible and dangerous.

F946 Loðmundarfjarðarvegur Borgarfjörður Eystri

F946 Loðmundarfjarðarvegur Borgarfjörður Eystri

Views all around F946 are simply amazing and you will be passing many different types of mountains and mountain passes of the beautiful Borgarfjordur Eystri area. Once you climb the highest point, which is located after the Húsavikúrskáli hut, you will then need to make a longer descent all the way to Klyppstaðarkirkja. This part of Iceland is inhabited only scarcely, mostly by rangers or researchers and only during summer. We didn’t have many hours of daylight remaining so we turned back soon and drove all the way to Seydisfjordur for our next accommodation stop.

Videos

epic iceland facebook group ask questions or get inspired in our community

Posted by Igor in Highlands, 0 comments